![]() Scale
Scale
Scale
With this tool you can re-size the selected objects or elements.
Depending on the ![]() Object
Object![]() Model
Model
The same applies for float comma User Data.
Depending on the mode selected, the Scale tool can be used to select objects, points, edges and polygons by clicking on them.
As always, the following applies when selecting (and generally for all selection methods):
- Increase selection with
Shift +click - Remove elements with
Ctrl/Cmd +click
Note also the functions described in the Select menu section, which also apply here.
The selections can be "drawn" by simultaneously pressing the right mouse button (i.e., the selection will work like the Live Selection).

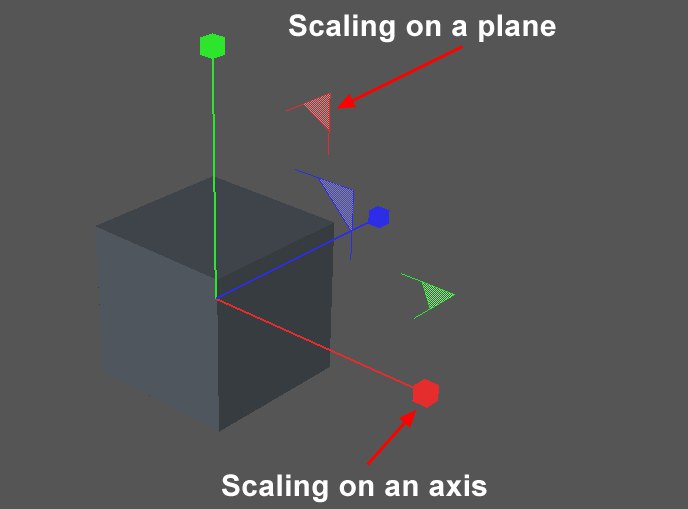
Clicking and dragging on the axes lets you scale the object along the axes.
Pressing the
- If pressed prior to clicking on an axis, the scaling will take place on a plane vertical to the axis.
- If pressed after you have started moving the object, the scaling will be quantized, i.e., in steps.
Pressing the
- Duplicates the object when in Object or Model mode.
- When in Edge or Polygon mode, the selected edges or polygons will be duplicated but will remain attached to the mesh, which basically results in a free extrude.
- Double-clicking on one of the elements marked in the image above will lock the direction of scale. A single click on an unlocked element will lock it. Double-clicking on the element again will unlock the element.
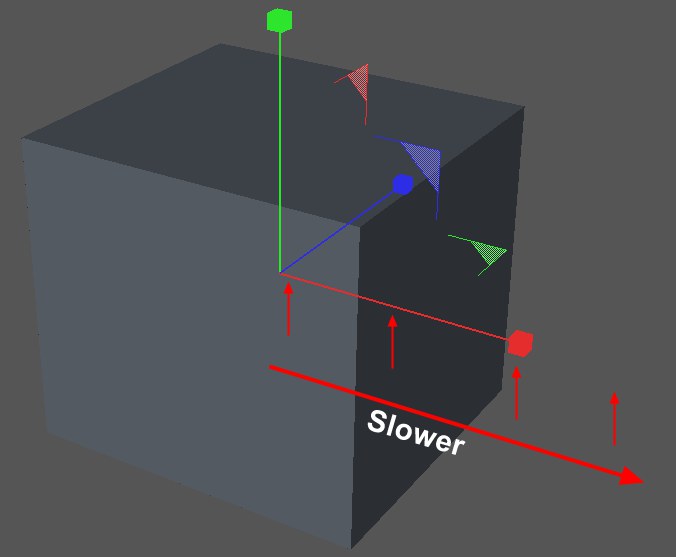
 Depending on where you grab the scale axis the scaling process will differ (fastest near the null point).
The cursor keys (+
The Axis Extension function is available here as well, with which handles can be positioned freely (you can, for example, extend a handle to the Viewport edge and then scale very precisely).
The default size of the Y axis in the object system is 1.0. For example, if you re-size the X axis from 1.0 to 2.0, the object doubles in size along the X axis. This results in a distortion of the object system, making precise construction more difficult since all local positions are now also distorted and no longer correspond to the length units of the world system. Therefore we recommend that you do not scale using the Object tool during the modeling process. Use the Model tool instead.
When using the Use Model Tool mode and Scale tool, some object types, such as parametric primitives, can only be scaled uniformly. To scale these objects non-uniformly, either enter the new size in the Attribute Manager or use the Use Object Tool mode.
When multiple objects are selected, a shared axis system appears in the viewport between the selected objects. You can scale the objects using the shared axis system or you can scale the objects using any one of their object axis systems (click the origin of the object axis system that you want to use).