Multi-Pass
When using Linear Workflow in conjunction with Multi-Passes we recommend that you render with at least 16-bit color depth. If this is not possible, disable the Linear Workflow option to restore the normal Cinema 4D R12 properties (reason: Multi-Passes are saved with a linear profile.
General Information
Cinema 4D offers numerous output formats and options. The Multi-Pass rendering and RLE/RPF bitmap format make it possible to edit rendered images in a wide variety of ways and with a variety of applications, including Photoshop and BodyPaint 3D in which Multi-Pass layers can be used.
The tried and true TIF format (Tagged Image File), for example, can contain an alpha mask, which in turn can be used to mask objects.
You can also edit or embed other image-specific information such as shadows, lighting, transparent surfaces and more. This is made possible by the RLA and RPF output formats. The Photoshop PSD format can also be used to include this information. An 8-bit channel is added to the normal image information which, for example, only includes the image's shaded regions, which in turn can be used as effects masks in such programs as Photoshop or Combustion.
This makes adding or accentuating shading, brightening of illuminated image regions or complex compositing for animation possible in an efficient and professional manner. In addition, separate channels can be created for different light sources, which allows for very precise control and modification of lighting conditions - and this in a rendered image!
Working with these additional channels does not demand that much more time. For example, Multi-Pass rendering makes it possible to render a scene with two or more different lighting scenarios. When the image or animation is renders, all you have to do is disable the layer with the lighting scenario you don't want to keep. Reflections, specular highlights and parts of the ambient illumination you create for the scene can also be disabled, added or otherwise manipulated - for either single images or animations. This can eliminate the need for numerous render tests, thereby saving you a lot of time.
Scenes from previous versions of Cinema 4D that include simulated GI can now be viewed with real GI and both versions can be compared in a single image. Products can be illuminated with multiple lighting scenarios and rendered simultaneously. A single image can contain multiple layers, each with a different lighting scenario. The channels that are not needed can then be disabled or removed in an image editing program (e.g., BodyPaint 3D).
Video effects can be limited or applied to specific layers. This list of possibilities is great and offers you a wide variety of methods for editing images and animations in addition to the ones mentioned above.
The settings described on this page are global and require further modification for specific objects.
How to use Multi-Pass
So, how do you define which channels should be rendered? There are two ways in which to do this:
- Click on the Multi-Pass button
-
Right-click on Multi-Pass
A menu will appear that contains all necessary commands. If a channel is enabled, it will appear as a sub-item of "Multi-Pass" itself and can be disabled there as well.
The items in the Channels drop-down list are:
Adds to the selection list all image layers that form the composite image. These layers are: Ambient, Diffuse, Shadow, Reflection/Specular (both in the Reflectance channel), Refraction, Atmosphere and Atmosphere (Multiply). All the other image layers (see The layers below) may be used for visual effects but are not actually part of the composite image.
If you have the Advanced Render module installed, Global illumination and Photon Caustics layers are also added to the selection list by this command.
Selects all image and material layers simultaneously.
Selects all channels that contain the prefix, Material. These are the scene’s material channels. The Multi-Pass channels contain information regarding the scene’s corresponding material channel (e.g., the Material Color Pass channel contains the material color for every object in the scene).
The following material layers can be selected: Color, Diffusion, Luminance, Transparency, Reflection, Environment, Specular, Specular Color, Normals and UVW.
Channels can be selected using the mouse (multiple selections in combination with the Shift or Ctrl/Cmd keys can also be made).
This command deletes all selected channels.
Empties the selection list.
Creates a blended layer. For example, you can blend Shadow, Global illumination and Photon Caustics as a single layer. After choosing this command, a dialog opens. Enable the channels you want to blend and click OK.
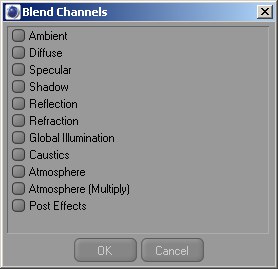 Blend Channel options.
Enabling this channel will open the following dialog:

This creates a mask layer for objects that use a specified ID number in their Compositing tags. After choosing this command, the Object Buffer dialog open. Enter the desired ID number and click OK.
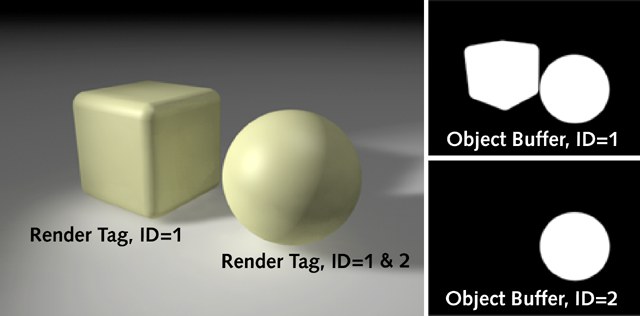 The sphere appears in both object buffers since its Compositing tag has two IDs (ID=1 and ID=2).
The cube’s Compositing tag was assigned the ID 1 and the sphere’s Compositing tag was assigned two IDs: 1 and 2. To the right are two alpha channels that were created as a result of two object channels (the first with Group ID 1, the second with Group ID 2) being defined in the Multi-Pass settings.
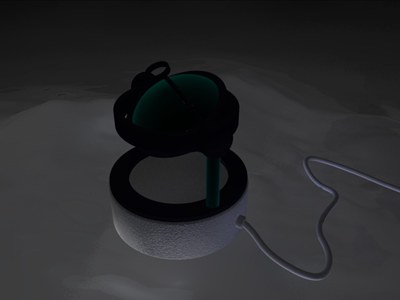
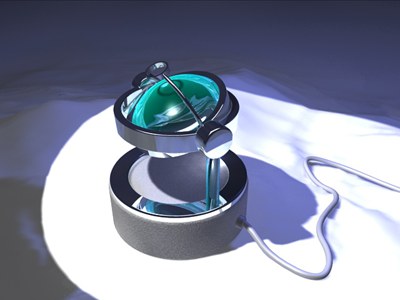 The final rendering.
Contains the image information as we know it. Red, green and blue plus an alpha mask, depending on the bitmap used. The Save settings define whether or not the alpha mask should be calculated and made part of the image.
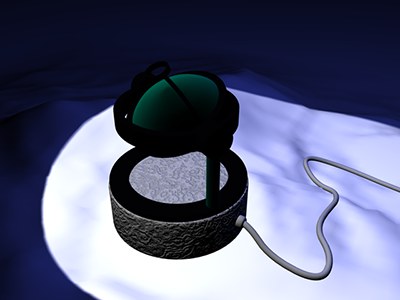
 Merely a gray surface: The ambient illumination.
This channel shows on the one hand how regions of the image illuminated by ambient light are affected by an ![]() Environment object. It also shows all objects that appear as lights (e.g., those with a material with an active Luminance channel or textures loaded in the Environment channel.
Environment object. It also shows all objects that appear as lights (e.g., those with a material with an active Luminance channel or textures loaded in the Environment channel.
Renders the scene’s diffuse lighting. The illumination is rendered without specular highlights and reflexion, and based solely on shading (shadows but no explicit shadows!).
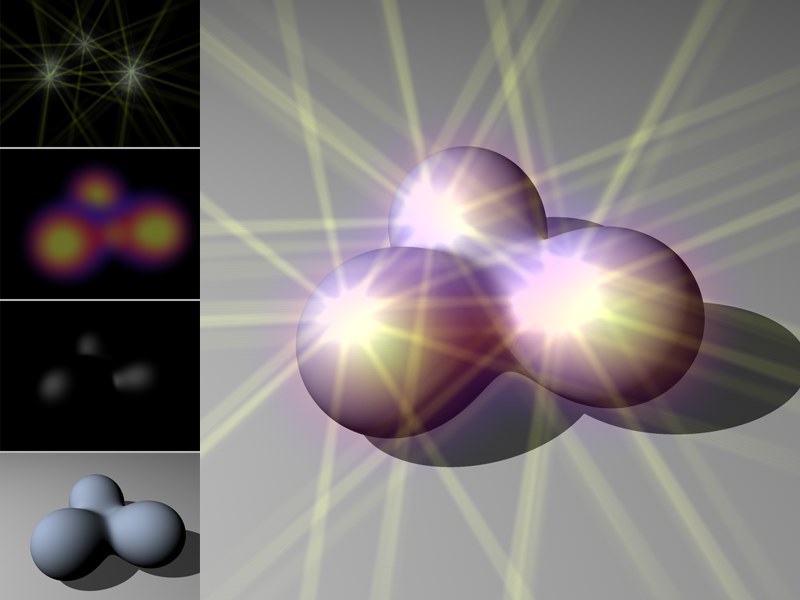
 An example of specular dispersion.
Displays the areas of the image in which specular highlights appear.
Note also Specular Multi-Pass settings.
 The main light source’s shadow.
Displays the shaded areas of the image.
 The reflective surfaces and the objects reflected in them.
Displays all reflective surfaces.
Separate Specular Multi-Pass settings are also available.
 Transparent surfaces and the objects behind them.
Creates a channel that displays all transparent surfaces, including refraction, and the objects that lie behind these surfaces.
 The Diffuse pass of the rendered image.
If GI is selected and set up accordingly in the Render Settings the effects of this channel and those of the dispersed light will be displayed.
If enabled for Multi-Pass rendering, the typical refraction reflexes that are created when light passes through a transparent or reflective surface can be saved separately to this layer.
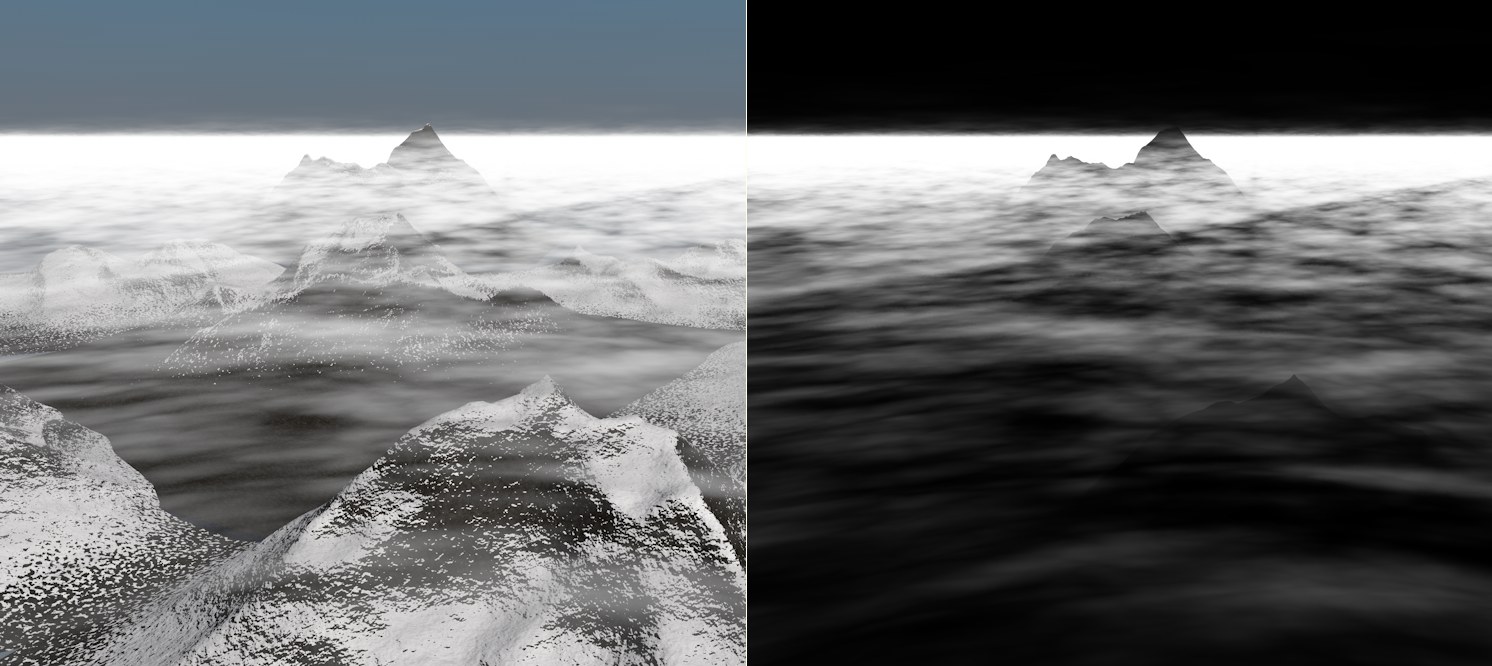 At left the normal rendered image, at right the Multi-Pass "atmosphere"
All volumetric image elements will be saved in this channel. These can include:
- Fog, volumetric clouds, rainbows, etc. from the Physical Sky.
- PyroCluster effects.
Other channels with the prefix, Material, serve to create additional channels for a given material channel relating to the entire scene. These channels are irrelevant for normal use of Cinema 4D.
This channel displays the distribution of brightness (incl. shadows) throughout the scene as if all objects were white. Only the dispersion of light on the objects’ surfaces will be displayed.
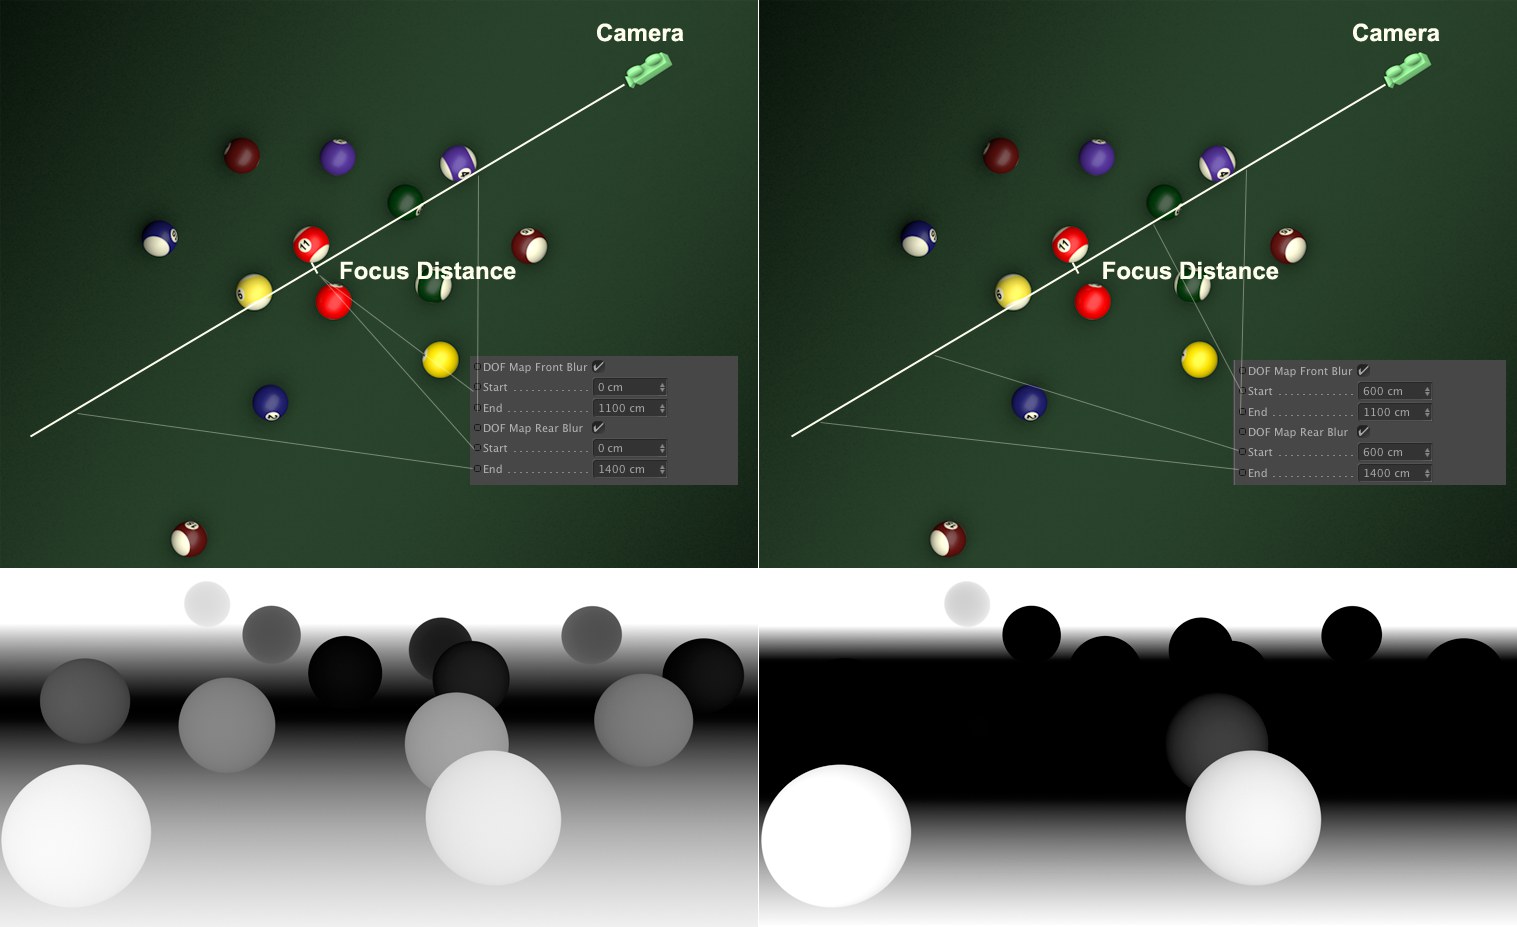 The DOF is controlled using the settings in the Object and Details tabs
This option lets you create depth maps (grayscale images that define Project elements in relation to their distance from the camera’s focal distance). Objects on the focal plane (defined using Focus Distance) will be colored black. The farther away to the focal plane an object lies, the lighter it will be - up to and including white. What is this good for? Using depth maps, third-party applications can quickly calculate a fairly accurate depth of field.
A focal plane can be defined in the camera settings (DOF Map Front Blur), in which front and back regions can be defined in which a black-to-white grayscale gradient can be defined.
A physically correct depth of field can be calculated using the Physical Renderer.
 From top left to bottom left: Highlights (AR), Glow (AR), Specular, and Diffusion, each as a separate Post Effects pass.
The Post Effects channel makes it possible to render a variety of post effects (PyroCluster, lens effects, vector motion blur, highlights, glow effects, glow) as separate passes.
Not to be confused with normal maps, these normal components are rendered as RGB (X=red, Y=green, Z=blue) without antialiasing. This is designed for compatibility with other applications.
This channel renders objects (without antialiasing), according to their UVW coordinates, in a green-red-blue gradient: U=red, V=green, W=blue. Applications such as After Effects can easily work with these files.
 A Motion Vector Multi-Pass. Left: A slowly rotating propeller; right: A propeller rotating faster.
Motion Vector lets you output color-coded motion vectors. Depending on the direction of movement, each object pixel will be colored accordingly red=X; green=Y; blue is not used). Third party applications, such as ReelSmart Motion Blur for example, can calculate motion blur based on these colors. The maximum length can be defined using the Motion Scale setting (Render Settings … / Options page).

You can generate an Ambient Occlusion pass for the entire scene, in accordance with the Ambient Occlusion options in the Render Settings.
 Ambient Occlusion will not work as a Multi-Pass for objects that lie behind refracted, transparent surfaces.
Physical Multi-Passes
The Multi-Passes described above are restricted in their functionality in conjunction with a physical material (or a Node-based material, which works precisely the same with regard to physical principles) that uses a Reflectance channel (see also PBR method, or where should the color, bump or specular textures be placed?).
With the Multi-Passes that were added in Release 20 it’s possible to correctly additively assemble the finished rendered image from individual Multi-Passes. This was not possible with the previous Multi-Passes. The new Multi-Passes perform a clean separation of diffuse and reflective parts from one another.
This only works if, as described above, only physical materials are used and the following Multi-Passes are rendered and added:
- The four Multi-Passes Indirect Specular, Direct Specular, Indirect Diffuse and Direct Diffuse
- Refraction
- Material luminance
If these are stacked as layers with the blend mode Add, the result will be identical ith the rendered result (see below for exceptions).
Direct Diffuse/ Indirect Diffuse/ Direct Specular/ Indirect Specular
 The Multi-Passes that produce the beauty pass only by addition (this scene is illuminated by both Area lights and an HDRI sky).
Note that, as with both direct passes (Direct Diffuse and Direct Specular), only the direct effects of the light sources (i.e., direct illumination via Area light and HDRI sky and reflectance) are depicted, while both indirect passes (Indirect Diffuse and Indirect Specular) also depict the effect of the other scene objects: the Diffuse Pass the indirect lighting (e.g., caustics for the large sphere on the floor, also referred to as Global Illumination) and the Reflectance Pass the reflections of other objects (e.g., the floor and the small red sphere in the large sphere).
With regard to the material, this means that:
- the diffuse Multi-Passes contain the colors generated by the material’s diffuse portion (Lambert/ Oren-Nayer)
- the reflecting Multi-Passes contain the colors generated by the materials reflective portion (Beckmann/ GGX/ Phong/ Ward).
The direct Multi-Passes are mostly less affected by noise as the direct passes. For the compositing workflow, this means that denoise filters may only work on indirect Multi-Passes, for example, while the noise-free direct Multi-Passes won’t need such filters, which would possibly omit details.
Corresponds to the Material Color multi-pass, only that a physical material is assumed and not the material channel Color. The colors in the Diffuse Default tab’s Reflectance channel are output.
Details about Magic Bullet Looks can be found at the function itself. Enable this Multi-Pass if you require a pass of the entire image without the Magic Bullet Looks effect.
Use Separate Lights to choose which light sources have their own separate layers.
The following options are available:
No separate layers.
Each light has separate layers.
Separate layers for all lights whose Separate Pass option is enabled (General tab).
Use Mode to control how the diffuse, specular and shadow information is layered for each light source that has its own layers.
Adds one blended layer for Diffuse, Specular and Shadow.
Adds one blended layer for Diffuse and Specular, and one layer for Shadow.
3 Channels
Diffuse+Specular+Shadow
Adds one Diffuse layer, one Specular layer and one Shadow layer.
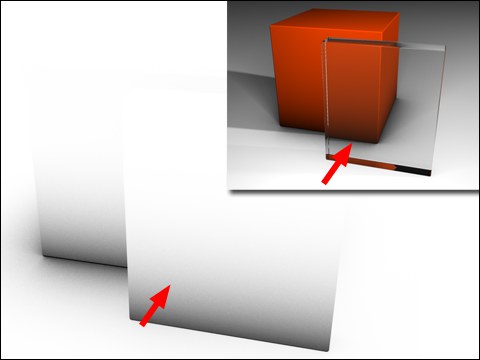
When rendering Multi-Passes with shadows switched on, slight artifacts such as bright lines may appear at object edges due to antialiasing. To prevent these artifacts from appearing, enable this option.
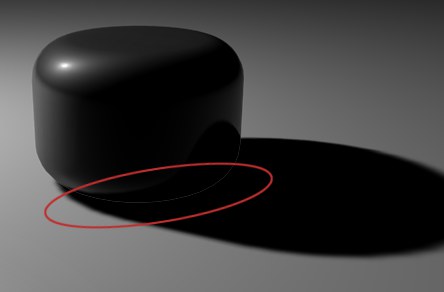 Enable Shadow Correction to prevent artifacts from appearing at the edges of objects.