Parameter
 Transform
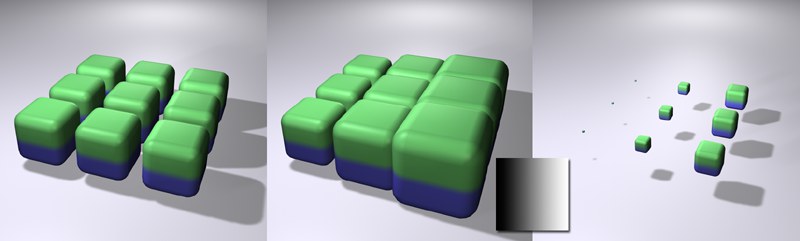 From left to right: Initial state w/o Effector; Relative mode; Remap mode; both with a Shader Effector containing the gradient shown and with a scale transformation applied.
In the image above the Effector scales the clones. Scaling can take place via addition to the initial size (Relative, mathematical: Cloner settings + (Cloner settings + Clone setting * Effector value) or starting from 0 (Remap, mathematical: Clone settings * Effector value).
Absolute is good for use in conjunction with position transformations since the clones will orient themselves to a P.X, P.Y or P.X point.
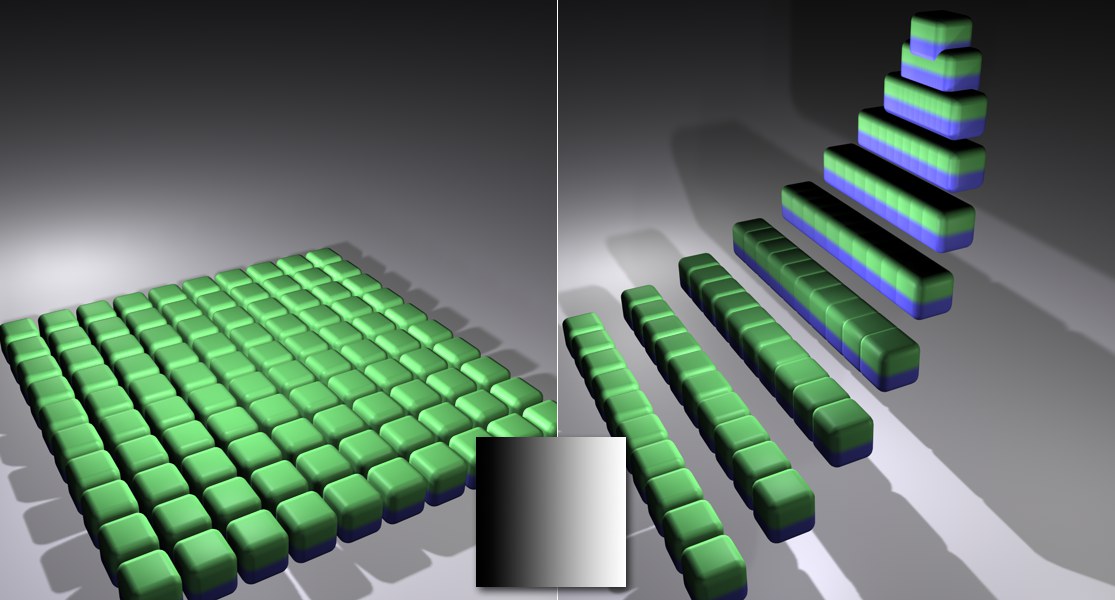 Left the initial state; right the Shader Effector with the gradient shown and a position transformation applied.
A coordinate system can be assigned to most clone transformations that require a direction (position, rotation, scale) using this setting. Imagine this coordinate setting arranged for each clone from the point at which the transformation begins. You can select from the following:
- Node: The Node coordinate system.
- Effector: The Effector coordinate system.
- Object: The object coordinate system of the clone-generating object (e.g., the Clone object itself).
Use this setting to define whether or not a given Effector should vary its position. Activating this option will make additional parameters available.
Enter the position range within which a given Effector should vary the clones here.
The Effector will create values between 0% and 100%, whereby 100% reflects the maximum value that can be entered for position, scale and rotation.
Use this setting to define whether or not a given Effector should vary its size. Activating this option will make additional parameters available.
You can enter a scale value here if Uniform Scale has been activated
This option will be made available if Scale has been activated. If active, clones will be scaled uniformly in all three directions. Otherwise the scaling in each direction can be defined individually.
When active, the following options will be made available:
Negative weighting or scaling can occur if, for example, cloned particles and a Random Effector are combined. The clones will then have an incorrect orientation. The Absolute Scale setting prevents this from occurring.
Use this setting to define whether or not a given Effector should vary its rotation. Activating this option will make additional parameters available.
Color
 A Plain Effector with a Random Field (that works once with Noise and once randomly).
The Color tab’s settings define if and how the color values generated by the Effector or Fields should be mixed with existing colors (e.g., those defined by a Cloner object (Transformation tab)).
4 options are available:
- Off: The Effector will not modify the color. Use this option if the Effector and all assigned Fields should not have an effect on the clones.
- Effector Color: Use this option if you use a Shader or Random Effector for coloring and do not want to use Fields. This is the method used in Cinema 4D prior to R20, which you should avoid using in favor of the next option.
- Fields Color: Use this option if you want to use Fields for coloring. This is the recommended method in place of Effector Color (see Color Mode, for example) since it offers more functions.
- Custom Color: The Effector will color using a custom color. This option is more of a compatibility setting for scenes created in older releases of Cinema 4D.
Note, that these are settings for scenes created in Cinema 4D prior to R20. When working with these settings, set Color Mode to Field Color and leave this option disabled.
- The following applies to Effectors (these produce only grayscale values), with the exception of Shader and Random Effectors: This option defines if the grayscale value should color the Clones directly (option disabled) or if their colors should be combined in that the grayscale values are seen as alpha values.
- The following applies to Shader and Random Effectors: Both have their own (internal) alpha value in addition to their color. If this option is enabled an overall alpha value will be ascertained using the color and internal alpha values. If this option is disabled the colors as they are ascertained by the Effectors (without any alpha at all) will be applied to the Clones.
A color can be defined using this option.
This is where you define the mix mode that will be used to mix the Effector color with the Cloner Object color. The following modes are available:
- Mix: An average color between that of the Effector or Field color and of the Cloner Object will be interpolated.
- Add, Subtract, Multiply: The colors will either be added, subtracted or multiplied.
- Divide: The Cloner’s color will be divided component-wise through the Effector color. This mode is not really a very effective one – it’s more for playing around with.
Other
If enabled, the values from the Fields will be blended with the effects generated by the next setting. If disabled, these will be controlled by the Fields directly (the effect can be seen most clearly with the settings Modify Clone or Time Offset options).
Generally speaking, if multiple Effectors (instead of multiple Fields) are combined, it’s recommended that this option be enabled (for all Effectors except the first). Otherwise, it’s more intuitive to leave this option disabled.
If you still want to work with weighting transformations, these can also be used in Fields (see MoGraph Field Layer).
Weighting can be set to a value anywhere between 0% and 100%. The weighting of all clones can be made visible for each clone-generating object (Cloner object, Matrix object, etc.) by selecting Weight in the Transformation tab’s Display setting. When activated for an object that generates clones the weighting for each clone’s position will be displayed as a red-to-yellow gradient (clones may have to be made invisible).
All Cloner Objects have internal UV coordinates (that have nothing to do with textures), that can be used to calculate an Effector’s effect. The effects of Effectors that use these UV coordinates, e.g., Formula Effector, can be influenced.
Use this parameter if you want an Effector to affect a clone’s child objects. This can be useful if the following is true:
-
You have made several objects to be cloned children of a Cloner.
We suggest the Sort mode, which will make the effect more visible.
Example:
The Cloner Object in the image above was set to Sort and was subsequently assigned a Step Effector (see Step Effector). A Modify Clone setting of 100% will produce a result as shown above. The distribution of clones will change in accordance with any changes made to the Modify Clone setting. Values less than 0% or greater than 100% are also possible, which will vary the number of child objects used to create clones.
Modify Clone also works with other Cloner Object modes – the setting then simply modifies the number of clones to be modified:
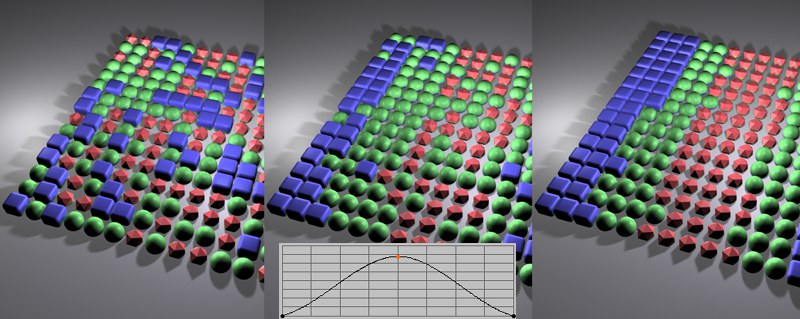 The Step Effector curve (insert) causes the effects shown above when Random mode has been selected. The Modify Clone value increases from left to right.
 A cylinder animated using two different deformation objects: Left, a Shader Effector; right, a Step Effector.
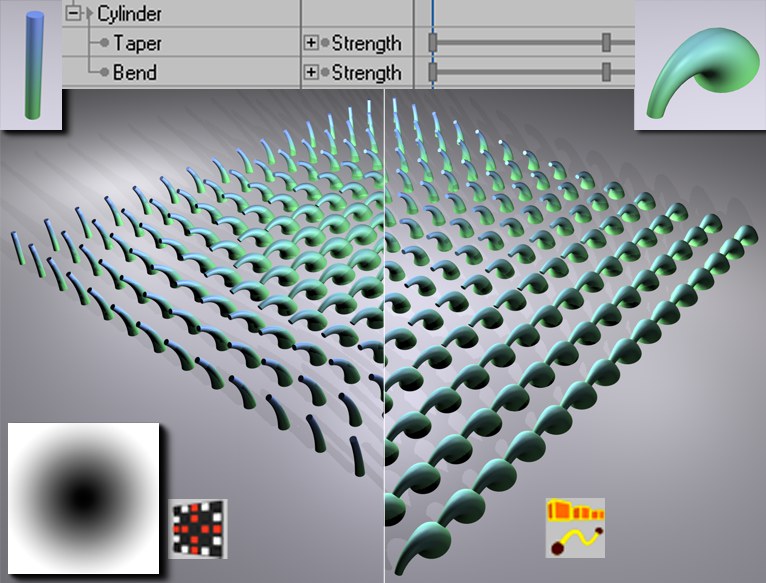
Let’s say you have an object, animated solely via parameter animation (light source, deformation object, etc.). It would be nice if an Effector could generate clones from that object at different intervals. This is what Time Offset does.
In the image above, Taper and Bend objects were animated from frame 0 to 20. Each Effector was assigned a Time Offset value of 20 - the Effectors distribute the clones with the temporal offset in accordance with the gray scale values (Shader Effector), i.e., from clone 0 to the last clone (Step Effector) or from wherever the corresponding Effector draws its input values.
The purpose of this setting is to blend clones from view at a defined value. This setting cannot be used effectively with all Effectors. This setting can be used effectively, for example, in conjunction with the Random Effector to randomly make clones invisible (make sure Minimum is set to -100%). Step and Shader Effectors will make the clones invisible at a value of 0. This can be done for the Step Effector using a spline, at the location(s) where the spline lies at 0 along the X axis (this would be the black areas when using a Shader Effector).
If the Plain Effector should affect the clone visibility, note that the Maximum and Minimum values should be set to 0% and 100%, respectively. In addition to the Falloff value, the Strength (greater or less than 50%) will also have an effect.