Viewport Hardware
Texture Interpolation controls which method is used to interpolate the textures when you zoom objects in the viewport: Nearest or Linear. Nearest uses the color of the nearest pixel in the texture, causing hard transitions in the zoomed texture. Linear uses linear gradients (i.e. linear interpolation) to create smooth or blurry transitions in the zoomed texture.
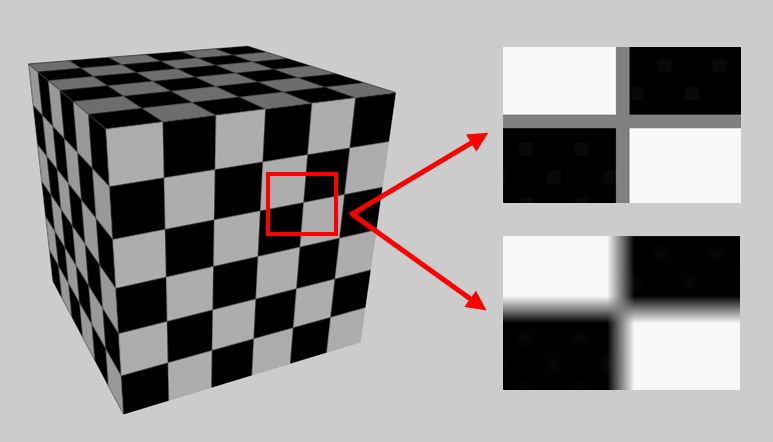 Texture Interpolation set to Nearest (top right) and Linear (bottom right).
Linear Mip Map
This method, which transitions between consecutively, internally "stockpiled" effigies of the texture that are continuously reduced in size, offers the best image quality:
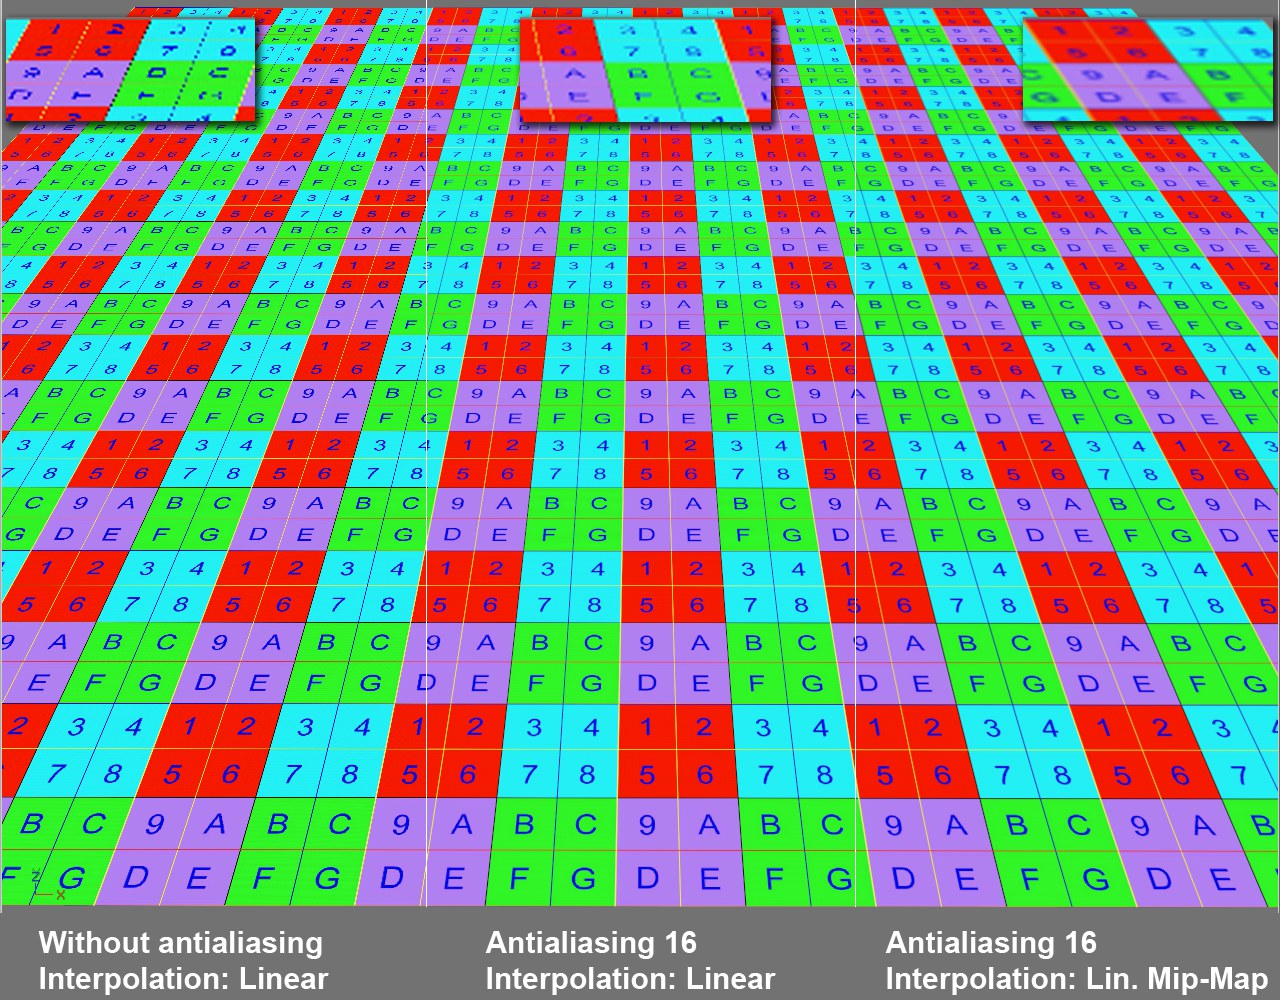 Various settings and their effects.
Use this selection menu to define the degree of antialiasing that will be displayed while working in the Viewport and the UV editor(not when rendering).
Cinema 4D can work with the following four types of anti-aliasing:
- None: No edge smoothing takes place
- FXAA: Fast edge smoothing that works as a type of post effect and therefore also takes texture edges into consideration. Overall, the display will be less sharp.
- MSAA: Slower but more precise smoothing using the graphics card that can be varied in different sampling levels (higher values = better quality).
- Supersampling (Can only be defined in the Viewport settings/Viewport on a per-scene basis): A CPU-intensive, slow edge smoothing (see also Supersampling).
The type of anti-aliasing you should select depends on your personal preference. The differences are often only nominal so experiment a little to see what suits your needs best.
This value defines the number of transparency layers that will be drawn correctly. It can be increased if faulty displays occur for several consecutive objects in a row that have different transparent materials:
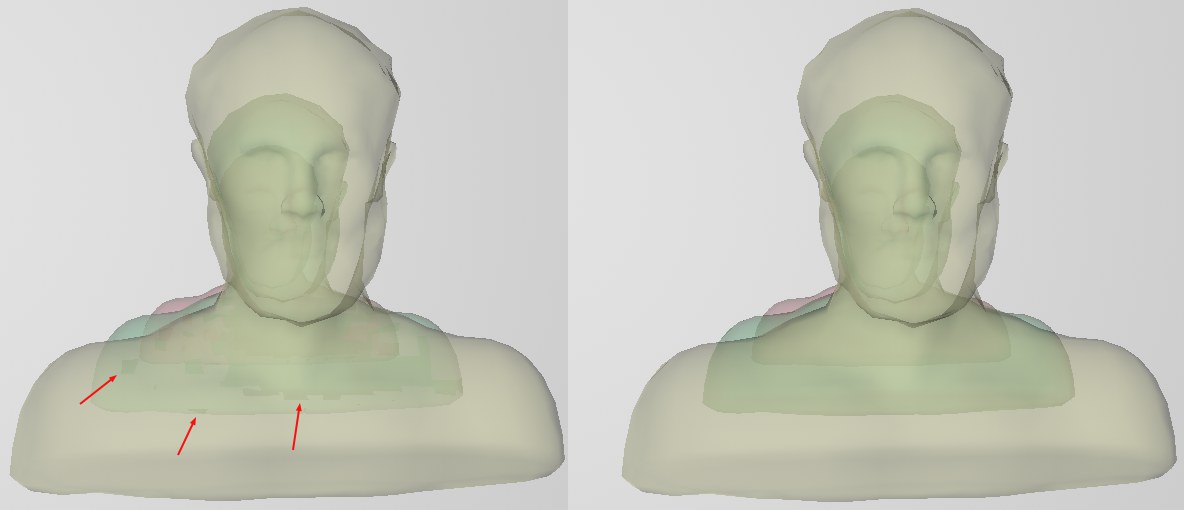 At left a value that is too small, at right a larger Maximum Transparency value.
A value of 0 will disable the correct rendering and will display the transparency as a raster effect.
Use this setting to define the maximum number of light sources will calculate (in the order in which they appear in the Object Manager). Higher values will lead to slower display times.
The texture view can also be smoothed using the UV meshes displayed there (the anti-aliasing settings descrobed above will be useds). . However, this is not always desired when working with UV components. Non-smoothed displayed components can sometimes be positioned more precisely - if snapping isn’t used.
Use this setting to define how the shadows of light sources are displayed (in the order in which they appear in the Object Manager). A value of 0 will result in no shadow being displayed. The presence of very many shadows can slow down the display. Shadows are one of the most render-intensive GPU framework features, which is why this option can be used to define a maximum number.
If enabled, the compiled Shaders in the Project will be saved. In rare cases, enabling this option can cause the graphics card’s driver to crash the application. If this occurs, disable this option.
 Note the marked brightness gradations at the left (don’t be irritated by the JPEG artefacting).
Banding can occur when you have gradual gradations in brightness (in the example above it occurs on the transition from RGB 69, 69, 69 to RGB 70, 70, 70). Dithering can visually resolve hard color transitions.
Cinema 4D now also supports HDR output in the Viewport - and only in the Viewport (this does not apply to the Picture Viewer. You can only benefit from this if you have an HDR montitor (usually with 10-bit or 12-bit defined). The advantage of an HDR monitor is that it can display more colors without banding and can also display these brighter.
If you enable this option on an 8-bit monitor, for example, the output colors will be restricted to 1, regardless of how bright a material or surface light is (represents the behavior prior to R25 for very bright elements. This also applies to the render output in the Viewport for th eStandard and Physical REnderers if the Depth is set to<TEXT_CYCLE_ID RDATA_FORMATDEPTH_32> 32-bits per channel</TEXT_CYCLE_ID>.
Information
Here you will find a range of information about the hardware used by Cinema 4D for displaying in the Viewport. This is only for informational purposes and will adapt accordingly if, for example, a new graphics card is installed.
- GPU: The graphics card model
- Framework: The framework that Cinema 4D uses. On a Mac, for example, this is Metal and on a PC DirectX, i.e., the interface that Cinema 4D uses to generate the display. In the following, the term GPU Framework will be used when referring to the Viewport display.
- Version: This is the current GPU Framework version. The minimum requirements are listed under Required. You can, for example, update the Framework version by installing a new graphics card driver.
- Shader Language: The shader language version can be important for plug-in developers and is therefore displayed here.
These days, graphics cards have the ability to display quite a bit in the Viewport, which was previously the exclusive realm of renderers. Thanks to the computer games industry, high-end 3D graphics can now be displayed fluidly, i.e., with a high frame rate. This is something that Cinema 4D also profits from. Maxon is constantly improving the display quality in the Viewport without the need for rendering. Cinema 4D S22 in particular has taken another major step towards supplying render quality in the Viewport (see below). In conjunction with this, note the Viewport Renderer , with which you can output the scene as it is displayed in the Viewport.
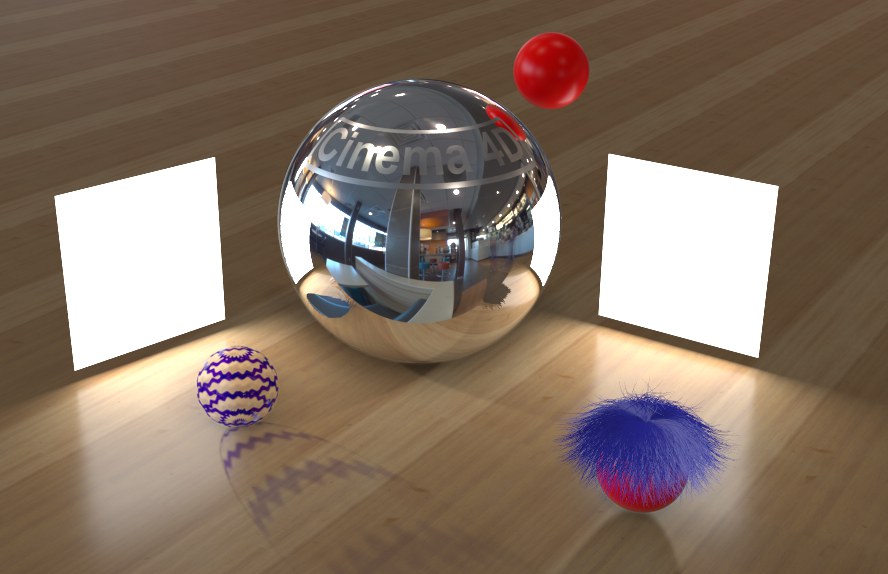 Complex reflections, shadows, hair (with limitations) and other effects can be displayed unrendered in the Viewport.
Nevertheless, you shouldn’t expect any miracles: Not all special lighting material properties in Cinema 4D can be displayed by the GPU Framework. Of course there is no guarantee that the Viewport display will be even close to the rendered result (depending on the effects used). Furthermore the GPU Framework and the Cinema 4D renderers are simply too different. However, for many applications, the GPU Framework can delivery good results, including for animations.
A lot was done in Cinema 4D S22 to improve the Viewport display. Describing each and every one of these improvements would be to exhaustive, which is why we will briefly explain the most important ones below:
- The display of render instances (in particular multi-instances) was made much faster.
- Colors defined in the Transparency channel, incl. colored shadows (as with colored glass) will be displayed correctly in the Viewport.
- Foreground and background objects can now display any shader.
- Color gradients in the Bump channel will generate a correct bump map.
- Improvements in the reflective behavior in conjunction with bump maps.
- The Pin Material tag now also works correctly in the Viewport.
- The display of noise has taken another step closer to the rendered result: In addition to the Seed value, Space Viewport and Grid are displayed correctly.
- Texture coordinates on hierarchical objects are now displayed correctly.
- Sharp/blurred reflections of sky texture videos are displayed.
- 3D color gradients are fully supported.
- The interplay between light sources, including falloff and the linear workflow has been improved.
- Improvements in the display of spot lights: square/square parallel spots look more realistic, radial color falloff is displayed correctly.
- The Physical Sky’s shadow display has been improved.
- The restriction of maximum 10 shadows from 10 light sources was eliminated.
- Improved antialiasing for depth of field Bokeh calculations.
- The Viewport tessellation in combination with Noise (e.g., for displacements) now better matches the render results. The Tessellation is also softer.
- Improvements were made to the display of OpenSubdiv Subdivision Surface objects
- Improved display of high dynamic range bitmaps (e.g., *.exr, *.hdr) via improved smoothing.
... and many more minor improvements.
Also take a look at the Viewport Preferences’ Effects tab where you will find numerous additional new settings for the Viewport.
Cinema 4D on MacOS only uses the forward-oriented GPU Framework Metal. This has the following limitations:
- The (tessellation)Mode Projective does not work (Uniform will be used).
- The Subdivision Surfaces Type is not supported (the non-adaptive mode will be used).
- In the Preferences’ Viewport Display menu, the Spline Size can be defined. This does not work with Metal.