Sculpt Menu
Subdivision is the most important command for Sculpting. If you want to sculpt an object is must first be subdivided, i.e., enough vertex points must be created to make it possible for the brushes to sculpt the surface. This command works just like the normal ![]() Subdivide...
Subdivide...
The command works as follows:
- if the selected polygon object does not have a Sculpt tag assigned to it, one will be assigned. Clicking the Subdivide button again will add the first subdivision.
- If the selected object already hast a Sculpt tag, the object will be subdivided each time the Subdivide button is clicked.
For each additional subdivision, the Base Object Layer’s subdivision level will be increased in the Sculpting Layer Manager. The Subdivision command is only available if you are already at the highest subdivision level (otherwise you can use the ![]() Increase
Increase
Only subdivide as much as in necessary. Each subdivision quadruples the number of polygons. Even though Sculpting has special algorithms that make efficient use of memory for very high subdivisions (much larger than normal), it is possible to quickly reach the limits of your computer’s memory capacity (note also the Memory (MB) setting in the Preferences menu). And as soon as your computer is forced to use its fixed-disc storage you can forget your smooth workflow.
Your file size will also increase the higher your subdivision is.
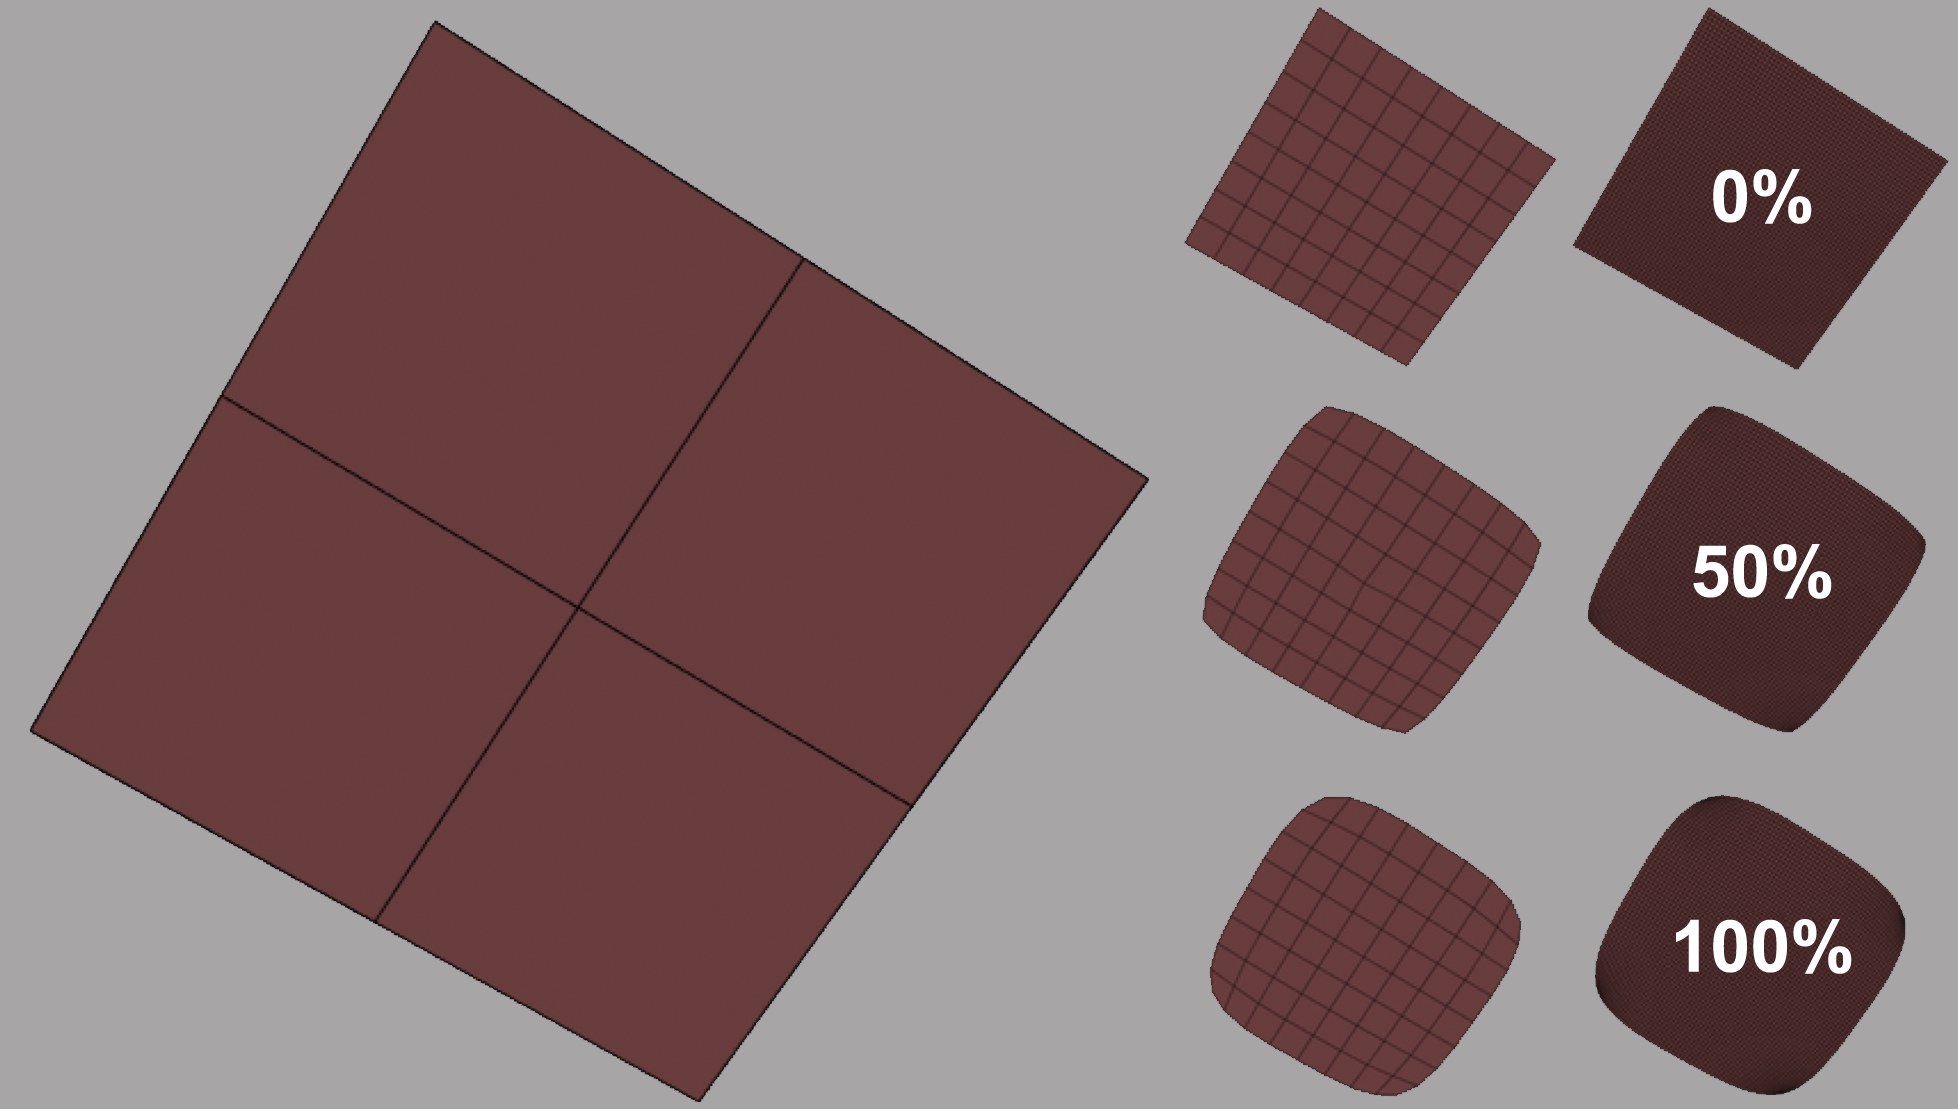
 Various Smoothness values for multiple subdivision steps.
This setting defines how the object should be smoothed when subdivided. If set to 0%, the original shape will be maintained; if set to 100%, it will be subdivided exactly like a Subdivision Surfaces object. Of course intermediate values can also be used.
This value can only be defined at a given stage in the subdivision process: For an object without a Sculpt tag it can be set after the first click on the Subdivide button. The first click simply adds the Sculpt tag - the second click will subdivide the object. After the first subdivision, all subsequent subdivisions will be made using the defined Smoothness value – which cannot be changed after the first subdivision has been made.
Use these commands to switch back-and-forth between existing subdivision levels. If the highest level is not detailed enough, click on the Subdivide button again to create a higher subdivision. Otherwise the subdivision level can also be changed using the Level setting in the Sculpting Layer Manager.