First Steps
How can I let the hair on the head grow?
The following mini tutorial only serves to quickly demonstrate how Hair works. Hair is very versatile and offers numerous possibilities for achieving the look you want.
- Load a head into your scene (Object Manager: File / Load Object Preset / Humans / Meg). If you want, you can delete everything except her head.
- Switch to the Use Polygon Tool and select the polygons on which the hair should grow. Click on Add Hair in the Simulate menu (part of the main Cinema 4D menu).
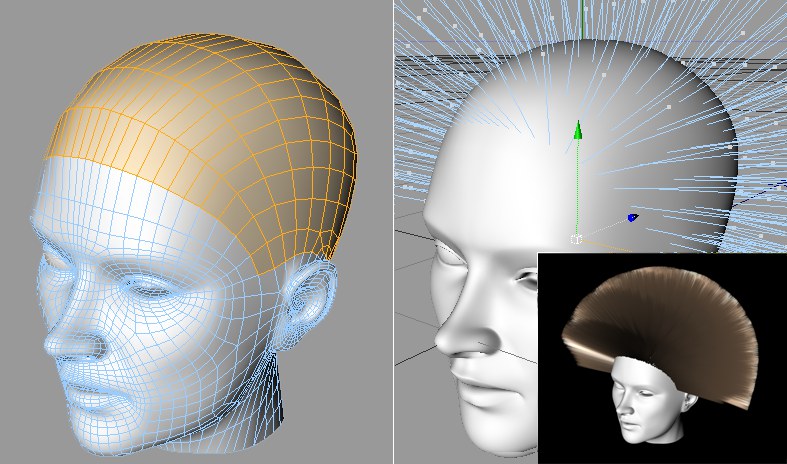
That’s it. You’ve already created hair that can be rendered! Now you can style the hair according to your personal taste. Follow the next steps to add a little style to the hair: - Shorten the guides a little (Length setting in the Hair object’s Guides tab) and play the animation (make sure no Hair tool is activate). The integrated dynamics will automatically apply a gravitational force to the hair. The hair will fall.

Select Set as Dynamics in the main Hair menu to fix the guides at any given state.
How you continue to style the hair is entirely up to you.
- You can manipulate all guides using the Hair tools (see Tools, Functions, Modes). An excellent tool for this is the Brush Tool, which can be used to brush the guides interactively in the editor view.
- You can reduce the number of guides.
- You can select and manipulate individual guides.
- You can also, depending on which style you want to create, forgo all automatic guide creation settings and place each guide manually, which will give you complete control over the styling of the hair.
Below are some examples of how guides were manipulated, and the resulting hairstyles.
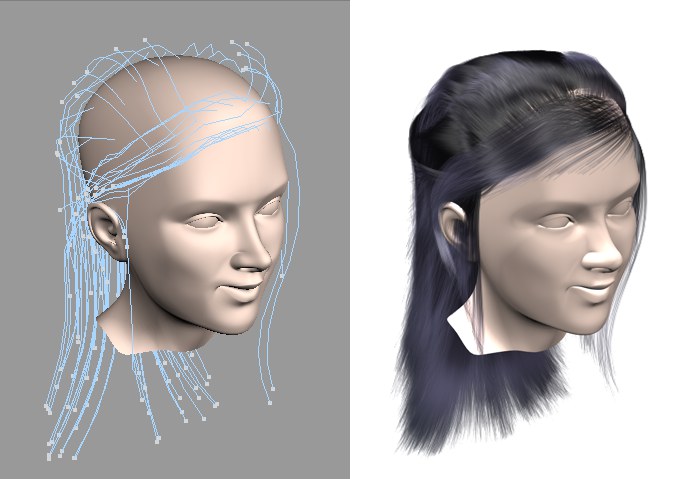
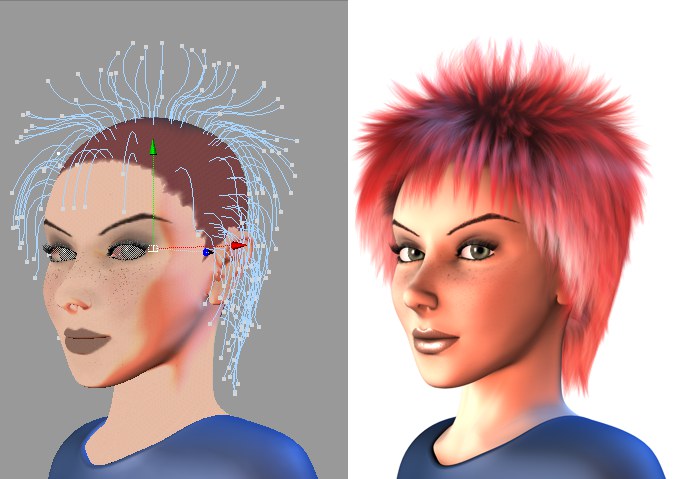 Copyright by Janine Pauke
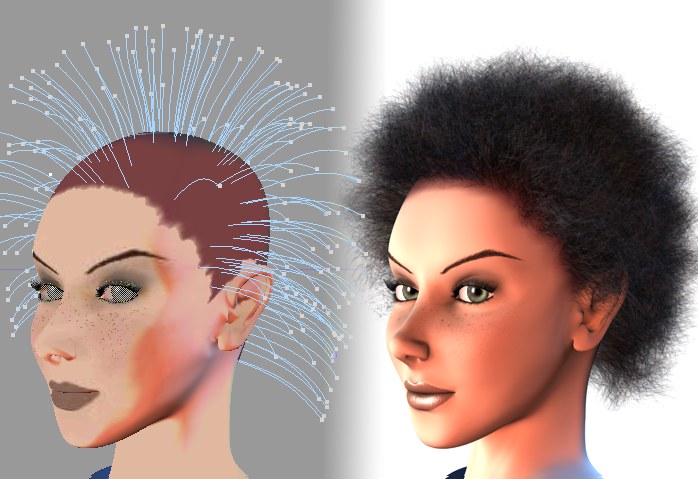 The length of the rendered hair is reduced additionally by the Frizz material channel. The Clump channel was also applied.
Another common use for Hair is to cover a vast surface with hair, without the use of guides (guides are present internally but cannot be edited). The look of hair applied in this fashion is primarily determined by the Hair material settings. Follow these steps if you want to create a grass-covered surface:
- Create a Hair material (Material Manager: Create / Hair Material) and add a few grass-like settings: Color = green, Bend in random directions, and a bit of Frizz.
- Drag the Hair material directly onto the surface on which it should grow. That’s it. The result should look similar to the image below:
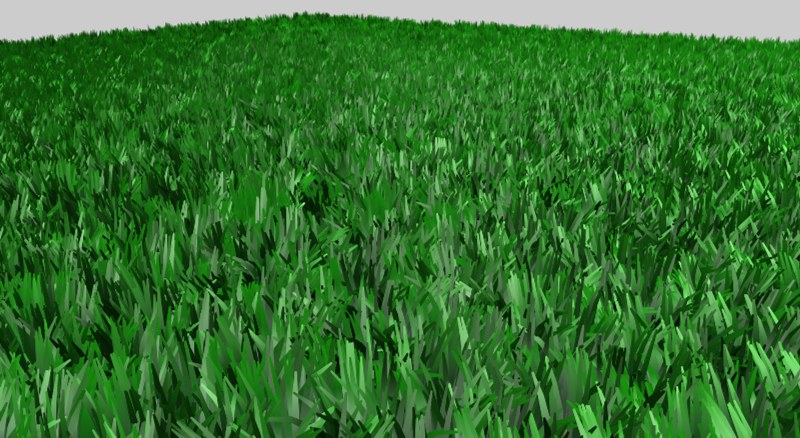
A (Hair) Render tag can also be applied to the hair-covered object, which will broaden the influence you can have on the hair. Hair count, length and the dispersion of hair (using the Polygon Selection Tag) can be edited. - With a little extra tweaking of the various HAIR material channels a quite exquisite grass lawn can be created. The key to doing so: The grass should not be too homogeneous. Use various Noise Shaders in the material channels, which will ultimately overlap each other. Each Noise Shader’s effect, however, should be subtle. If done correctly, a lawn such as the one pictured below can be created:The yellow grass was created using a second HAIR material tag (see here for more information on blending HAIR materials) and "seeding" it amongst the green grass. This can be seen well in the areas in which the green grass is thinner.
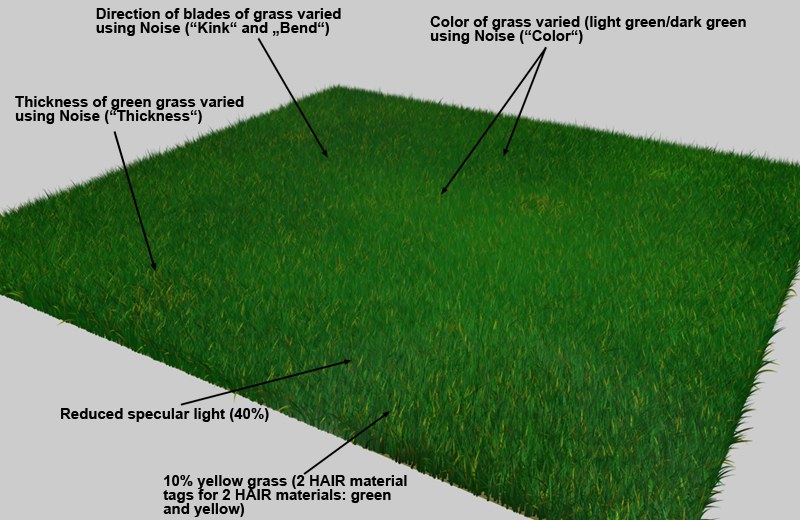 Various overlapping Noise Shaders in the HAIR material channels make for a inhomogeneous grass surface.
Guides, Hair Materials and Hair
The guides may give the impression that they define where hair will grow, but that’s not the case. Guides can be present at locations where no hair grows, and hair can grow where no guides are present. Guide density also has nothing to do with hair density. The best results can be achieved by distributing guides evenly. Too many guides in close proximity to one another will result in far too many hairs being interpolated between them at that location (which can, of course, also be done intentionally).
Naturally, it would, in most cases, be better to place guides where hair actually grows.
Hair is interpolated between guides:
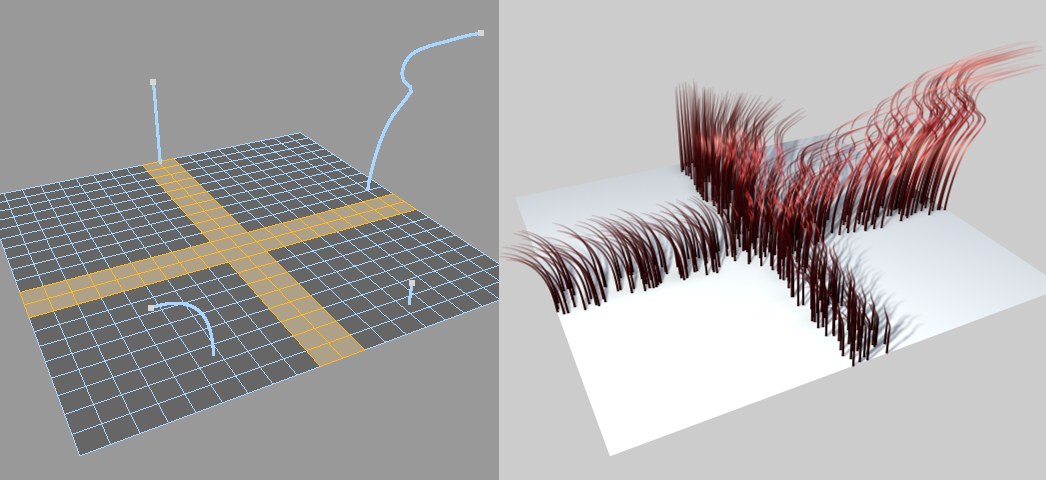 Hair grown only on selected polygons has been interpolated between the guides.
Guides roughly define the hair’s style and length (i.e. hairstyle). How each individual hair will be rendered is defined by the Hair material.
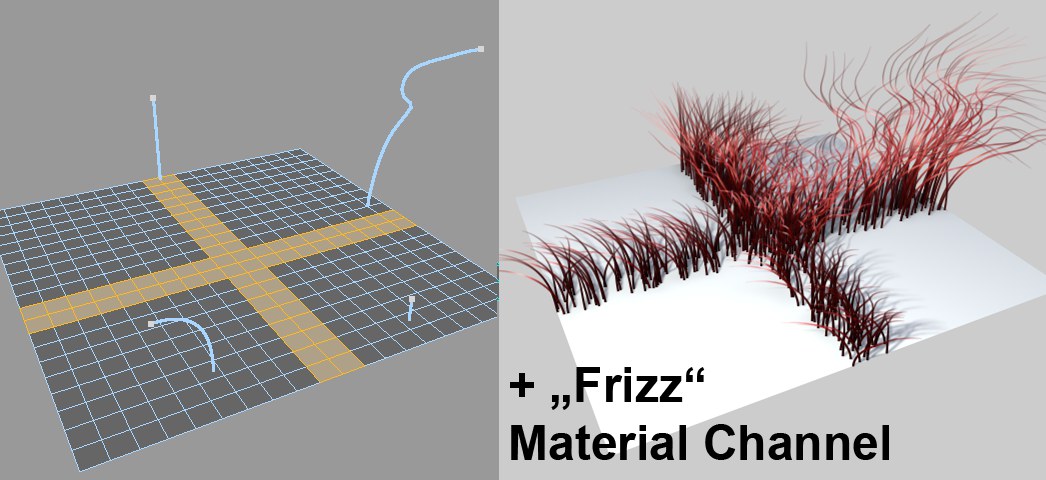 The hair shown in the previous image is now also affected by the Hair material.
So, where within Cinema 4D can I find Hair?
Here is a brief description of Hair components and what they’re used for:
- The main Hair menu, including all tools, commands and modes, is located in the Cinema 4D Simulate menu.
- The Hair Render settings are located in the Render Settings’ Effects menu.
- A Hair material can be created in the Material Manager. In most cases, a Hair material will be created automatically. The Polygon Hair Shader can be used as a channel shader for rendering polygonal hair.
- When hair is created, a Hair object will be added in the Object Manager. Within the Hair object, you can define guide and hair dispersion, polygonal hair, how guides or hair should be displayed, dynamics, and much more.
- Numerous Tags can also be applied to hair in the Object Manager, e.g., to define polygonal objects as collision objects, save guide selections, mix various Hair materials using the Hair Material tag, and much more.
- Several Hair presets are available in the Cinema 4D Preference menu’s Hair menu.
- For those of you who can never get their fill of XPresso, several Hair Nodes are available that can be called up via New Node or X-Pool. Nodes let you check for and read out collisions between guides and hair.
- and finally, there are Hair presets available in the Presets folder of the Content Browser just waiting for you to try them out!