UV Packing
In this UV Manager menu, you will find various settings for optimally re-arranging UV Islands.
But isn’t this what the Optimal Mapping settings do as well? Yes, but this is a part of what Optimal Mapping does. As you know, Optimal Mapping takes place in multiple steps:
- Unwrap UV mesh
- Relax UV mesh
- Pack UV mesh
The settings in this menu restrict the process to three steps: the optimal arrangement of the existing UV Islands without creating new ones (exception to the rule, see Rasterized). For the most part, this ensures an efficient use of the UV space so as not to waste any texture surface.
Use the Polygon Selection to restrict the packing to specific regions.
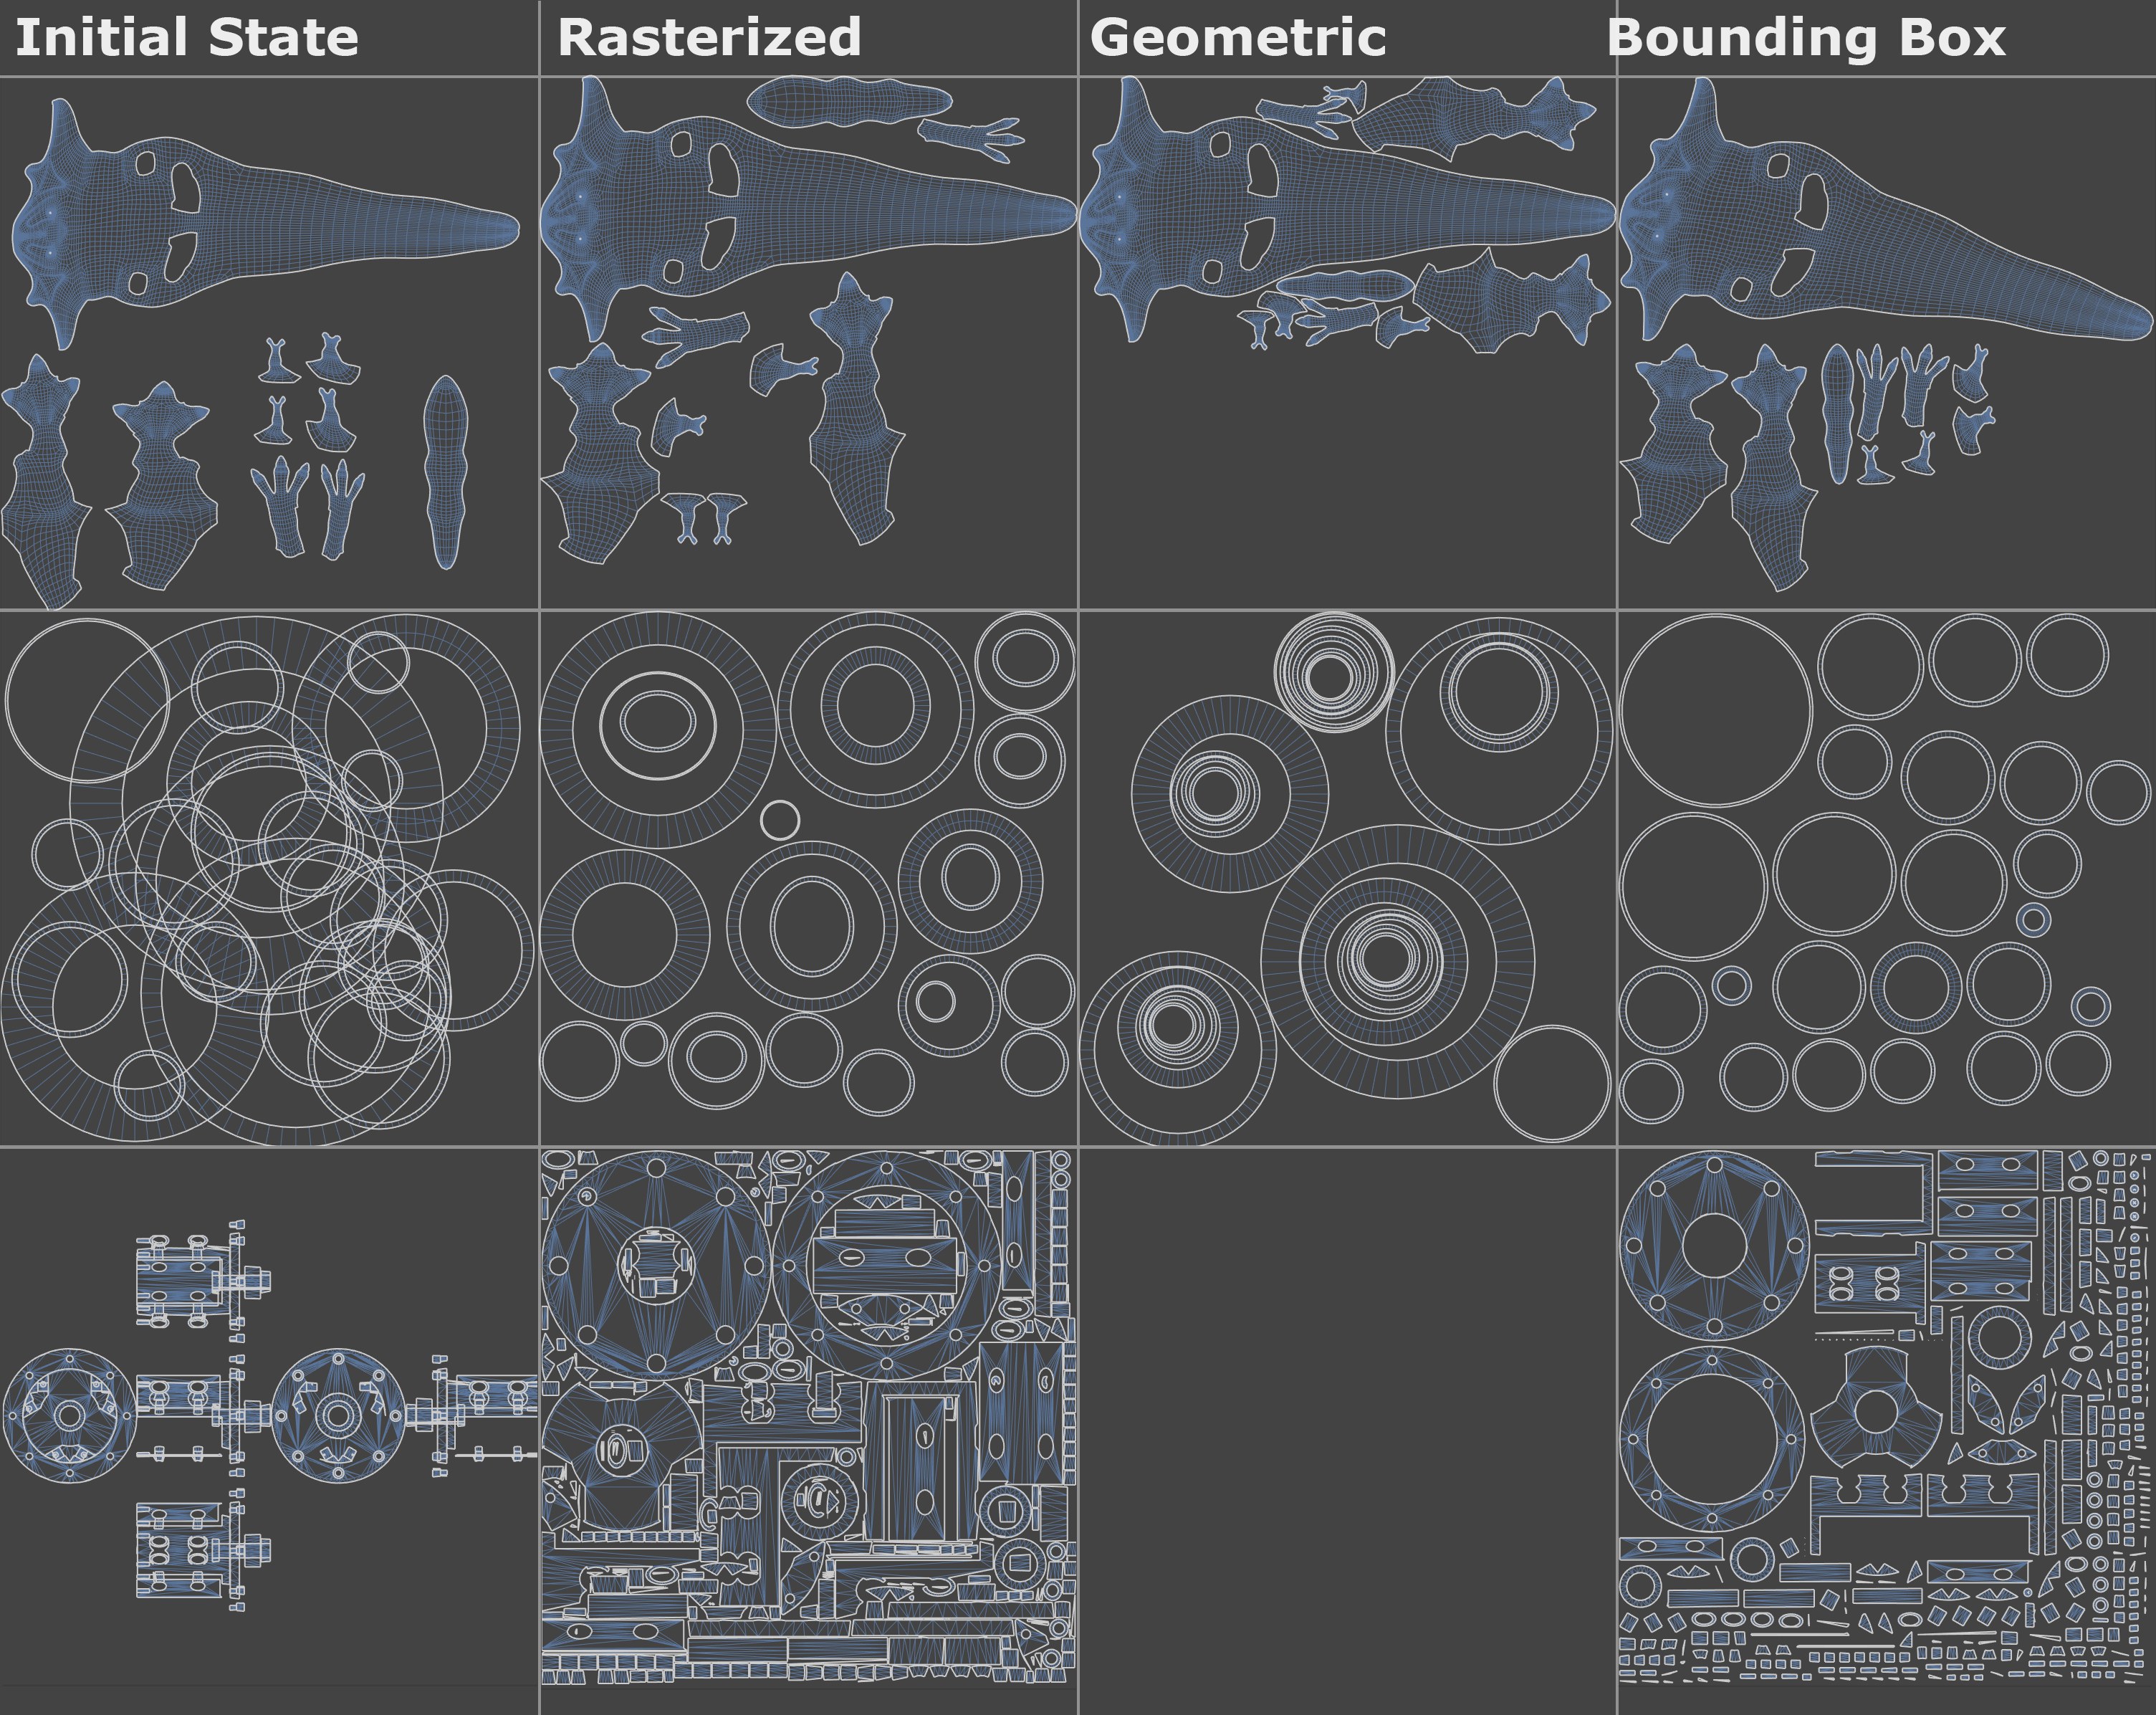 The 3 modes with different UV meshes. At the left of each image, the initial UV state before packing.
When you should use which mode:
- Rasterized: Use this mode when working with a very high number of UV Islands to get good and fast results. Contrary to the other two modes, this mode can be used to deform UV Islands in some circumstances, e.g., for UV Island overlaps and the creation of new islands.
- Geometric: This mode offers the best results. Here, the UV surface is used most efficiently. However, the render time - especially if there are many UV Islands - will be much longer than with other modes.
- Bounding Box: This is the historic (prior to Cinema 4D S22) Packing mode that was available in the Optimal Mapping menu. This mode is fast but cannot interlace UV Islands as the other modes can. This mode "wastes" more UV surface than the other two modes.
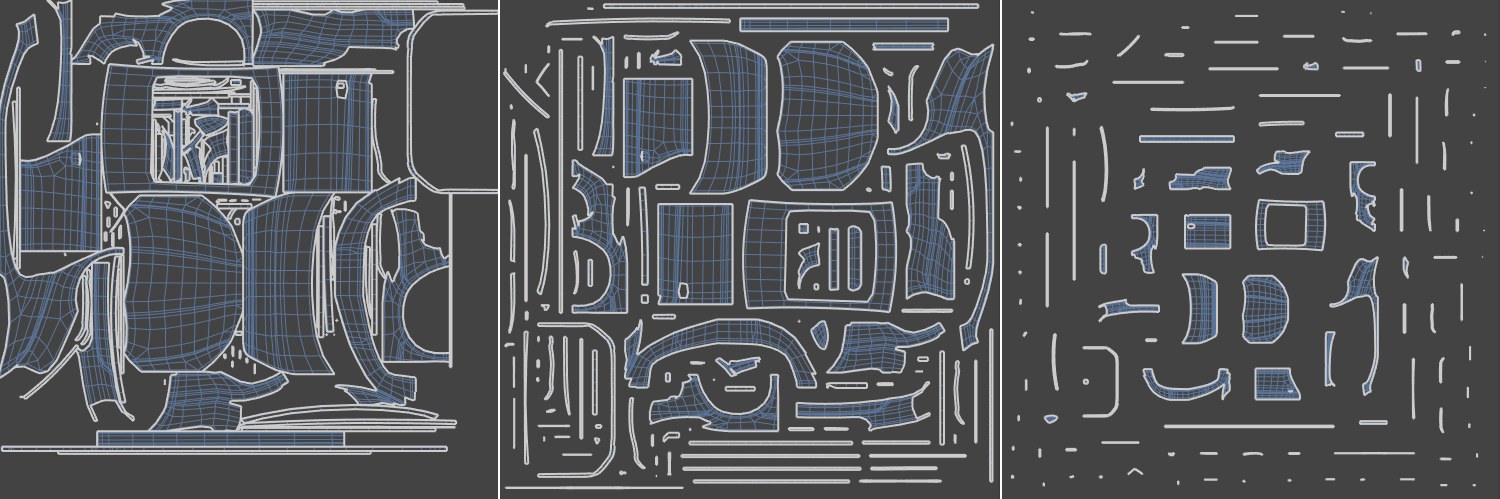
Note that different results can be produced each time the Apply button is pressed. Contrary to other operations, an endless number of Packing solutions is possible. the algorithm is very dependent on the UV mesh that it is given to work with. The result is that different UV meshes will lead to different results.
Note that this mode is not designed to work in conjunction with overlapping UV modes. If overlapping is present when the function is called up, these might be broken down into smaller UV Islands. The number of UV Islands will therefore not necessarily remain constant.
If you know the size of the texture onto which the final effect should paint, you can enter it here. This is the aspect ratio that lets the UV mesh be adapted accordingly. Entering 1024/1024 will lead to the same result as, for example, 850/850.
Overlap Identical Islands
Overlap Mirrored Islands
The algorithm will try to find identical or mirrored UV Islands in order to overlap them congruently (it will work similarly to what’s described below but can dissolve overlapping by creating new UV Islands). The texture will then be projected identically on the respective UV Islands.
Note that this mode can have problems with UV meshes if these have self-overlapping - as can happen with projections. Packing will then abort with an error message.
This selection menu as well as the Gap Size and Spacing settings are primarily used to determine how the minimum distance between UV Islands is defined:
- Texture Space: If you know the final texture size you can enter it in pixels. In addition, the UV coordinates will be distorted according to the texture’s aspect ratio.
- UV Space: In this mode you can enter the minimum distance as a percentage of the UV tile size.
If you know the size of the texture onto which the final effect should paint, you can enter it here. This is the aspect ratio that lets the UV mesh be adapted accordingly. Entering 1024/1024 will lead to the same result as, for example, 850/850.
 Increasing Gap Size and Spacing values from left to right.
Here you can enter the minimum distance between the UV Islands in either pixels (Gap Size) or as a percentage of the UV tile size (Spacing). Note that valuable texture space will be lost the greater the minimum distance is. This is especially important for smaller UV Islands. A smaller distance between UV Islands is necessary to prevent color overlapping at the seams when painting. The larger the values, the correspondingly smaller the UV Islands will be scaled.
See Preserve Orientation.
See Stretch to Fit.
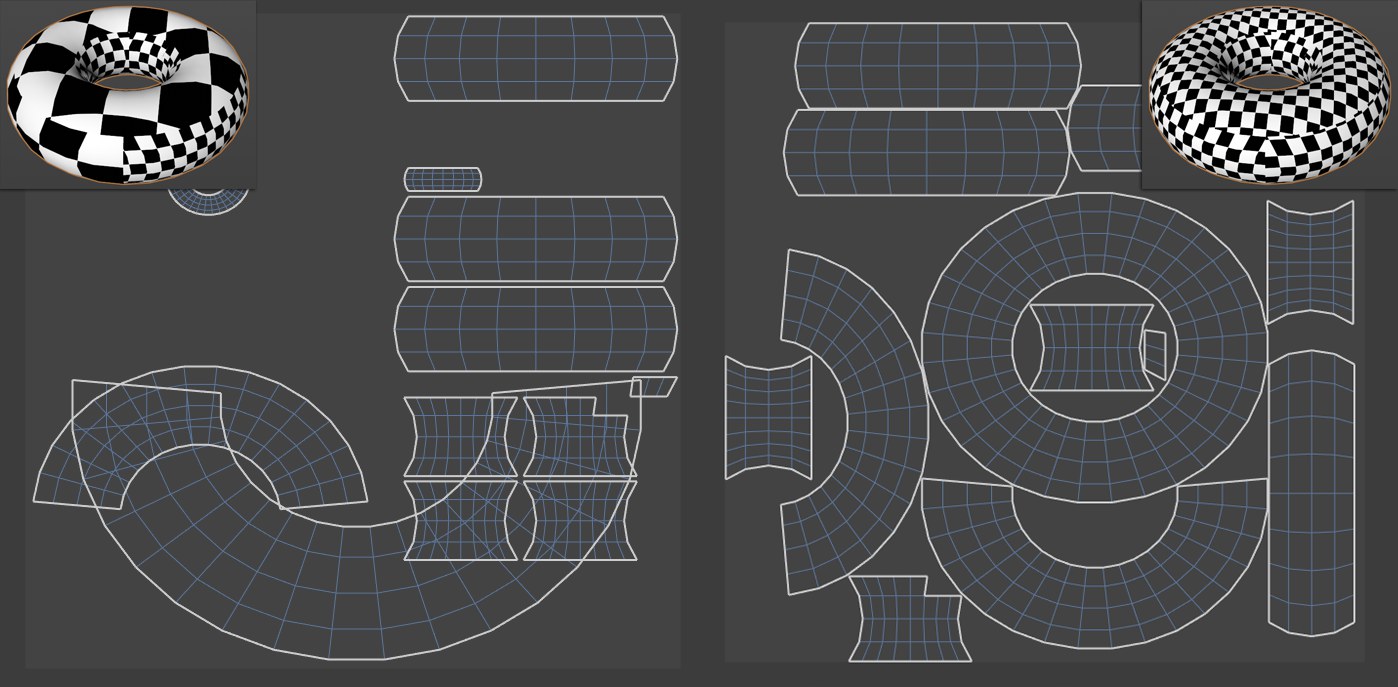 A tile texture: at left the initial state, at right after packing with Equalize Island Size enabled.
If your UV mesh consists of differently scaled UV Islands - as is often the case for manually modified UV meshes - the UV mesh can deviate greatly in size proportion from the respective polygons on the object. Enabling this option will adapt the UV size to that of the polygon object. For example, if a polygon is tiny here it will also be tiny there.
Overlap Identical Islands
Overlap Mirrored Islands
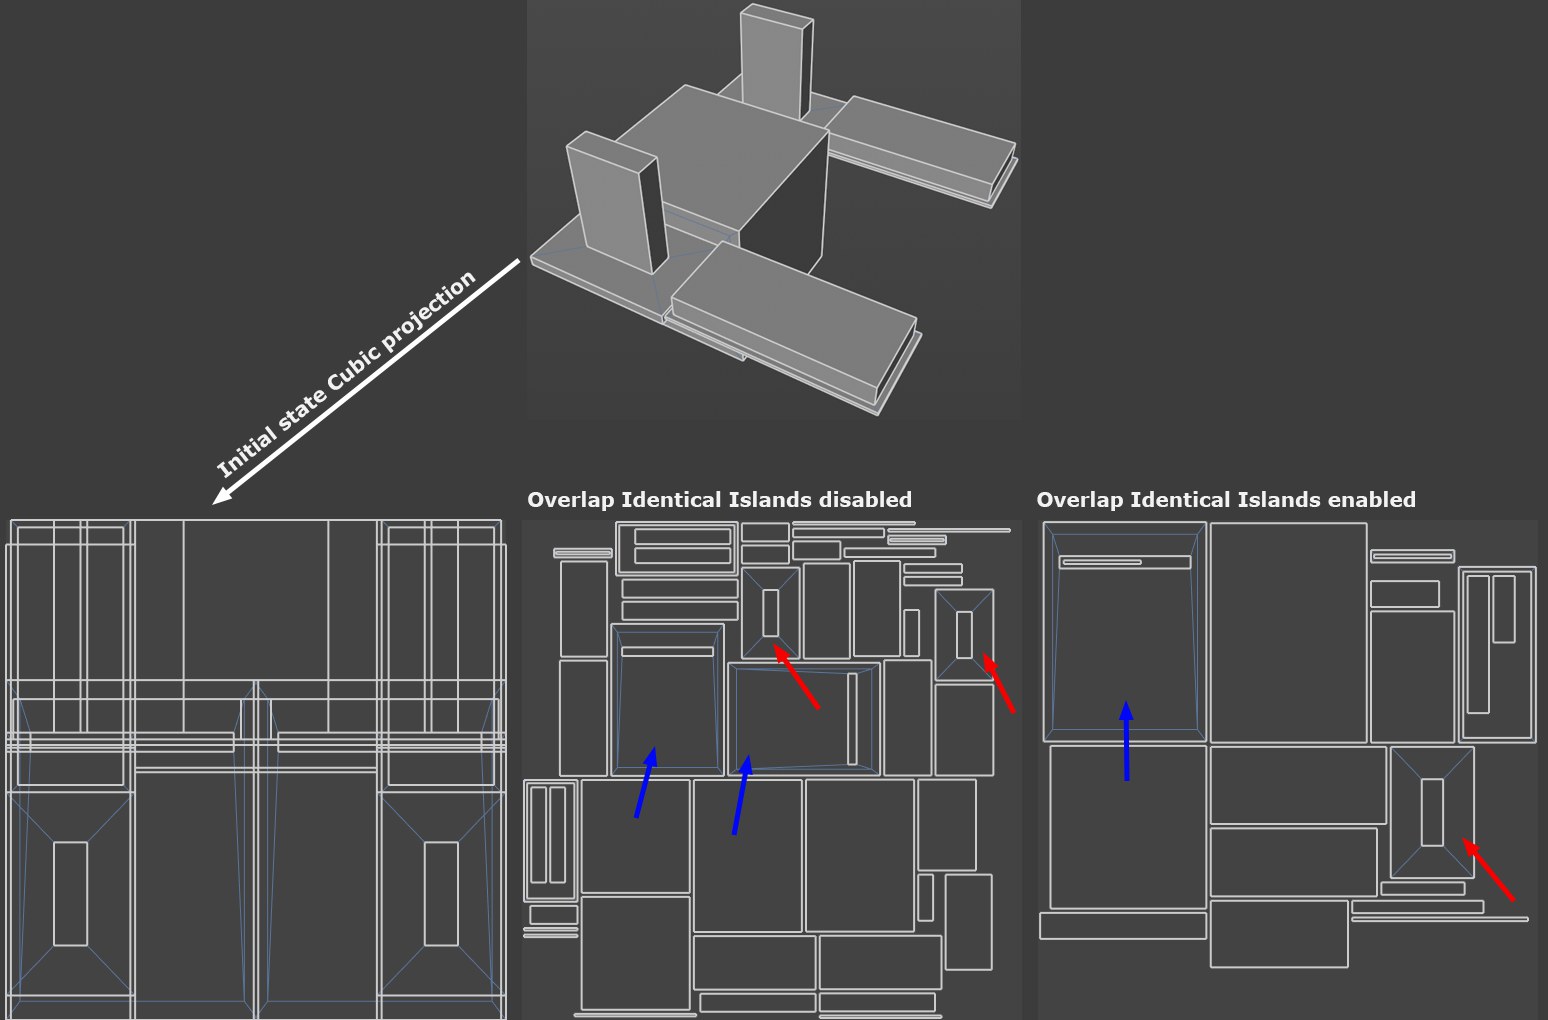
The objects shown in the image above are first assigned a Cubic projection and then packed using UV Packing. Note that as in the depiction at the bottom center, identical or mirrored UV Islands will at first be ignored and each island has its own UV surface. As soon as you enable Overlap Identical Islands, the respective UV Islands will be overlapped.
In some cases, both options will lead to the same result:
- If Overlap Identical Islands is enabled, identical shapes and shapes that are identical if they are rotated 90°, 180° or 270° will be included.
- If Overlap Mirrored Islands is enabled, identical shapes and shapes whose axis is mirrored and are identical will be included. This function does not affect axial-symmetrical UV Islands (e.g., to then fold one half onto the other).
In the example above, nothing has to be rotated or mirrored to produce identical shapes. Both options will produce the same result.
This mode places a bounding box around each UV Island, i.e., a cube or rectangle with the maximum dimension of the UV Island and re-arranges these boxes, incl. the island, according to several defined parameters. No concave shapes can be interlaced and no island holes can be used, contrary to the other modes.
This setting can be used to define the distance (as a percentage of the UV tile size) between polygon groups. Polygon groups should not lie adjacent to one another because this can cause color bleeding at the edges. Therefore, you should not set Spacing to 0% in most cases. Very low percentage values will suffice for most purposes.
See Preserve Orientation.
See Stretch to Fit.
See above: The packing result there looks slightly different due to the different algorithm.