How UV Weld works

This command required an active selection: UV components must be selected along UV Seams. The selected elements must build a connected mesh, whose UV mesh is unstitched, on the 3D object. You cannot, for example, connect the UV polygons of a character’s foot with those of the character’s eyes but you can connect those of the foot with those of the ankle if these were separated in the UV mesh. these separated UV Islands can later be re-attached at the fitting location.
This can differ somewhat, depending on the component mode selected:
- In Use Point mode, the UV points of opposite seams must be selected on both sides. Corresponding points will be welded midway between the two respective points.
- In Use Edge mode, only one side of the edges has to be selected to connect them with the corresponding UV edges. Corresponding UV points will be welded midway between the two respective points - looks like Use Point mode in the above image if the same selection is made.
- In Use Polygon mode, all selected polygons - if they are connected to the border polygons - will be connected to the opposite side and a relaxation will take place concomitantly. Contrary to UV point selection, you only have to select UV seam polygons on one side. The algorithm will then connect the corresponding polygons automatically.
All components can be selected in any mode to automatically weld corresponding components to other UV seams.
Make sure that the regions to be connected lie close to one another in the UV mesh because the resulting mesh will otherwise crisscross.
Note also the ![]() UV Weld and Relax...
UV Weld and Relax...
Note that the UV Weld replaces the previous UV Connect command (prior to S22), which worked similarly.
This command can be used to re-attach separated UV meshes and Islands, which is similar to what the ![]() UV Weld
UV Weld
The default state when the command is called up is UV component selections, which are elements of UV Seams as described here for the UV Weld command (the weld process works for the most part as it does there).
In the next step, the mesh relaxation, UV Pins will be included, which affix UV points at the location at which they lie. If the next step - realigning (Auto Realign enabled) - the UV Pins will no longer apply. Don’t be surprised if the UV Pins move as a whole.
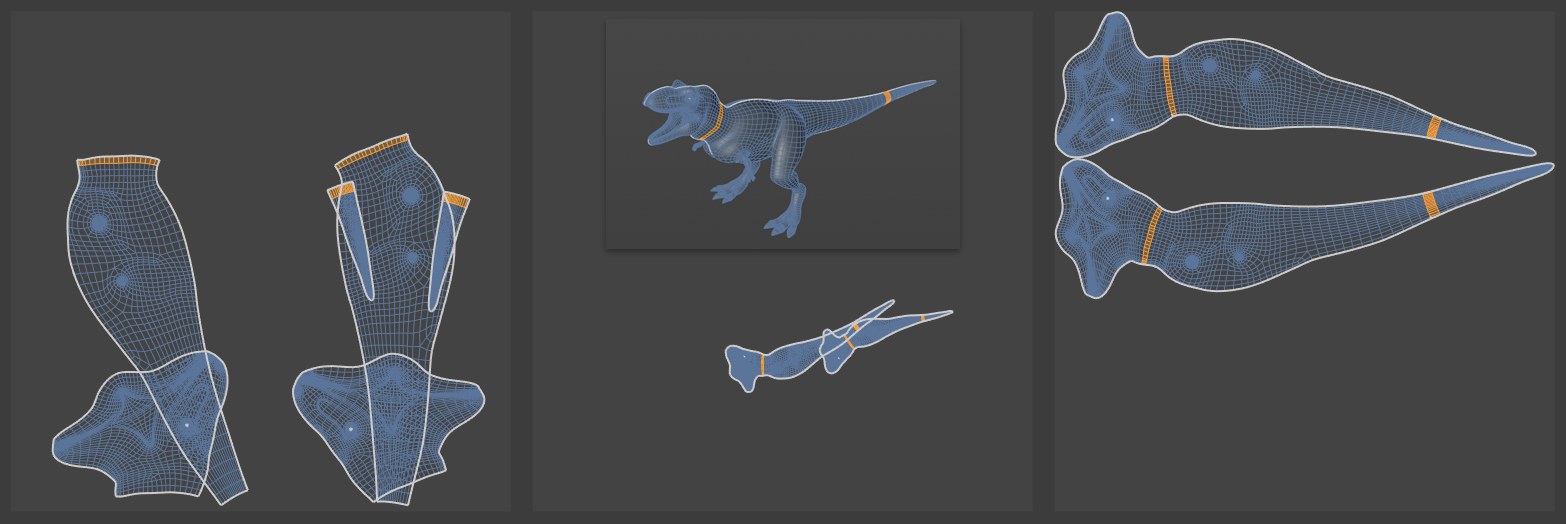
What can the result look like?

In the top half of the image above, two UV polygon rows were selected (could have also been edge selections or point selections on both sides of the seam), with which the command attaches the island at the right location and/or closes a cut.
In the bottom half of the image, a UV Seam edge is selected and used to cleanly weld and realign both dinosaur head halves.
Note also the ![]() UV Weld
UV Weld
Calling up this command can produce an error message if UV meshes without seams are found (see also here).
 Left: initial state; center: option disabled; right: option enabled.
If this option is enabled, the effect will be restricted to existing polygon selections. Contiguous selections will be turned into new UV Islands.
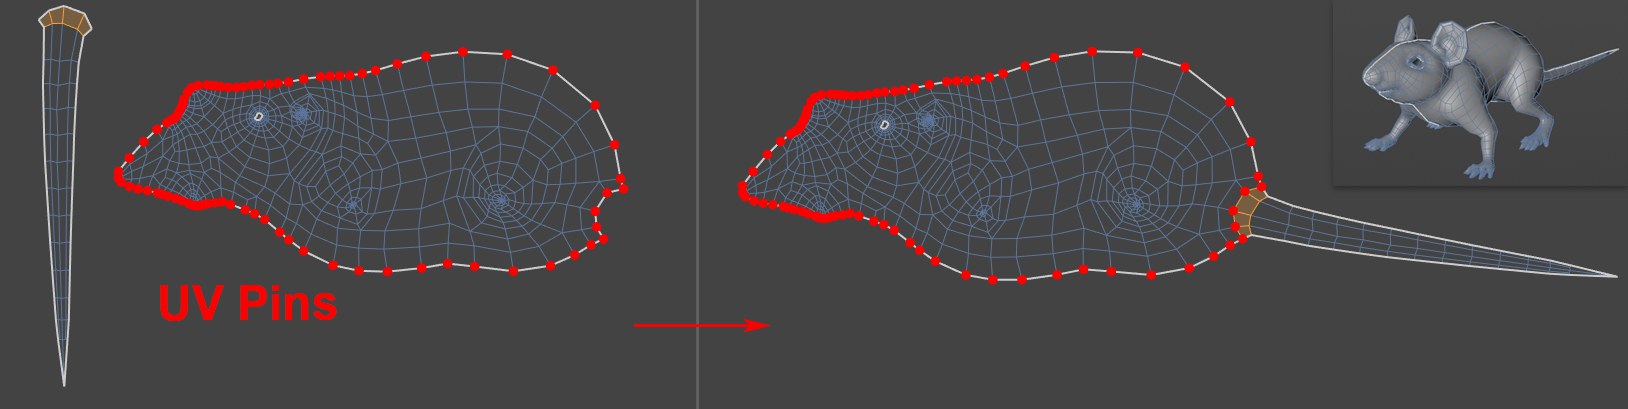
UV points affixed via UV Pins will remain unchanged if this option is enabled and Auto Realign in disabled. The command will remain restricted to the mouse’s tail, which is welded to the body via polygon selection.
If you want to affix certain UV points only for the relaxing process, select the respective points and call up the ![]() Add UV Pins
Add UV Pins
 Left: initial state; center: option disabled; right: option enabled.
Enable this option if the UV Islands should in the end cover the UV tile and be as free as possible of overlapping. You will use the Bounding Box mode, as you know it from the UV Manger’s UV Packing menu.