Object Properties
This field is very similar to the Subdivision settings located in the Subdivision Surface object. A value of 1 will subdivide each polygon of the child object into four smaller polygons, a value of 2 will subdivide each polygon of the child object into sixteen smaller polygons and so on. The subdivision value will control how smooth the Cloth Simulation object appears to be. The higher the number, the slower the playback will be during the cloth simulation, but the nicer the results.

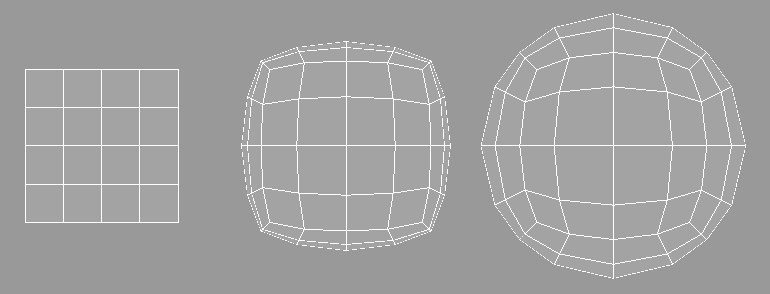
The images above show the original polygonal cage that has the Cloth tag applied to it (left) and the same polygonal cage with a Cloth object applied to it using a Subdivision value of 2. The wrinkles and bulges of the cloth become more defined as the subdivision increases.

Due to the nature of the Cloth surface algorithm, wrinkles in the surface become more apparent as the subdivision increases. This can be used to simulate cloth wrinkles. However, if this is not the desired result, use a Cloth surface with a very low subdivision value inside of a Subdivision Surface object; this can produce the same results without the wrinkles.
If clothing smoothed with Cloth surface is being penetrated, it can help to set Subdivision to 0 or to enable the Limit option.
This setting will interpolate the surface Normals of the polygonal cage, or more accurately the cloth object. A value of 0% means that the subdivided surface will not interpolate the surface Normals. A value of 100% will interpolate the surface Normals when subdividing the surface.
Above is an example of how the surface Normals are interpolated as the Factor value is increased on the same object.
At many times during a cloth simulation, two points may approach each other whose corresponding surface Normals are adjacent to each other. At this point the Cloth surface will interpolate its subdivided surface through the control cage or cloth object. The Limit option will prevent this from happening. Take the given situation:
With the Limit option disabled the subdivided surface will pass through the control cage.
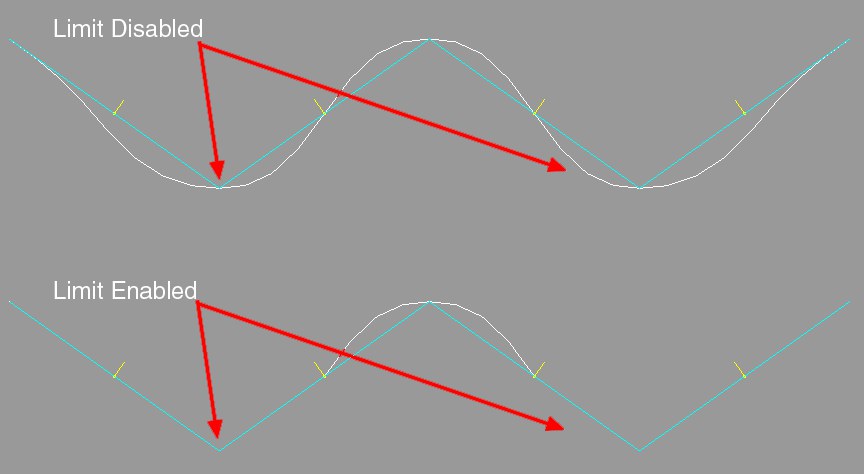
With the Limit option enabled the subdivided surface will not pass through the control cage’s surface. The direction of the surface Normals for the polygonal cage will determine if the Cloth surface is passing through the geometry.
This is another property that separates Cloth surface from the Subdivision Surface object. By increasing the Thickness setting, the Cloth surface object will generate a form of extrusion to make the cloth look thick. The thickness of the subdivided surface will be determined by the direction of the surface Normals for the control cage. This allows for the control cage to be modeled without thickness resulting in fewer polygons that need to be calculated during the cloth simulation.
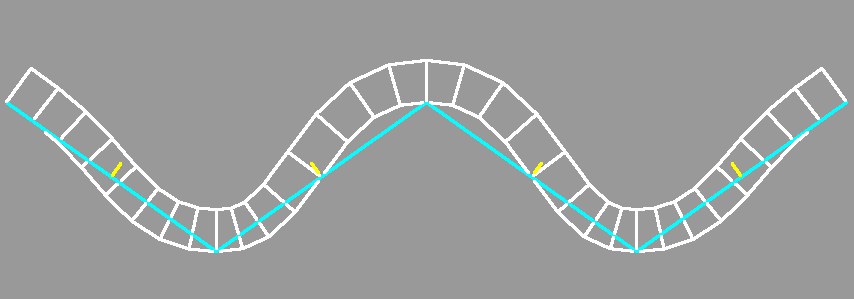
The left image above shows the Cloth surface when using a Thickness value of 20. Also notice that the Normals are facing up the Y axis, which is defining the direction of the thickness.
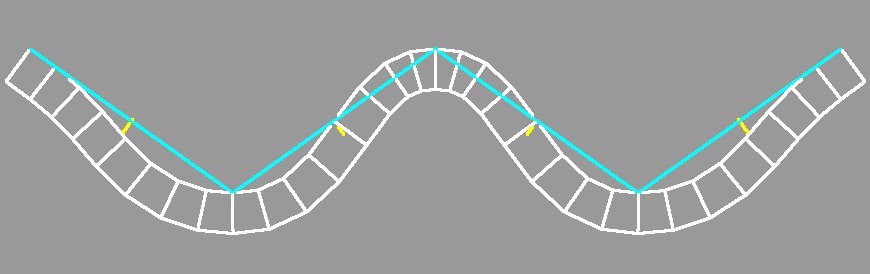
The right image above shows another Cloth surface using the Thickness setting. As opposed to the other image, this one has the surface Normals reversed.
This option offers another possibility for creating thickness. The thickness is created dependent on the number of polygons belonging a point and their polygon normals (thickness and orientation will be added). This means that the thickness will abate towards the edges and increase towards the poles. Thicknesses greater than defined will be generated. This effect is often exaggerated one that diminishes towards the edges.