Glow
The Object ID corresponds to the object buffers defined in the Compositing tag.
Suppose there are dozens of objects in the scene and you want only one of them to glow. In the render settings, on the Effects page, add the Glow post effect and set Object ID to 1. Assign a Compositing tag to the object that should glow and, in the tag, enable Buffer 1. The glow is now restricted to this object.
The size of the glow is defined as a percentage of the viewport’s size. If you want the glow to appear to grow when you zoom objects, enable the Zoom Scale and Distance Scale options.
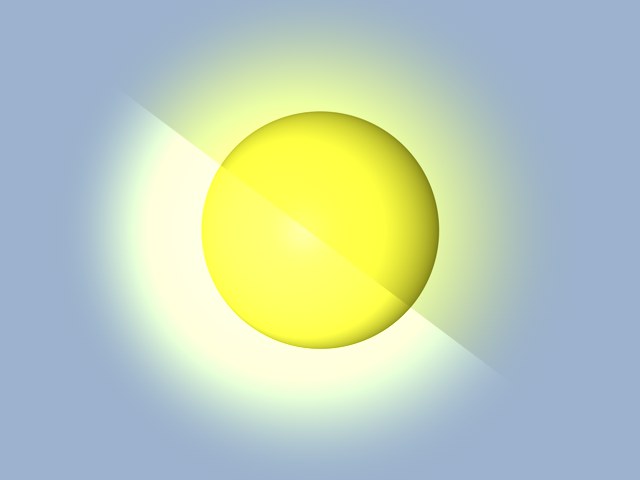
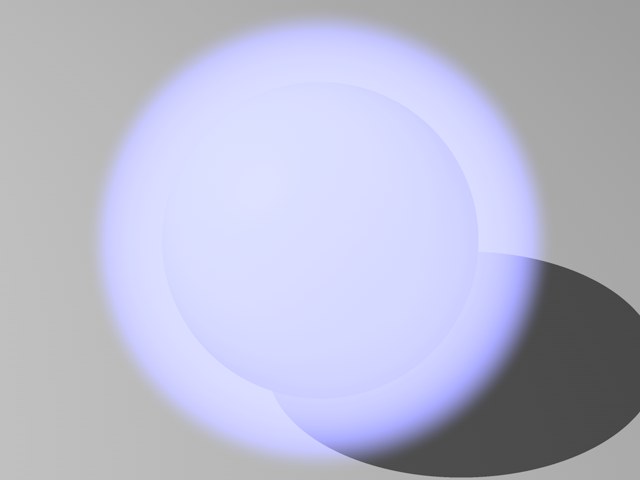
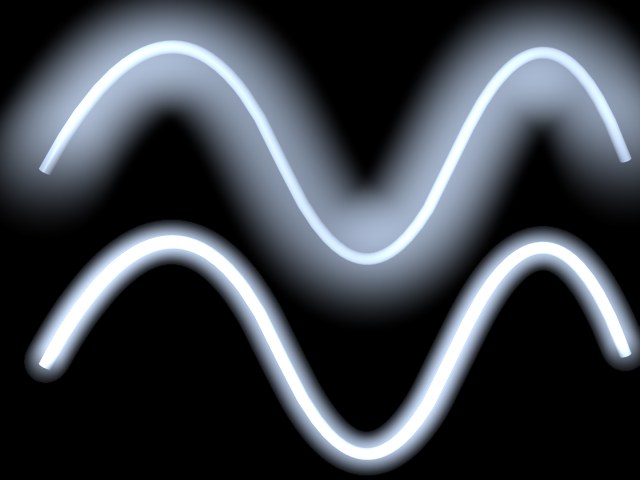 Top: High Size value. Bottom: Low Size value.
The Size value also affects the glow’s brightness. This is because the intensity of the glow (defined by Intensity) is spread over the entire glow.
The Intensity is a measurement for the transparency of the glow. A value of 0 represents full transparency (i.e. no glow). Increase the value for more opacity and thus a brighter glow.
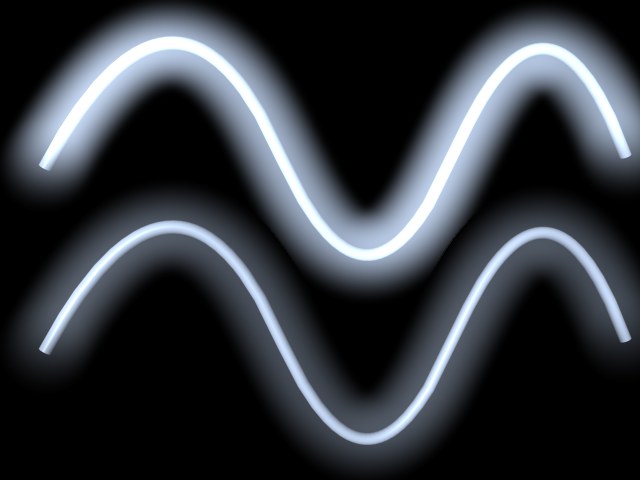 Top: High Intensity value; Bottom: Low Intensity value.
This parameter controls the glow effect for dark surfaces. Using Back Intensity you can fine-tune the transition from glowing areas to non-glowing areas. To reduce the amount of glow for dark areas, set Back Intensity to a high value.
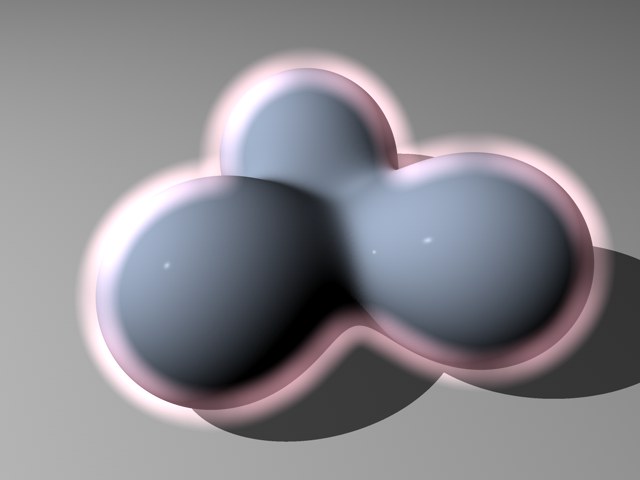
 Left: High Back Intensity value; Right: Low Back Intensity value.
You can also use Back Intensity to achieve negative glow for effects such as dust clouds and smoke clouds. For negative glow, set Back Intensity to a low value.
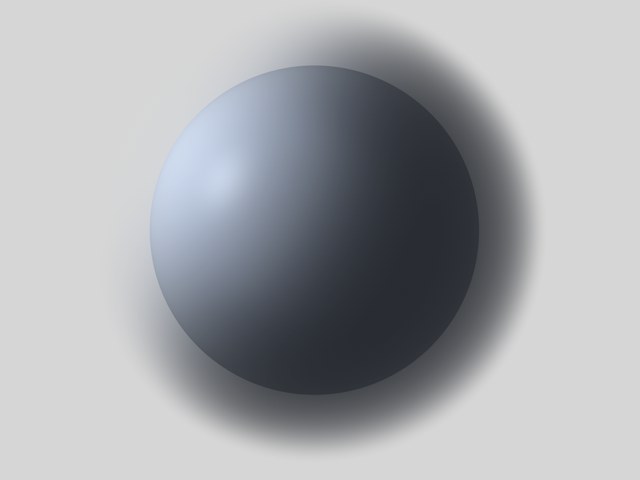 Use a low Back Intensity value for negative glow.
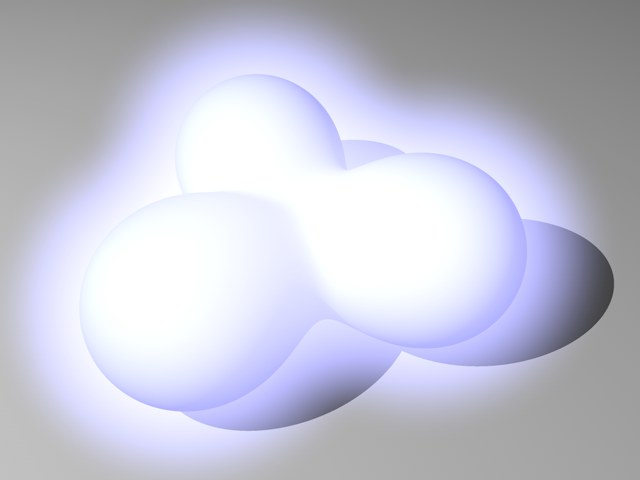
The glow effect is usually additive and brightens pixels. Using Luminosity you can reduce the glow’s additive nature, causing the glow to darken. A value of 0% results in a diffuse, dusty cloud.
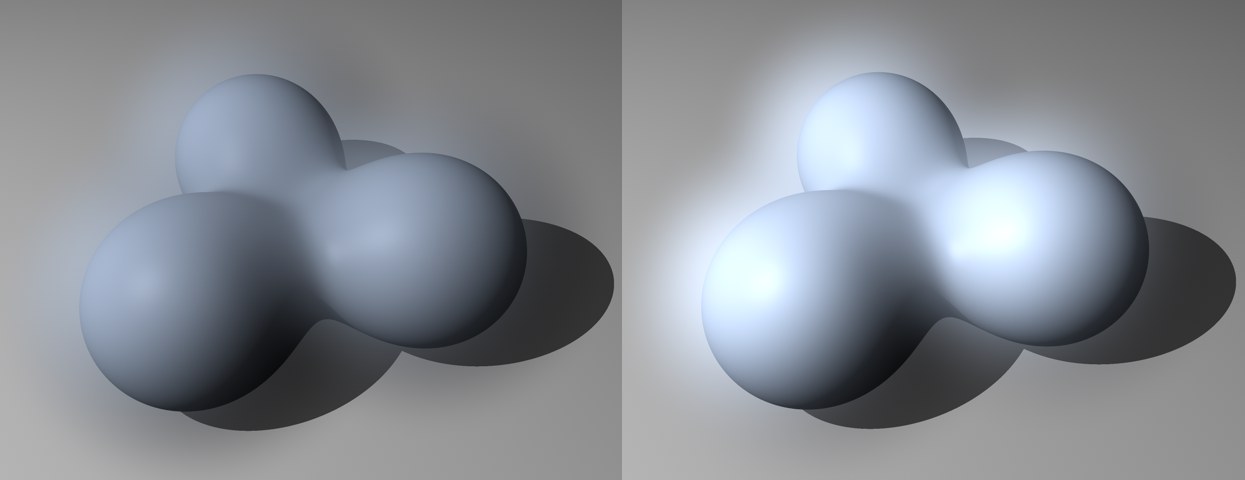 Left: Luminosity set to a low value; Right: Luminosity set to a high value.
This parameter gives you a more refined way to control luminosity by checking the brightness of the rendered pixels. The glow and the rendered pixels are combined in an additive process. Use the Back Luminosity value to adjust this process.
 Back Luminosity set to a high value (bottom left) and a low value (top right).
The Back Luminosity parameter is especially useful for correcting glows that are too bright and washed out.
If the Use option for Color is disabled, the glow will be the same color as the material. To define a different color for the glow, enable the Use option, click the color box and choose the desired color (to access color sliders, click the triangle that’s next to the color box).
The color is also important when you want objects to glow with a uniform color regardless of their rendered brightness. Click the color box, choose the desired color and set Balance to a high value. Define an object ID and assign a Compositing tag to the glowing object with the corresponding object buffer enabled.
You can restrict the glow effect to object edges by enabling this option. To make the object’s edges glow with a uniform color — regardless of the rendered brightness — choose a glow color and set Balance to 100%.
 For uniform edge glow, enable Glow Edges and set Balance to 100%.
There are two ways to zoom objects in the viewport:
- By increasing the camera’s Focal Length value.
- By moving the camera closer to the objects or vice versa (see Distance Scale).
Enable Zoom Scale if you are zooming via the Focal Length value and you want to zoom the glow as well as the objects.
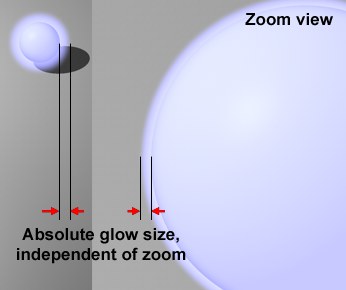 Zoom Scale disabled. The glow still has the same thickness when you zoom the object.
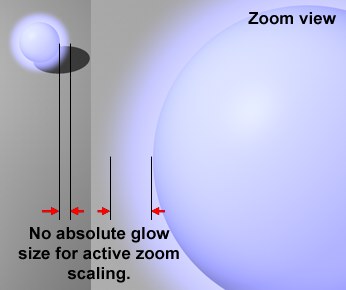 Zoom Scale enabled. When you zoom the object, the glow is also zoomed.
Enable Distance Scale if you are zooming by moving the camera (or objects) and you want to zoom the glow as well as the objects. Otherwise the glow will remain the same thickness. See "Zoom Scale" for more details.
Note: This function does not work in conjunction with the Physical Renderer.
The Balance parameter controls how bright the rendered pixels must be in order to trigger glow in those areas. With the default value of 0%, only the brightest areas will glow. With a value of 100%, all areas will glow with the same intensity. However, note that a dark glow will be used for the dark areas. Use the Object ID parameter to restrict the glow to the desired objects.
 Balance set to a high value.
To make the object glow with uniform color, enable the Use option for Color, click the color box that’s next to the option and choose the desired color.
 Glow of uniform color (Color option enabled).