Composition Helpers
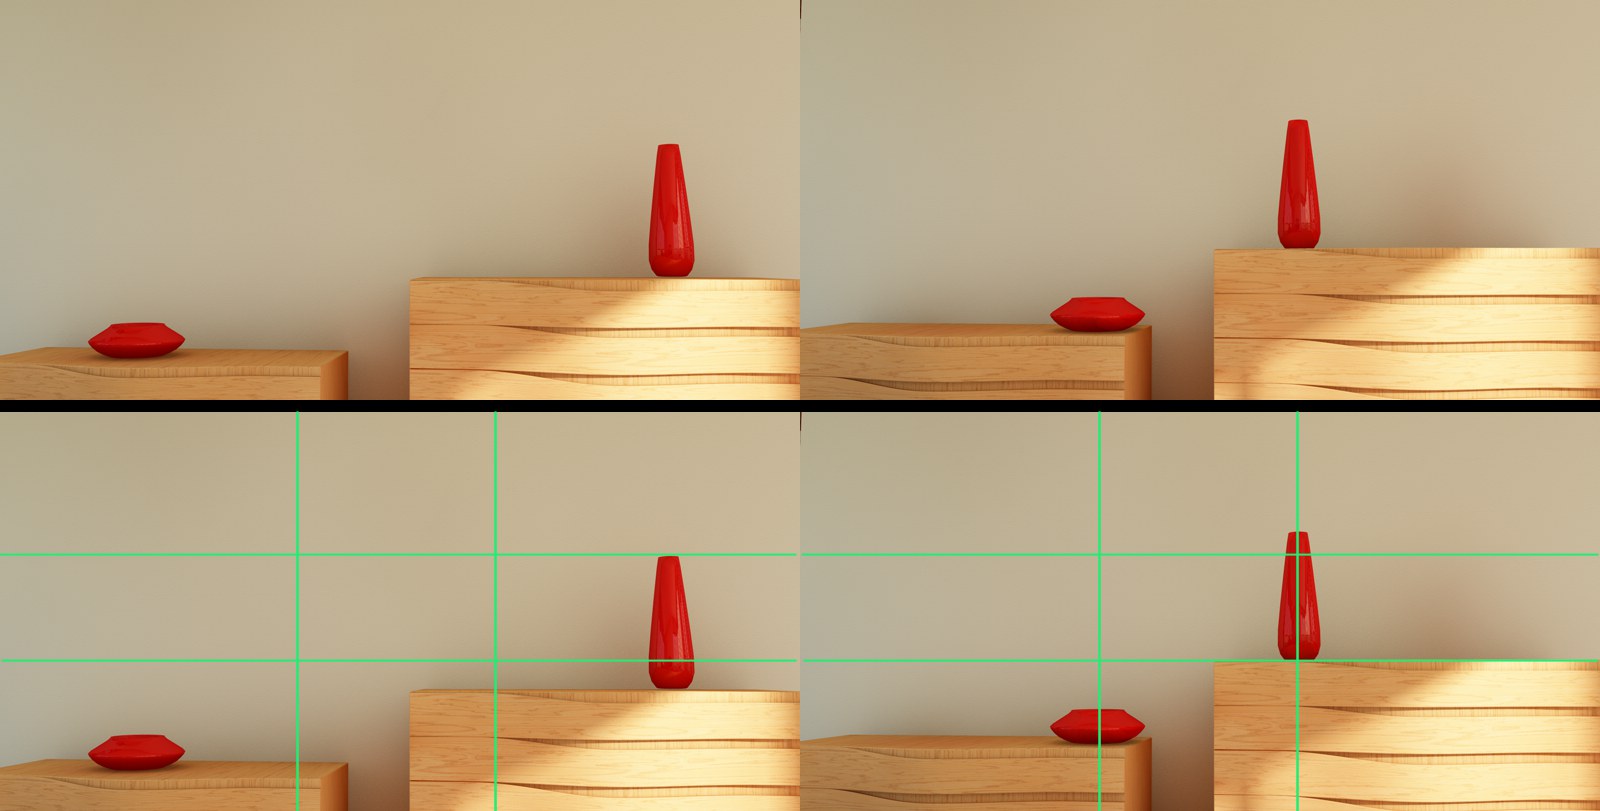 The arrangement of the vases at the left appears less harmonious than at the right. At the right, the vases are arranged according to the ,golden section’.
A common problem in the composition of Project elements is the correct arrangement of important image regions, which is something even Renaissance painters had to take into consideration in applying the golden section.
In the Composition (Helpers) tab you will find settings that, when enabled, will display guidelines in the Viewport that you can use to arrange your scene.
- These Helpers are only visible in the Viewport for which the camera is defined.
- These Helpers will be adjusted to fit within the Render Safe region.
- These Helpers will normally be invisible when the scene is rendered (unless the Viewport renderer make an exception).
This does not mean that all objects in your Project must be arranged according to these Helpers (which in most cases is not useful) but it can often help arrange a distinctive object or objects along a visual line or lines (this can be done by either repositioning the object(s) or by simply zooming or repositioning the camera accordingly). Repositioning the camera can often achieve a more subtle effect.
The various options can be combined.
In addition to the golden section there is also a golden angle, which, however, is not available among the available guidelines. The golden angle is 137.5°.
Enables or disables the visibility of the Helpers for the active camera. The following Helper types are available:
 All available Helpers are enabled.
 Grid
Diagonal
Triangles
Golden Section
Golden Spiral
Crosshair
Enables or disables the respective helper type.
![]() Grid
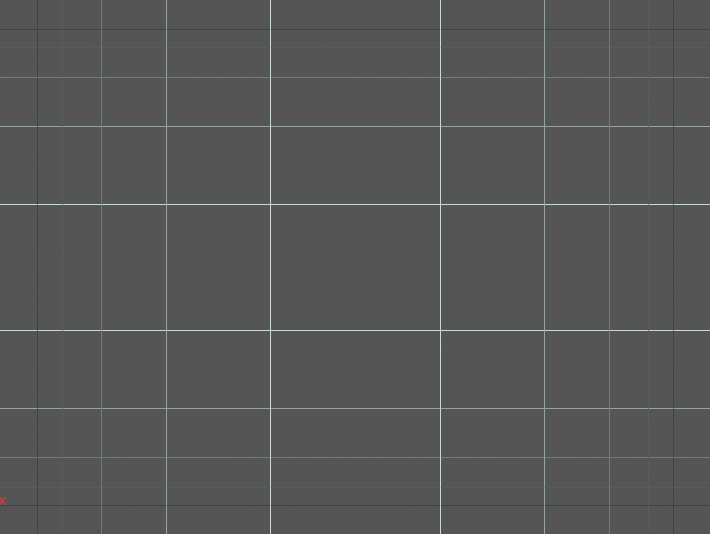
Grid
Enabling this Helper will place a definable grid over the camera view.
The default grid consists of a 3x3 grid, which is commonly used by photographers and is referred to as the ,rule of thirds’ (which comes very close to the golden section - see below). Two horizontal and two vertical lines divide the view into 9 equal cells. The subject of the scene should lie on one of the four cross-sections or on one of the lines. For a landscape, for example, the horizon can be positioned on the lower horizontal line.
Use this value to define the number of horizontal and vertical cells.
Use this setting to define the grid’s color.
![]() Diagonal
Diagonal
Enabling this Helper will place a diagonal line across the camera view. Arranging a motif along this diagonal line can give an image a dynamic look. Diagonals that incline from left to right are viewed as being positive (in countries in which text is read from right to left, this diagonal would also incline from right to left).
Enable this option to mirror the diagonal line (incline from right to left).
Use this setting to define the color of the lines.
![]() Triangles
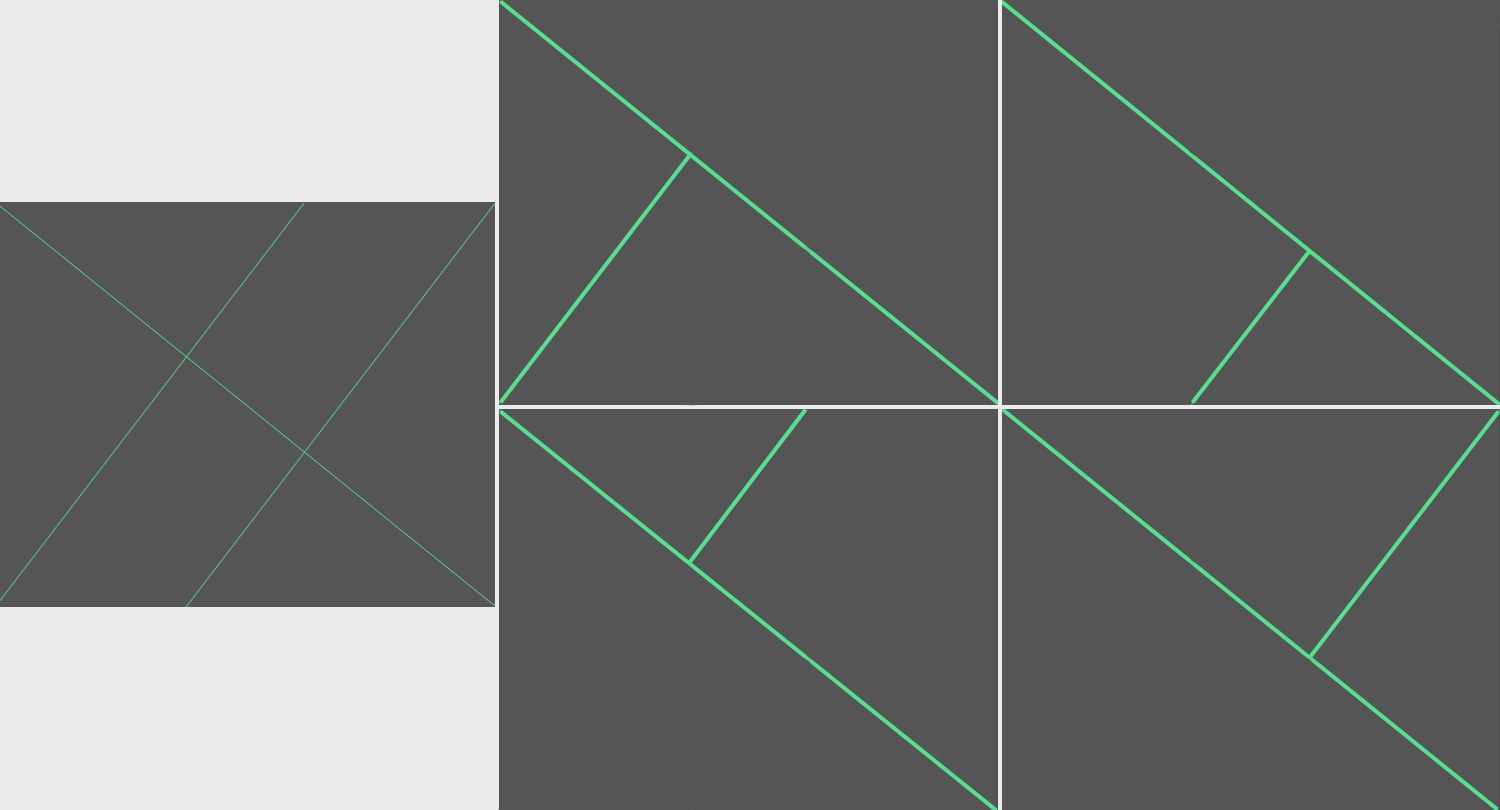
Triangles
Enabling this Helper will place two diagonal lines across the camera view. These lines are positioned so that the golden section lies between them.
If this Helper is combined with the Diagonal Helper, (Mirror disabled and Mode set to Mode 2), the camera view can be divided into additional triangles, which are also common in photography and referred to as the ,golden triangles’.
The Mode setting defines whether or not the Helpers should be positioned so the short Mode 1 or long Mode 2 cell should be used as the golden section.
Enable this option to mirror the Helpers horizontally.
If enabled, the Helpers will stretch from one side to the other; if disabled, the top and bottom edges will be used.
Use this setting to define the color of the lines.
![]() Golden Section
Golden Section
The golden section is probably the most well-known method of image composition. A golden section exists if two elongated regions of an image combine to create a harmonious impression:

This ratio has been in use since Ancient Greece with regard to aesthetics and harmony and as the ideal proportion in art and architecture. It is probably no coincidence that the golden section, for example, of the distance from the elbow to the fingertips lies almost exactly at the wrist.
The golden section can be displayed using either horizontal or vertical lines in the Viewport.
This setting lets you add up to 4 lines that will be positioned according to the golden section. In the image below is the maximum number of lines with Top, Right, Bottom and Left enabled):
Enable these options to define which lines should be displayed.
Use this setting to define the color of the lines.
![]() Golden Spiral
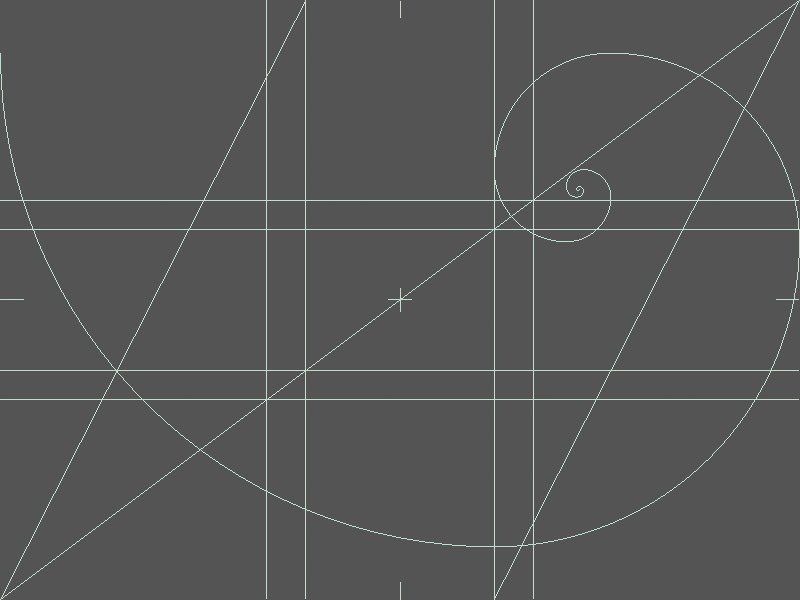
Golden Spiral
Also referred to as the ,logarithmic spiral’ or Fibonacci Spiral, the Golden Spiral in creases the distance from its center point by an equal factor with each rotation (which in turn represents the golden section). This spiral is often found in nature (inflorescense, pine cones, etc.). Even the shape of a human’s ear often follows the rules of the Golden Spiral:
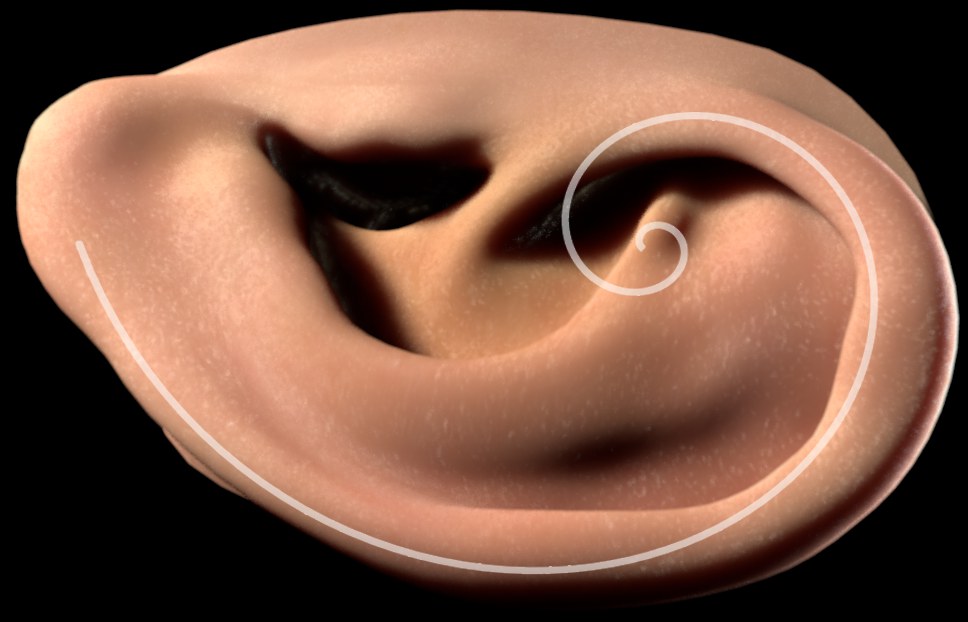 Model © by Infinite Realities.
Use these options to mirror the Golden Spiral horizontally or vertically.
If enabled, the Golden Spiral will be flipped upside-down.
Use this setting to define the edge on which the Golden Spiral should lie. Center will position it at the center of the top and bottom edges.
Use this setting to define the color of the line.
![]() Crosshair
Crosshair
The Crosshair Helper marks the center of the image with a crosshair and the center of each edge with a short line.
Use this value to define the size of the crosshair and the gaps between the crosshair and the edge markers.
Use this setting to define the color of the lines.