Object Properties
Initializes the current state of the deformed mesh, so you can safely make modifications without losing this initial state. Note that when initializing a mesh that already has the Smoothing Deformer set to either Relax or Stretch modes, it will set the initial state based on the non-deformed mesh (so, it will appear not smoothed/not relaxed, and only modifications made to the points afterward will be smoothed/relaxed).
Restores the mesh of the deformed object to its recorded initial state.
Displays the memory usage for the currently stored state.
This parameter controls the strength of the Smoothing Deformer. Lower values will restore the object toward its non-deformed state.
Sets the type of smoothing to use.
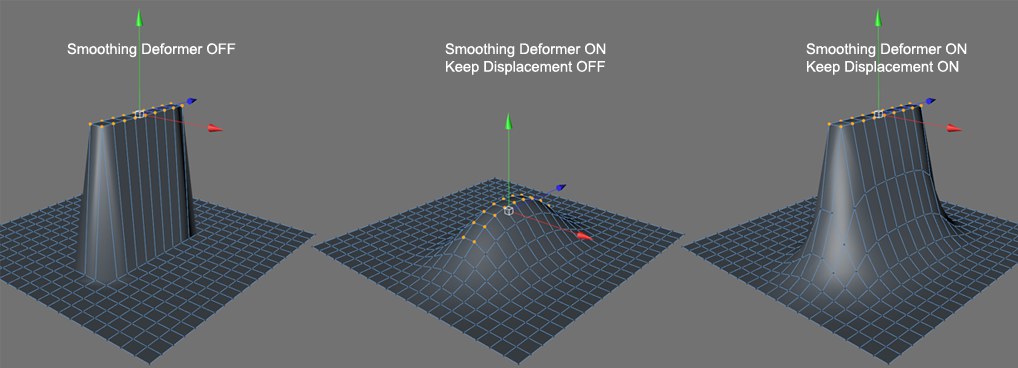
This mode will effectively turn your mesh into some sort of piece of cloth. Each point moved will move the surrounding points as if they were on a cloth surface, creating wrinkles and folds automatically. The edge length will be preserved if Keep Displacement is off. For a more rubbery surface feel, turn Keep Displacement on.
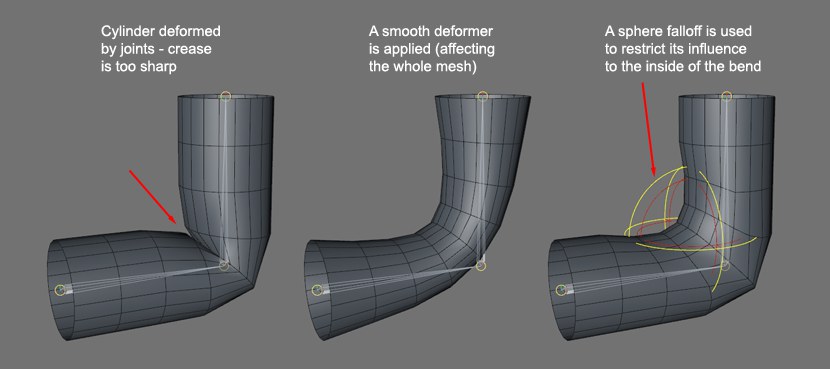
This mode will simply smooth each polygon and point toward their center, resulting in an overall smoother mesh. Note that using this mode can result in a loss of volume. You can make use of the falloff shapes or stiffness maps to focus on an area of your mesh. For example, adding a Smoothing deformer in smooth mode to the bend of an elbow, restricted to the inside of the bend with a sphere falloff can be a quick way to fix any artefacts coming from the deformation of the joints.
Pretty much like the Smooth mode, Stretch will smooth points and polygons, but you will not lose the volume of your initial mesh.
Defines how many times the smoothing algorithm will be applied. Increasing iterations will accentuate the impact of the deformer, if you prefer, by smoothing the mesh further. Do not increase this value too much, as Cinema 4D could become unresponsive depending on your machine.
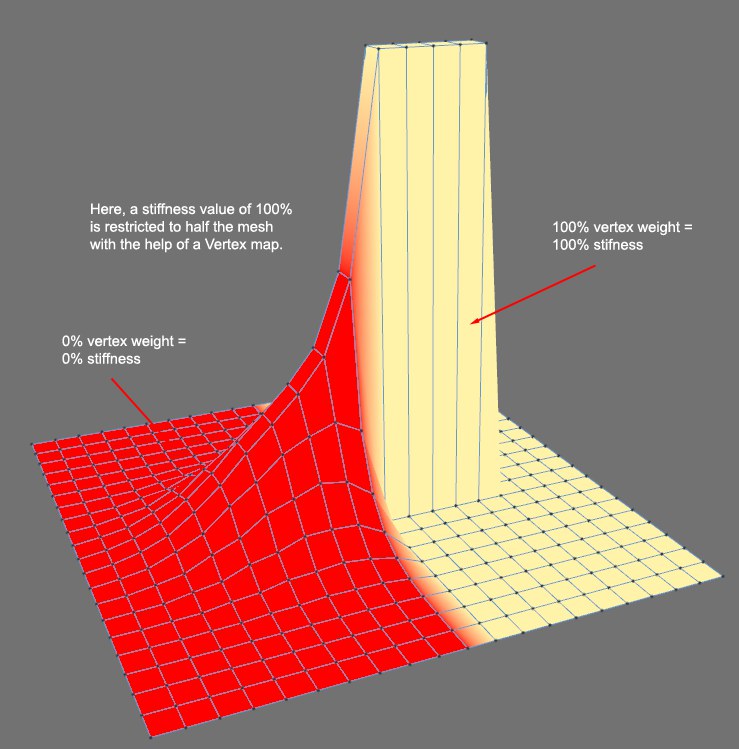
This parameter controls the impact of the smoothing deformer on the mesh, pretty much like the Strength parameter at the exception that this parameter can be controlled selectively when used in conjunction with a Stiffness Map.
Enable this option if you would like to retain the exact position of the points being moved compared to their non-deformed state. The polygons will be stretched to accommodate the point position.
Drag a Vertex Map here to restrict the impact of the Stiffness value over the mesh.