Effector
Use this slider to adjust the strength of the Effector. A Strength setting of 0% means the Effector will have no effect.
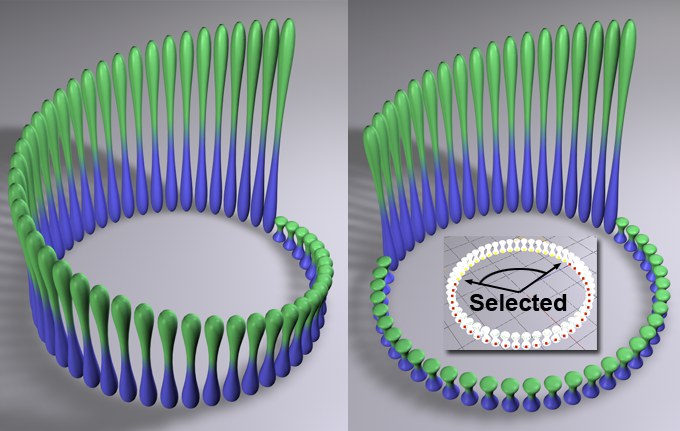 At left a Step Effector without a selection, at right with a selection.
A MoGraph Selection or MoGraph Weightmap tag can be dragged into this field or placed automatically by selecting a Cloner Object and an existing MoGraph selection/weighting, and creating an Effector.
The Effector will then work as follows, depending on the tag’s settings:
- MoGraph Selection tag: Will only affect the clones belonging to the selection.
- MoGraph Weightmap tag: The clone weighting (values between 0% and 100%) saved in the tag will be multiplied with the effector strength.
Depending on the option selected, the clones will orient themselves according to:
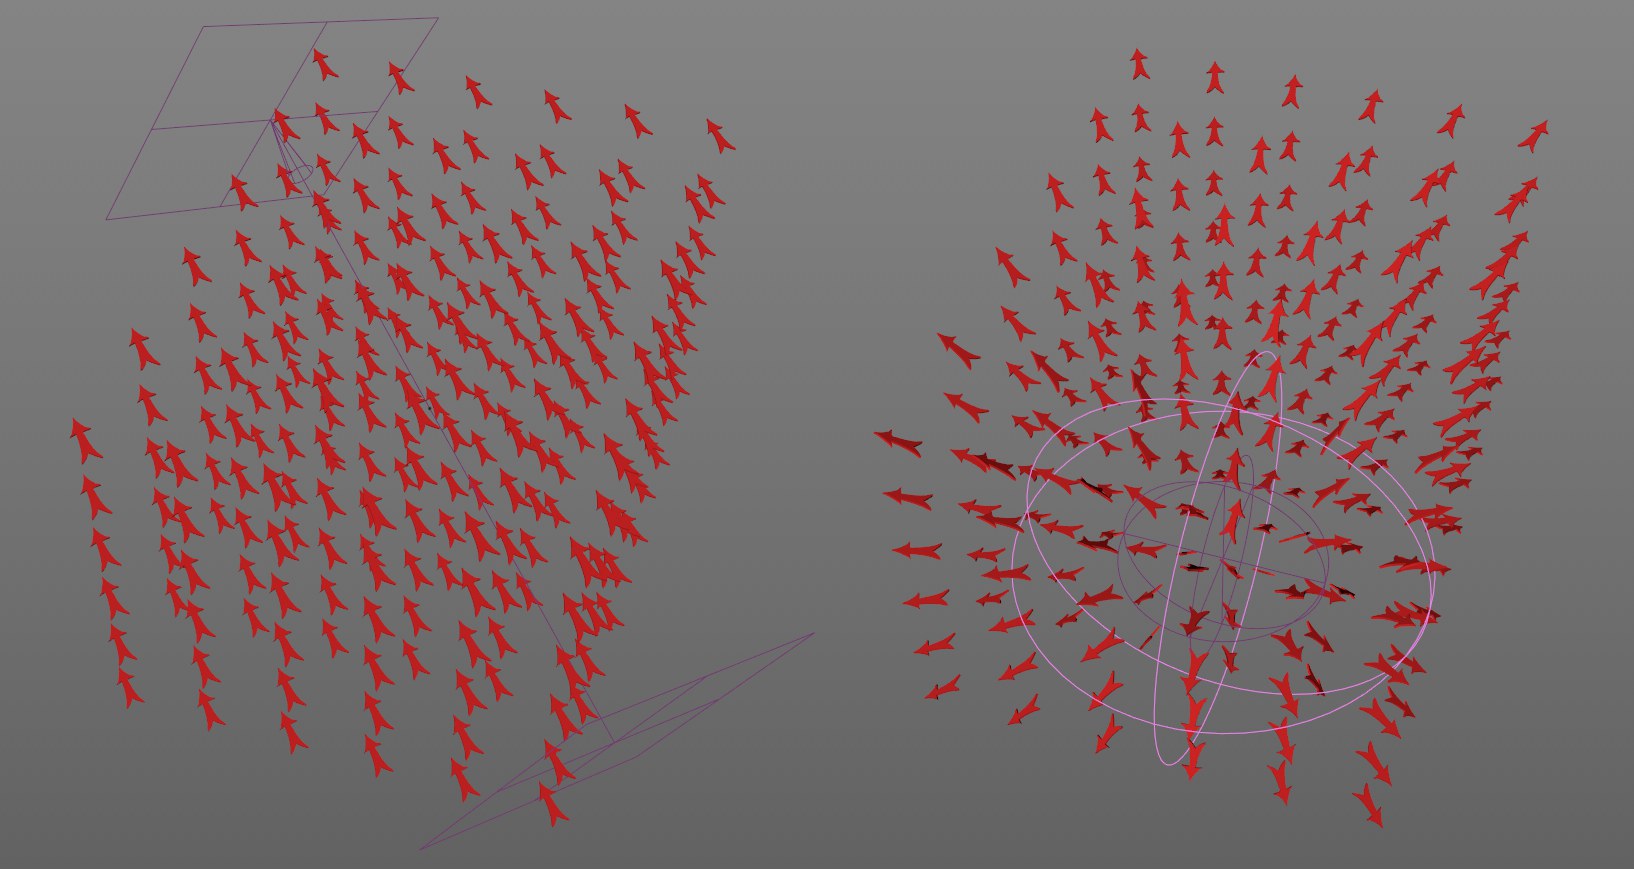 A Linear Field in the Target Effector on the left, on the right a Spherical Field. The directions always run from maximum to minimum.
The Field functionality consists of 3 channels: Value, Color and Direction. Fields can affect these three properties, whereby the direction plays the smallest role because it’s supported by so few elements. These are primarily (in R20) the Target Effector and, for example, the Falloff Node and Python Fields).
Fields can directly define a direction (or a vector). For the common Shape Fields such as Linear or Spherical Fields, this direction always runs from maximum to minimum effect, i.e., for a Linear Field, the same direction will result and for a Spherical Field it runs from the center outwards.
Fields that are used in conjunction with a direction functionality will be displayed with a Direction tab where custom directions can be defined.
Clones will align themselves to their Z axis by default.
Interesting effects can be achieved in combination with a Spline layer, for example:
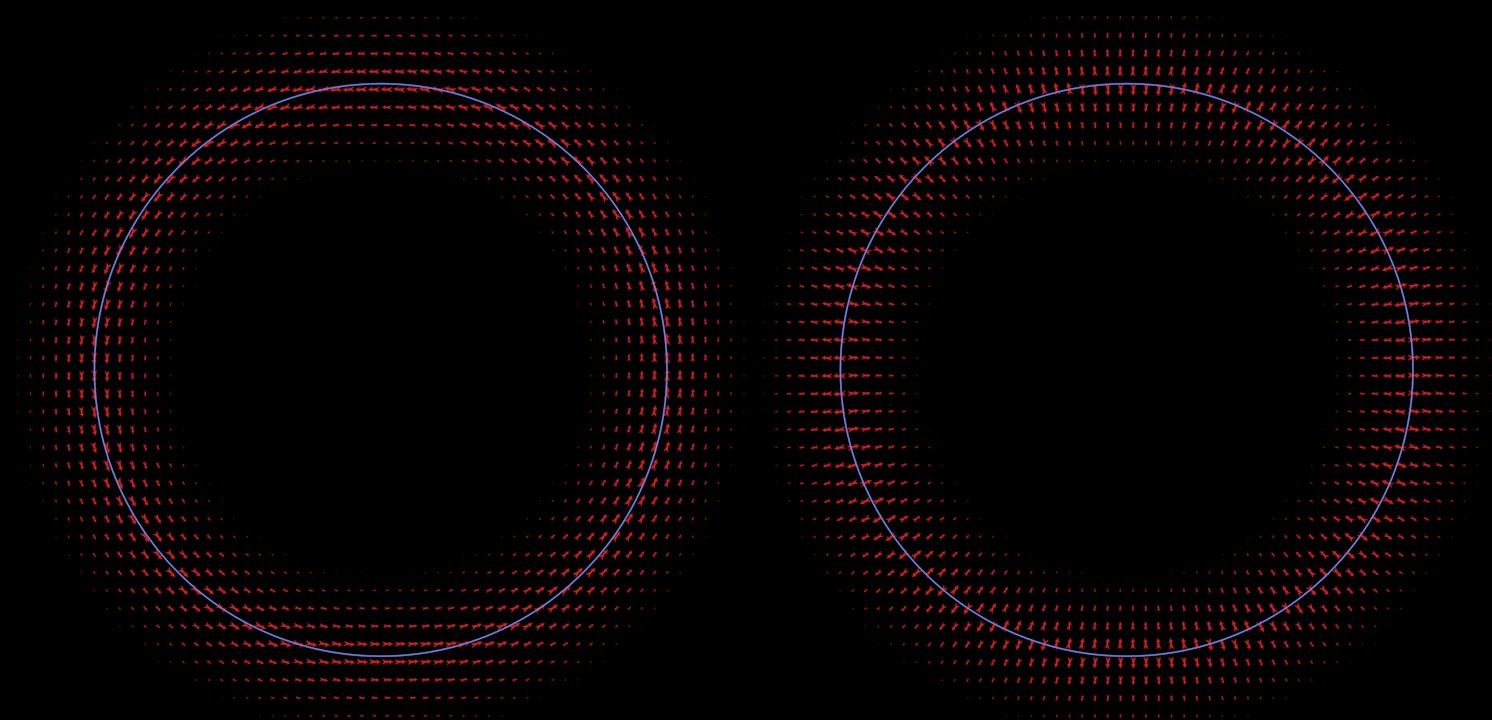 Spline object layer in a Target Effector: left in Distance Mode Along, right Radius.
Other interesting Field effects with regard to the Direction channel:
- Noise Fields, that work according to their effect distribution (always in the direction of the weaker effect)
- Particles whose direction of flight is used
- Point object that assigns directions to object points or surfaces
- Constants for which you can define a custom direction
Enabling this option will set the directional vector length as a MoGraph weight value (see also MoGraph Color Layer). Other Effectors/Field lists can use this weight value (if the clone-generating object is placed into the list).
 At left Set Weight is disabled and all arrows have the same length; at right the option is enabled and creates a fitting scaling. At left Set Weight is disabled and all arrows have the same length; at right the option is enabled and creates a fitting scaling. |  |
Here arrows orient themselves to the nearest object point. Set Weight ensures that a separate Effector (the Plain Effector with the name Plain) scales the arrows’ lengths.
The clones will be oriented themselves with their Z axis in the direction of the Object Target. The Object Target is defined by dragging the desired object into the Target Object field. If this field is left blank, the Target Effector itself will be used.
The clones will always orient themselves with their Z axis in the direction of the camera in the 3D view.
Next Node
Previous NodeEach clone will orient itself with its Z axis according to the previous or next clone. In the example below, a torus was used to demonstrate:
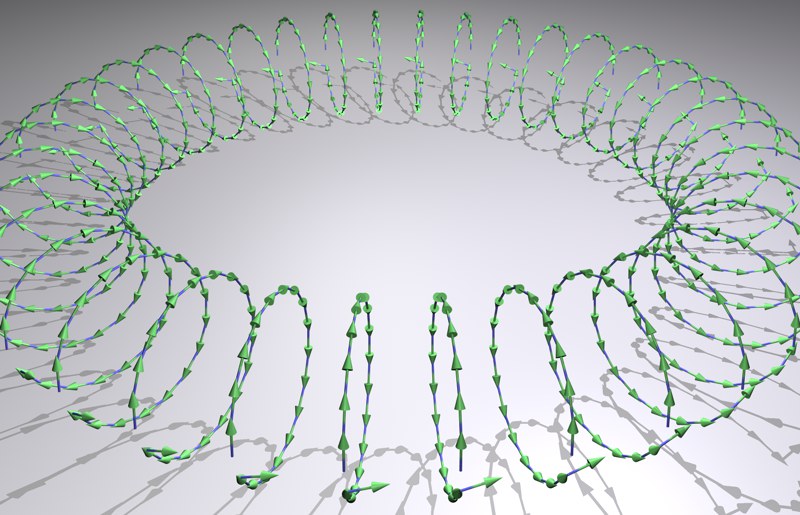 Each clone orients itself according to the previous or next clone.
See target mode Target Object.
If this setting is activated, a clone’s Z axis will always point to the Object Target; if this setting is not active, the rotation’s pitch direction will remain unchanged. An up vector can also be set.
Instead of the positive Z axis, the negative Z axis will attempt to orient itself to the target.
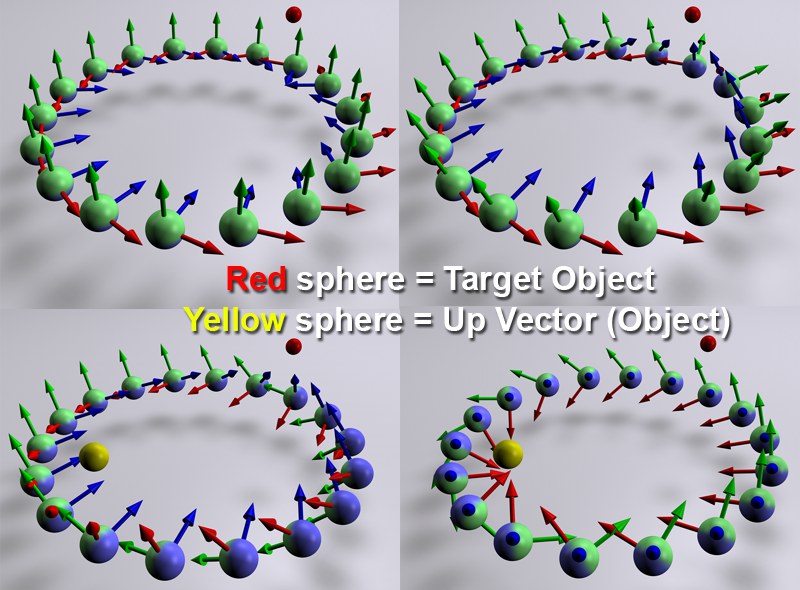 Clockwise from top left: Use Pitch deactivated; Use Pitch active; additionally, Up Vector set to Object; additionally Target Mode set to Look at Camera.
As soon as Use Pitch is activated, the clones will point with their Z axis exactly in the direction of the position defined in Target Mode (in as far as Reverse Heading is not active). The rotation of the clones, though, is herewith still not set entirely. One of several pre-defined vectors or Object can be selected from the Up Vector menu in whose direction the clones should be oriented with their X axis (in as far as the locked Z axis permits).
See Up Vector.
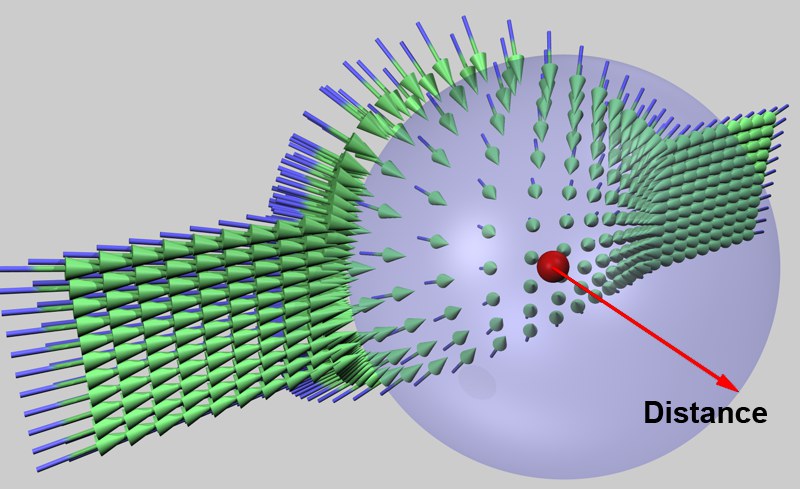 Clones can be pushed away from a target object (here red) by activating the Repel setting. Distance Strength here has been set to 100%.
The following sliders appear when Repel is activated:
Defines the minimum distance the clones must have from the target object (or an Effector in other modes) before being displaced.
Use this slider to adjust the strength of the repulsion.