Lens Effects
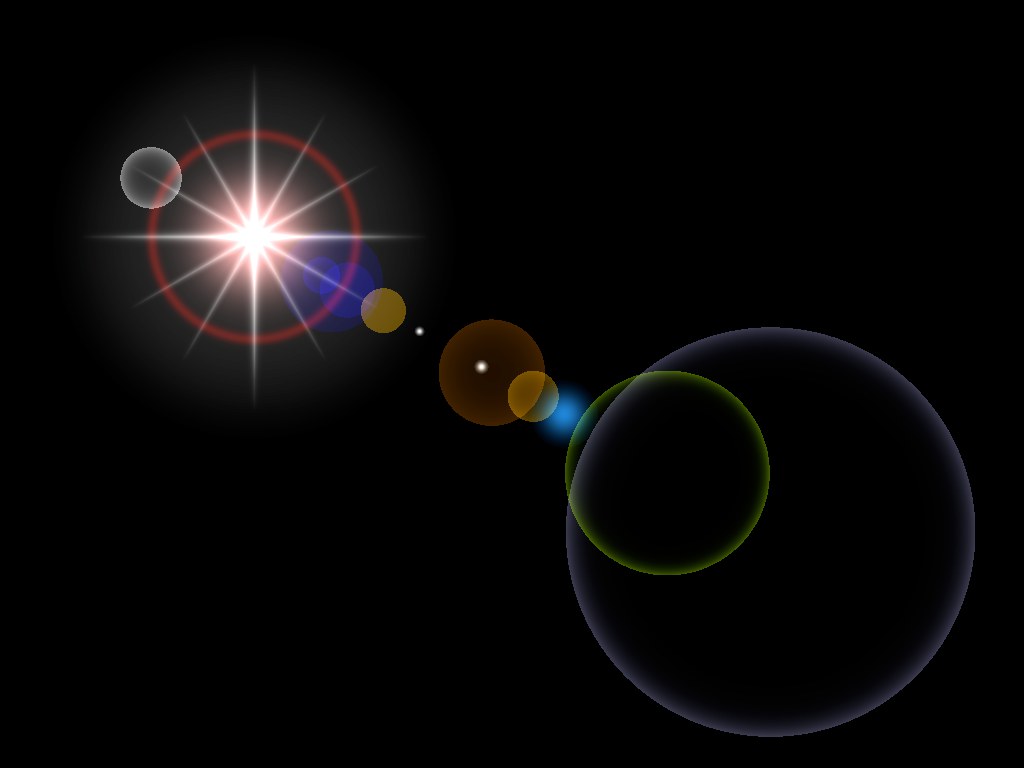
Cinema 4D can simulate the aberrations of real-world camera lens systems and film material. Basic sunbeams are brought to life with a solar corona or a halo. A lens reflection of a low-quality camera lens can be easily simulated, as rainbow colored circles develop and run diagonally across the screen. A welcome flaw in an otherwise too perfect virtual world!
You may recall that on the General page you have the option to disable light radiation (No Illumination). If this option is enabled then the light source will no longer illuminate the objects in the scene, but all lens effects of the light will still be visible. This is handy, for example, in a scene in which the objects are already illuminated as you want and adding another light source for a lens flare will result in over-lighting the scene.
The parameters for these lens effects are many and varied and take up two separate pages. You can define the basic effect on the Lens page. Use the Glow editor and Lens editor to refine almost any detail of the lens effect.
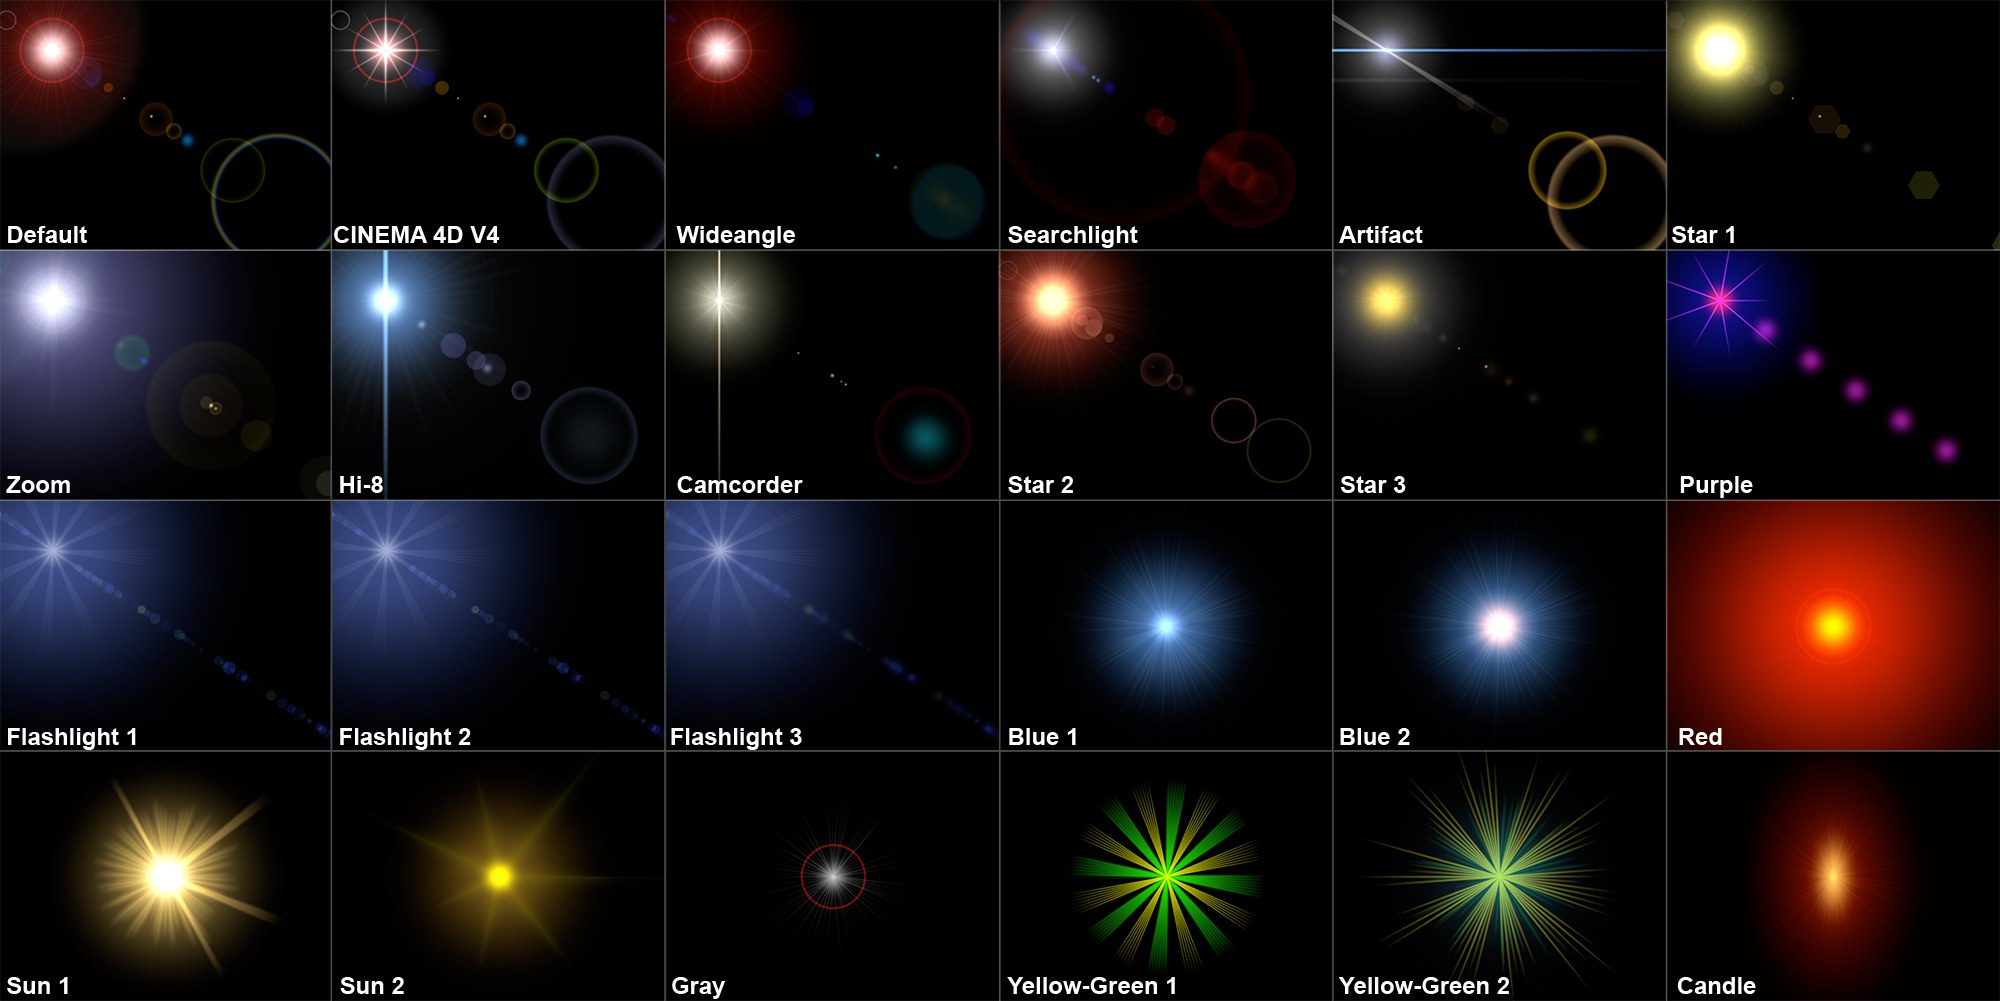
To change the overall shape of the light’s glow, select a glow element from this menu of predefined light source glows.
Glows are a type of over-exposure to light. When the light intensity is sufficient, this exposure bloom includes film grain in the areas surrounding a bright light, even though those areas are not illuminated. The rings around a glow (sometimes called halos) are also caused by over-exposure, but with added color distortions caused by the diffraction of the film grain.
Lens reflections, (termed reflexes), are caused by the focal image of poor quality lenses. The colored shape produced is an artifact of the lens surface, the shape resulting from the shape of the lens. Large apertures produce small reflections, small apertures produce larger ones. Use the Lens editor to change the reflexes as desired. The small preview shows the Lens Type, while the large preview shows the entire lens effect.
Controls the global brightness of the glow. To increase the brightness, enter a value above 100%. To reduce the brightness, enter a value below 100%.
Modifying this value allows you to change the aspect ratio of the glow. The glow appears circular at its default size of 1. Smaller or larger values shrink or stretch the glow’s aspect to a horizontal or vertical ellipse.
Click the Glow Edit button to open the Glow editor.
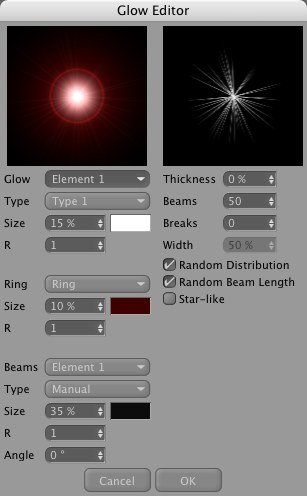
Use the Glow editor to edit glow properties such as rings, the colors of beams and the number of beams. There are four main areas in Glow Editor dialog: one area for the glow itself (top left), one for the surrounding ring (center left), one for beams (bottom left) and one for the type and appearance of the beams (top right).
Glows consists of a stack of separately editable elements. The end result is the combination of effects from each element. Select which element you want to edit.
Choose a type of glow type for the currently selected element. This defines the distribution of brightness for the element.
Here you set the overall size of the glow element as a percentage of the screen’s size. A value of 100% represents the distance from the center of the screen to the edge of the screen.
This value defines the aspect ratio for the glow. A value of 1 results in a circular glow, whereas values greater or less than 1 produce a horizontal or vertical ellipse.
To set the color of the glow element, click the box to the right of Size. The system color chooser will open. Select the desired color.
Choose one of the following Ring settings from the drop-down list: Inactive (no ring), Ring (set the ring’s color using the color box next to Size) or Rainbow Ring (multi-colored ring).
Here you set the overall size of the ring element as a percentage of the screen’s size. A value of 100% represents the distance from the center of the screen to the edge of the screen.
This value defines the aspect ratio for the ring. A value of 1 results in a circular ring, whereas values greater or less than 1 produce a horizontal or vertical ellipse.
To set the color for the ring element, click the box to the right of Size. The color picker for your operating system will open. Pick the desired color.
Beams consists of a stack of separately editable elements. The end result is the combination of effects from each element.
Use the drop-down list to choose which element you want to edit.
Choose a beam type for the element from the drop-down list. This defines the distribution of brightness for the element.
Here you set the overall size of the beam element as a percentage of the screen’s size. A value of 100% represents the distance from the center of the screen to the edge of the screen.
This value defines the aspect ratio for the beam element. A value of 1 results in a circular shape, whereas values greater or less than 1 produce a horizontal or vertical ellipse.
To set the color of the beam element, click the color box to the right of Size. The system color picker opens. Pick the desired color.
To rotate the beam element to a particular angle, enter the angle value here.
Defines the width of beams as a percentage. The lower the value, the narrower the beams will appear.
Defines the total number of beams. Up to 200 beams are allowed per light source.
You can add breaks to the beams by entering the number of breaks into the Breaks box. The breaks will be added to the gaps that already exist between beams.
Use the Width parameter to control the size of the breaks.
For a random arrangement of beams, enable this option.
Enable this option if you want the beams to vary in length.
To have the beams arranged in a star-like pattern, enable this option. The beams will thicken towards the center.
For a realistic star, use a low number of thick beams.
Select the desired reflexes from this menu of presets.
Controls the global brightness of the reflexes. Values below 100% reduce the brightness of the effect; values greater than 100% increase the brightness.
The reflexes appear circular at the default size of 1. Smaller or larger values shrink or stretch the reflexes to a horizontal or vertical ellipse.
Click the Reflexes Edit button to open the Lens editor.
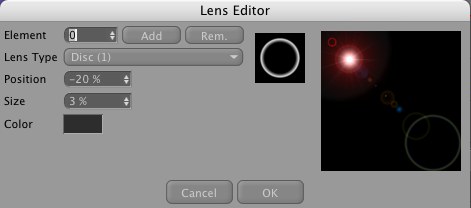
To open the Lens editor click the Edit button in the Reflexes area.
Choose which reflex you want to edit.
To add or remove reflexes, click the Add or Rem buttons. You can use up to 40 reflexes.
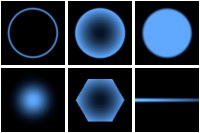
Defines the shape of the reflexes. Only in the rarest case, if at all, should different reflex types be used in the same scene. For example, apply only circular or only hexagonal types in the same scene. Keep in mind that your scene is shot through one simulated real-world lens — these lens reflections depend upon that lens system, not on your existing scene lights.
Here are some examples:
This value sets the positioning of the element on the screen. The axis on which all reflections lie travels through two points: the light source, and the center of the screen (which is also the center of the lens).
Here the following values apply.
- 0% = light source
- 50% = screen center
- 100% = 2 x distance light source center
Negative values place the reflections behind the light source.
This value determines the size of the element. The radius is shown as a percentage, where 100% is the distance from the center of the screen to the edge.
Select the color for the element.
This value adjusts the size of the entire lens effect (rays, glows and reflexes). This saves you from having to adjust each effect individually.
Use this value to rotate the lens glow (only lens glow will be affected) to any angle.
When the Glow Distance Scale checkbox or the Reflex Distance Scale checkbox is enabled, this setting adjusts the distance value used to calculate the glow and reflex effects. The lower the value, the more distant (i.e. smaller) the effect appears. Increasing the value makes the effect appear closer.
Lens reflexes normally have a constant size no matter how far away they are from the camera. However, if for example you want a spaceship model to fire torpedoes that pass under the camera, the lens reflexes and glows must become larger as the torpedoes near the camera.
If this option is enabled, the properties defined on the light’s General page also affect the glow/reflex effects. For example, if the light source color is red then the glow/reflex effect also appears red.
Enabling this option will make the lens effect fade the closer it is to the edge of the image. The lens effect will have maximum intensity when it is at the center of the screen. This corresponds to a light’s physical behavior in the real world.
Enabling this option will determine whether light sources that lie behind objects will still produce effects. Lens flares do not occur if light sources are behind objects, but glows or radiation can produce pleasing effects.
Normally, if a light source with a lens effect starts to disappear behind an object, the effects are still at maximum strength until the light source origin is fully behind the object. With this option enabled, the effect’s strength gradually fades as the light source approaches the object.
A good example of this effect is the gradual fading of a sun behind a planet.
If this option is enabled, the glow effect is scaled according to its distance from the camera. The further away the glow is from the camera, the smaller the glow will be.
The same as Glow Distance Scale only for reflexes. If this option is enabled, the reflexes are scaled depending on their distance from the camera. The further away the reflexes are from the camera, the smaller they appear.