Function available in CINEMA 4D Prime, Visualize, Broadcast, Studio & BodyPaint 3D
![]() Spline Rail
Spline Rail
Spline Rail
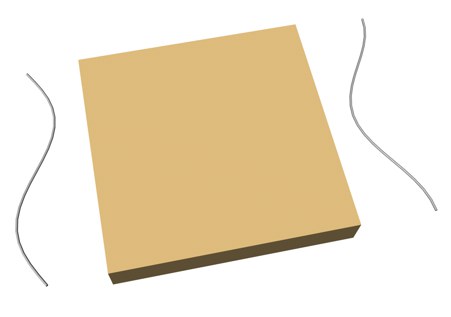
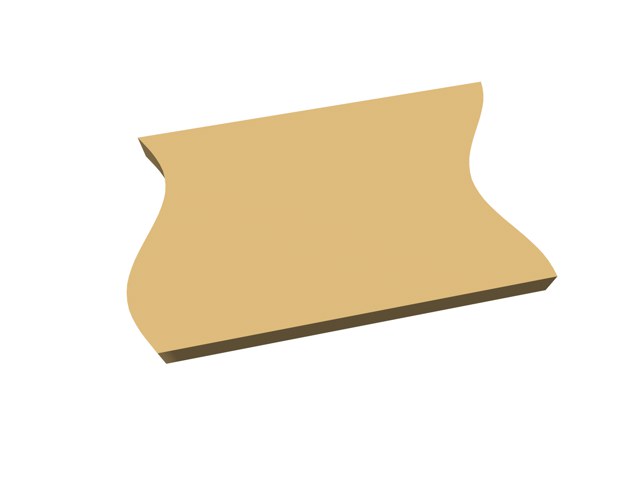
Spline Rail deforms polygon objects using up to four splines that define the target shape.
 Before Spline Rail deformation
 After Spline Rail deformation
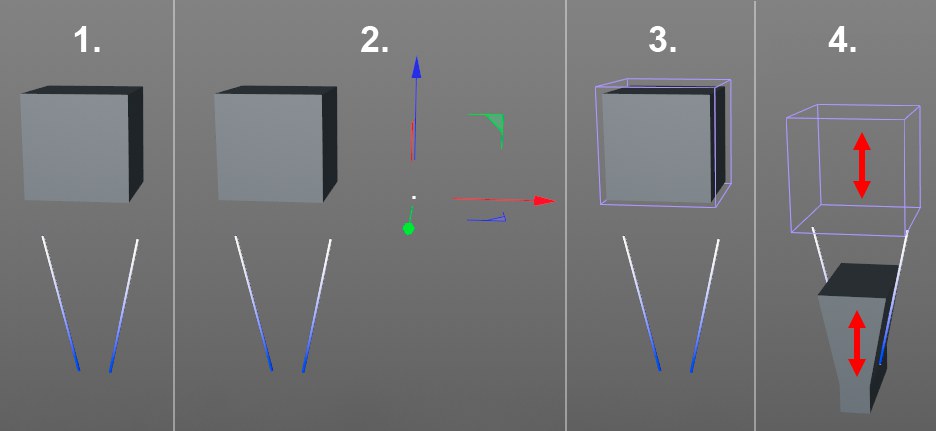
Suppose that you want to squeeze a cube through a funnel that is represented by two splines. To do this, proceed as follows:
- Choose Create / Object / Cube to create a cube.
- In the Attribute Manager, change segments X, Y and Z to 10. Changing the segments will enable us to create a smoother deformation.
- In the viewport, change to the XY view (by default, select View / View 4). This gives us an orthographic view of the XY plane.
- Choose Create / Spline / Sketch to create a freehand spline.
- Click to create the first point in the viewport. Click and make a second point to create a diagonal line as shown in the picture above.
- In the Attribute Manager, disable Close Spline on the Object page. This is very important.
- Double click on the spline’s name in the Object Manager and name it Left.
- Select the Left spline in the Object Manager and duplicate it by pressing Ctrl+C (Windows) or Cmd/Ctrl+C (macOS), then Ctrl+V (Windows) or Cmd/Ctrl+V (macOS). This will create a new spline named Left.1.
- Select the Model tool and in the Coordinates Manager change H to 180. Your splines should now look like those in the picture below.
- In the Object Manager, double-click the Left.1 spline’s name and name it Right.
- Choose Create / Object / Null to create a Null object.
- In the Coordinates Manager, change P to 90. This rotates the Null object so that its Z axis now points in the same direction as the Y axis of the cube. We will use this Null object’s coordinates as the reference for our Spline Rail deformer in a moment.
- Create a Spline Rail object and adjust its position and scale to match that of the cube. In the Attribute Manager, drag the splines and the reference object into the respective fields (Z Spline left/right and Reference). This state is shown in image 3 above. Finally, make the deformer a Child object of the cube.
- Select the Spline Rail and move it along its Y axis. The cube will be deformed by the two splines as you move the deformer. Switch to the 3D view if you wish to see the effect in 3D. As with all deformers, the Spline Rail can be animated using Cinema 4D’s animation tools.
 You can also use the Spline Rail object to make surfaces follow splines. This works even better with MoGraph’s Spline Wrap.