Tag Properties
Use this setting to define the position of the camera to be morphed in its path across all cameras defined in the Morph Camera tag. These are:
- for Source Mode
Simple Morph : Camera 1 and Camera 2 - for Source Mode
Multi Morph : all cameras on the List in the order they are listed.
Click on the small arrow at the left of the Blend setting to open the corresponding Blend Curve:
This curve can be used to fine-tune the Blend setting. The default linear progression produces a proportional relationship between the Blend setting and the camera movement. This is in principle the same as the Timeline’s Time Track (if blending is seen from a temporal point of view) in that various behaviors can be defined by modifying the Blend value.

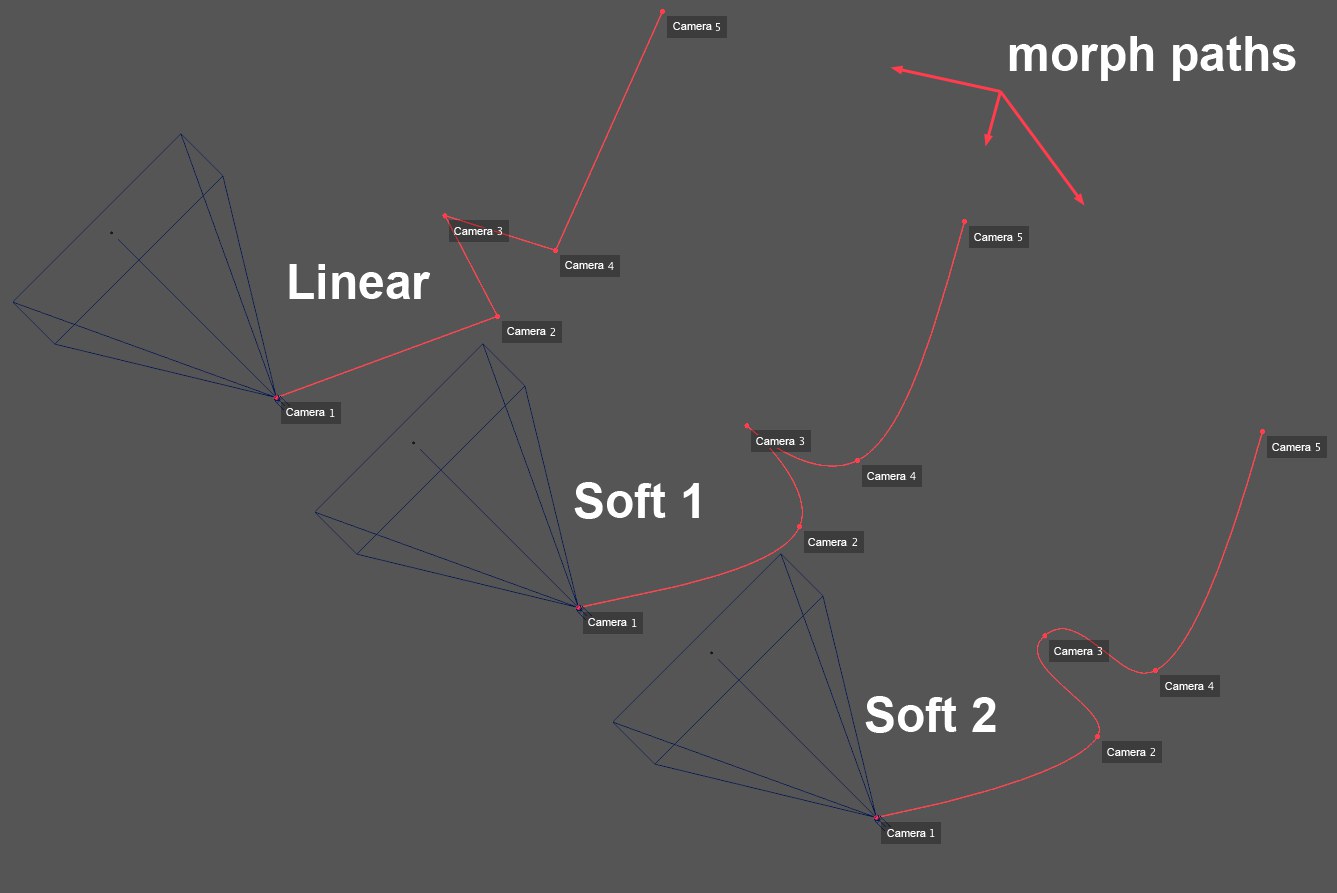
These three options can be used to define the interpolation between cameras (this is not only a positional interpolation - other settings such as Focal Length can also be interpolated):
- Linear: A Morph Camera moves along the shortest path from one camera to the next.
- Soft 1: The animation spline path has a Cubic interpolation (with each camera position as supporting points).
- Soft 2: The animation spline path has a Akima interpolation (each camera position a supporting point).
If enabled, the Up Vector for the Morph Camera will be set vertically, i.e., your angle of view’s tilt will always be 0°.
If this option is disabled, tilting can occur during interpolation even if a given camera is not tilted (the shortest path per interpolation type will be used).
If the previously described Stabilize option is enabled, an additional object can be defined here whose Y axis orientation displays the Up Vector for the Morph Camera, i.e., if you rotate the object the camera will rotate with it (relevant to its tilt).
![]() Source Cameras
Source Cameras
2 modes are available:
- Simple Morph: Morphing will take place between 2 cameras. Both camera fields (Camera 1 and Camera 2) can be animated, which makes it possible to use the individual cameras to affect the Morph Camera.
- Multi Morph: Any number of separate cameras can be used in the morphing process.
If Source Mode is set to Simple Morph, these menus can be used to define the various parameters (for 2 selected cameras in conjunction with the ![]() Camera Morph
Camera Morph
If Source Mode is set to Multi Morph, all cameras along which the Morph Camera should move can be dragged into this list. This list will be automatically filled in when at least 2 cameras are selected and the ![]() Camera Morph
Camera Morph
Note that the sequence in this list also defines the order in which the Morph Camera will acquire each camera.