Options
Strength is a general setting that defines the strength with which the tool affects points. Simultaneously pressing
Radius defines the tool’s size, which will be displayed as a circle in the Viewport. The falloff defined for the Falloff tool will exert its effect within this radius.
This setting is used to define how the tool should work. You can select from the following options:
Drags the mesh in the direction of the mouse movement (this is how the Magnet tool worked in previous versions of Cinema 4D).
Drags the mesh in the direction of the camera.
Drags the mesh in the direction of the point Normals at the center of the tool (does not work in conjunction with splines).
Deforms the mesh in the respective directions of its point Normals (does not work in conjunction with splines).
Repels the mesh radially away from the tool.
Spins the mesh around the tool.
Twists the mesh and drags it in the direction of the center of the tool
Works like Twister and also drags the mesh in the direction of the camera.
Smooths the mesh like a Subdivision Surface object would (does not work in conjunction with splines).
The following 4 options are only available for the Brush tool and only affect the editing of Vertex maps (for which the ![]() Paint Tool
Paint Tool
Paints on a weighting.
Use brush strokes to blur abrupt changes in weighting.
Takes the weighting at the center of the brush and distributes this value across its radius.
Enlarges/reduces existing weighting values.
If this option is enabled, only the visible points that are not obscured by other objects will be affected in the active Viewport. If disabled, the points not visible from the angle of view of the camera can also be moved.
Elements hidden via the ![]() Hide Selected
Hide Selected
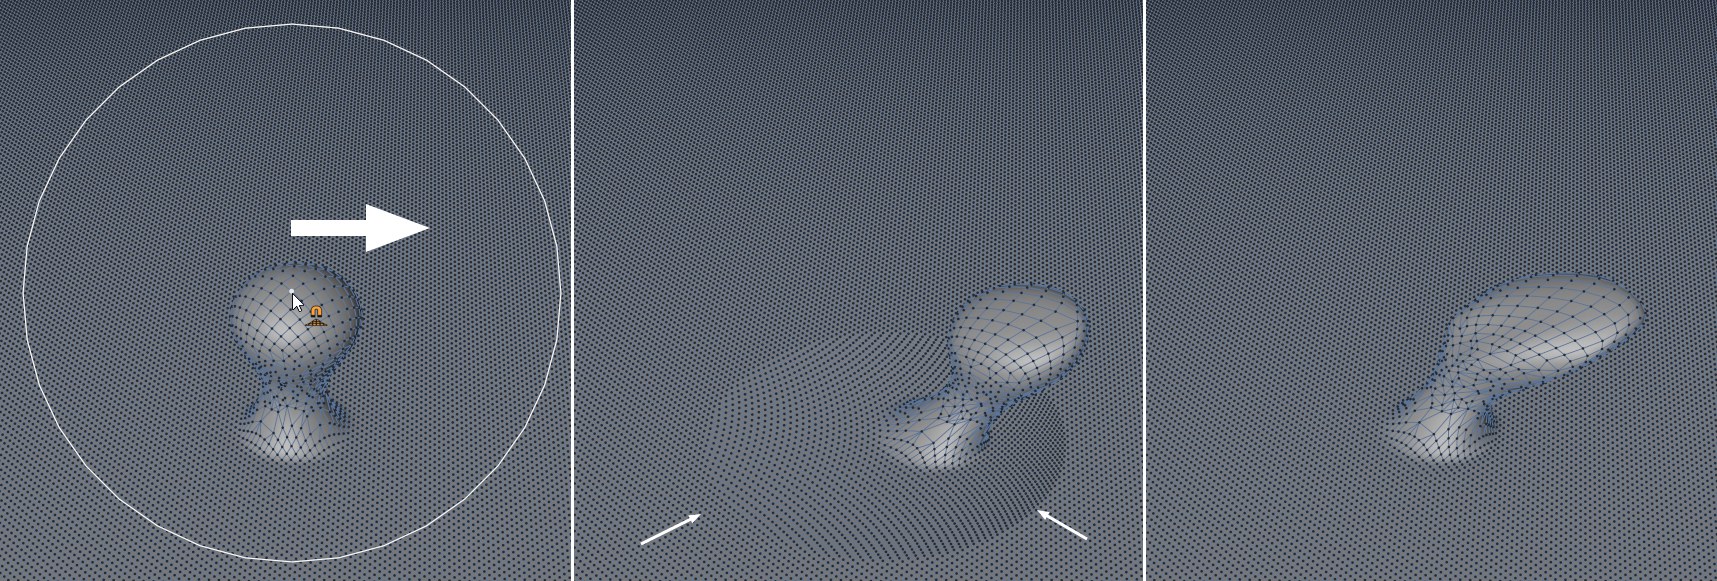 Surface, here shown using the Magnet tool. Center: Surface disalbed, at right enabled.
Enable this option if you want to extend the tool’s effect beyond the sphere shown in the Viewport. In the image above you can at the center how part of the plane is also being moved because this area lies within the effect’s radius of the visible tool preview on the left. At the right on the other hand, the tool orients itself to the surface, which makes it possible to make very fine modifications to the object surface.
This enables or disables the circular tool preview.
![]() Restriction
Restriction
Space
X [-∞..+∞%]
Y [-∞..+∞%]
Z [-∞..+∞%]
This setting can be used to restrict the tool’s effect along 3 axes. For example, if you don’t want to modify the position of points along the Y axis, set Y to 0%; if you only want a minimal change in position, set Y to 10%, for example. The Space setting defines if the object or global coordinate system should be use.