![]() Spline Arc
Spline Arc
Spline Arc
The Spline Arc tool for which you don’t have to switch to the Use Points mode (it can be used in the normal Use Model mode), can be used to create a wide variety of arcs and soft connections between segments:
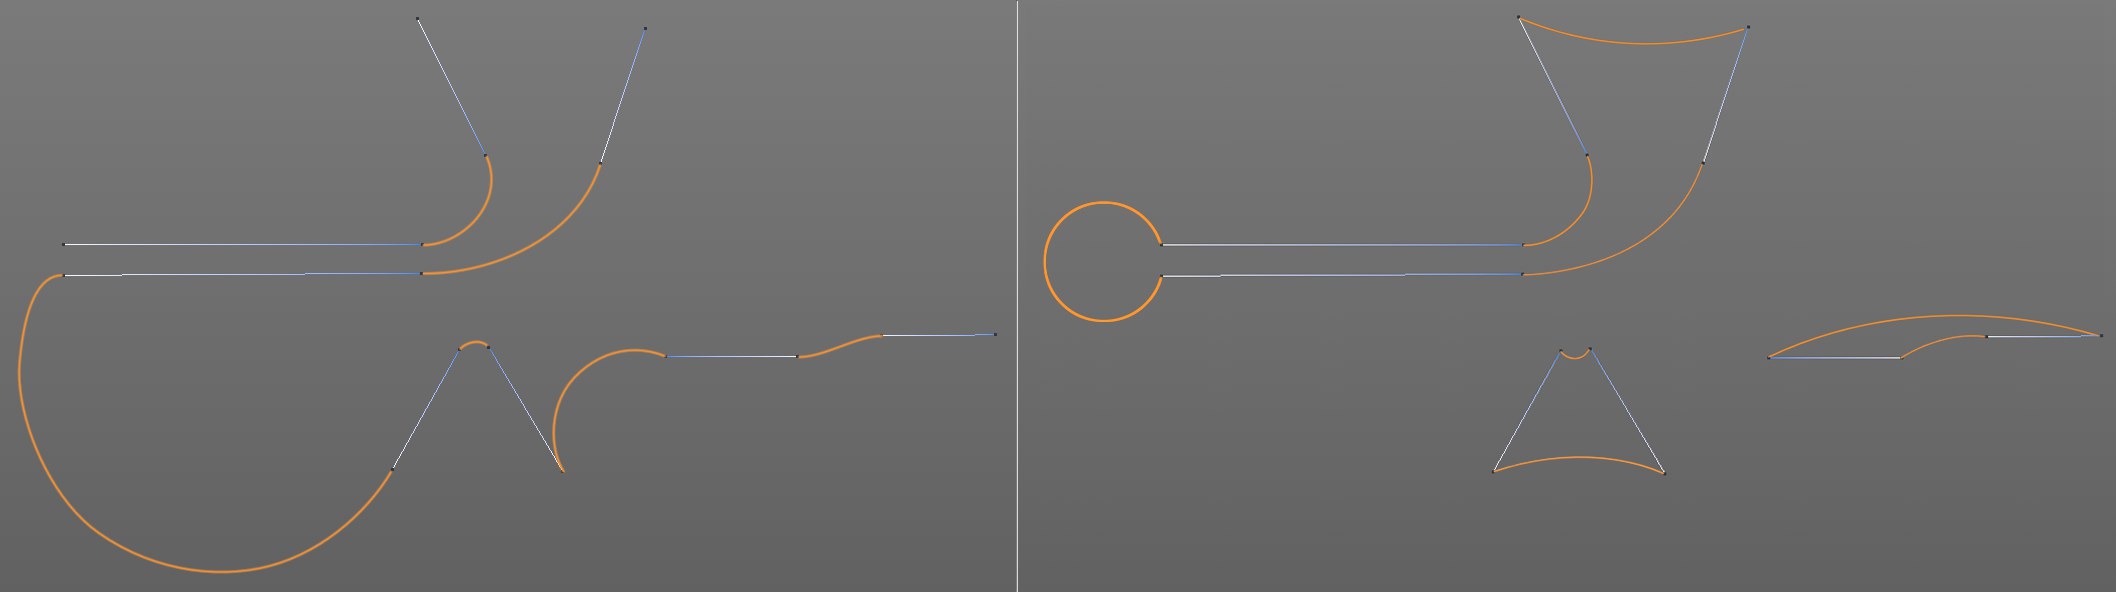 In the image above you see an orange colored arc that was added to the blue-white spline segments.
The Spline Arc tool creates arcs, mostly as circular arcs of a 3-point circle, i.e., 3 points are required (start point, middle point, end point) that define the final circle. All modifications that are done interactively in the Attribute Manager affect the 3 points that define the circle’s shape.
The Snap Settings will be applied when the arc is created.
Note that the circular arc segments are approximate but are not exact due to technical reasons.
How is the Spline Arc tool used?
There are several ways the Spline Arc tool can be used. A preview will always be shown before the actual arc is created:
Click on spline points to be connected
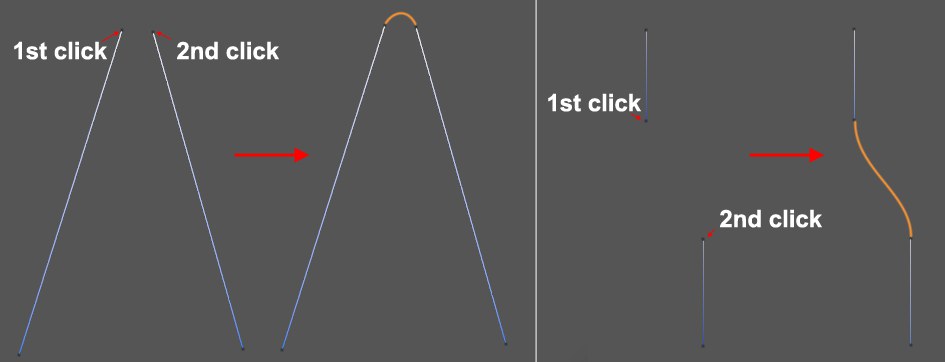
Click two spline end points (where the splines should end or begin). Cinema 4D will connect these points automatically with an arc-shaped line (which can also consist of 2 opposing curved segments, see right side of image above). Depending on the length of the spline segments, the temporary arc helper object described below will be displayed, which can be used to connect the segments with a circle’s segment.
If a spline has multiple segments and you close one segment, a new spline will be created (Cinema 4D cannot process splines that contain both open and closed segments).
Starting from a spline start or end point
Click on a start or end point, release the mouse button, click on another position and drag the temporary arc helper object described below. Release the mouse button and click again to create the arc.
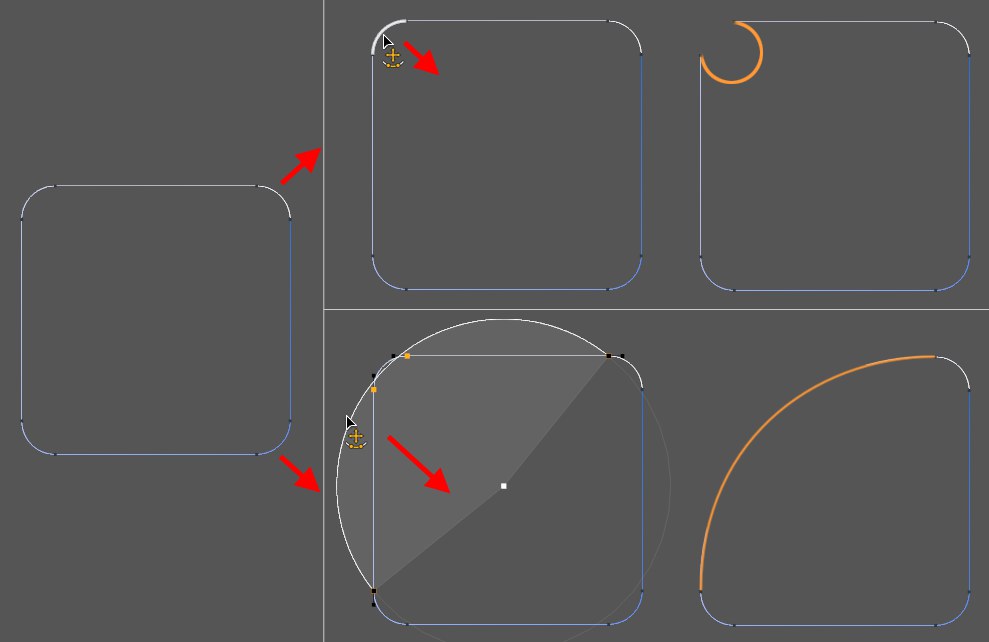
Grab a spline segment between two points and drag. As long as you hover above a spline segment, a possible coherent arc segment will be displayed. When dragged, this segment will be converted to an interactively editable circular segment:
 The circular arc can be expanded by selecting additional neighboring points.
If you want to enlarge or reduce the editable spline section, simply
The Spline Arc tool can be used to grab and move the tangents of individual spline points or selections.
The arc helper object will, for example, be displayed when an existing spline segment is grabbed, if a segment is created by dragging the LMB and subsequently grabbed or when matching spline ends are connected. As soon as you click in an empty space, the Spline Arc tool will be created. The arc helper object can be displayed in 3D space or as connected with splines. If the start or end points are moved, the Spline Arc tool will either be attached to segments (enable point snapping to do so) or be created as a new segment. The arc helper object offers a range of interactive properties that can in part be defined numerically in the Attribute Manager:
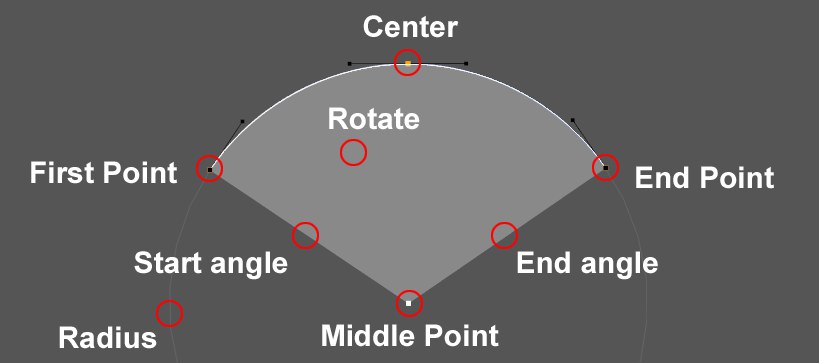 These points can be grabbed and modified interactively.
- Middle Point: This is the middle point of the circular arc and can only be moved perpendicular to the connecting line that runs between the start and end points.
- Start/End Point: These are the start and end points of the spline arc to be created. Both can be moved freely (but may have to be detached from other spline segments).
- Center: Grab the spline arc between the defined start and end points to move the Middle Point (always lies at the center of the arc between the start and end points). This modifies the curvature of the circular spline arc.
- Start/End Angle: Moves the start and end points while maintaining a constant radius.
- Angle: Rotates the entire Spline Arc around its center.
- Radius: Modifies the Spline Arc’s radius.