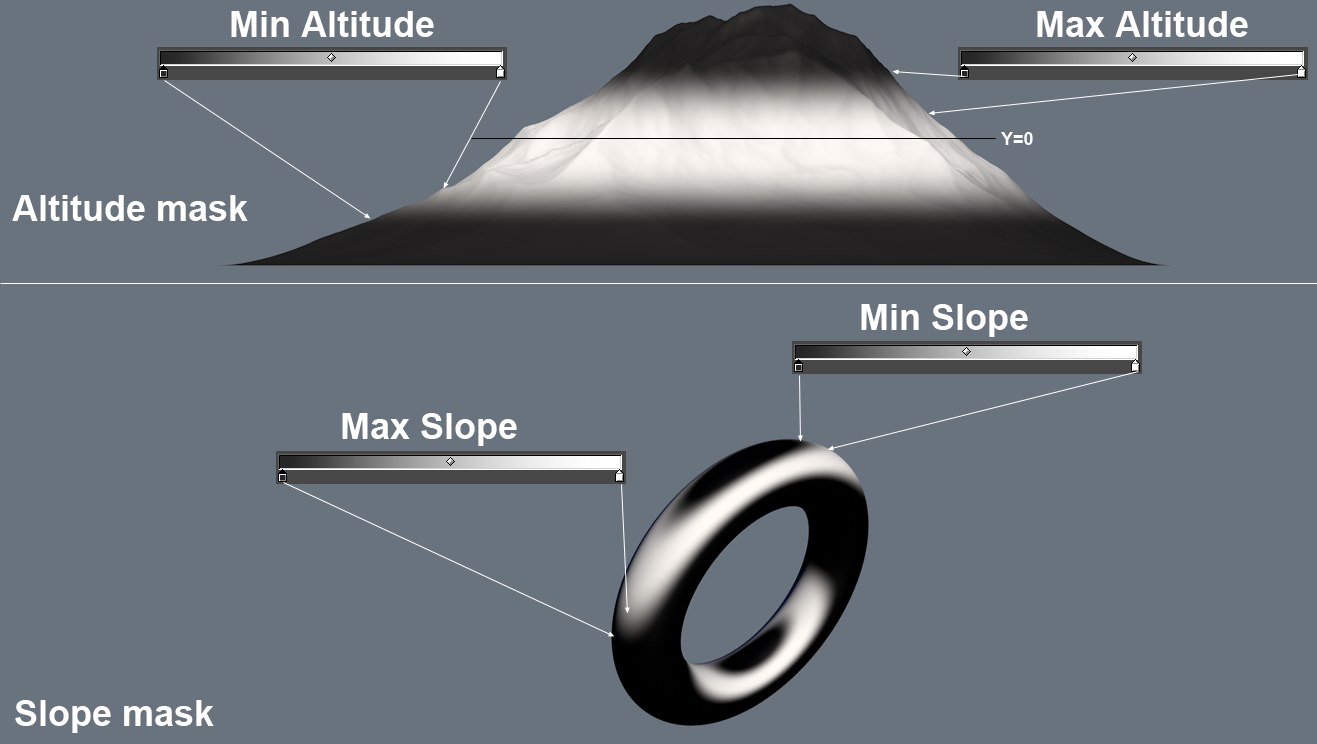
Shader Properties
 The gradient was applied in combination with Soften Min/Max values.
The Gradient is the color gradient that is applied according to the Min Altitude and/or Max Altitude or Min Slope and/or Max Slope values. But only if the Soften Min/Max values are not set to 0%. Otherwise only the colors defined for the far left and far right color handles. An abrupt transition will result. The color at left represents the unmasked color and the color at right the masked color. For solely alpha or layer masks the gradient should always be black-to-white.
Enable this option if the shader should mask in a vertical direction beginning at the object or world origin (e.g., tree or snow line).
Min Altitude [-∞..+∞m]
Max Altitude [-∞..+∞m]
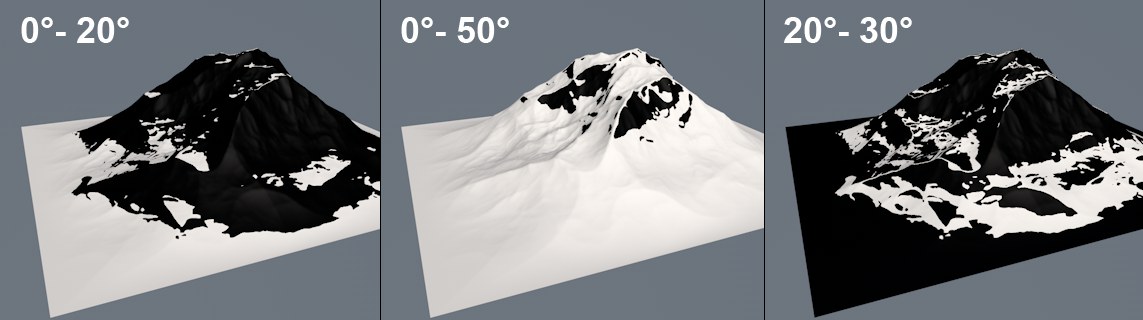
Use these values to define the altitudes at which the shader should assume a different color (see image above). The calculation will originate at the object or world origin (Use Global Coordinates option enabled).
The snow line, for example, should be defined using the Min Altitude value, i.e., masking will be applied from above down to this altitude (Max Altitude should be set to a high value that exceeds the height of the object).
The tree line, for example should be defined using the Max Altitude value, i.e., the masking will be applied from below up to this altitude (Min Altitude should be set to a very low value that exceeds the dimensions of the object).
Soften Min [0..100%]
Soften Max [0..100%]
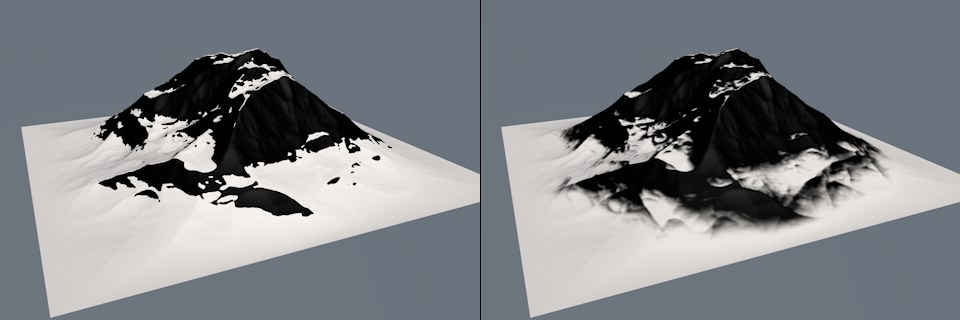
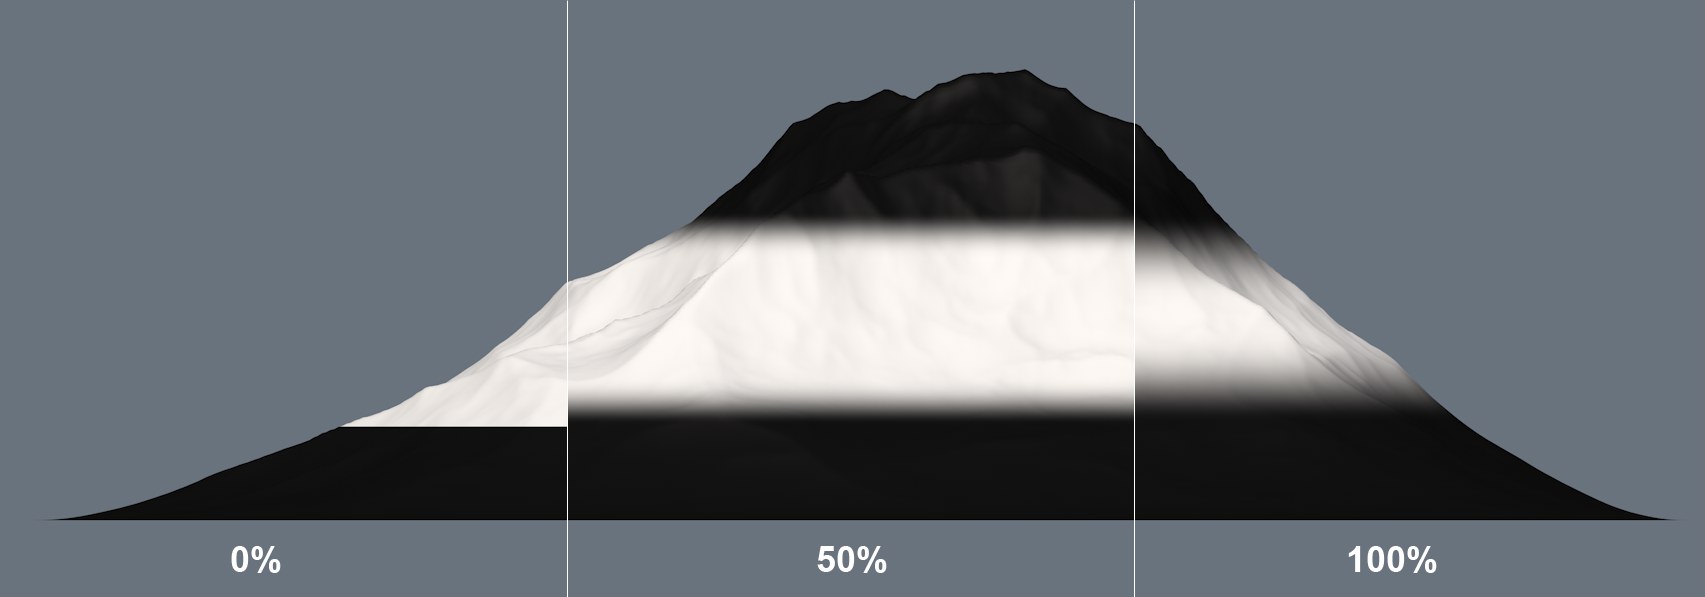 Soften Min/Max creates a gradient at the edges.
Use these settings if the limits defined via the Max Altitude (upper) and Min Altitude (lower) should not be rendered as abrupt transitions. A value of 100% will soften the mask from the defined limit to the center of the corresponding masked region.
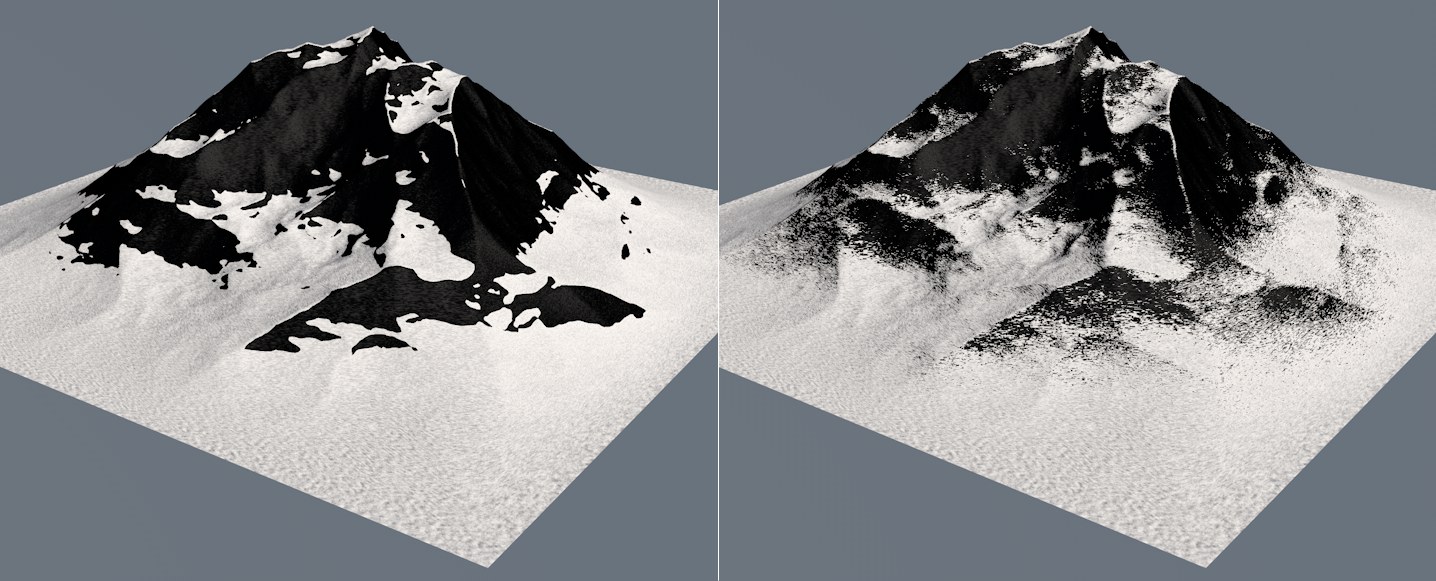
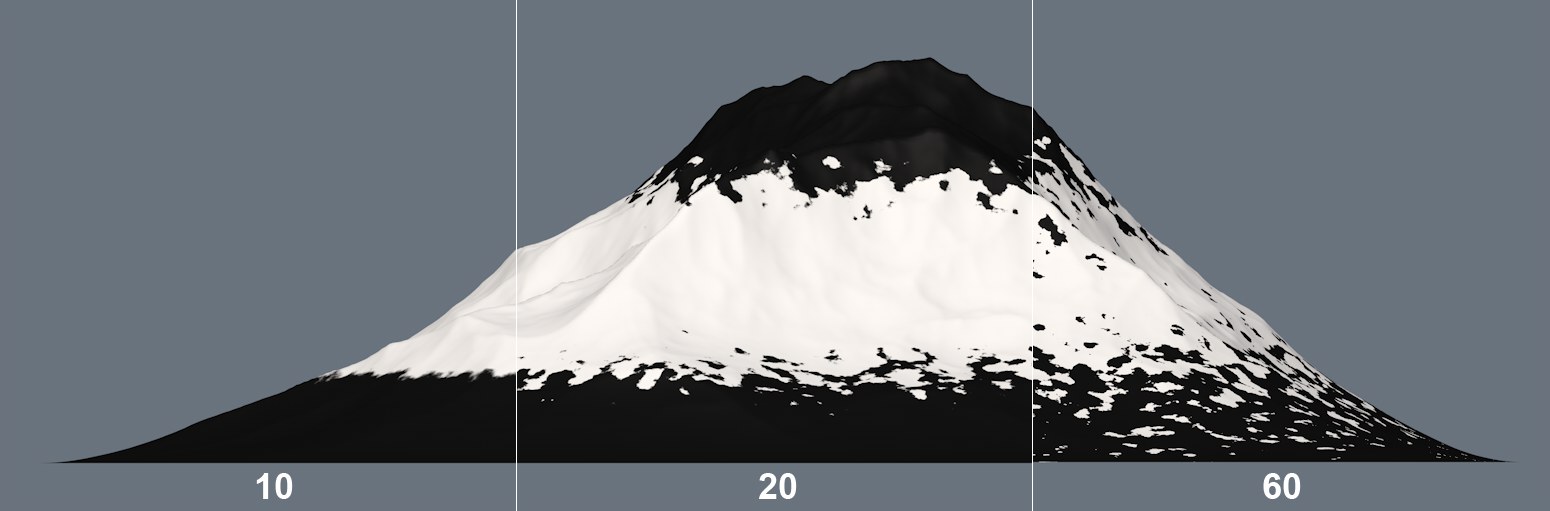 Noise Height adds progressively more irregularities in border regions.
This value adds progressively more noise beginning at the defined Min Altitude or Max Altitude locations (i.e. the border regions) where transitions would otherwise be too abrupt. Especially in conjunction with the Soften Min/Max values you can use this setting to create a gradually ending and irregularly shaped border region.
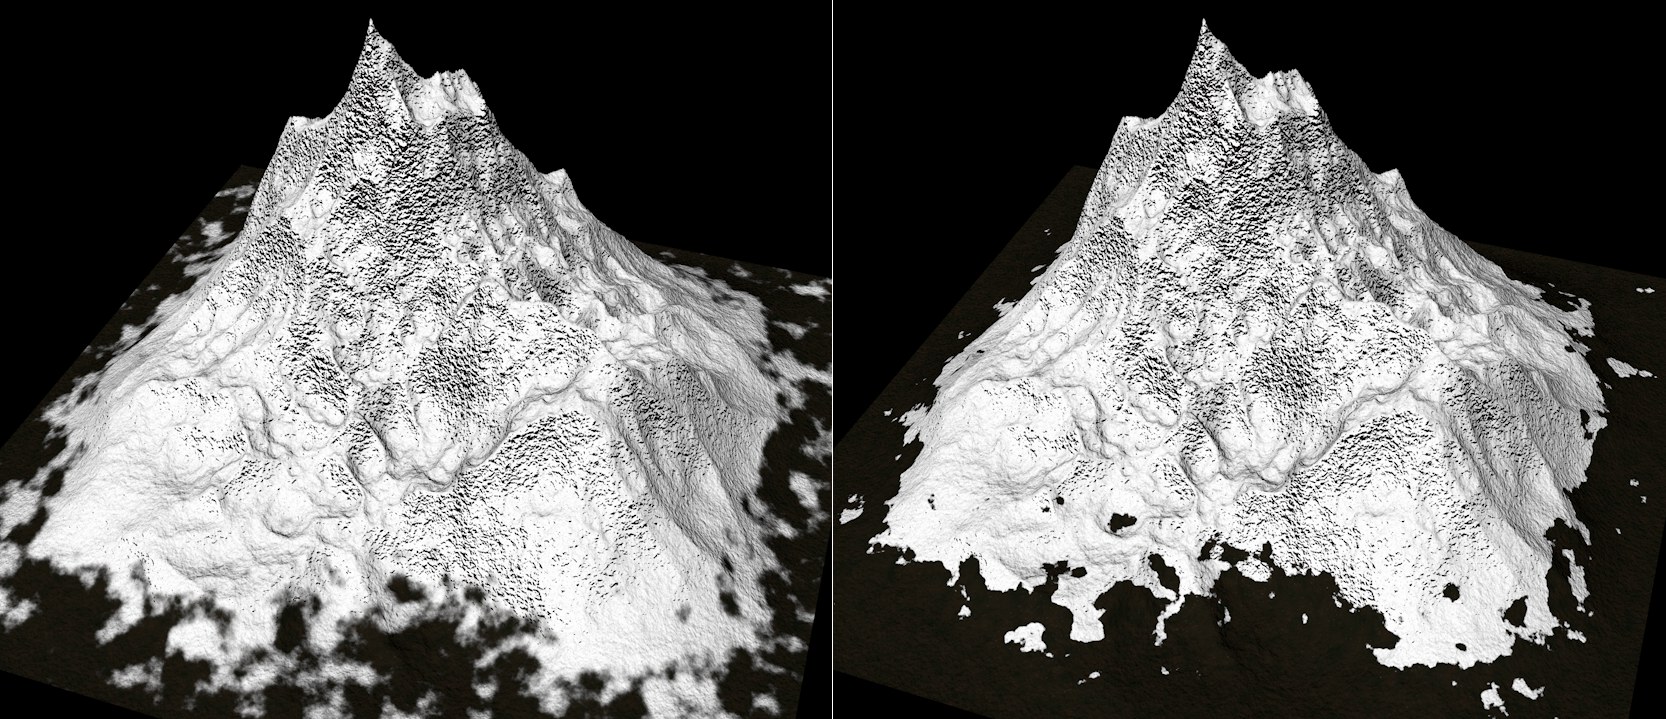
 At left small Scale value, at right a large value.
Use this value to define the size of the noise. The smaller the value, the more homogenous the noise will be; larger values will result in correspondingly irregular noise.
Enable this option if the shader should mask in accordance with surface Normals (i.e. vectors that are perpendicular to polygons) or Phong angle (if Phong shading is enabled).
Min Slope [0..179°]
Max Slope [1..180°]
 Different angles for Min Slope and Max Slope and the corresponding results.
Use these values to define the angle limits (i.e. the difference to the axis defined for Direction below) at which the shader should change color (see image above). Imagine these angles as borders, between which snow lies. A Min Slope value of 0° with a Max Slope value of 20° results in all surfaces whose surface Normals diverge between 0° and 20° from the defined axis (Direction) will be masked by the Terrain Shader.
Soften Min [0..100%]
Soften Max [0..100%]
 At left a low Soften Max value, at right a higher value.
If the border defined by the Min Slope and Max Slope values should not transition abruptly, you can use the Gradient defined above.
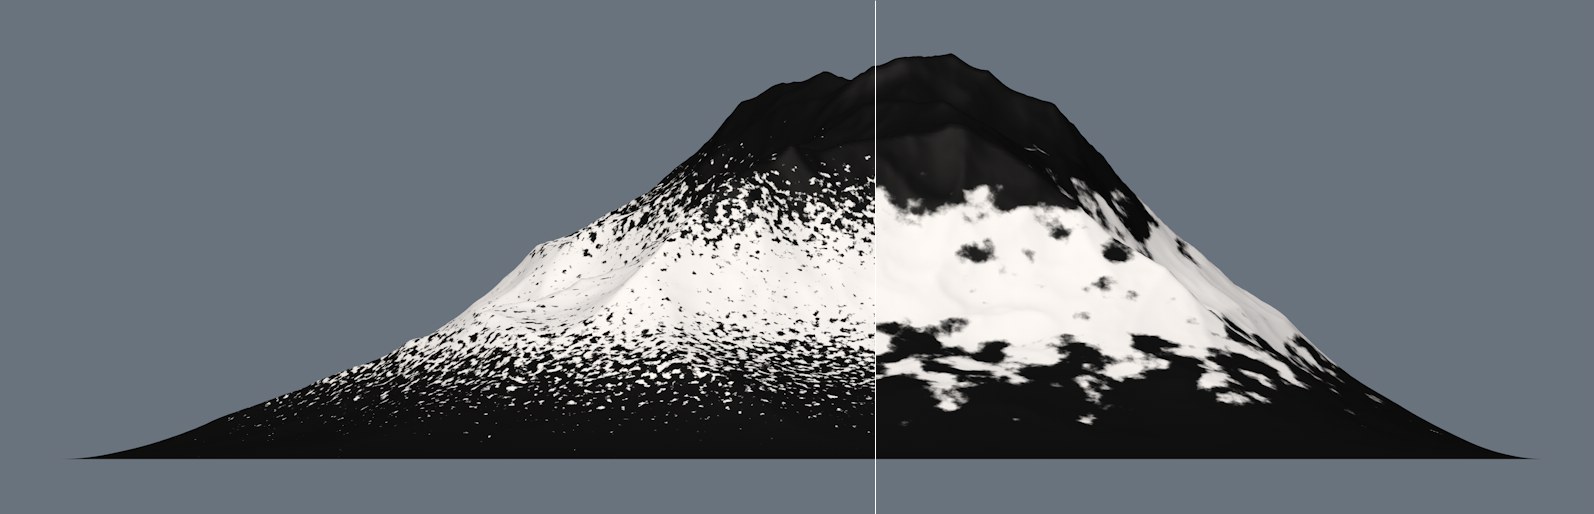
 Use Bump disabled at left, enabled at right.
Adding a Bump material channel (FBM Noise is a good example) will calculate so to speak artificial little structures into the surface. The slope masking can also include these structures in their calculations. This is a very good method of creating realistic snow dispersion in mountainous regions.
Note that this option does not work if the shader is used in an Alpha channel.
Use this option to define the axis (object coordinate system) from which the diversion of the surface Normals will be calculated. This is usually the positive Y axis, i.e., a vertical axis oriented upwards. If Custom is selected, any direction can be defined.
A practical application would be the dispersion of snow on a mountain onto which wind blows from a particular direction and defining this direction via Custom Direction accordingly.
Here you can define a custom axis (consisting of X, Y and Z values). Alternatively you can use the ![]() Enable Axis
Enable Axis
Alternative Blending
Hardness [0..100%]
These options can be used to reduce very soft mask transitions when altitude and slope masking are combined, as is for example the case with a snow-covered mountain (snow only lies at certain altitudes, except at steep regions). This makes the snow line look more realistic:
 Alternative Blending disabled at left, enabled at right (with Hardness set to 90%).
By the way, the mask values for altitude and slope are normally multiplied internally (Alternative Blending uses the Levr blend mode), i.e., if one of them masks then this region will always be masked when rendered, regardless of what the other does.
Use the Hardness value to define how soft (low values) or hard (higher values) the transition between masked and unmasked regions should be.
If enabled, Min/Max Altitude and Min/Max Slope will be applied in the world coordinate system and not in the object coordinate system.
Inverts the masking: regions that were previously masked will be made visible and vice-versa.