Redshift Basic Render Settings
Introduction
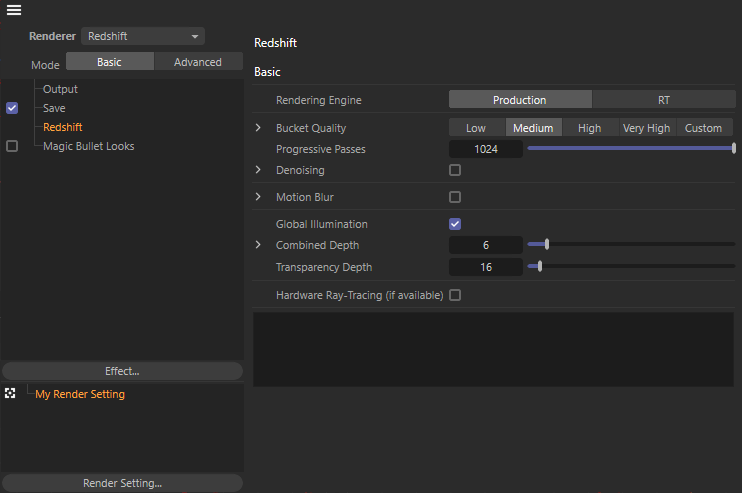
Redshift features two modes for approaching its render settings, a streamlined Basic mode and a more detailed Advanced mode. Basic mode consists of a small selection of frequently used render settings while Advanced mode exposes all of the available render settings. If you're just getting started with Redshift or prefer to keep things simple the Basic mode is a great way to adjust your render quality without the need to fine tune render parameters.
The render settings for the Basic mode are covered below on this page, to see information covering the Advanced mode please see the Render Settings - Advanced page.
Changes made in the Advanced mode are still active while using the Basic settings mode, any of these changes are noted in the window below the Basic settings as pictured in the image below.
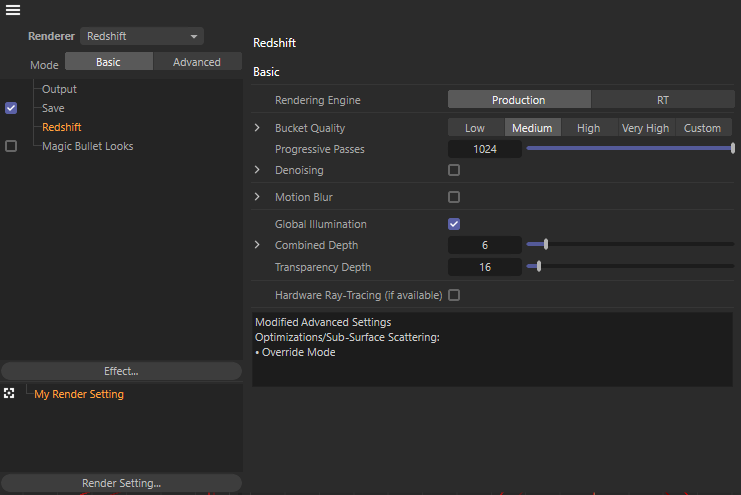
Modified Advanced Settings window
Settings
This is where the Basic or Advanced mode can be toggled. For information covering the Advanced mode please see this page.
Bucket Quality
The Bucket Quality setting allows you to quickly adjust overall render quality by switching between preset sampling Threshold values. Higher quality modes decrease the Threshold value which improves render quality and reduces noise but at the cost of render time. The Custom preset is automatically switched to when you enter your own custom threshold value. For more detailed information please see the Unified Sampling page.
Basic mode uses Automatic Sampling by default, if you want manual control over your sample counts you must switch to Advanced mode to disable automatic sampling.
Threshold
The Threshold parameter refers to Unified Sampling's Adaptive Error Threshold and is controlled by the Bucket Quality presets or by the user when set to Custom Bucket Quality. Lower Threshold values improves render quality and reduces noise but at the cost of render time. For more detailed information please see this page.
| Bucket Quality | Threshold |
|---|---|
| Low | 0.100 |
| Medium | 0.010 |
| High | 0.005 |
| Very High | 0.001 |
| Custom | User controlled |
|
|
|
|
|
|
Bucket Quality: Low Render Time (Min:Sec) : 0:44 |
Medium 3:20 |
High 7:53 |
Very High 22:50 |


Denoising
The Denoising checkbox allows you to quickly toggle denoising on and off. Denoising allows you to easily render images at a reduced baseline quality (lower sample counts) and increased speed at the expense of some potential accuracy. Denoising can only do so much and a balance must be struck between Bucket Quality and the denoiser engine of choice in order to find what works best for your project. For more information please see this page.
Denoising Engine
Redshift has three built-in Denoising Engines and they can easily be switched between here, each one with their own general pros and cons.
- OptiX - Very fast and can be used during interactive rendering but can have more trouble cleaning noise compared to alternatives.
- Altus Single - Slower (renders the frame once before denoising) and non-interactive but produces good results for final quality renders.
- Altus Dual - Slowest (renders the frame twice before denoising) and non-interactive but produces great results for final quality renders.
For more information on Denoising and the different Denoising Engines please see this page.
The images below were rendered with Bucket Quality Low in order to better demonstrate the differences of the different Denoising Engines due to the low sample count resulting in more visual noise.
|
|
|
|
|
|
Denoising: Off Render Time (Min:Sec) : 0:43 Bucket Quality: Low |
OptiX 0:44 |
Altus Single 0:49 |
Altus Dual 1:24 |


Motion Blur
The Motion Blur checkbox lets you quickly toggle Motion Blur on and off. For more information please see this page.
If a Motion Vector AOV is enabled in your scene all Redshift motion blur will automatically be disabled in the beauty render as this would be undesirable for a Motion Vector AOV.
For more information on AOVs, please see here.
Motion Blur Steps
This controls the number of linear motion blur steps that Redshift will use to represent the trajectory of cameras, lights and objects. More steps means the trajectories will be more accurate but also more memory will be used.
Deformation Blur
This checkbox toggles Deformation Blur for Motion Blur on and off. Deformation Blur tracks the motion of individual vertices and can be memory-intensive, if your objects do not have animated deformation this parameter can be left disabled for increased performance. For more information please see this page.
In the example images below notice how the trajectory of the moving lantern is more appropriately rendered as the Motion Blur Steps are increased. All renders were taken from the same animation, the only thing changed was the Motion Blur Step count.
|
|
|
|
|
|
Motion Blur: Disabled Steps: N/A |
Enabled 2 |
Enabled 4 |
Enabled 10 |


Global Illumination
The Global Illumination checkbox lets you quickly toggle bounced indirect lighting on and off. For the most realistic lighting Global Illumination should be left enabled but it will increase render times. For more information please see this page.
By default Basic mode uses a combination of Brute Force for primary bounces and Irradiance Point Cloud for secondary bounces.
In the example images below notice how the bounce lighting from the floor and wall next to the lantern is realistically filled in when Global Illumination is enabled.
|
|
|
|
Global Illumination: Disabled Render Time (Min:Sec) : 2:59 |
Enabled 3:17 |

Combined Depth
Depth parameters control how many times a ray of its individual type can interact with objects in a scene until it is terminated.
The Combined Depth parameter specifies the maximum combined limit of global illumination bounces, reflection bounces, and refractions for a single ray. This means that even if the individual depth values for global illumination, reflections or refractions is higher than the Combined Depth the resulting render will still be capped at the Combined Depth value.
Separating the controls like this provides more flexibility, allowing individual effects to be rendered with increased depth when needed but restricting unnecessarily high render times.
Increasing Depth values can quickly and greatly increase render times in scenes with many bounces. In general it is best practice to the lowest depth values that still allow for the desired render, higher depth values provide more realism at the expense of render times.
Global Illumination Depth
The Global Illumination Depth parameter sets an individual cap on how many times an indirect lighting ray can bounce. Increase this parameter for interior scenes where many indirect bounces are required for realistic lighting.
Reflection Depth
The Reflection Depth parameter sets an individual cap on how many times a reflection ray can bounce.
Refraction Depth
The Refraction Depth parameter sets an individual cap on how many times a refraction ray can bounce or pass through objects.
Transparency Depth
The Transparency Depth parameter sets an individual cap on how many times a transparency ray can pass straight through objects. Transparency is utilized for things like Opacity in the Redshift Material to go much deeper than complex refractions and render much faster than refractions.
Transparency Depth is not limited by the Combined Depth parameter.
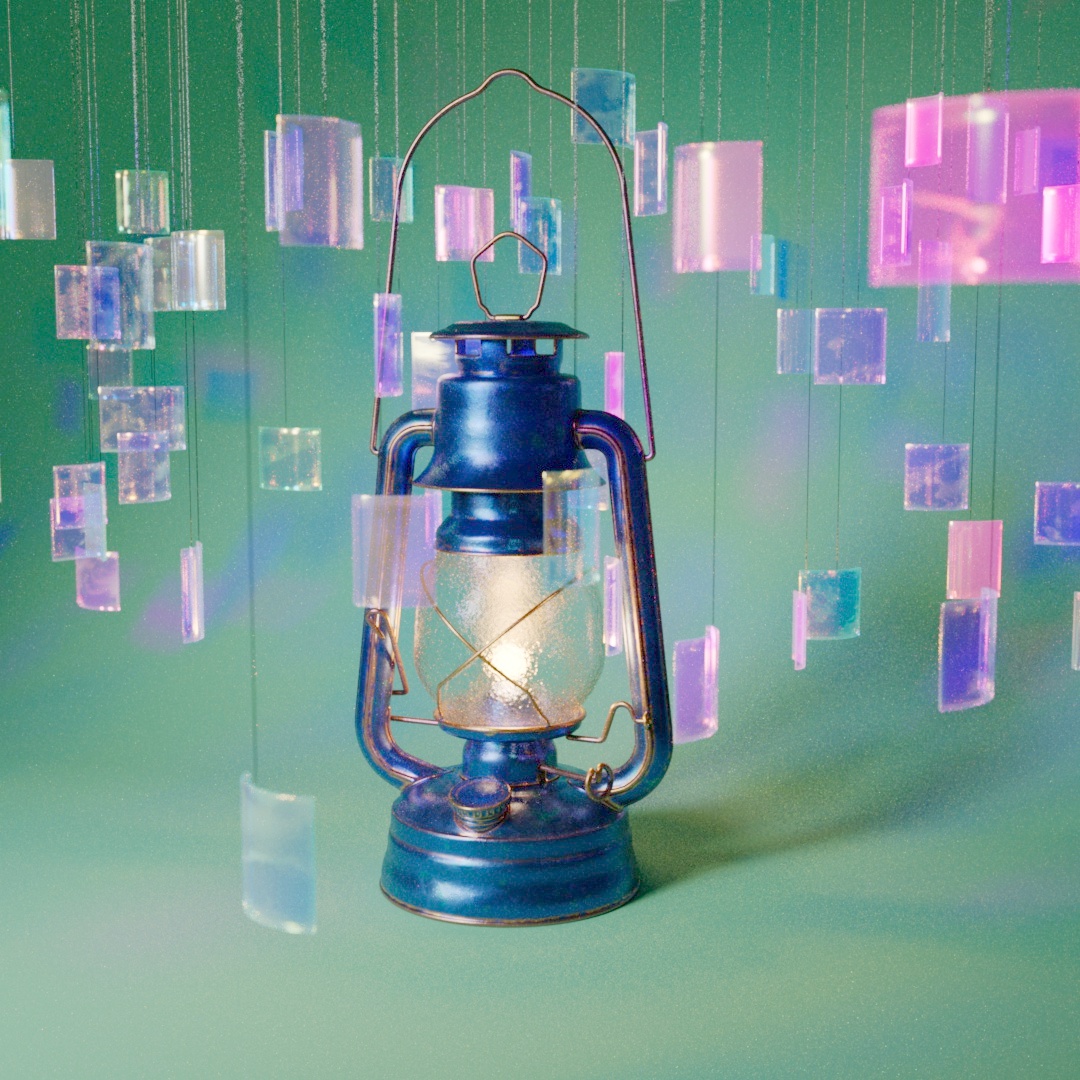
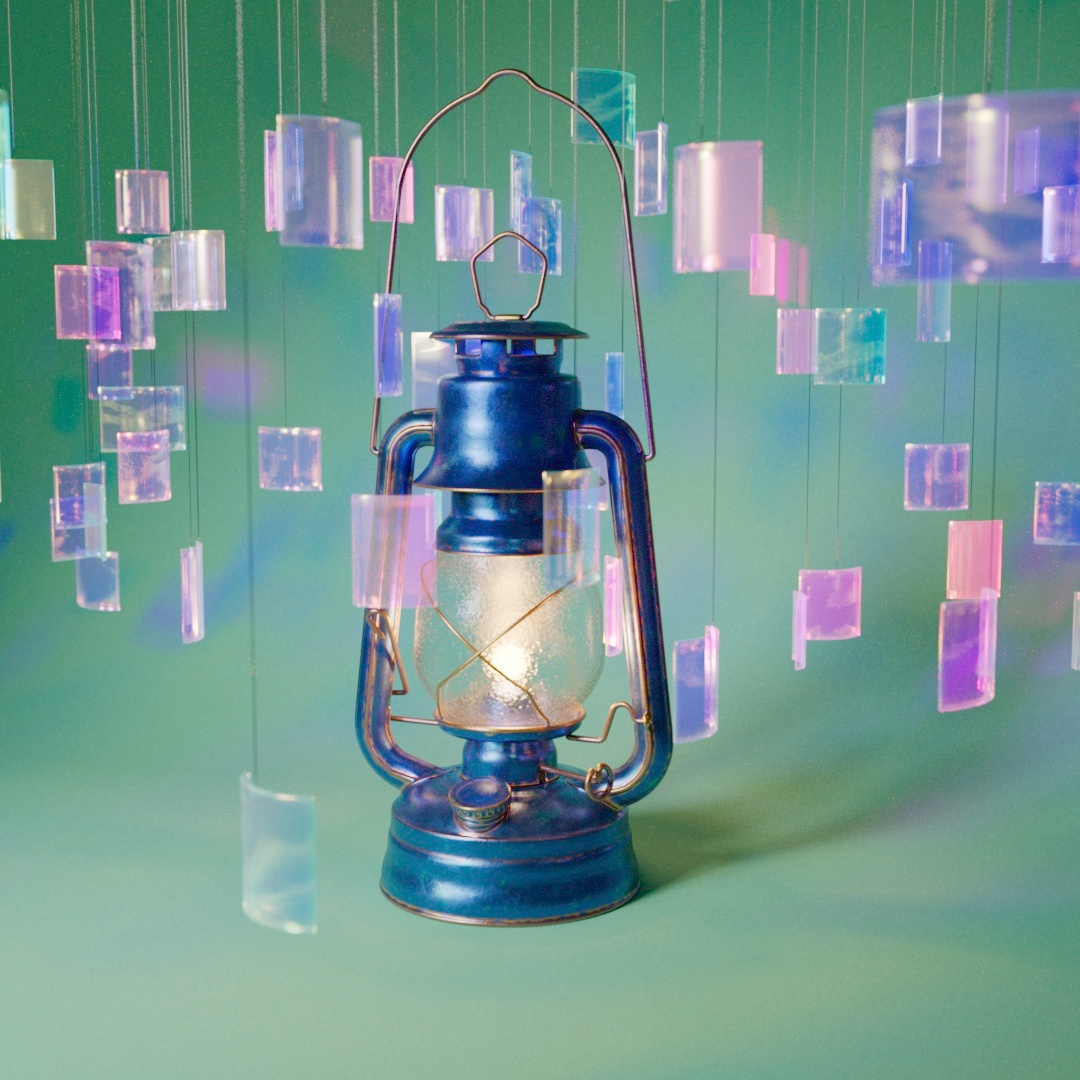
The test scene below was modified specifically to demonstrate the impact of the depth settings by putting 8 panes of glass in a row in front of the camera. Each pane of glass has actual thickness so for a ray to fully pass through one it requires a trace depth of at least 2, since there are 8 panes of glass a minimum trace depth of 16 is required to see through all 8 panes. See below that the glass on the lantern is not even visible until the refraction trace depth is high enough to get through all 8 panes of glass and the lantern glass itself. These same limitations are imposed on each ray type by their individual caps as demonstrated in the last example where the Global Illumination and Reflection Depths are reduced well below the Combined Depth resulting in the loss of most of the reflections and global illumination.

|
|
|
|
|
|
Combined Depth: 6 Global Illumination Depth: 4 Reflection Depth: 4 Refraction Depth: 6 Transparency Depth: 16 |
8 6 6 8 20 |
24 20 20 24 48 |
24 1 1 24 48 |


Hardware Ray-Tracing
When enabled this will utilize any available hardware accelerated ray-tracing as long as you are rendering with compatible video cards like the Nvidia RTX series graphics cards.
The impact of hardware accelerated ray-tracing varies from scene to scene, with scenes that spend more of their time specifically on ray-tracing generally seeing more of an improvement with hardware RT enabled. Non-ray-traced effects like irradiance point cloud and irradiance cache GI are not accelerated by hardware RT.
|
|
|
|
Hardware Ray-Tracing: Disabled Render Time (Min:Sec) : 4:11 |
Enabled 3:31 |

