Tips and Tricks
So where does the light actually come from?
Example 1
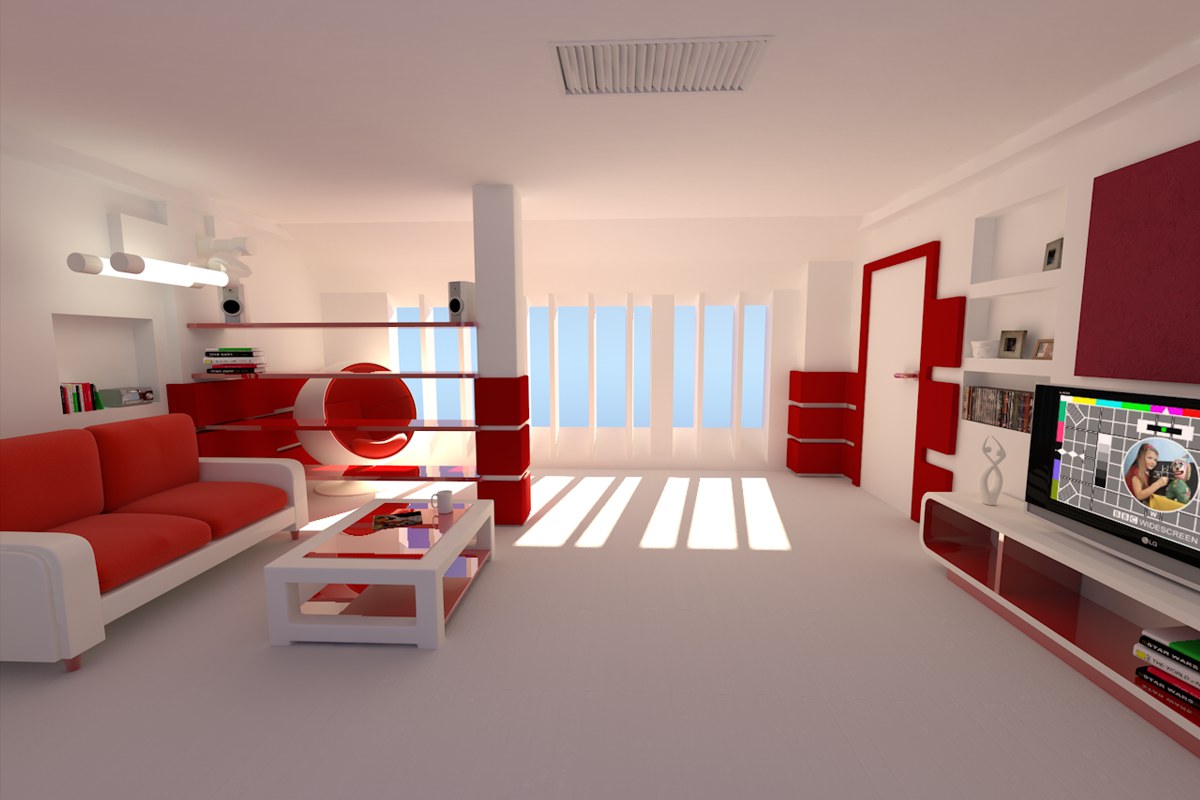
After objects have been placed and textured/colored, and the slightly reflective floor has been finished, you don't have to be a rocket scientist to light this scene.
In this scene, the only sources of light next to the Physical Sky are the two fluourescent lights at the left.
 The Physical Sky and 2 Polygon Lights are used to light the scene.
The front and rear of the room have openings that let a large amount of light in. Two types of light enter the room through these openings, both of which come from the Physical Sky:
- The yellow sunlight that casts an Area shadow
-
The bluish sky light that is emitted by a sky hemisphere.
The two Polygon Lights (objects with a luminous material applied) on the wall at the left influence the overall lighting of the room very little. The nominal amount of light emitted by the television at the right plays no role at all.
These few light sources are enough to achieve a realistic lighting of this scene. The bulk of the work is done by GI. Otherwise the Preset Interior High (High Diffuse Depth) will be used.
A Physical Sky was used with a slightly raised Sky value and a much stronger Sun value applied.
Example 2
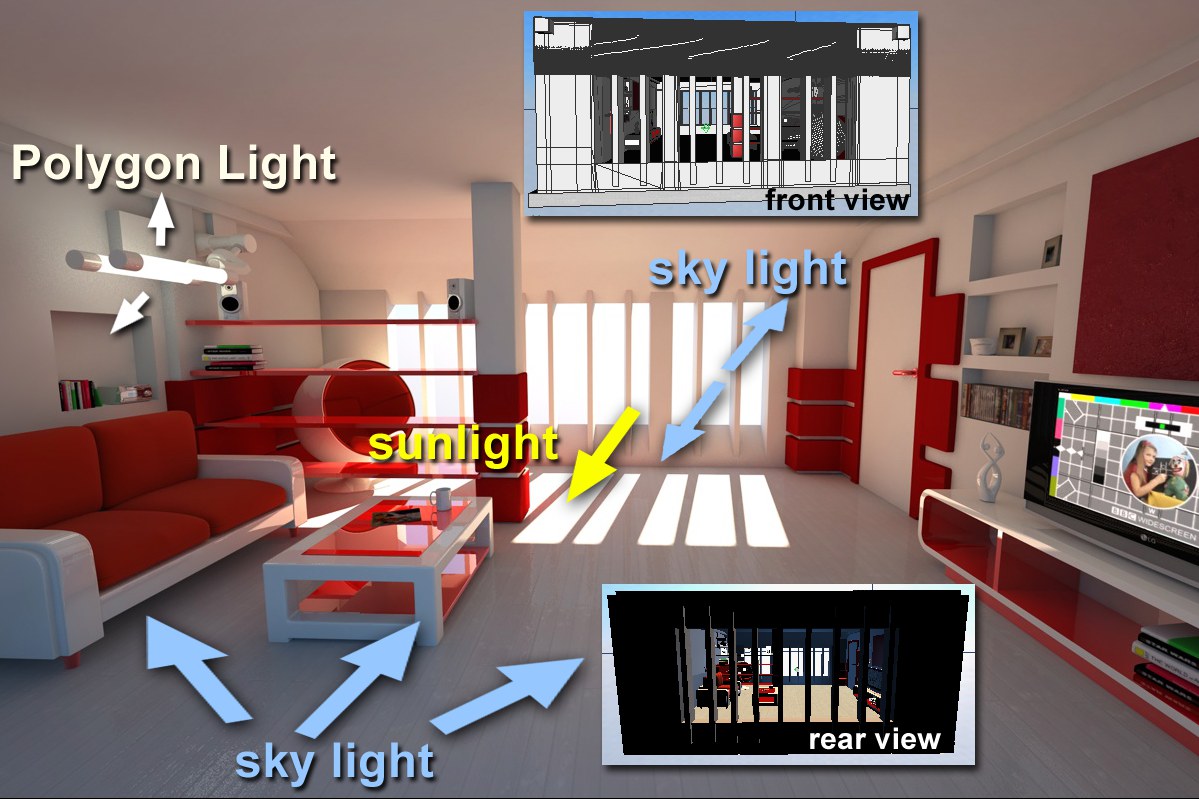
 Scene by Holger Schömann.
What sets this scene off, in addition to the dispersed reflection of the floor tiles and the displacement-generated area rug, is the HDRI lighting that was used.
 Light only enters this room through the window and the skylight!
This room has two relatively large openings through which light can enter - the skylight in the ceiling and the window. Both openings were defined as GI Portals in order to concentrate the GI calculations in the right areas. The light is generated via a HDRI texture on the Sky Object.
Example 3
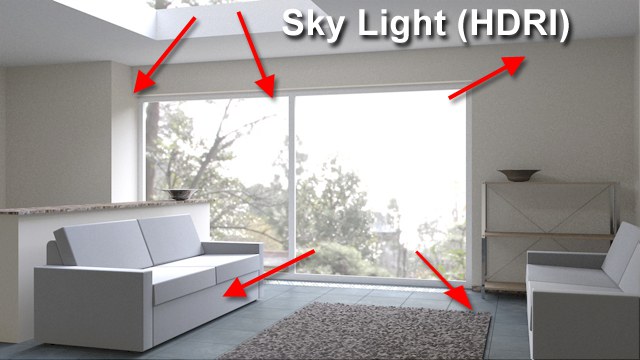
 4 Area lights are used to illuminate the Vase.
What is it that makes this vase look so darn good? Actually, nothing special (except for the excellent composition of the scene itself … ): The scene is lit by four slightly blue and orange colored Area lights with Inverse Square falloff ("Details" tab). The falloff type is important since it most accurately simulates the falloff of real world light. Additionally, the Show in Reflection option has been activated for several of the Area lights, resulting in several reflections on the surface of the vase.
As you can see in the image above, the use of GI (IR+IR Diffuse Depth = 3) results in an even and very pleasant dispersion of light.
Outdoor Scenes
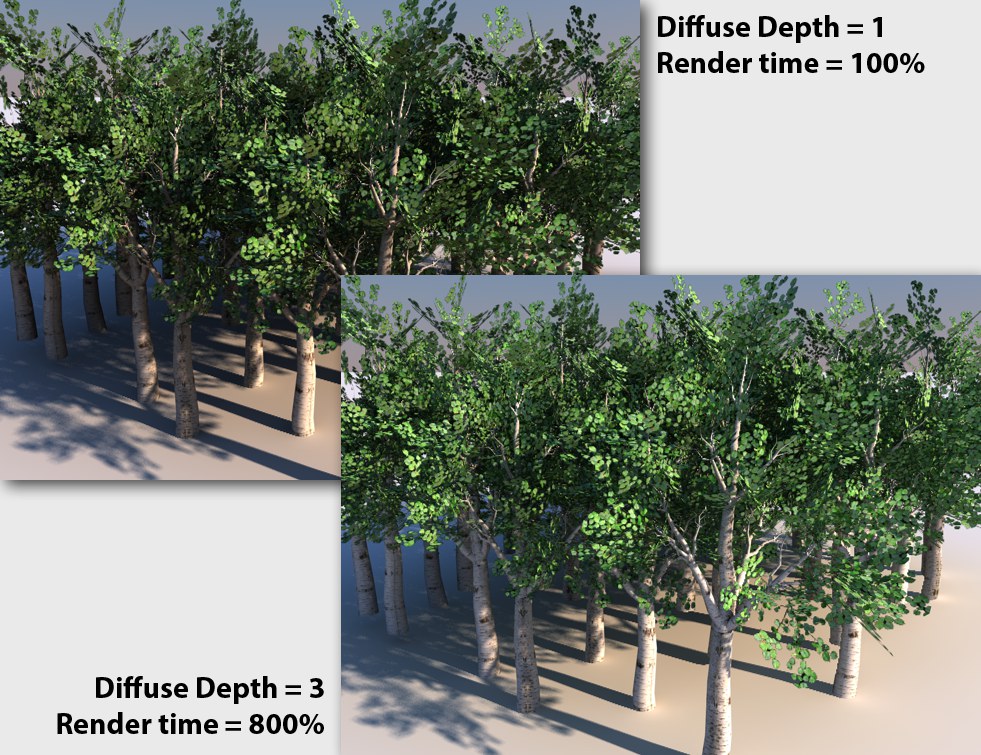 Left: Diffuse Depth = 1; right: Diffuse Depth = 3. The visible difference is minimal but the difference in render times is large.
For outdoor scenes that are illuminated primarily by the sky a Diffuse Depth value of 1 is sufficient since the sky emits light from just about every direction and almost all object surfaces "see" the sky and are illuminated by its light.
Color Mapping and 32-bit Rendering
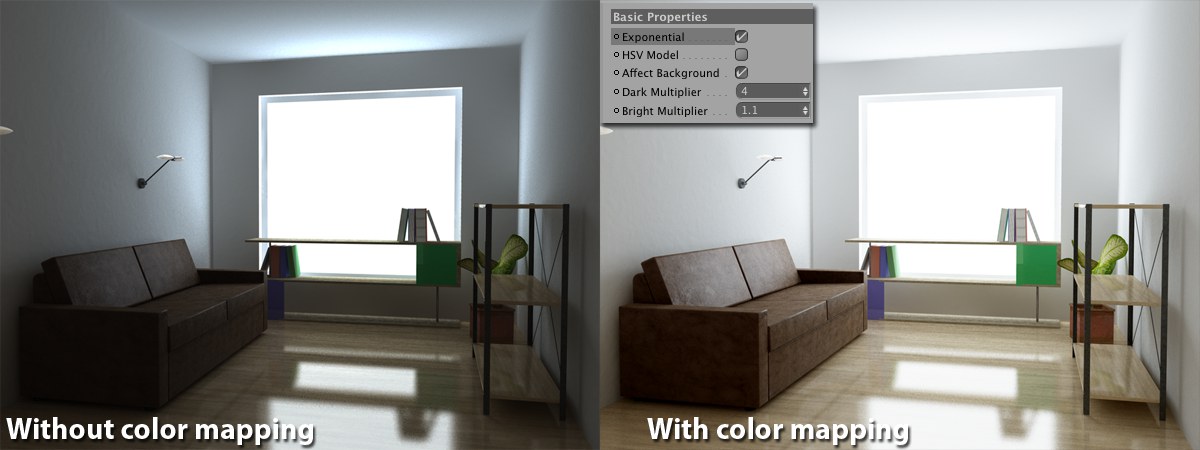 Left a normal 8-bit rendering; at right the image rendered with Color Mapping. The only light source used was a Polygon Light (object with illuminating material applied). Scene by Holger Schömann.
Balancing the brightness of a rendered image is very important for achieving optimal render results. Many times the brightness of a scene is inhomogeneous or contains faulty contrasts. Sometimes artists tend to pump up the brightness of the light sources if a scene is rendered too dark only to realize that these areas are then too brightly illuminated.
There are two ways in which this can be avoided:
- Color Mapping
- 32-bit rendering with subsequent editing in an image editing software that can edit 32-bit images and offers the necessary tools for editing 32-bit color depth (the current version of Photoshop offers only a limited number of tools for working with 32-bit images).
Both methods basically do the same thing - they take rendered images with greater color depths and converts them to 8-bit images.
Exclude Glass from GI
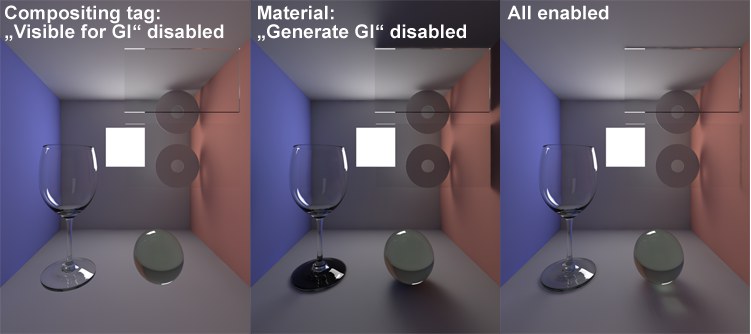 Each of the transparent objects was excluded from GI in a different manner. Render times increased from left to right. Not how dark the shadows were rendered in the middle image.
Depending on the scene you exclude an object from GI by
- applying a Compositing tag (Seen by GI option) …
- or in the material channel (Receive GI option or Generate GI for Caustics), which lets you "block" GI for certain materials (this occurs automatically for transparent materials with Receive GI - see also Glass/Mirror Optimization).
Due to its transparency, glass can easily be excluded from GI since the effect is so minimal and the render times can thereby be reduced.
You basically have to decide on an individual basis whether or not applying GI to a glass object in your scene will make a noticeable or important difference in the final rendered image. Use the image above as a reference.
GI and Baking Textures
See Bake Object
GI and Specular Highlights
Note that the material's Specular Color channel will be ignored when only GI is used to illuminate a scene (without using Cinema 4D light objects and only using luminous objects). So, why is this?
Well, both effects are simply well-functioning illusions to make materials look realistic using common, often spherically shaped (i.e. very small) sources of light. In the real world, specular highlights are merely a reflection of area light.
For the calculation of GI this means the following: Specular highlights are adjusted using the Reflectance channel and the size/color of the luminous object.
Of course you can also create additional Cinema 4D light sources that affect specific objects in order to create more specular highlights. This may not be in harmony with the principle of a true global illumination but what counts is the final result!
GI and Animation
GI and animations are technically challenging. If a single image takes a long time to render using GI, then rendering an animation with a series of these images will require very long render times. In addition, Irradiance Cache tends to flicker if its settings are set too low.
You should adhere to the following when creating animations with GI:
- When using IR+IR/IR+QMC: if flickering occurs on surfaces, the Samples value probably too low (four-digit figures may even be required). If, on the other hand, flickering occurs in small regions around an object, the Record Density value is too low. In this case, decreasing the Maximum Spacing value should help. If this does not do the trick, set the Record Density to a higher setting.
- Flickering can even occur at optimized IR+LM settings if the base light map is of poor quality (see ,Optimize Light Mapping’ below).
- QMC+QMC will not flicker (the render times will increase accordingly; these will be at a maximum).
Camera Animation and Full Animation
Irradiance Cache offers the following animation types:
- Use Camera Path: Only the camera is in motion and all other Project elements remain unchanged with regard to lighting - no objects and no lights move. This makes it easy for Irradiance Cache because it can use a single, non-flickering cache for the entire animation. The Full Animation Mode must be disabled (and Use Camera Path enabled if light maps are used). You can also use tricks (see Prepass Only) to get the desired result.
- Full Animation: For a different lighting situation in which objects and/or lights are animated, a separate cache must be rendered for each image. If you do not want to load or save GI cache files, disable Auto Save and Auto Load (Cache Files tab) for all cache types involved. Deactivate all options pertaining to camera animations (such as Use Camera Path for light mapping).
If you want to load/save cache files, Auto Load, Auto Save and Full Animation Mode must be enabled for all cache types involved.
GI Caches and Team Render
How do GI and Team Render work together?
Stills
With still you don't have to make any changes; using the default render settings (not the Render Settings in conjunction with this), all Render Clients will participate in rendering a single cache file, which will also be used by all Render Clients during rendering.
Animation
First you must ascertain if a Camera Aniamtion or a Full Animation is being rendered (see above for an explanation of how these differ).
- Full Animation: This can be sent directly to Team Render for rendering. Make sure that the Full Animation option is enabled in the Cache Files tab.
- Camera Animation: All caches must first be pre-calculated without Team Render (this is the only way to achieve flicker-free results). Subsequently, the scene can be rendered in Team Render, including cache files.
The following applies to both methods: If pre-calculated cache files exist that should be used with Team Render, the Auto Load option must be enabled in the Cache Files tab.
If QMC Rendering is being used, which does not require caches, it can also be sent directly to Team Render.
Optimizing Light Mapping
Unfortunately, light maps are not particularly constant from one animation frame to the next. In addition, light leaks can suddenly occur, which negatively effect the GI calculation. Try the following:
- Experiment with Prefilter (faster) and Interpolation Method (slower) in the Light Mapping tab. Light maps can be smoothed to a certain degree, which reduces the differences between subsequent light maps. Larger Sample Count values are also helpful because they also have a smoothing effect.
- Single-polygonal wall strengths can lead to light leaks (small, very bright spots). Make sure walls are created with the proper volume (i.e., thickness).
- If widespread flickering occurs at corners/bevels when using IR+LM, increase the Path Count (x1000) value. If flickering only occurs in a small, isolated region, reducing the Samples Size value can help (the Path Count (1000s) value might have to be increased to compensate).