Solaris Mesh Topics
Render Geometry Settings LOP
|
| Render Geometry Settings LOP |
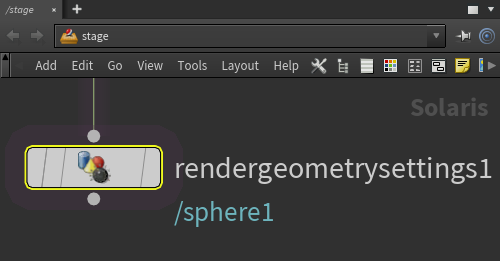
Use a Render Geometry Settings LOP to add per-object Redshift options to geometry in the scene.
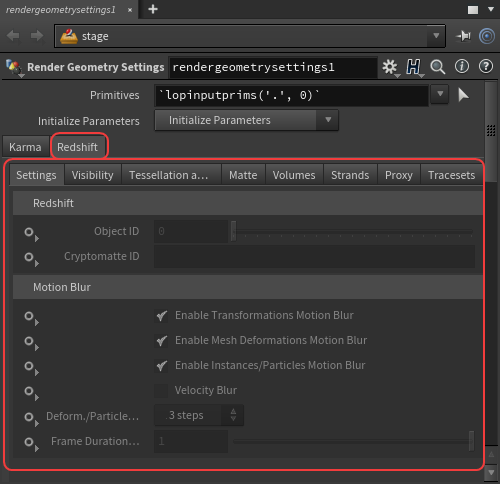
The Render Geometry Settings LOP has a Redshift tab that contains all the familiar Redshift object settings like visibility, tessellation, matte and more. For more information on these settings please see the Mesh Topics page.
Many of these settings must be overridden with the set or create options to the left of each parameter before they take effect.
Also be aware of other overriding factors like freeze tessellation in the render settings that may be blocking the expected result.
|
| Redshift settings for Render Geometry Settings LOP |
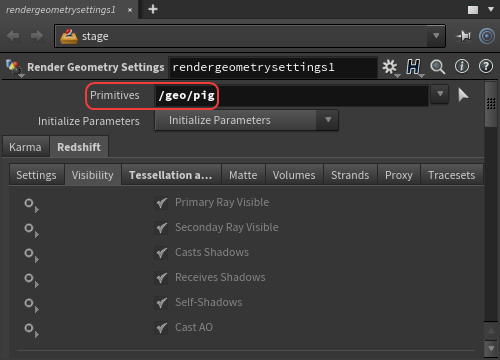
By default a Render Geometry Settings LOP is set to apply its settings to any incoming geometry but specific objects can be specified by linking them to the Primitives path as highlighted below.
|
| Specifying a specific object for a Render Geometry Settings LOP |
Tessellation in Solaris
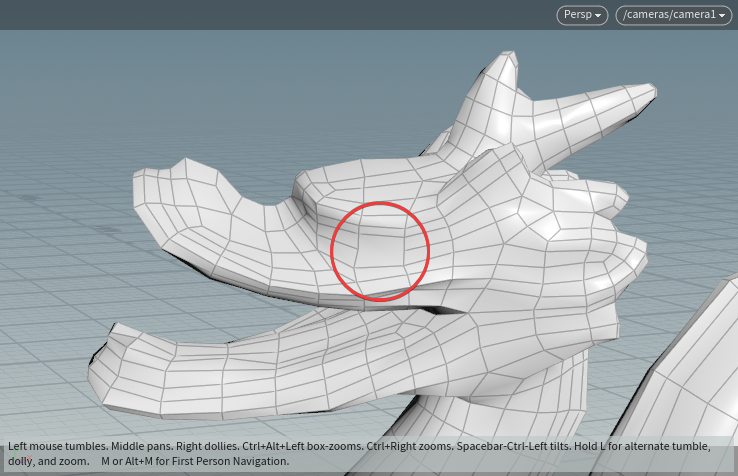
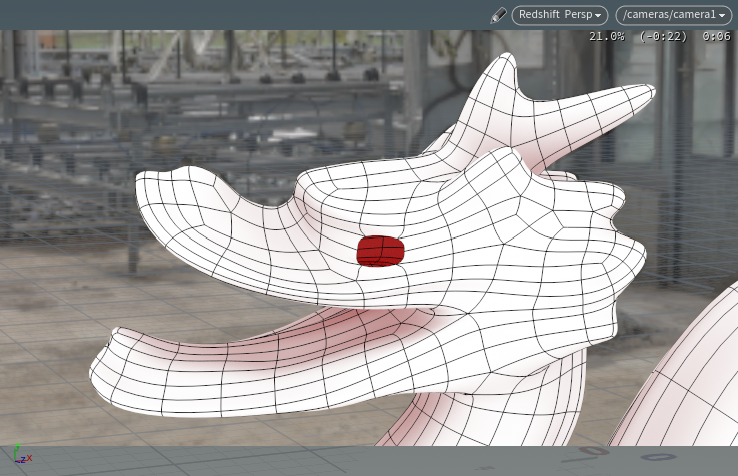
Solaris is only compatible with triangles and quads when rendering with tessellation. Fix all Ngons or triangulate the mesh before rendering otherwise the Ngons will result in holes in your mesh.
|
|
| Wireframe of mesh with Ngon | Render of mesh with Ngon |
Redshift Proxies
Exporting Proxies
Use a Render Settings LOP and a USD Render ROP to export proxies from Solaris.
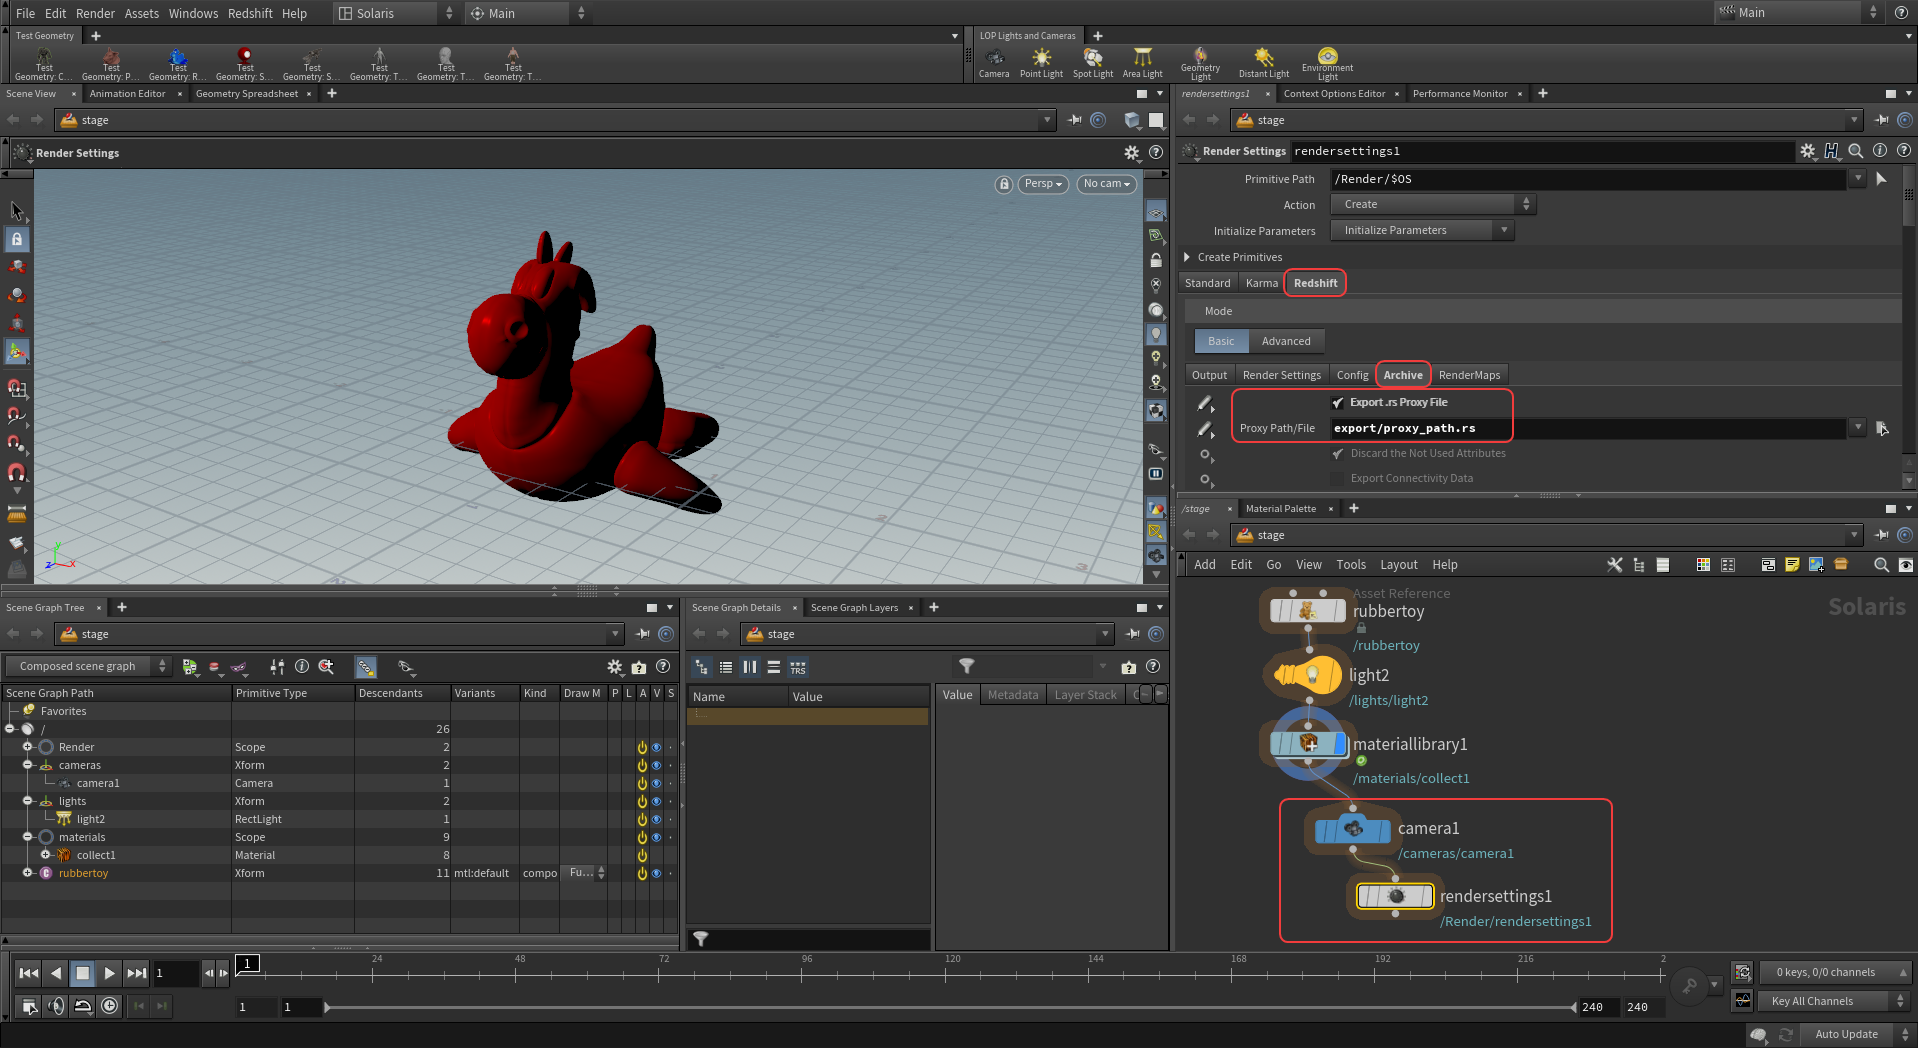
The Render Settings LOP is used to set the export "Proxy Path/File" for the Redshift proxy, this is found under the Redshift tab's Archive section as outlined below. Everything prior to the Render Settings LOP will be exported with the proxy.
A Camera must be included with the proxy or the proxy export will fail.
|
| Using a Render Settings LOP to export a Redshift Proxy |
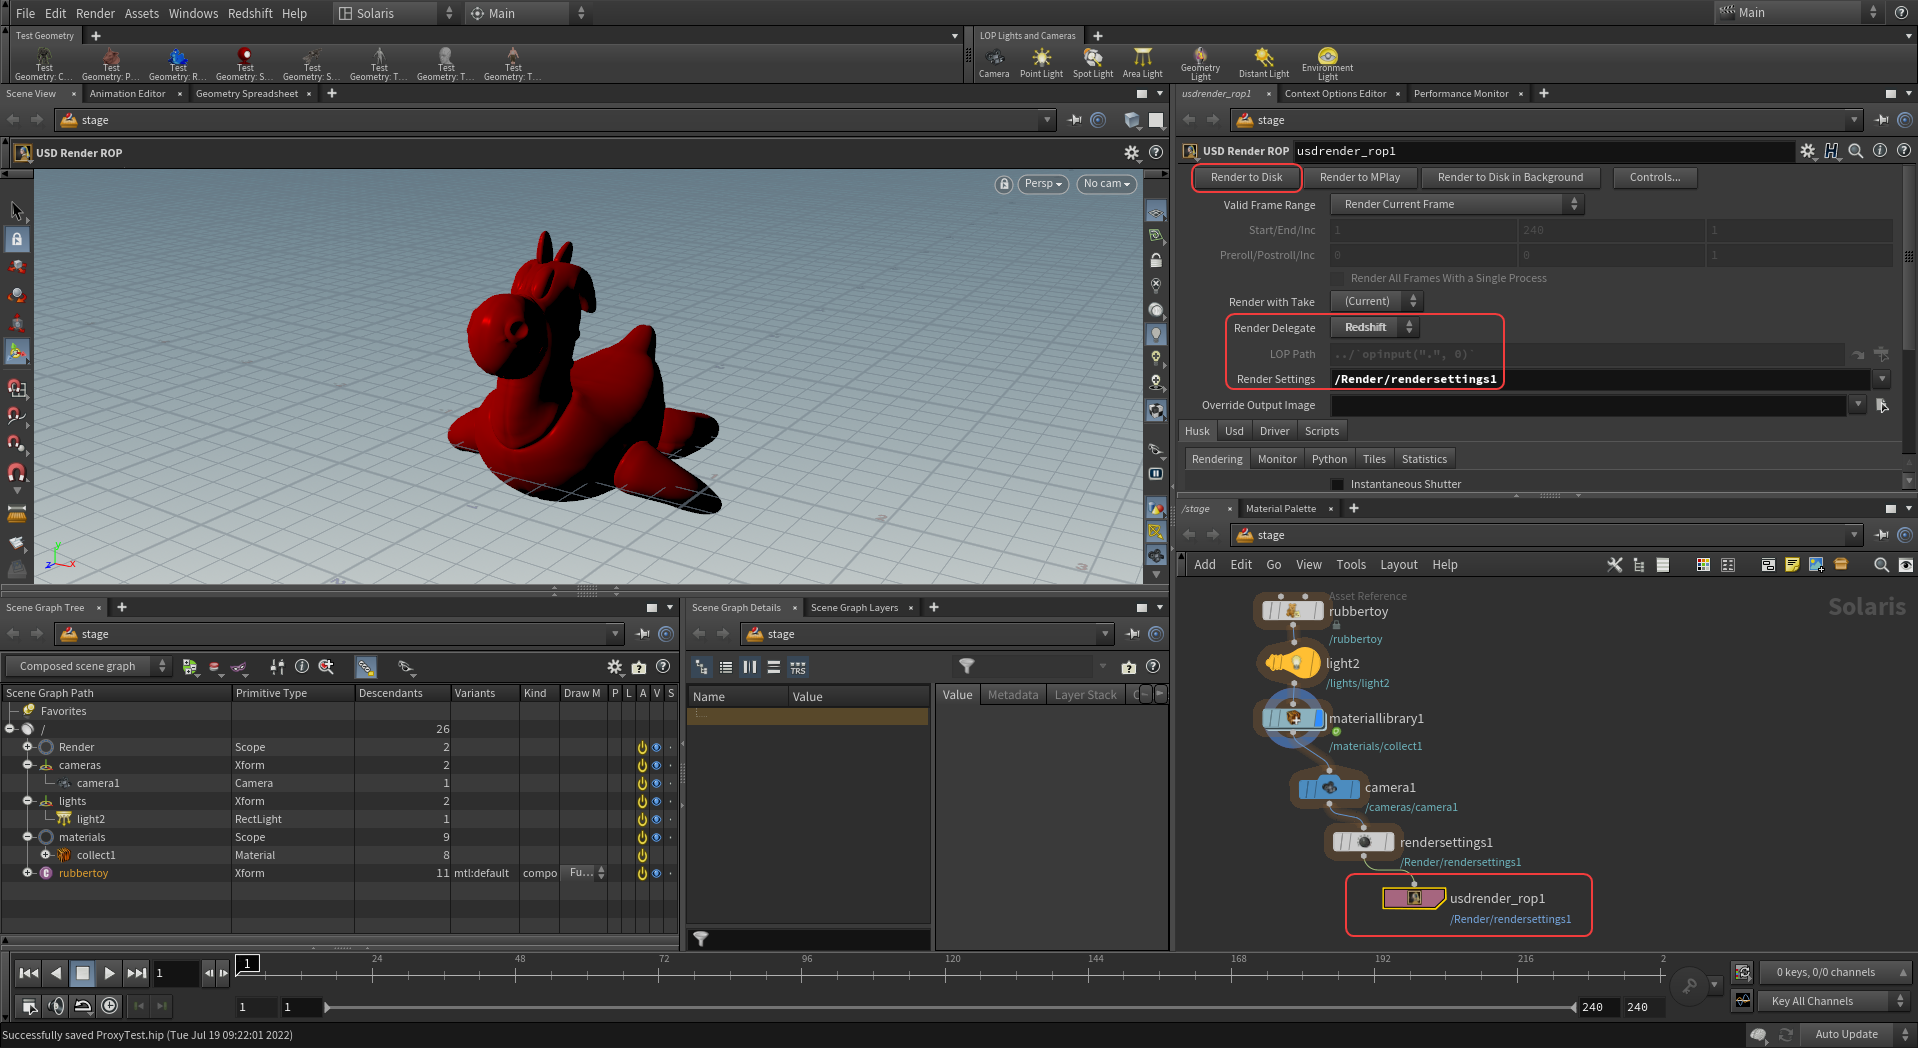
Then a USD Render ROP is used to initiate the proxy export. The Render Settings LOP that was used to configure the proxy output must be specified in the USD Render ROP as outlined below. Once configured, press the "Render to Disk" button to export the Redshift proxy to the specified location.
|
| Using a USD Render ROP with a Render Settings LOP setup for Redshift proxy export |
Importing and rendering Proxies
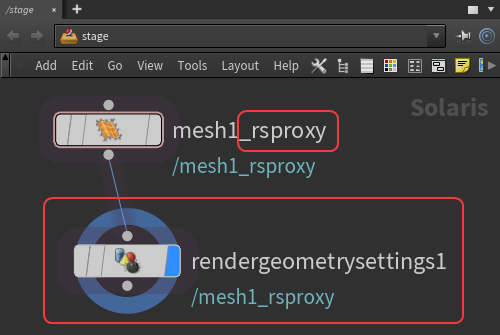
To import a Redshift proxy a placeholder LOP must be created with the "_rsproxy" suffix.
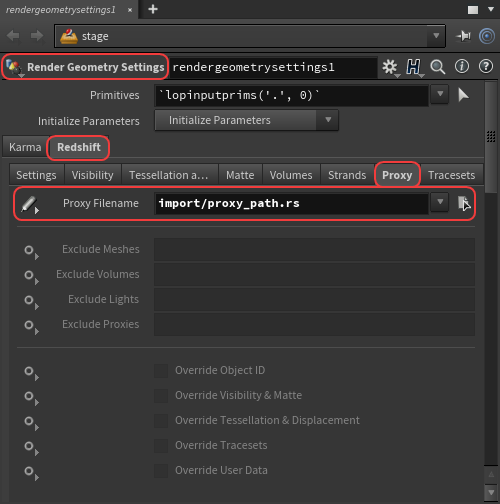
In the example image below, a mesh node was created and renamed "mesh1_rsproxy." Then create a Render Geometry Settings LOP and set the proxy's import path with the "Proxy Filename" parameter under the Redshift tab's Proxy section as outlined below.
|
|
| Proxy import example stage | Render Geometry Settings configured for Redshift Proxy import |
Material Overrides
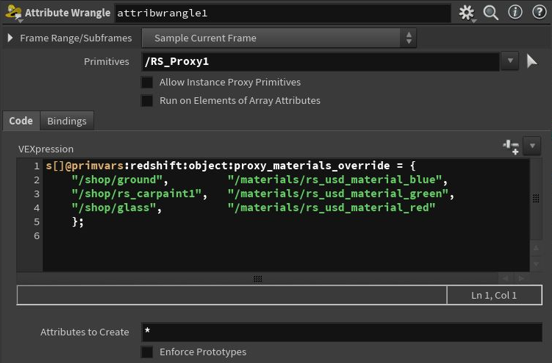
Multiple materials can be overridden on a Redshift Proxy by using the "primvars:redshift:object:proxy_materials_override" string array primvar which should include pairs of proxy/scene override materials. Materials must be available in the USD scene by assigning them to a dummy object or other method.
|
Instancing
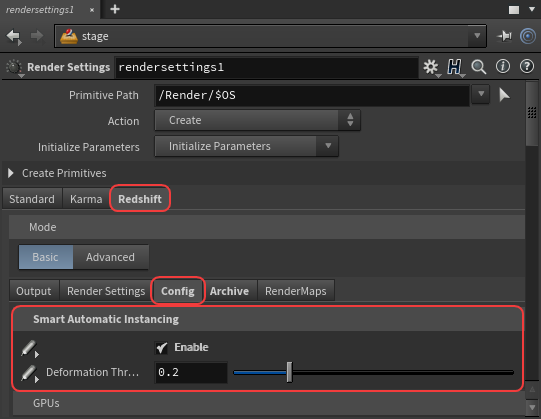
Smart Automatic Instancing can be used in Solaris by enabling it in a Render Settings LOP under the Redshift tab's Config section as pictured below. Note that the parameters need to be overridden with the set or create option on the left for both parameters. Nested instancing and nested attributes are supported by expanding USD nested instances to plain RS point cloud instances.
The "Deformation Threshold" parameter exists only in the Hydra plugin, it explores the scene looking for objects that can be instanced and when two or more objects are found to have mesh tolerances within the threshold only one is extracted and all other objects are added as instances.
|
| Enabling Smart Automatic Instancing |
Procedurals
Solaris can also make use of the same procedural workflows as Houdini, for more information please see the Alembic Procedural page and the USD Procedural page.