Matte Options
Introduction
The per-object matte options in Redshift allow you to turn an object into a matte object at render time for compositing. It is intended to be a more practical alternative to the deprecated Matte Shadow Catcher material since it does not require a custom shader to be created per matte object.
When matte is enabled the object will be 'invisible' in the beauty render with the default settings, essentially cutting a hole in the scene and revealing the environment instead. This allows you to more easily composite CG objects against a photographic back-plate. The matte options also allow you to catch shadows on the object and control the reflections, refractions, and diffuse/GI contribution depending on the underlying material that is applied to the matte object.
|
|
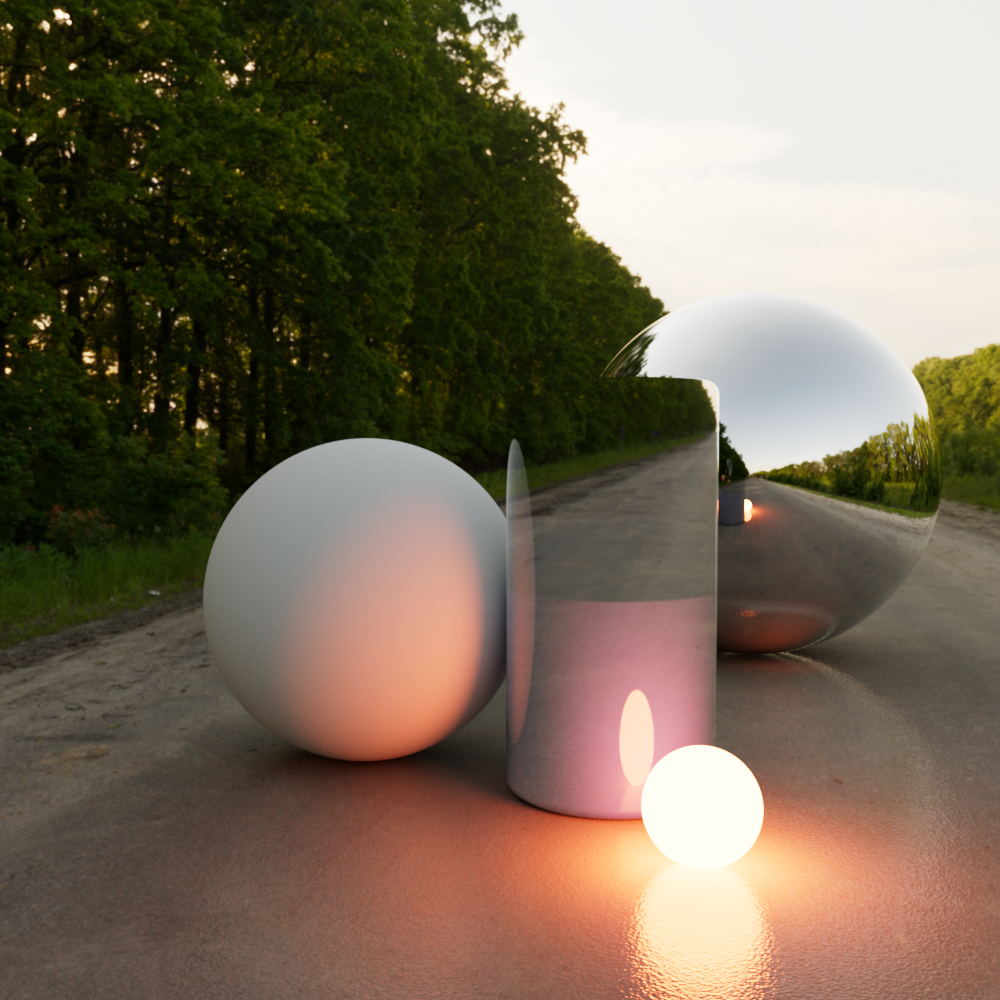
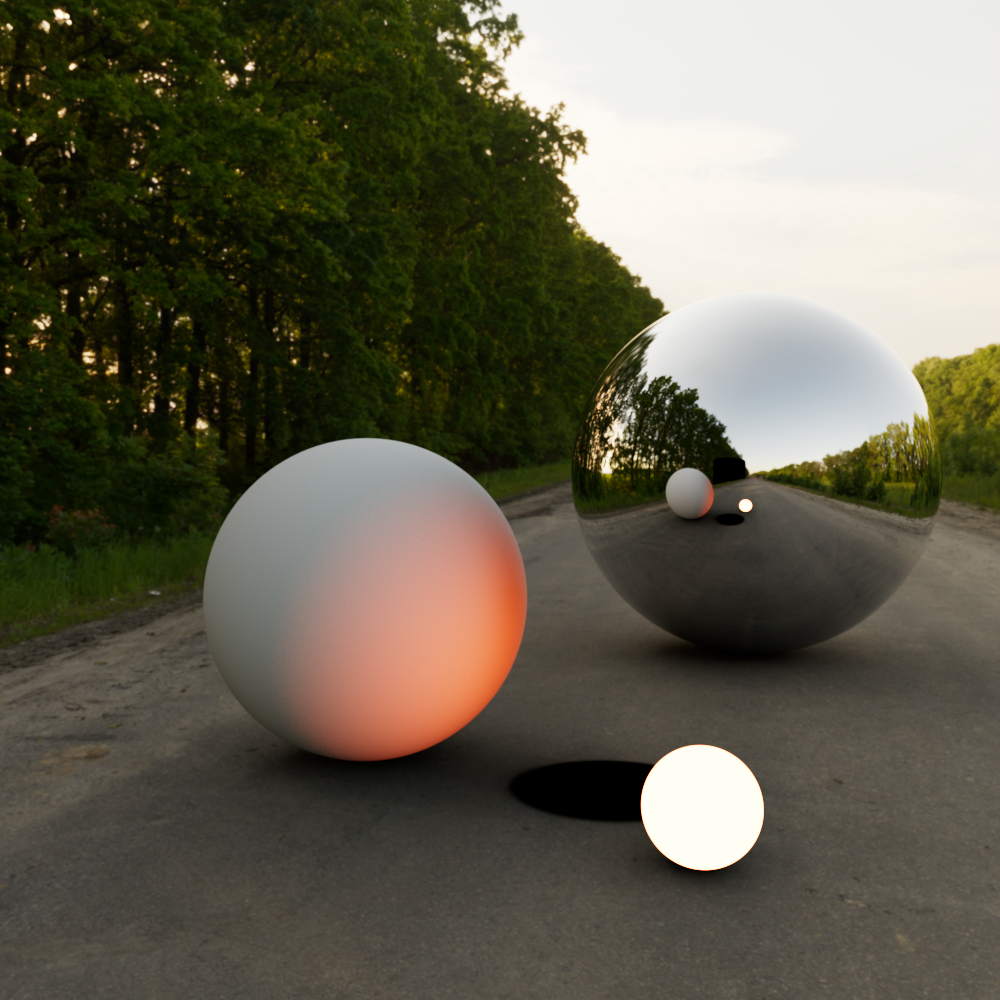
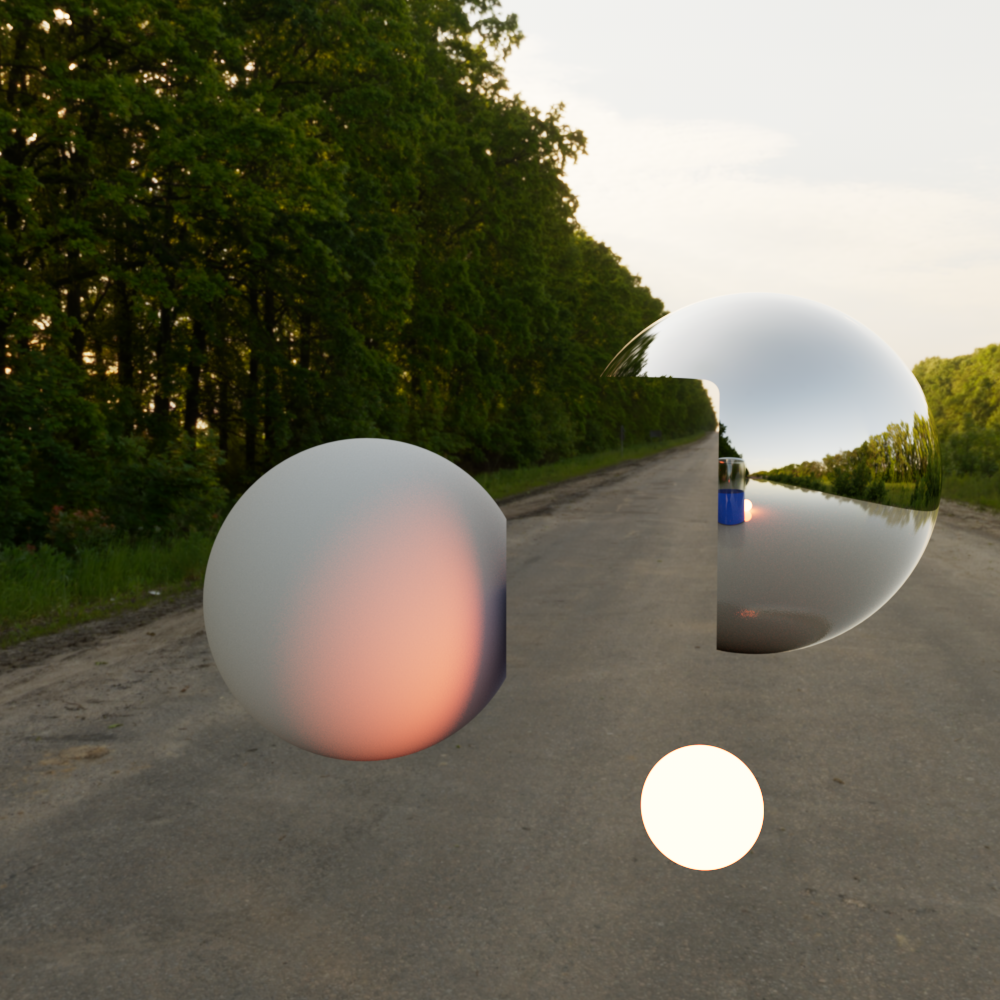
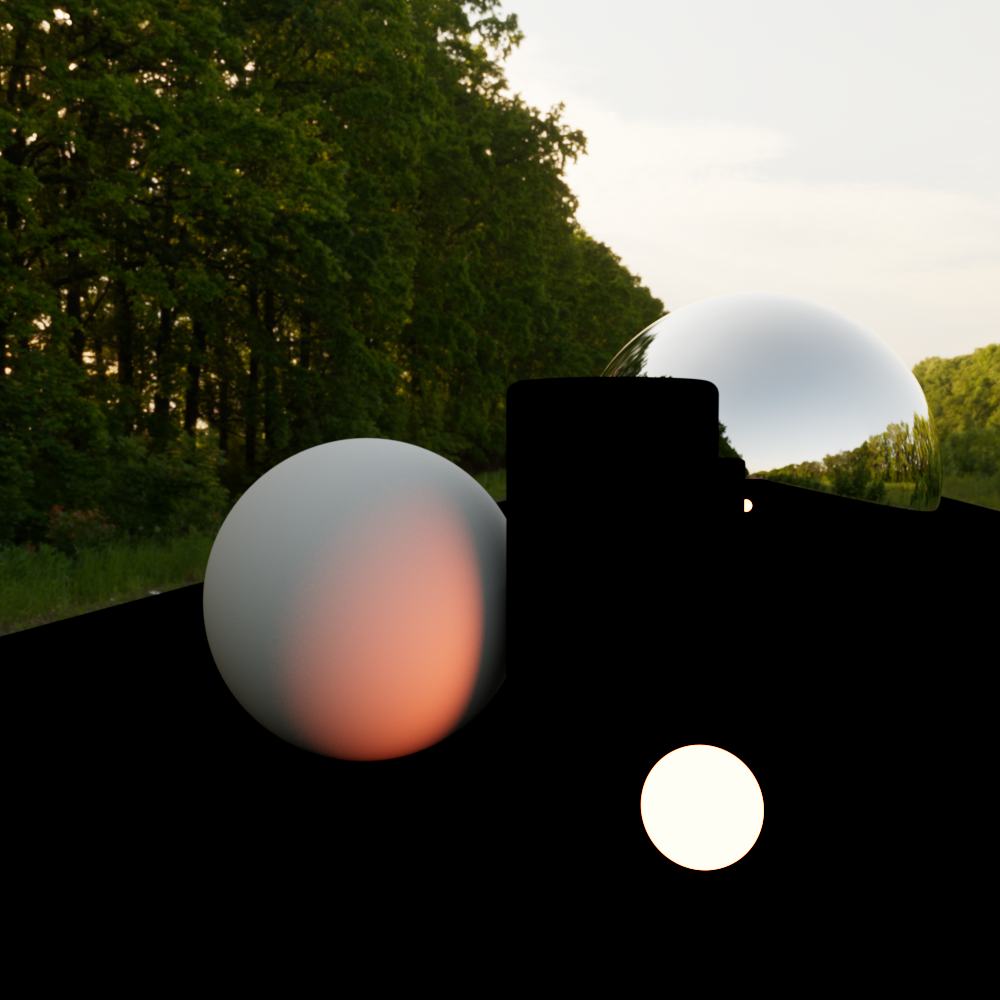
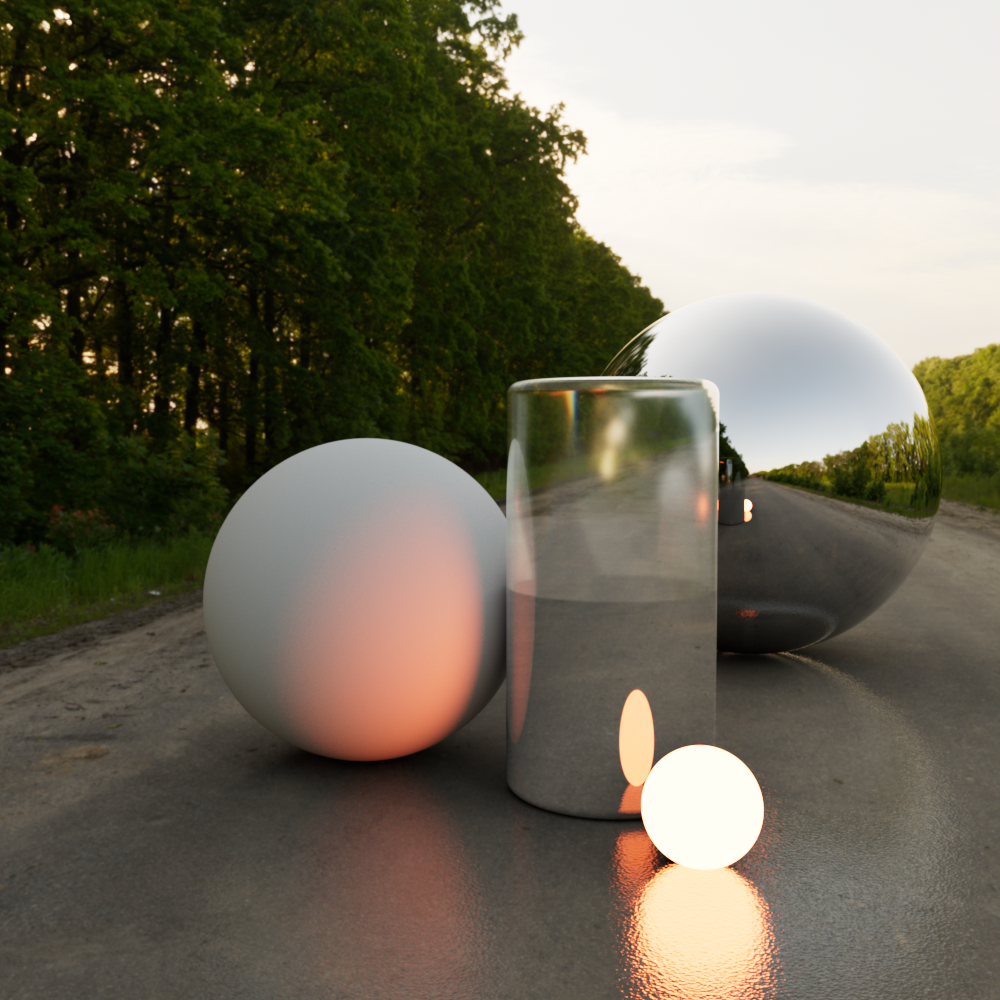
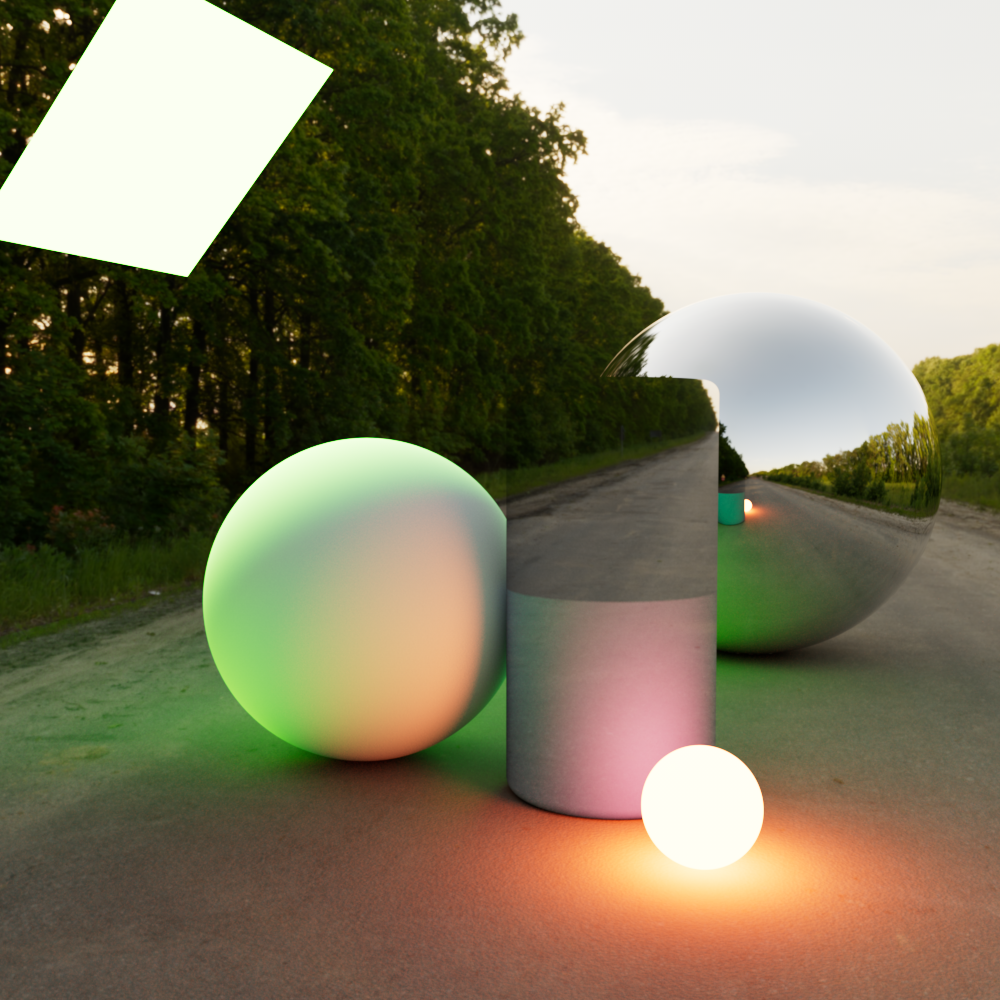
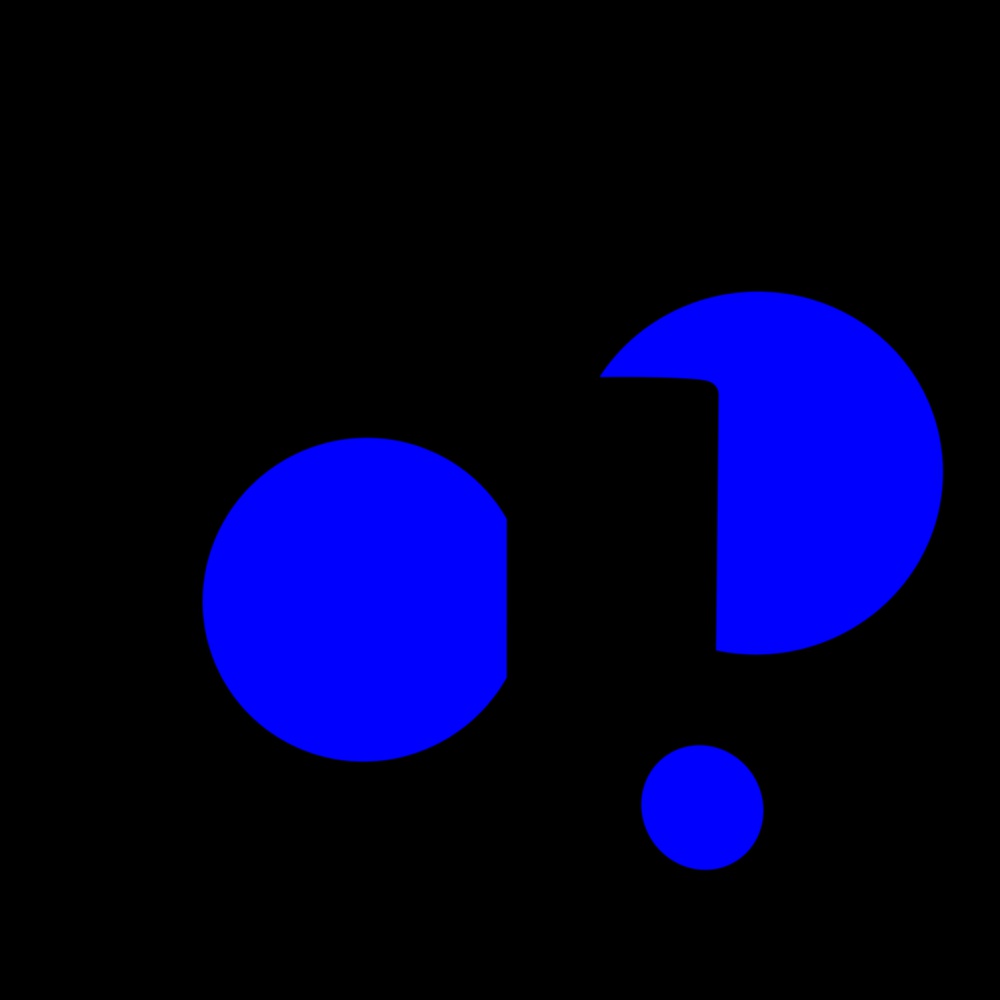
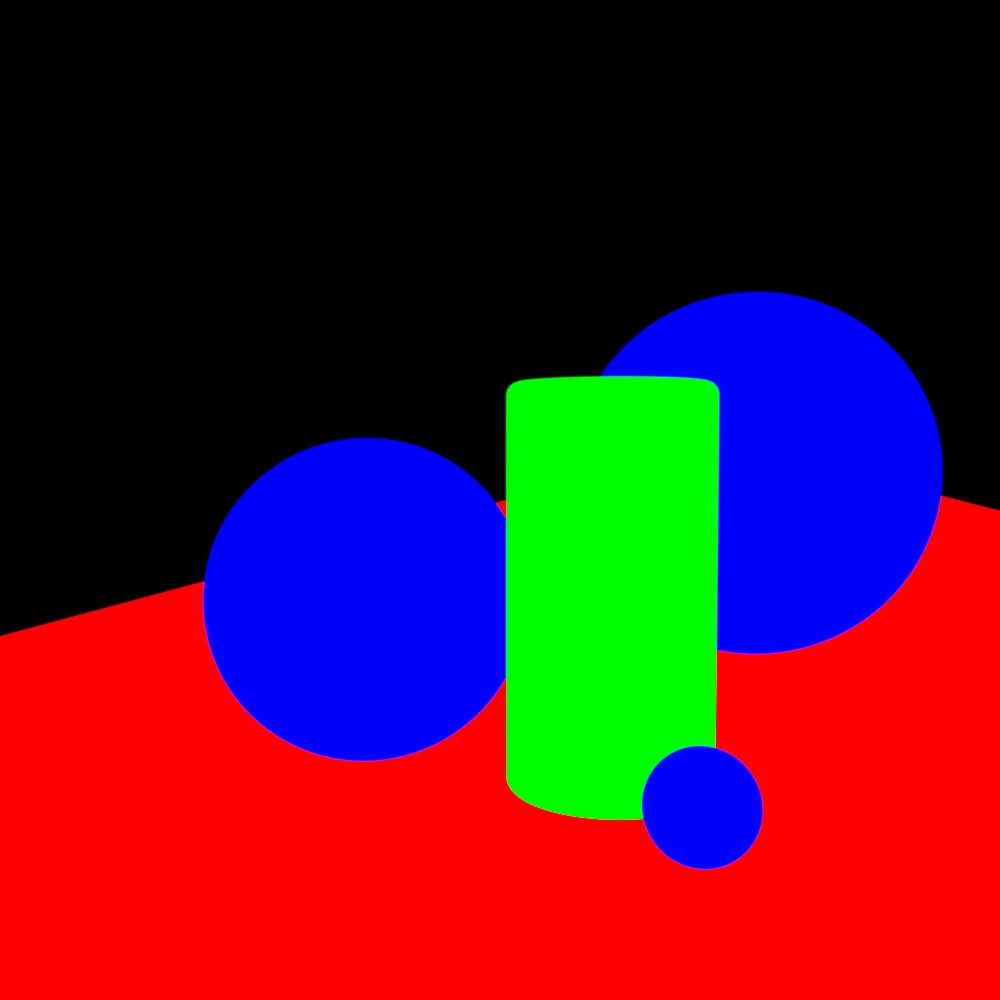
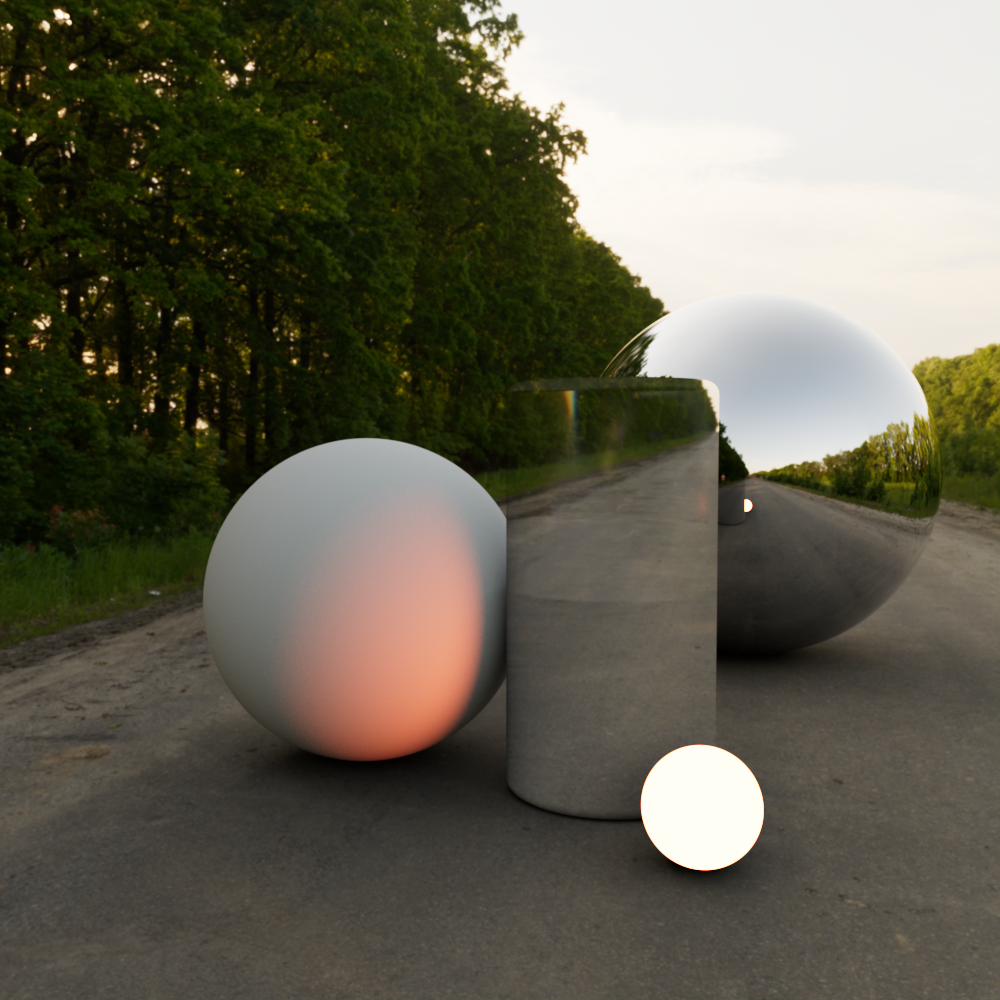
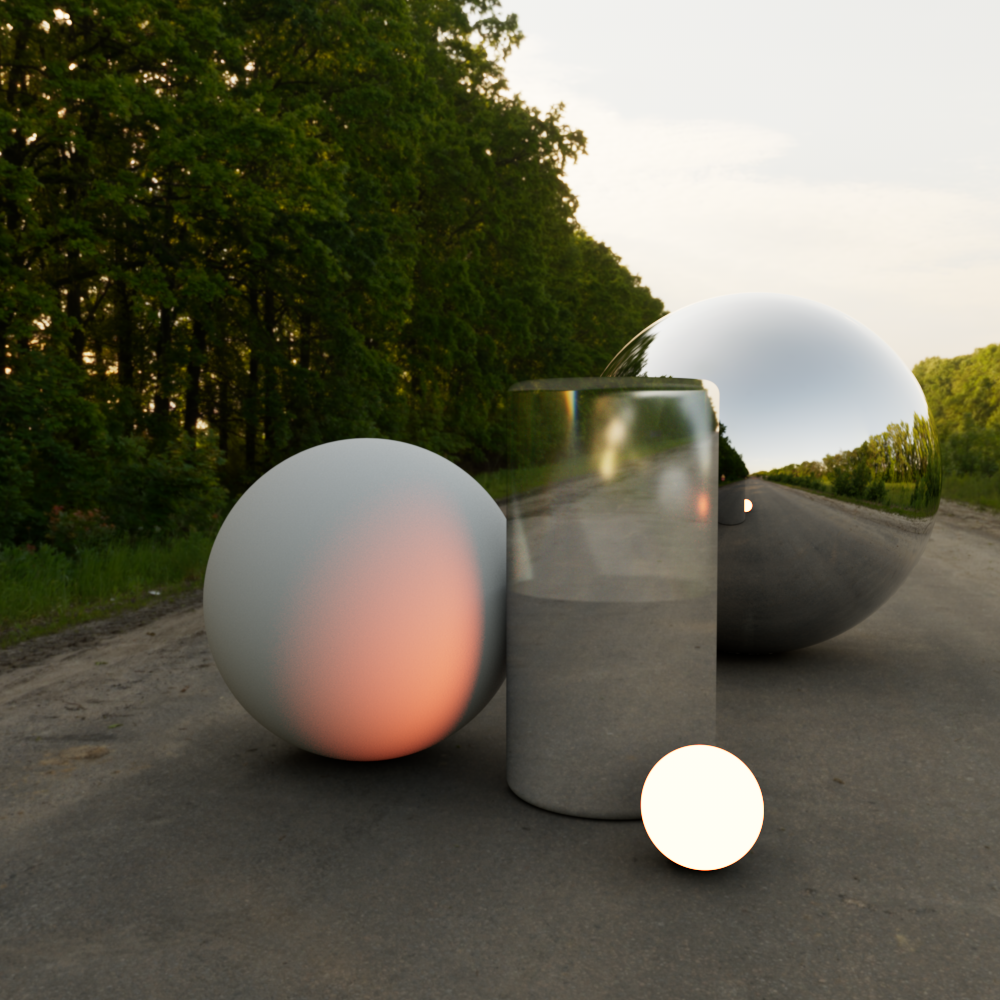
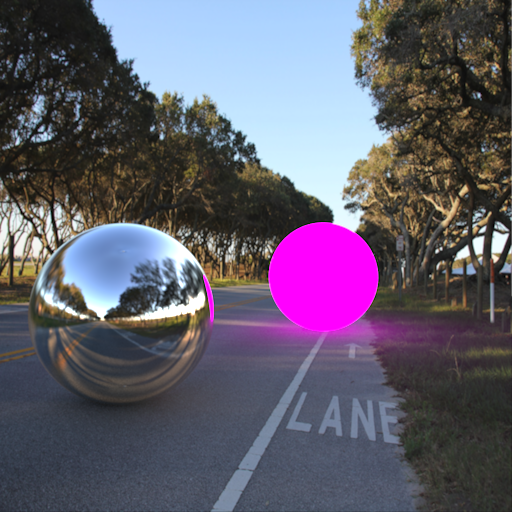
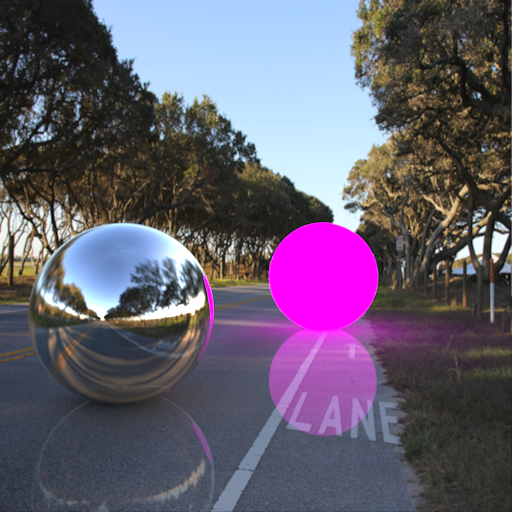
| Mattes disabled | Mattes enabled on ground plane and cylinder |
The Matte object override parameters can affect both the primary and secondary rays similar to Redshift visibility settings but they differ in that matte options cut out and affect the alpha of the rendered image while disabling primary and secondary visibility options for an object would only reveal the objects in a scene behind them.
Per-object visibility settings can even be used in combination with matte options.
|

|
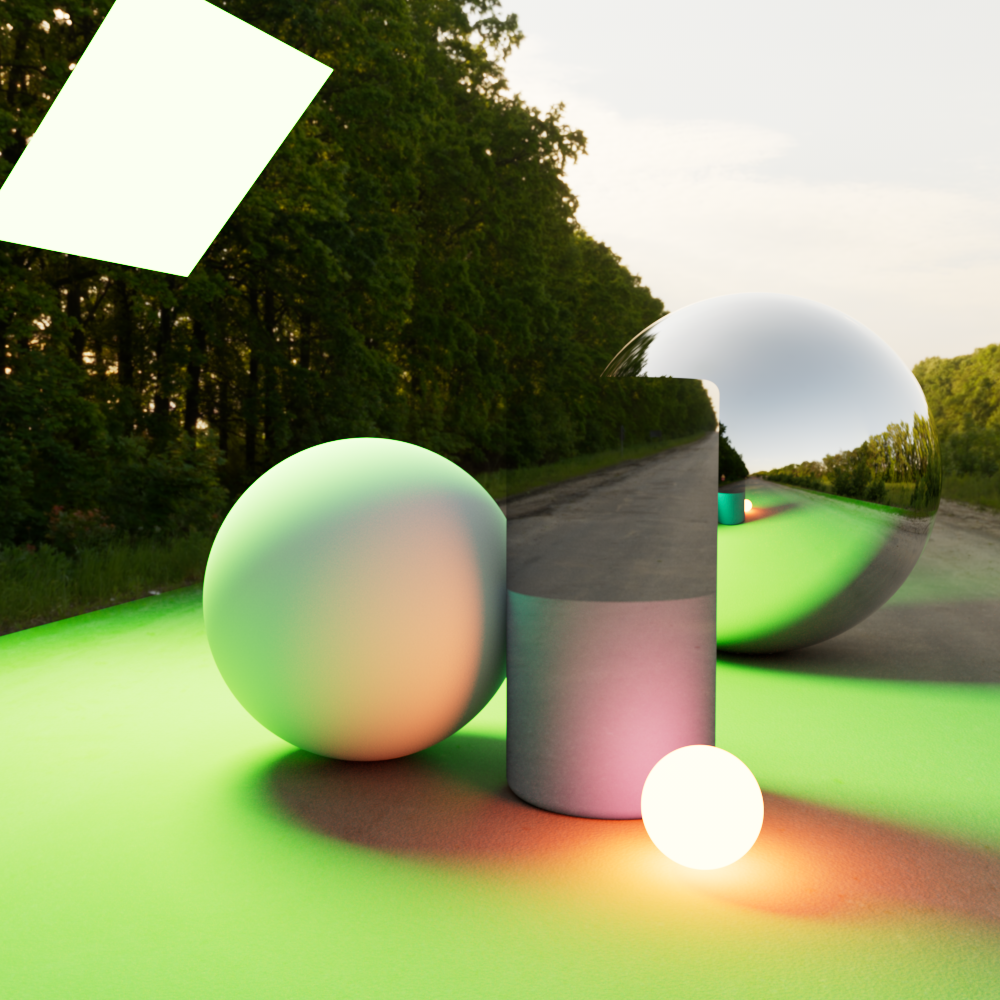
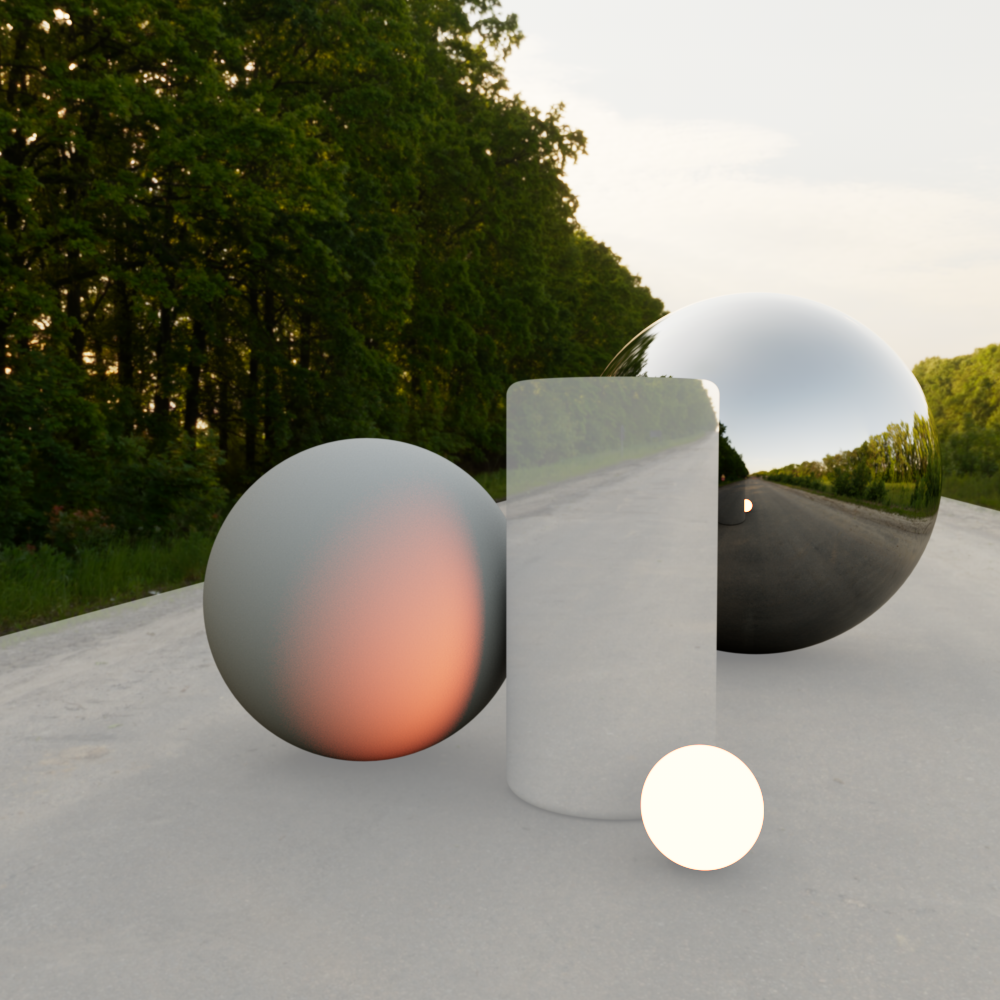
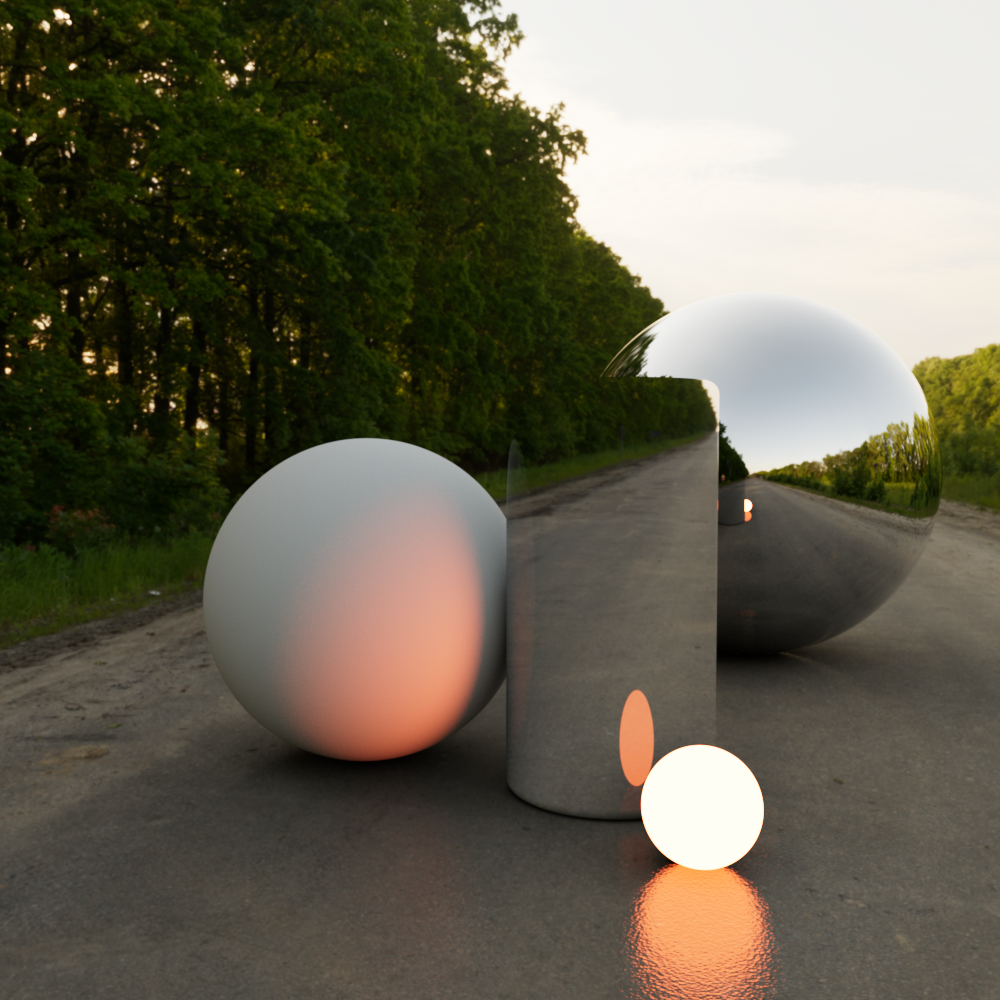
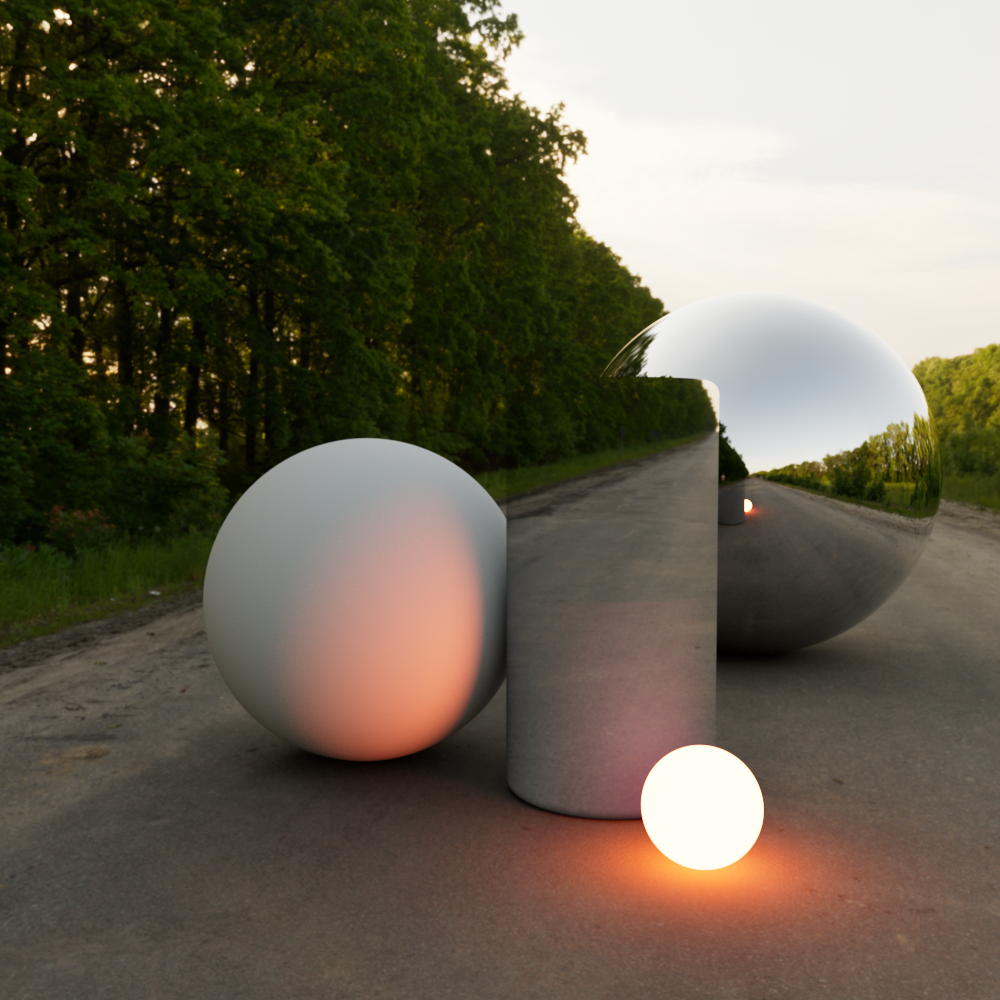
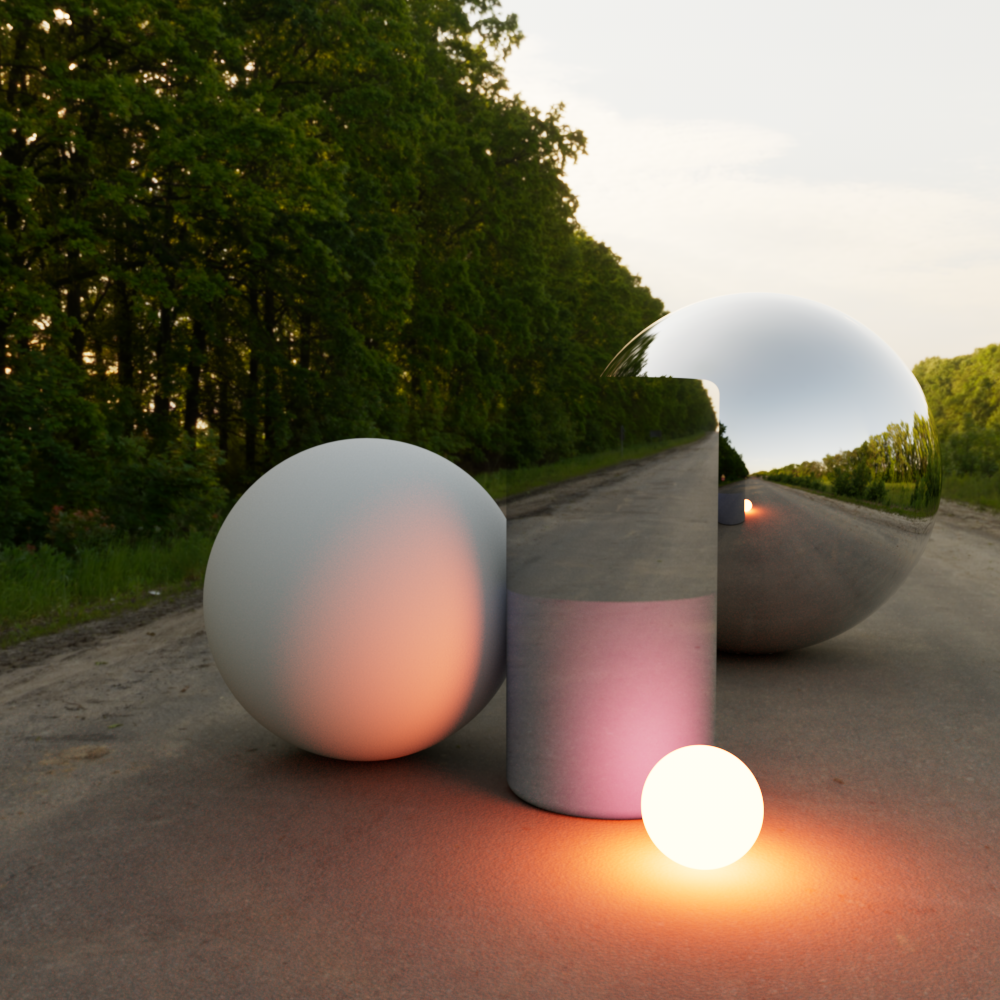
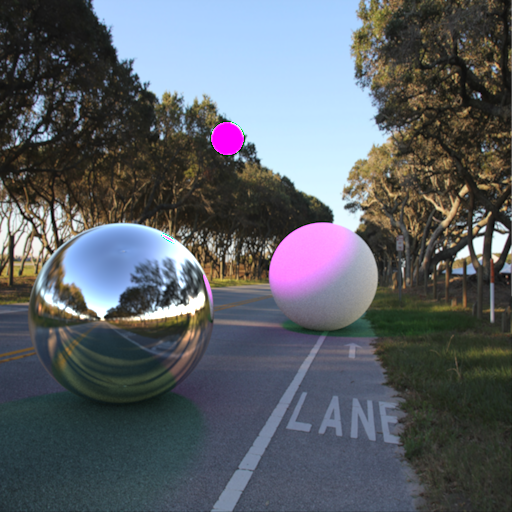
| Cylinder: Primary and secondary visibility disabled | Cylinder: Matte enabled with shadow catching |
How to use
There are two ways of using matte nodes in Maya:
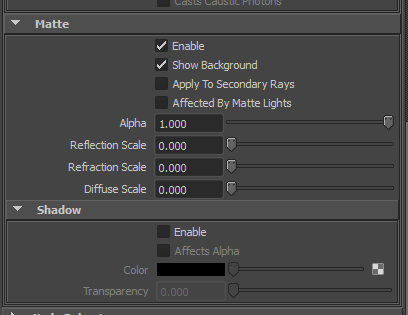
The easiest way is to edit the Matte options under the shape's Redshift options, as shown below. You can enable them by checking the 'Enable' attribute as seen below.
The second, more advanced, way is to attach Redshift Matte nodes to your Maya objects. Redshift Matte nodes are custom object set nodes which gives you the flexibility of using a single Redshift Matte node to control the matte properties of multiple objects (the same matte parameters will be applied to all objects connected to a Redshift Matte node).
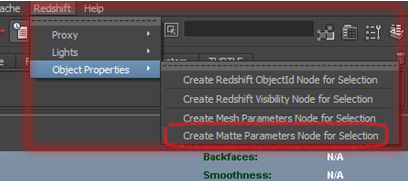
To assign a Redshift Matte node to one or more objects in your scene, select the objects and, from the main menu, choose Redshift > Object Properties > Create Redshift Matte Parameters Node for Selection, as shown below:
Using materials with a matte object
The behavior of a matte object is driven directly by the material that is applied to it, this is very important to keep in mind when setting up mattes.
For example, if you want reflections to appear on the matte object then the material applied to the matte object must have a reflection component of some kind like reflection, coat reflection, sheen reflections, or even car paint metallic flakes. However if the material used on the matte object has no reflection component then no reflections will appear even if the matte reflection scale is set to 1. This same general rule applies to all diffuse / gi, reflections, and transmission / refractions as well.
Since any material controls the behavior of a matte object this means that matte reflections can benefit from bump, displacement, and in general any feature of a Redshift shader setup that contributes to diffuse, reflections, or refractions.
Parameters
Matte
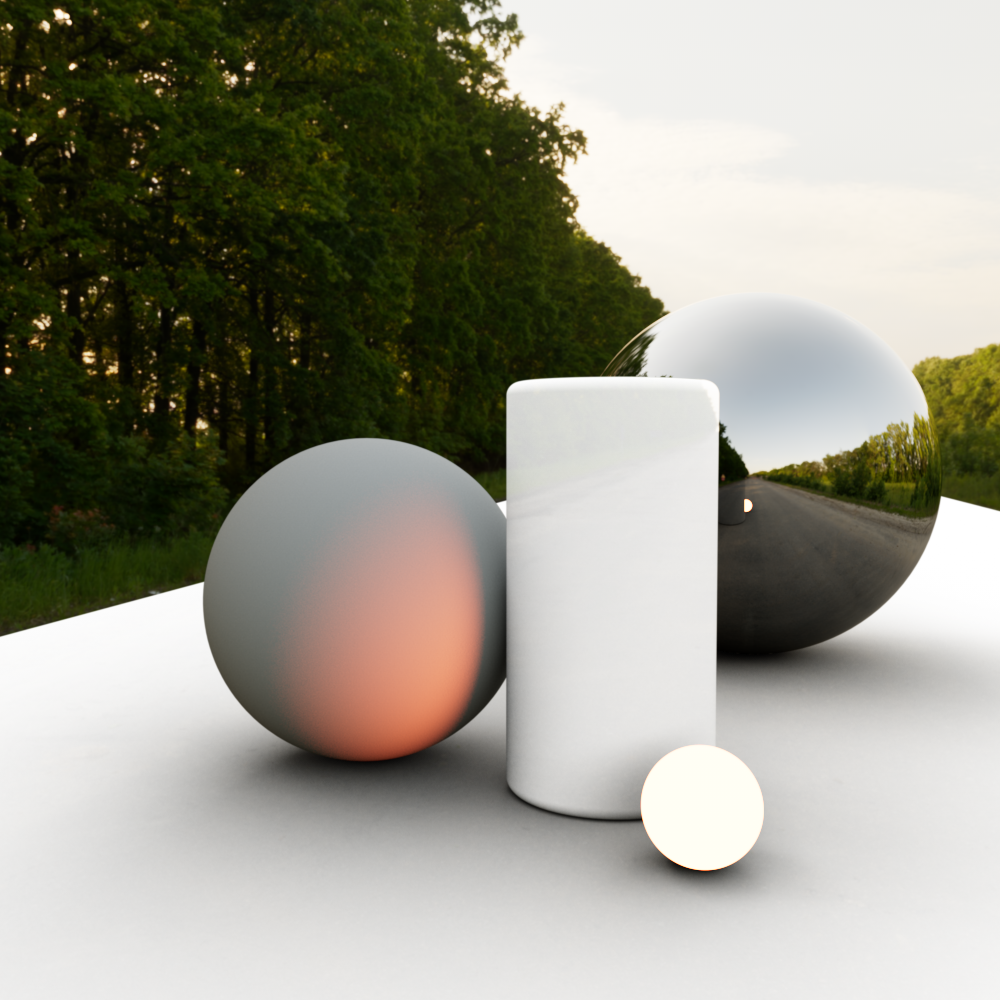
In the example images below the matte object properties have been applied to the ground plane unless noted otherwise. Shadow catching has been enabled in most example images as well.
The ground plane has a simple Redshift Standard material applied with diffuse and reflections components with a bump map. The lighting and background environment is a dome light with its alpha set to 0.
Enable
Enables the matte object override.
When matte is enabled the object will become invisible in the beauty render with the default settings, essentially this cuts a hole in the scene and reveals the environment instead.
|
|
|
| Matte: Disabled | Enabled |
Show Background
Shows the global environment shader background image in the matte objects place. When this option is not checked, the matte object will be black.
This option does not work with ray marched volumes.
|

|
| Show Background: Disabled | Enabled (default) |
Apply to Secondary Rays
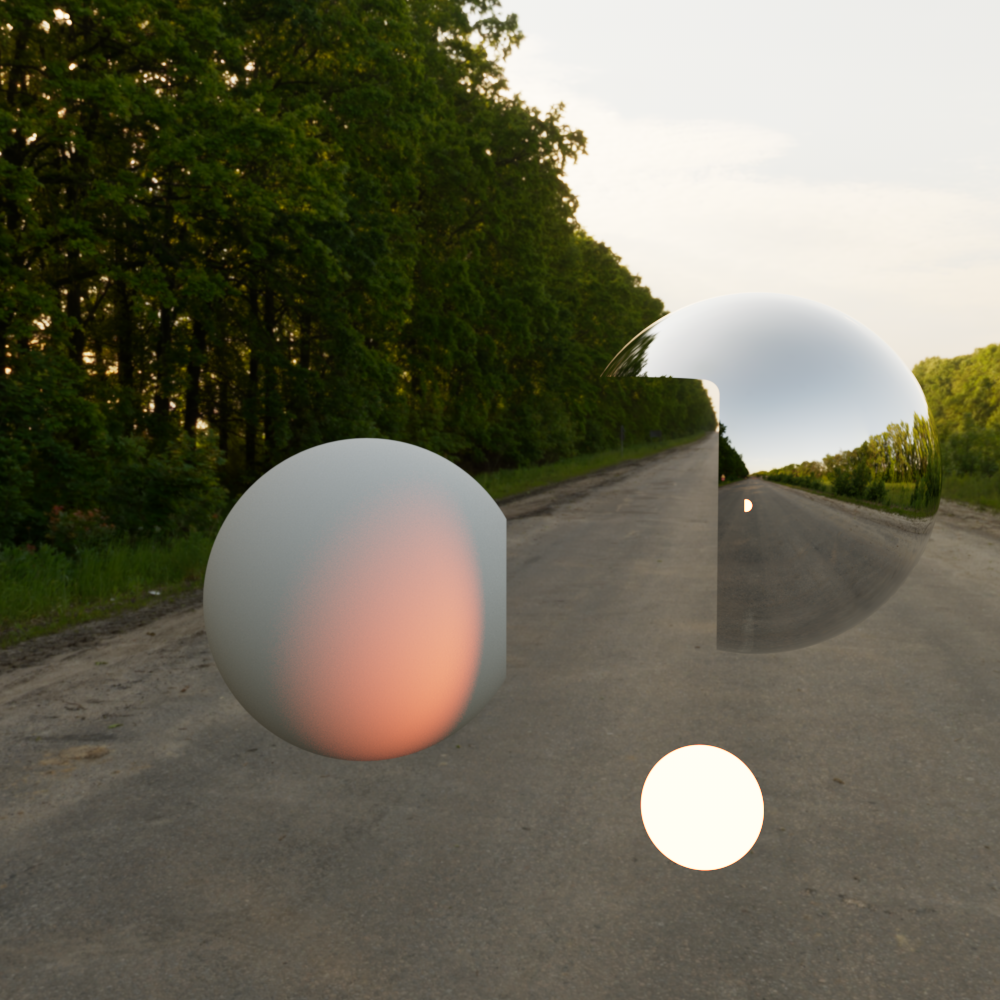
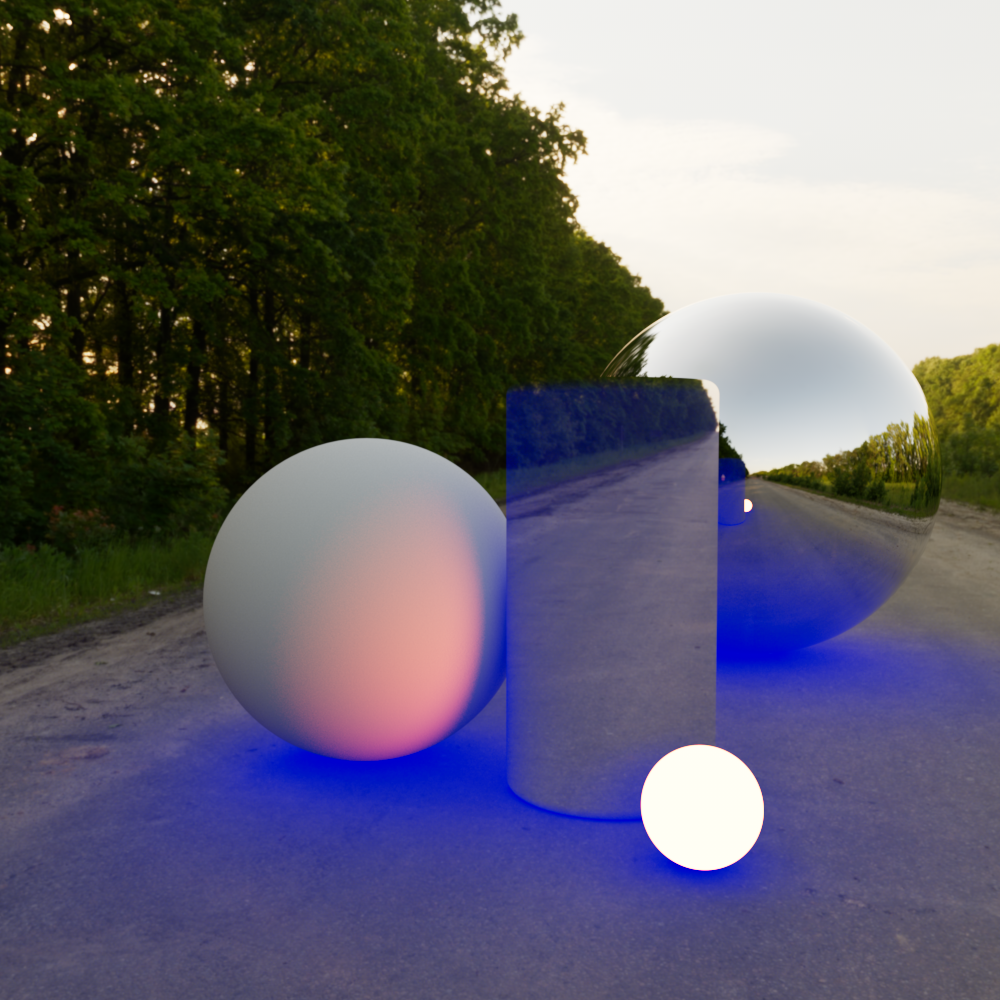
Enables the matte object override for secondary rays, such as reflections, refractions and GI.
By default only primary rays are overridden so the matte object can still be seen as normal in reflections, refractions and GI
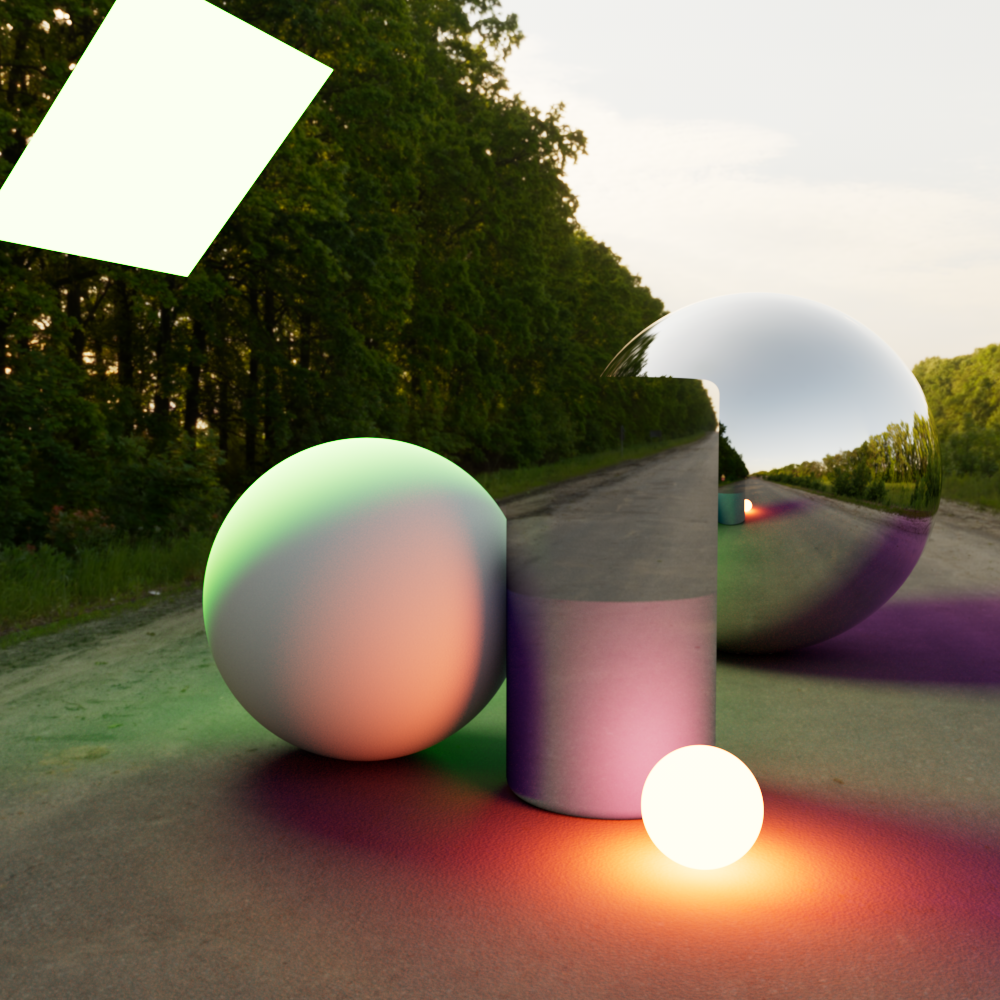
When apply to secondary rays is disabled the reflection of the matted ground plane is still visible in the reflective mirror ball and global illumination can still be seen bouncing from the matte cylinder and matte ground object onto the white diffuse sphere in the example image below.
|

|
|
|
| Apply to Secondary Rays: Disabled (default) | Enabled | Disabled (default) | Enabled |
Affected by Matte Lights
This enables the capture of diffuse illumination from matte lights on matte objects.
Requirements for illumination from matte lights:
-
Light parameters:
-
Matte shadow illuminator: Enabled in the Contribution section of a light
-
-
Matte object parameters:
-
Affected by Matte Lights: Enabled
-
Diffuse scale: Greater than 0
-
This option does not work with ray marched volumes.
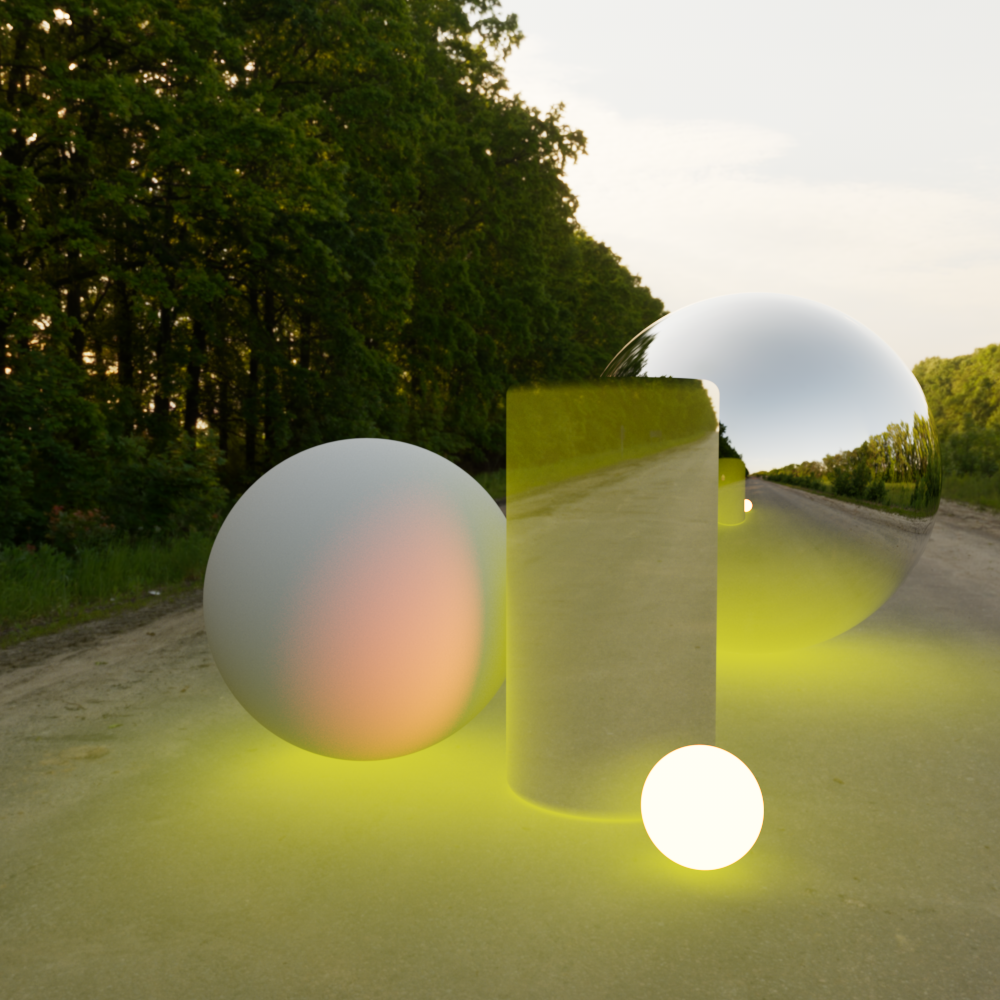
In the example images below a green light has been added to the scene with the matte shadow illuminator option enabled.
Notice that when affected by matte lights is disabled the matte light still affects the diffuse shading of the white sphere even though it does not affect the matte object itself. The green color cast that is visible on the matte object is due to the GI bounce lighting from the spheres onto the ground matte.
|
|
|
Affected by Matte Lights: Disabled (default) Light: Matte Shadow Illuminator: Enabled |
Enabled Enabled |
When a light does is not set as a matte shadow illuminator it will still cast shadows on a matte object but it will not contribute to diffuse lighting of a matte object.

|
|
|
Affected by Matte Lights: Disabled (default) Light: Matte Shadow Illuminator: Disabled |
Enabled Disabled |
Include in Puzzle Mattes
When enabled, matte objects will be included in puzzle matte AOVs.
When disabled, by default, matte objects will not be included in puzzle matte calculations.
|
|
| Include in Puzzle Mattes: Disabled (default) | Enabled |
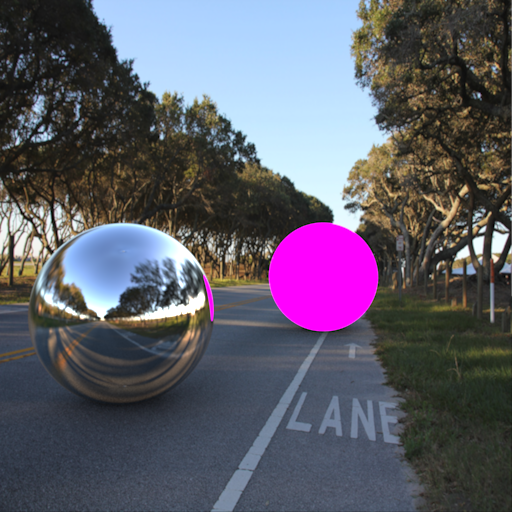
Alpha
This controls the alpha value of the matte object.
When an alpha value of 0 is used the matte object will be completely cut out of the background in the alpha channel.

|
|

|
| Alpha: 0 | 0.5 | 1 (default) |
Reflection Scale
Scales the amount of reflection visible from the underlying materials that have been overridden.
This option does not work with ray marched volumes.

|
|

|
| Reflection Scale: 0 (default) |
0.2 |
1 |
Refraction Scale
Scales the amount of refraction visible from the underlying materials that have been overridden.
This option does not work with ray marched volumes.

|
|
|
| Refraction Scale: 0 (default) | 0.5 | 1 |
Diffuse Scale
Scales the amount of diffuse/GI visible from the underlying materials that have been overridden.
This option does not work with ray marched volumes.

|
|
|
| Diffuse Scale: 0 (default) | 0.2 | 1 |
Shadow
Matte Shadow options do not work with ray marched volumes.
Enable
This turns the matte object into a 'shadow catcher.' For added realism, capturing CG shadows on a matte object is useful when compositing CG objects onto photographic back-plates.
|

|
| Shadow: Disabled (default) | Enabled |
Receive Shadows from Mattes
When this option is enabled, matte objects will receive shadows from other matte objects. When disabled matte objects will not receive shadows from matte objects.

|

|
| Receive Shadows from Mattes: Disabled | Enabled (default) |
Affects Alpha
When this option is enabled, the intensity of the matte shadows is stored in the alpha channel.
Matte alpha must be set to a value greater than 0 for shadow alpha to have any effect.

|
|

|
|
Shadow Affects Alpha: Disabled (default) Matte Alpha: 1 |
Enabled 1 |
Enabled 0 |
Color
This is the base color of the shadows. The darker the shadow, the more of this color is applied. For example, if the cast shadow is solid black, then it is effectively replaced with this color.

|
|
|
|
Shadow Color: Black (default) |
Blue |
Yellow |
Transparency
This scales the amount of shadow that can be received between 0 and 1, larger values make the shadow more transparent.
When shadow transparency is set to 1 the result is the same as having matte shadow catching disabled entirely.
|
|
|
|
| Shadow Transparency: 0 (default) | 0.5 | 1 |
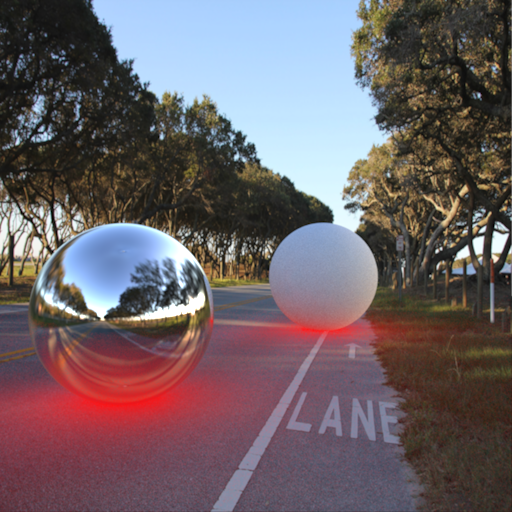
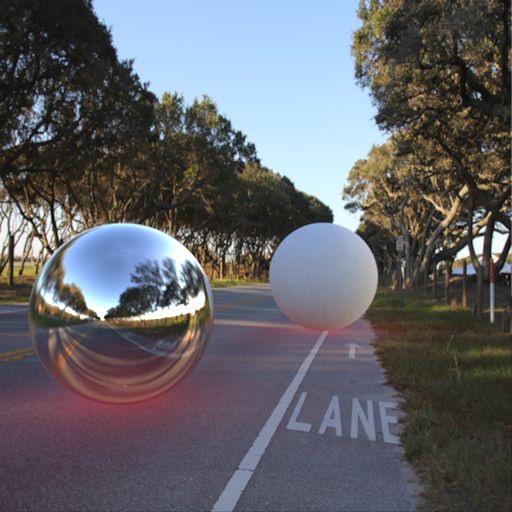
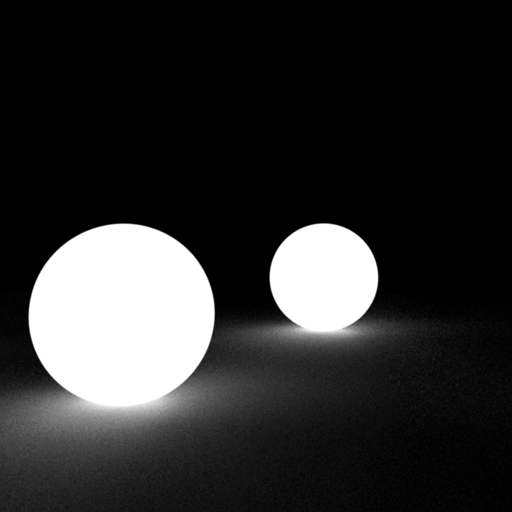
Matte Example
Below is an example of a simple scene containing two spheres, a reflective plane and a dome light with back-plate enabled for the background image.
|
|
|
|
| Without the Matte Parameters object properties. | With the default Matte Parameters options applied to the plane object, you now see the plane effectively disappear. The two spheres look like they are now floating in the scene. Furthermore, the reflection in the closest sphere of the matte plane still shows its original material. | Enabling the 'Shadow' and 'Apply to Secondary Rays' parameters make the spheres appear to be part of the back-plate photograph. |
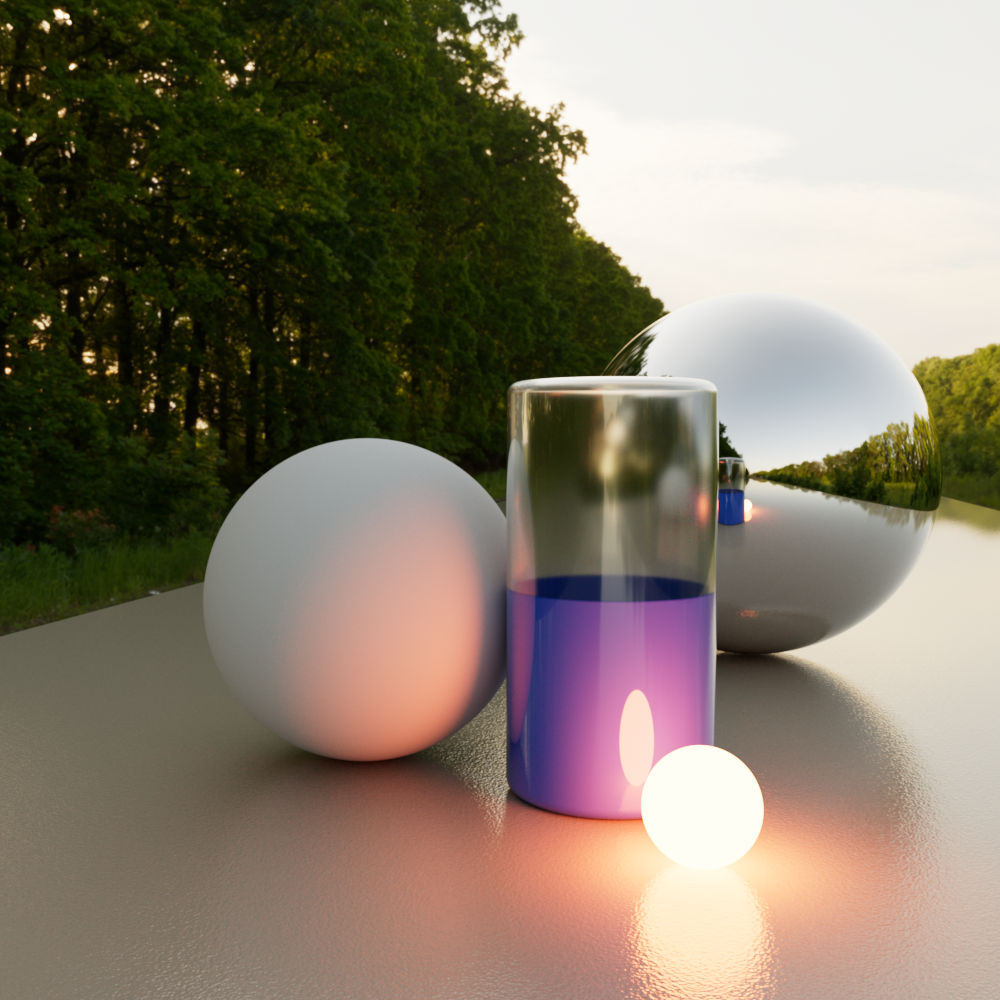
Below shows an example of how the Reflection and Diffuse Scales can be used to show some of the properties of the original material applied to the matte plane.
|
|
|
|
| The second sphere has been made emissive. Without the Matte Parameters property override, the plane surface material would be receiving diffuse GI. With the matte properties override, by default you will see no additional GI as pictured above. | Setting the 'Diffuse Scale' to a value other than 0 will allow the diffuse GI of the underlying material through. Here we use a value of 0.5 to demonstrate. | Recall that the original plane material is also reflective. Setting the 'Reflection Scale' to 0.5 here now shows some of the underlying material's reflection. |
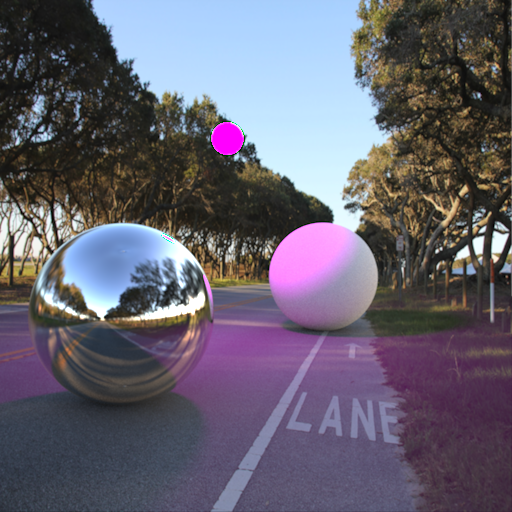
Below shows an example of adding a purple diffuse area light that will be configured to illuminate the matte plane.
|
|
|
|
| Here a spherical area light affects the two spheres in the scene, and casts matte shadows on the matte plane. | Enabling the 'Matte Shadow Illuminator' option on the light turns off its matte shadow casting capability, because the matte surface is expected to be actually illuminated by this light. | Enabling the 'Affected by Matte Lights', with a 'Diffuse Scale' value of 0.5 now allows the matte surface to be illuminated by the matte shadow illuminator light. |
Below shows examples of the shadow options.
|
|
|
|
| Here we've made the shadow 'Color' red (1.0, 0.0, 0.0) | And set the 'Transparency' to 0.75, to make the shadows more 'transparent'. Note that setting the 'Transparency' to 1.0 would effectively disable matte shadows altogether. | When 'Affects Alpha' is checked, this is what the alpha channel will look like. |