Dome Light
Introduction
The Redshift Dome Light is an infinite, texture-mapped area light. Using HDR images you can achieve high-quality lighting results that would otherwise require several lights. Since a single dome light can reproduce the lighting of several distant lights, it can help with performance too. Since an HDR image can originate from a real-world environment, the dome light is an important tool to match the lighting of cg elements with live-action elements. Ideally, High Dynamic Range (HDR) textures in OpenEXR format should be used because they can capture a wide range of intensities.
Redshift has a maximum limit of 4 dome lights per scene.
Dome lights cannot be combined with environment shaders. If the scene or any material uses environment shaders, the dome light will override them.
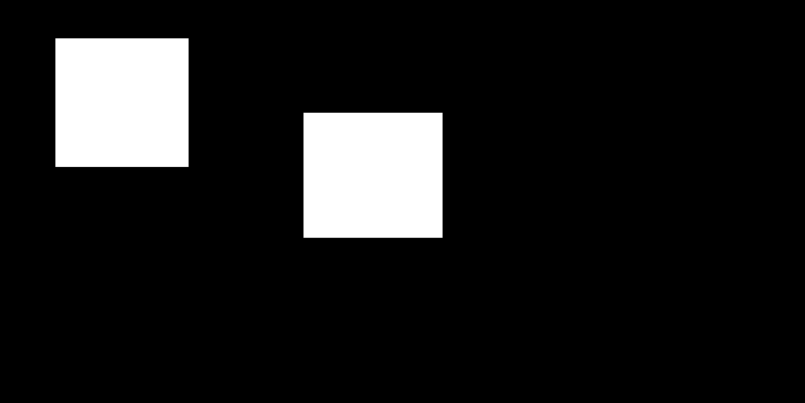
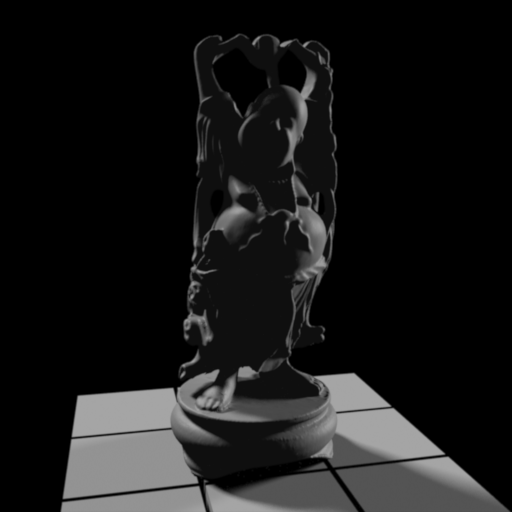
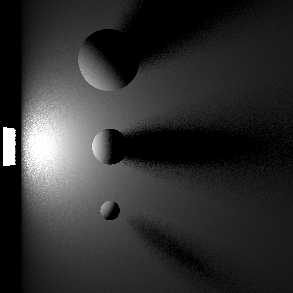
The intensity of color values in an HDR texture as well as the shape of high intensity areas have a direct impact on the intensity and shadow softness of the lighting in the scene. In a sense, a dome light's texture behaves like an area light: very small, very bright spots on a texture map will produce sharp shadows while large spots will produce softer shadows.

|
|
|
The small white squares create sharp shadows |
The larger white squares create soft shadows |
|

|
Global Illumination helps Redshift catch dome lighting more efficiently, particularly with indoor lighting situations. If you're getting dome light noise please try enabling GI before increasing dome light samples.
|
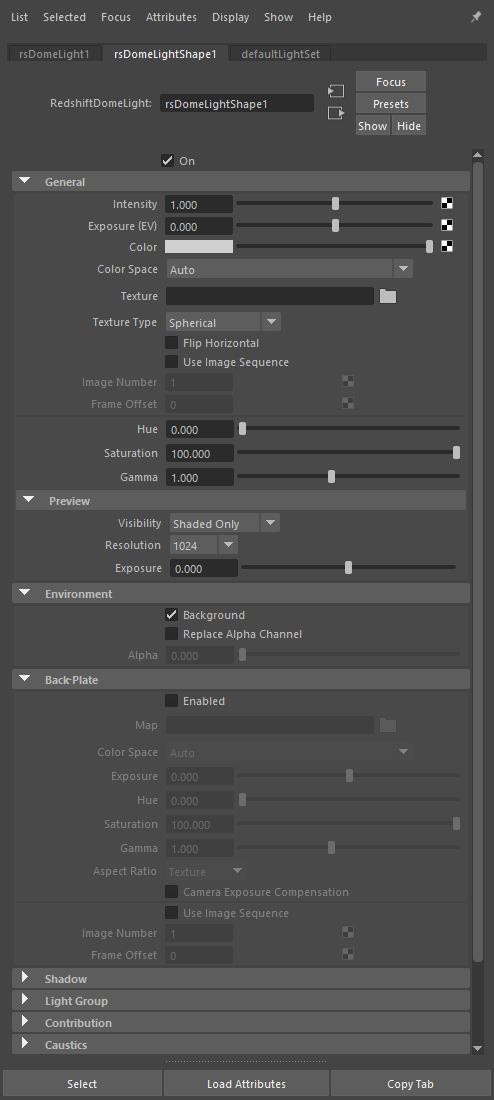
General
Intensity
Controls the overall intensity of the dome light.
Exposure
This setting increases or decreases the intensity of the light in "stops". Therefore, a value of one means "twice as bright", a value of two means "four times as bright" and so on. A value of -1 means "half as bright", a value of -2 means "quarter bright" and so on.

|
|

|
|
Exposure: 0 |
1 |
-1 |
Map Source
Controls the texture mode for the dome light from the following options:
- Texture: (Default) Uses the map loaded in the "Texture" slot
- Shader: Uses a shader connected to the "Map Shader" slot
Map Shader
Connect a shader here to be used as the dome light texture. This supports procedural shaders like the Ramp, Tiles, and OSL shaders.
The Maxon Noise does not currently work properly with the Dome Light.
|
Horizontal ramp |
RS Tiles |
Color
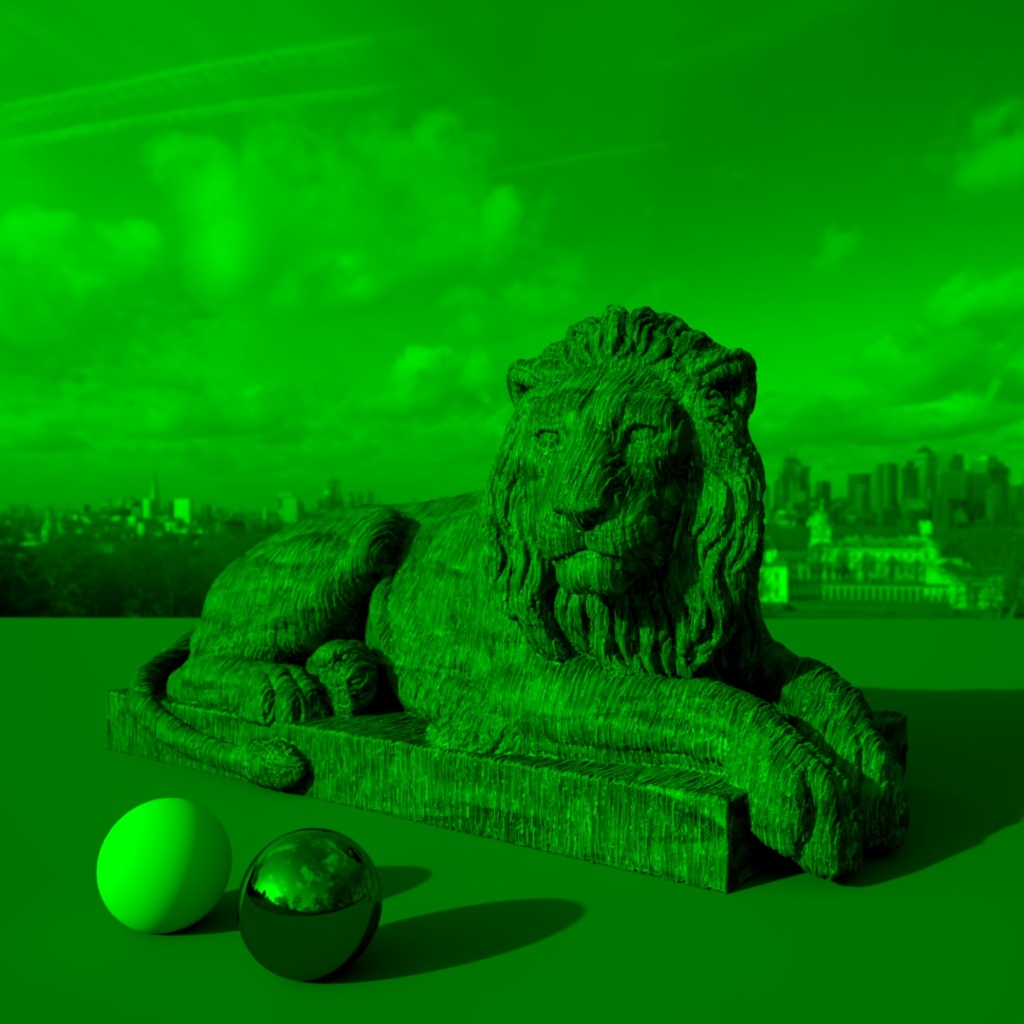
This setting lets you apply a color tint to your dome map. The default of white results in an unaltered dome map.
The closer your tint color is to white the less affected your light color will be. For a mild color tint be sure to use a desaturated color, a fully saturated color can fully tint all the colors in the scene as pictured below in the saturated green example.
|
|
|
|
|
Tint Color:
|
|
|


Texture
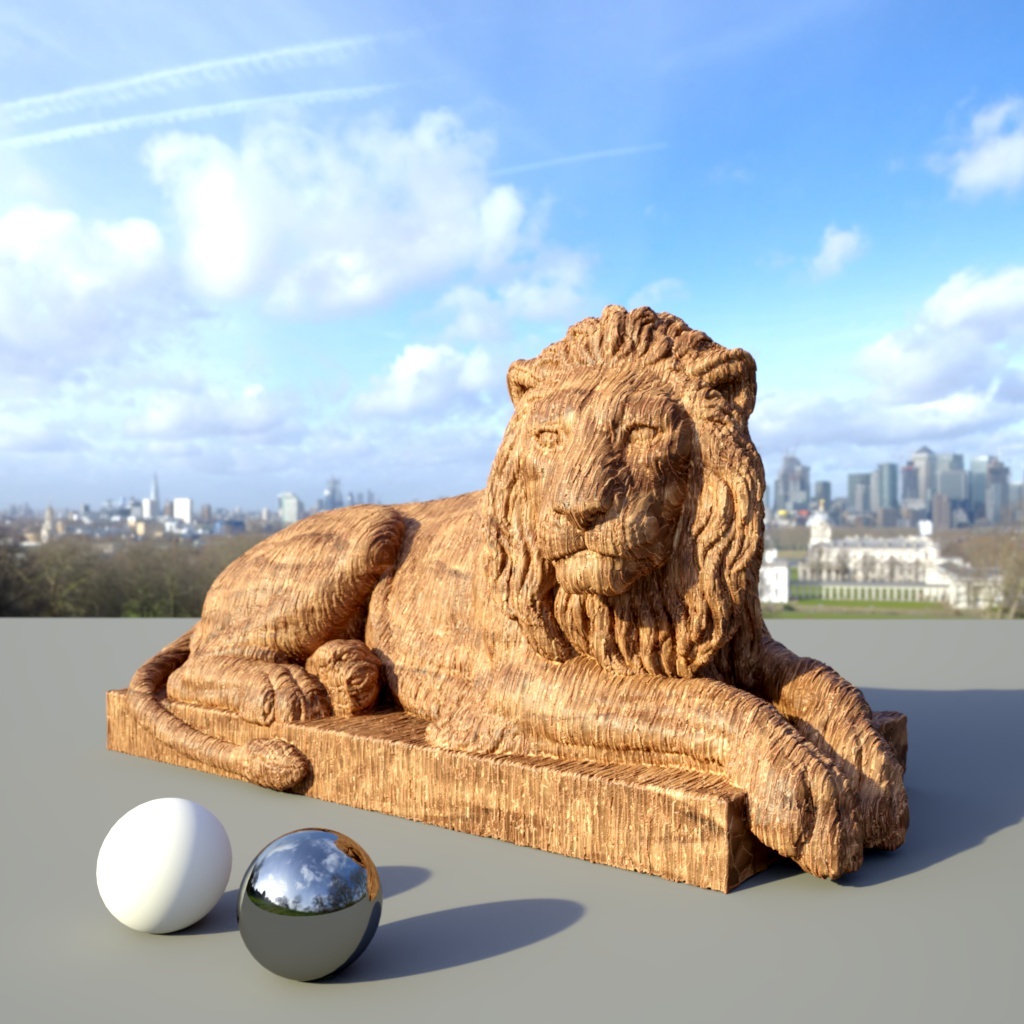
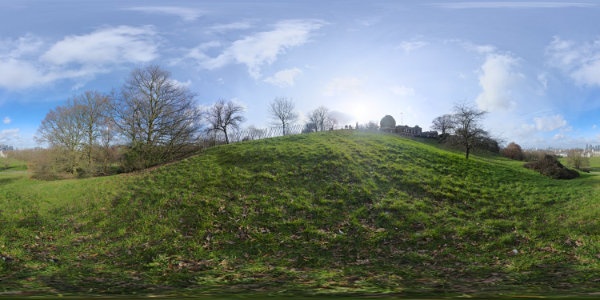
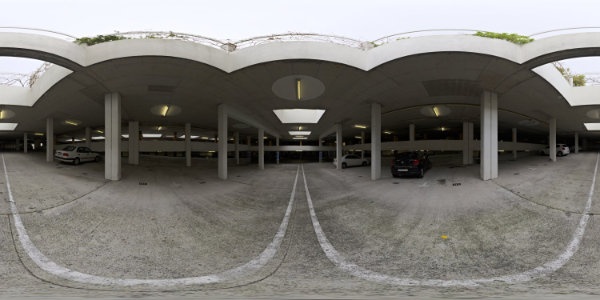
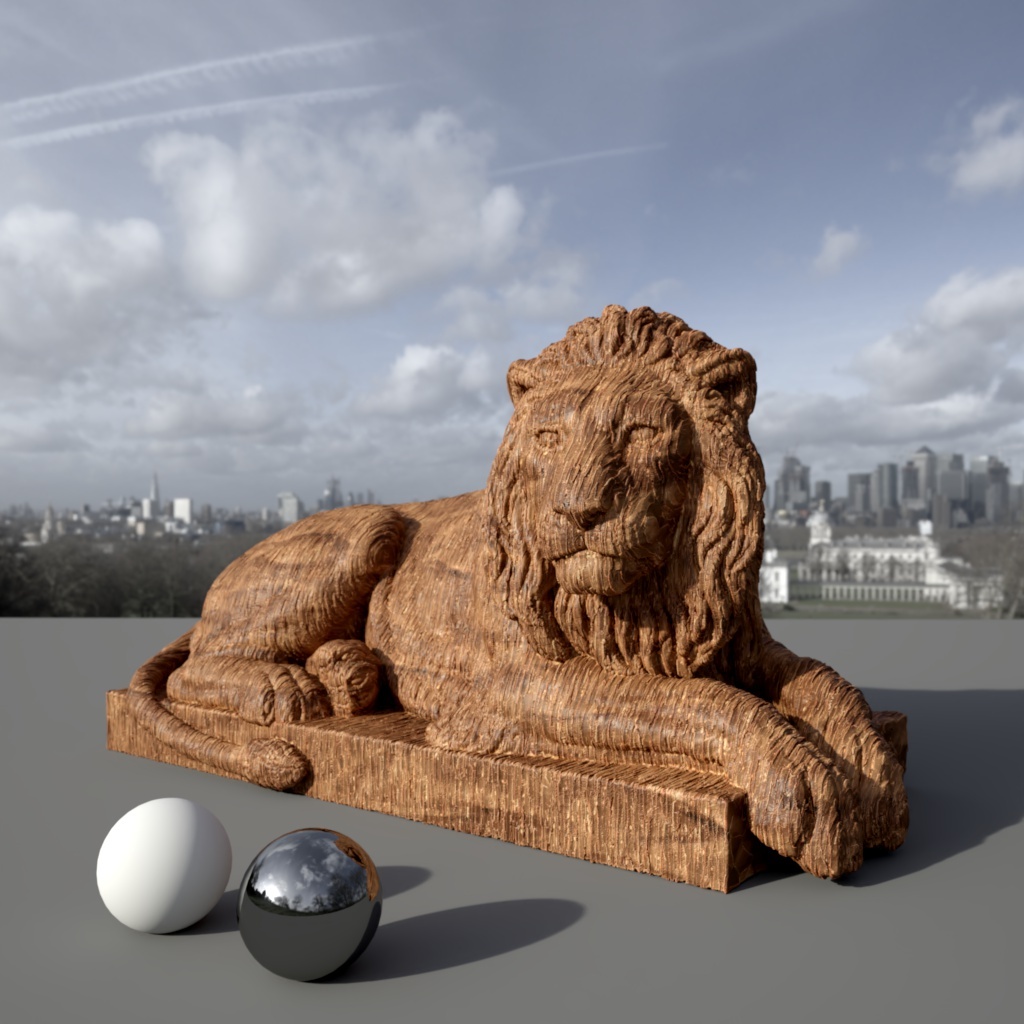
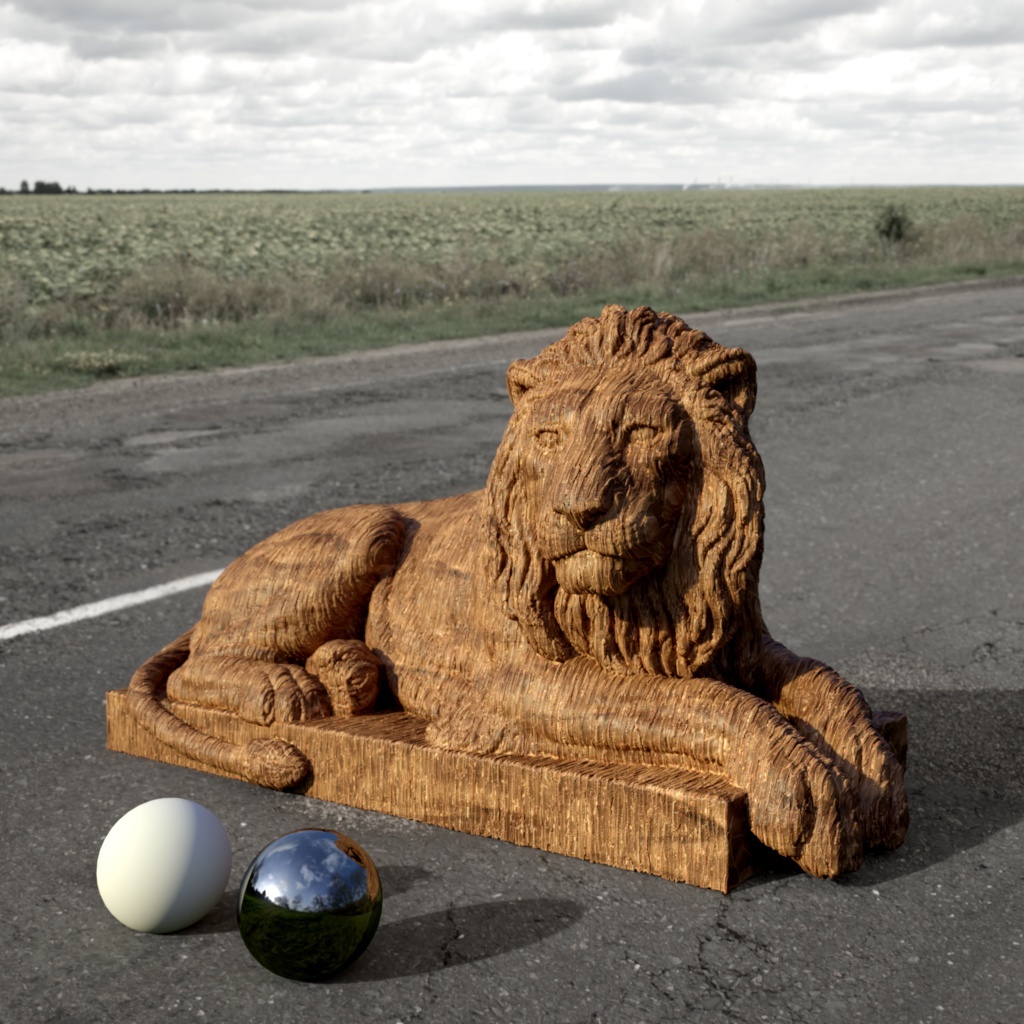
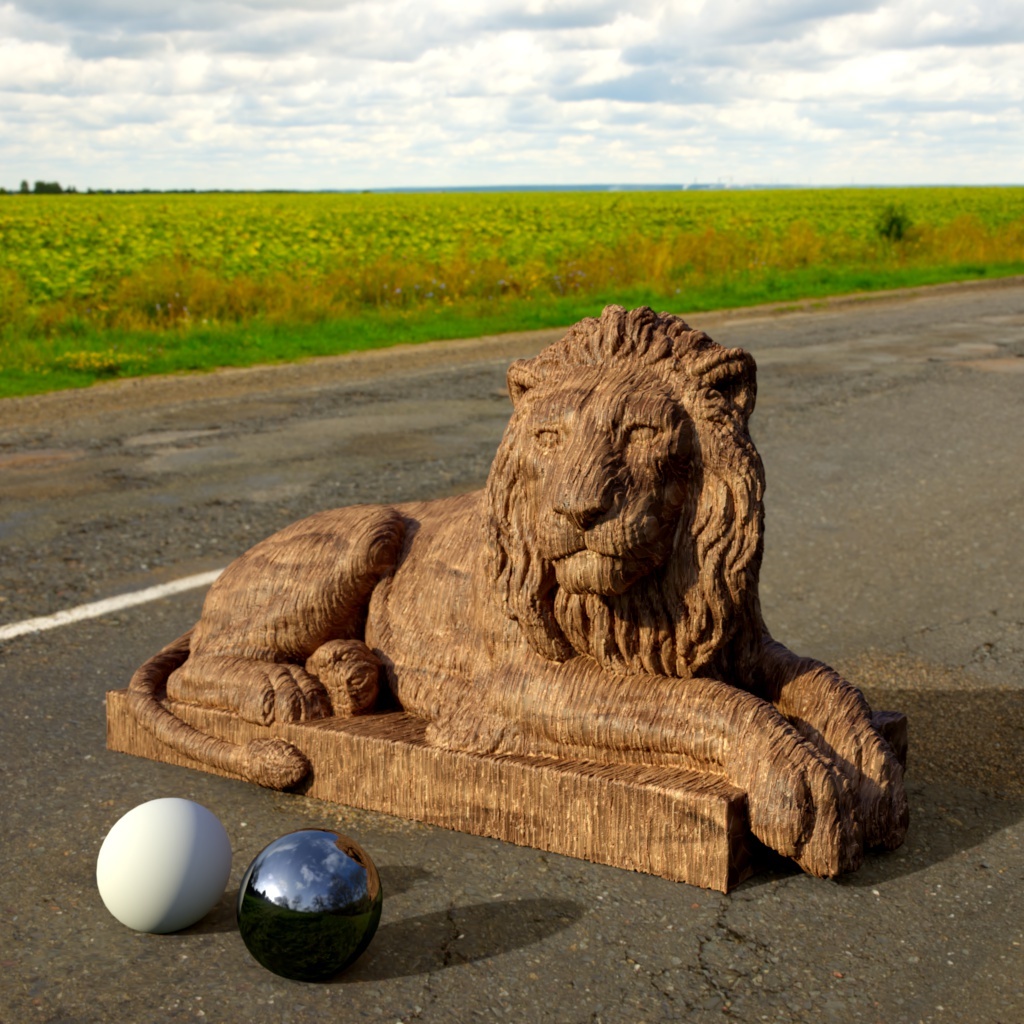
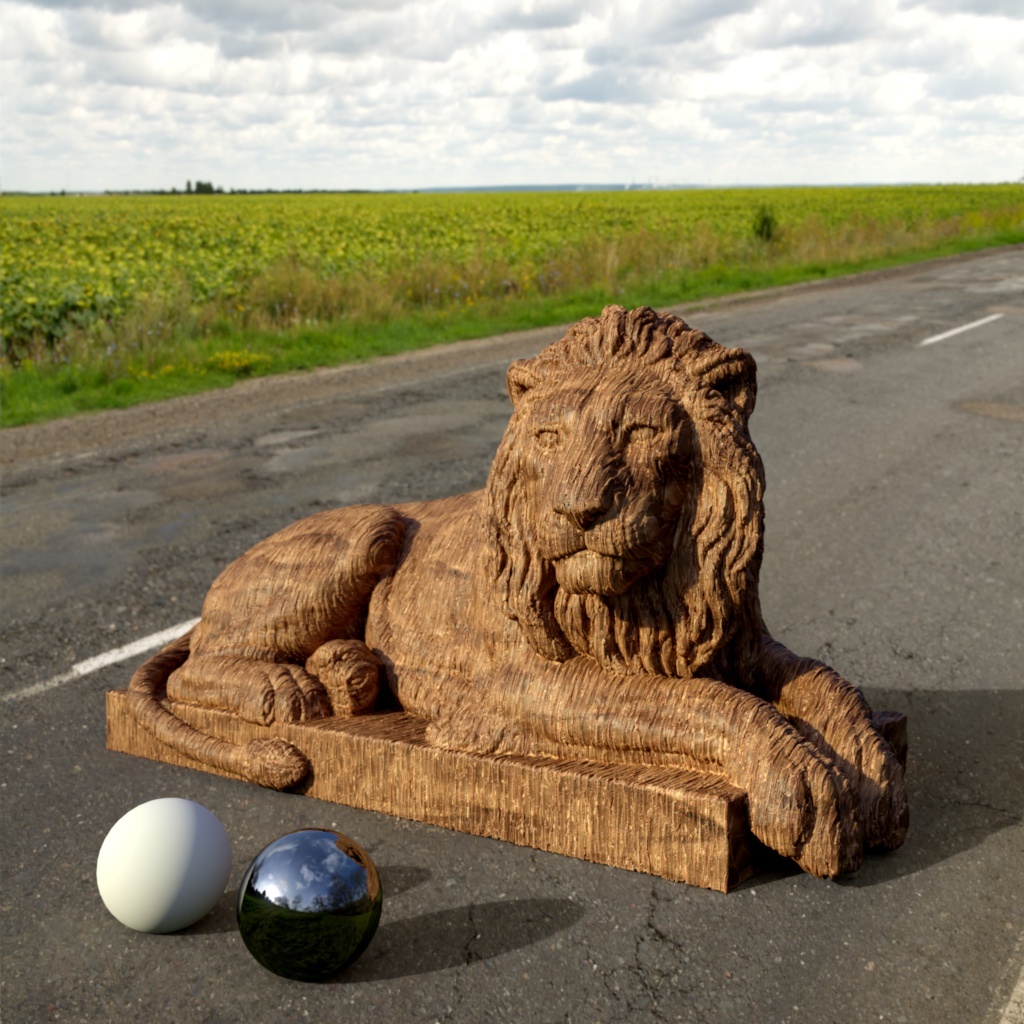
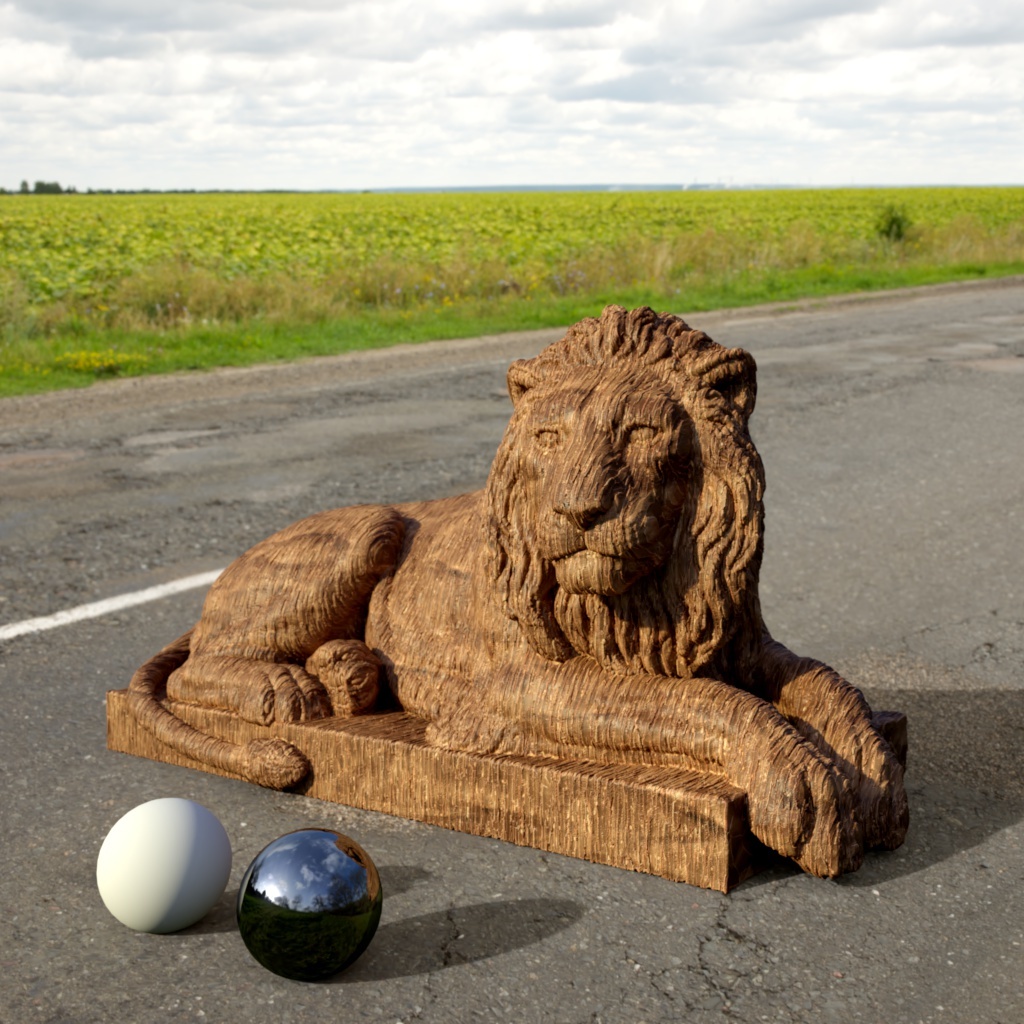
Specifies the image that will be used as a light source.
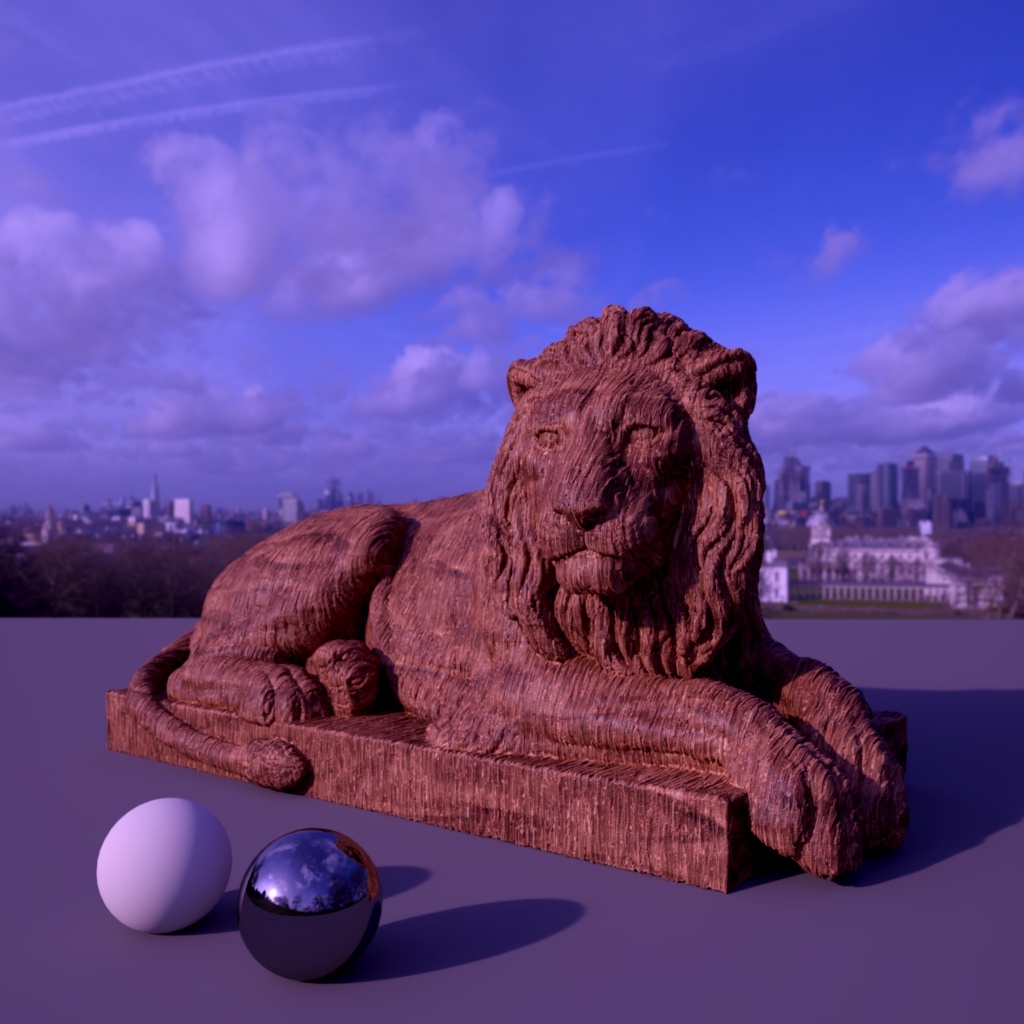
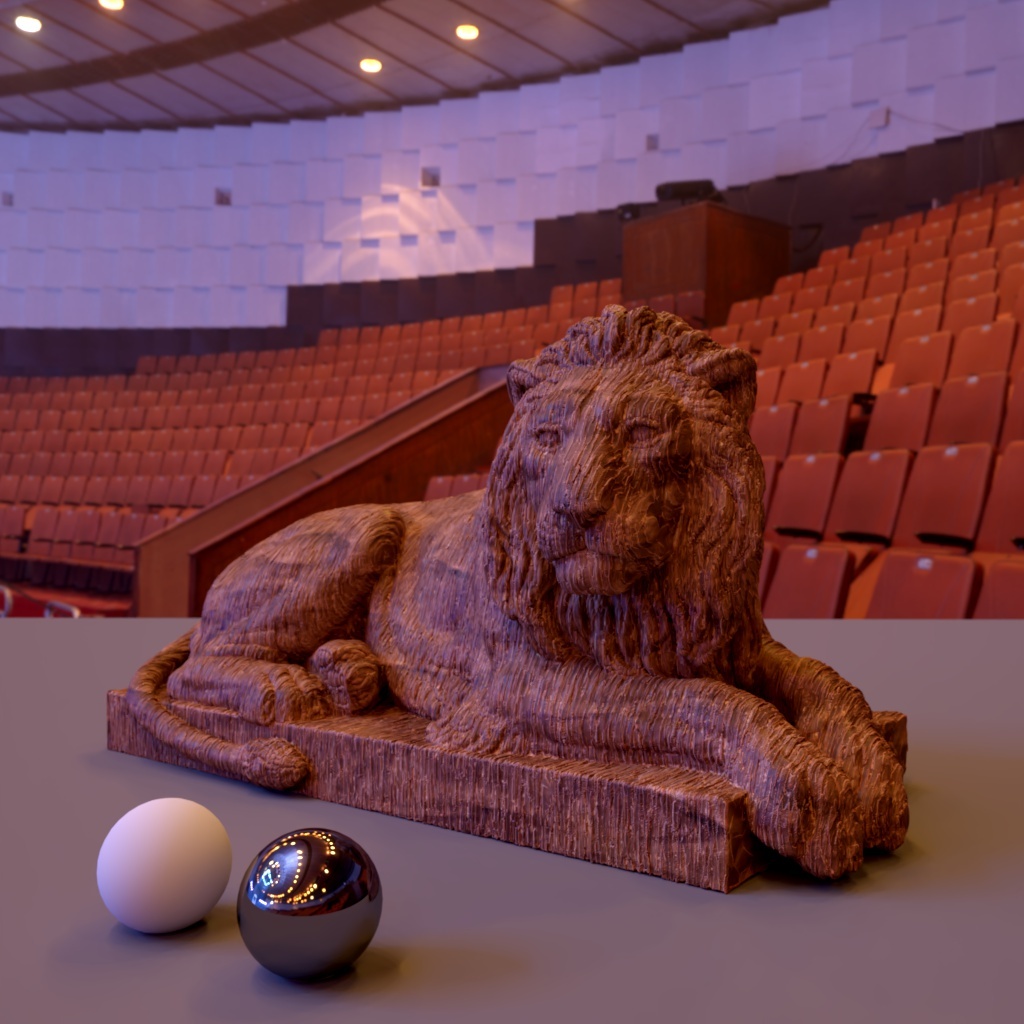
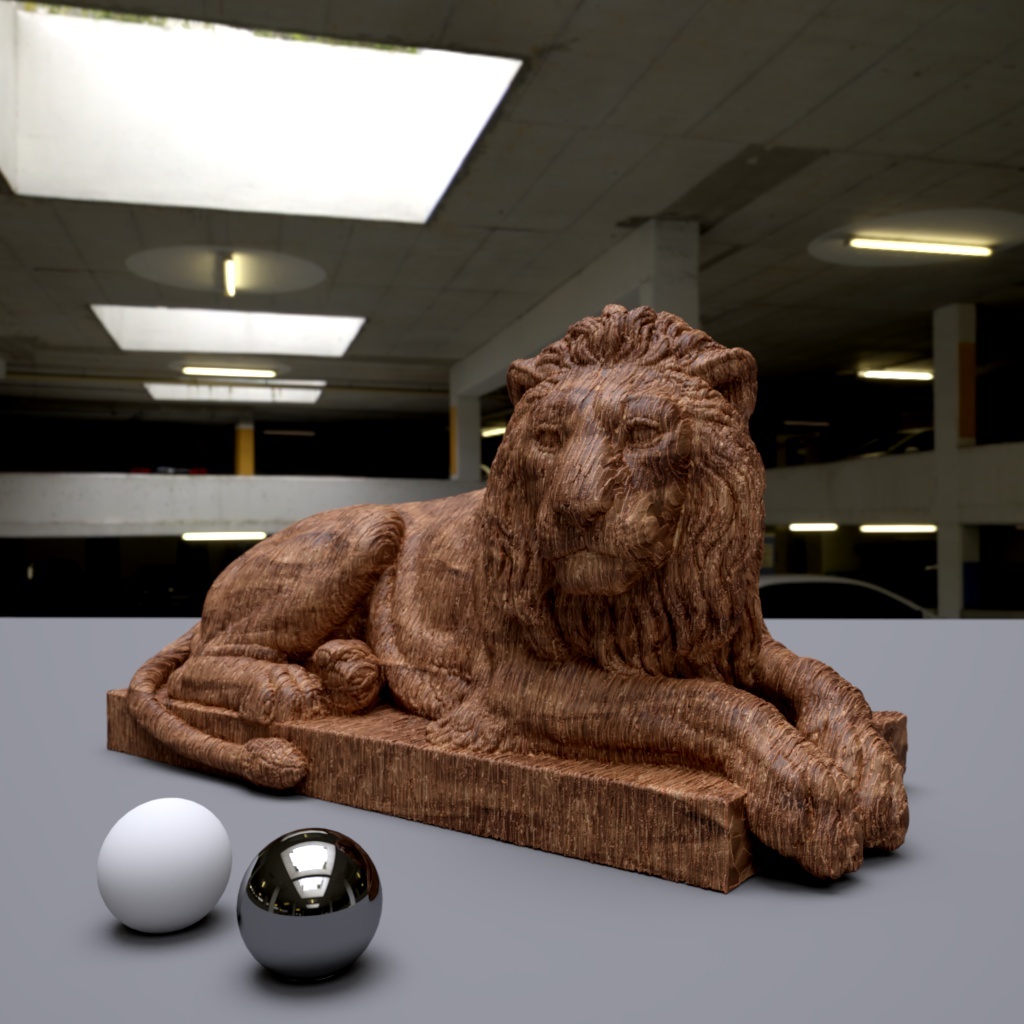
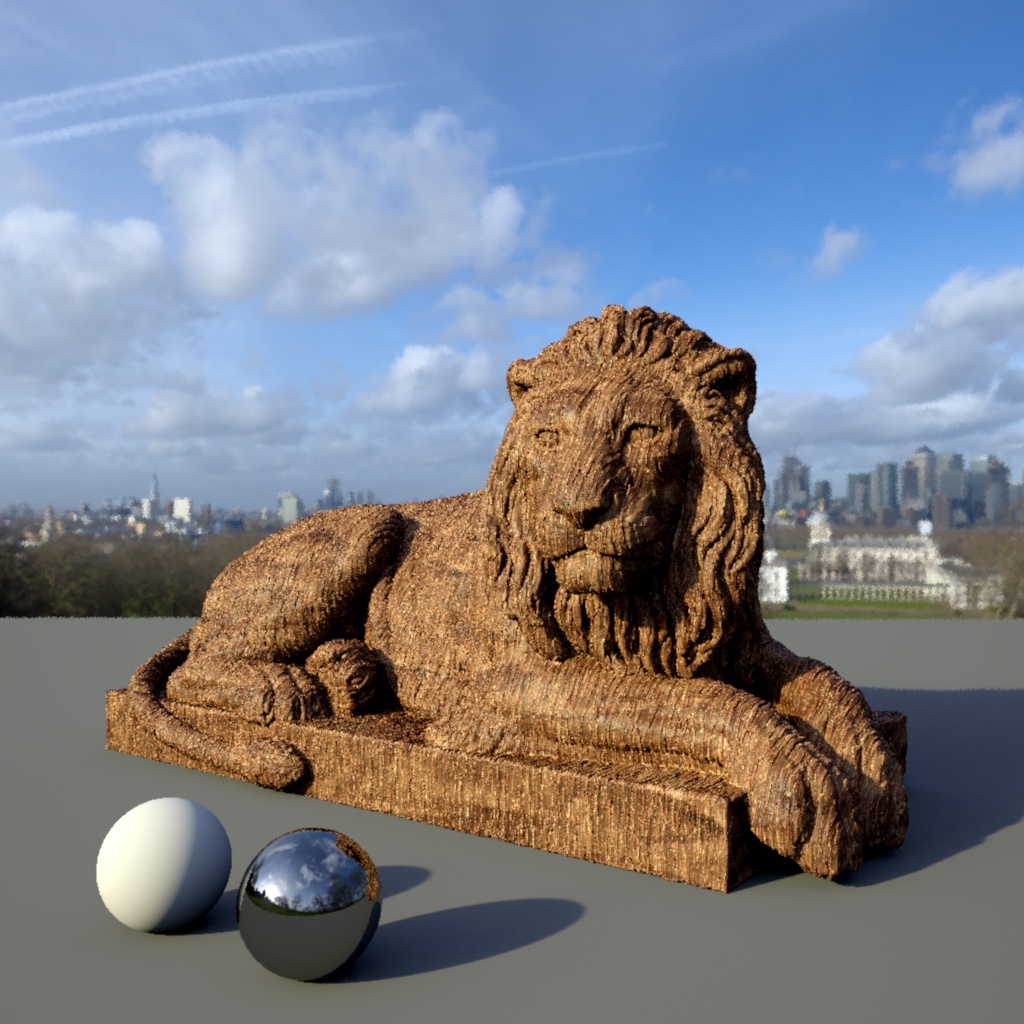
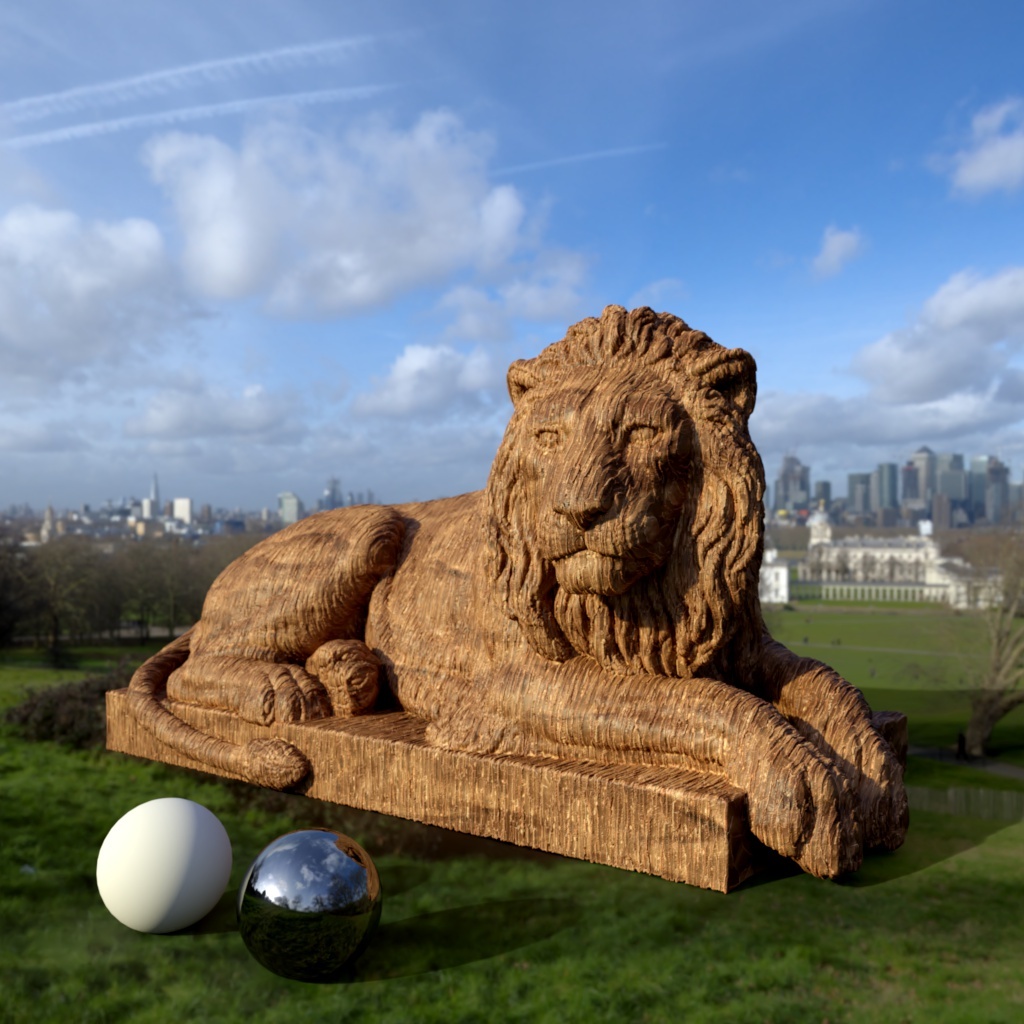
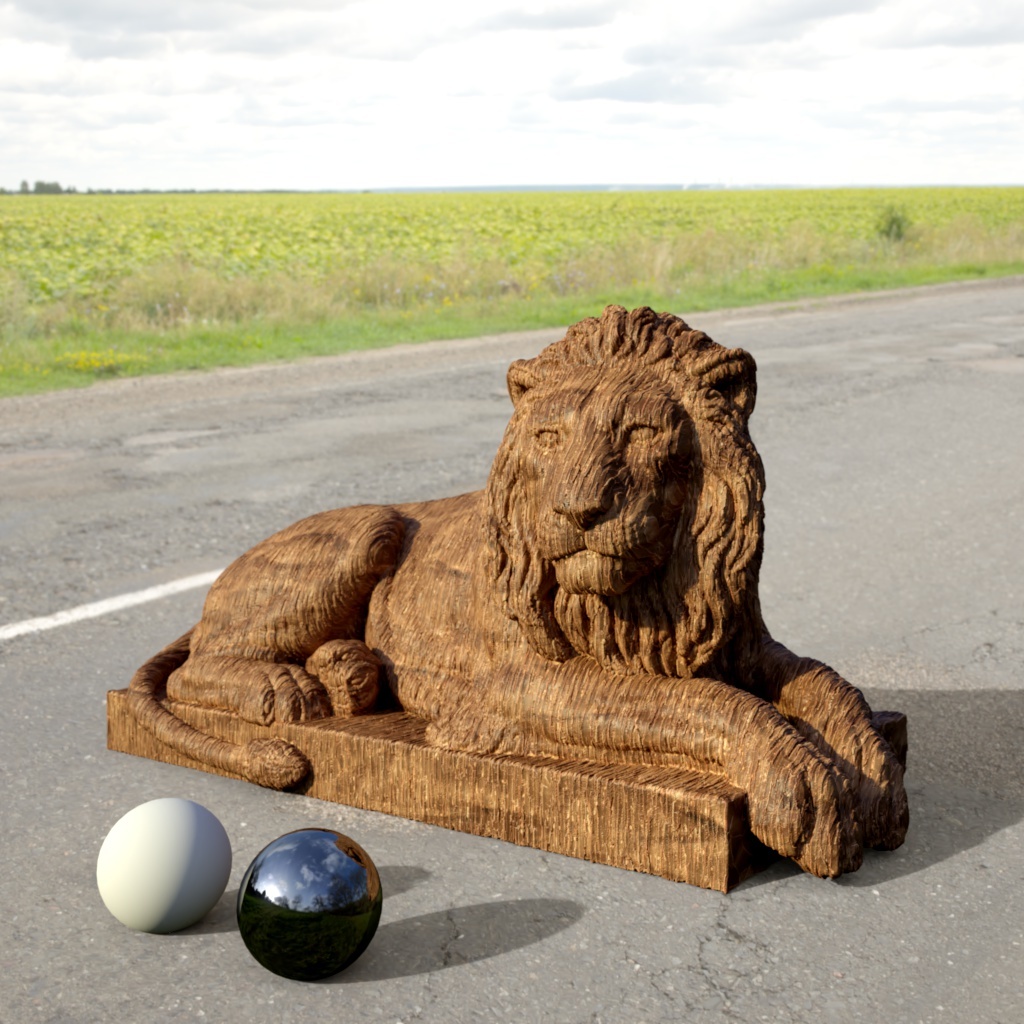
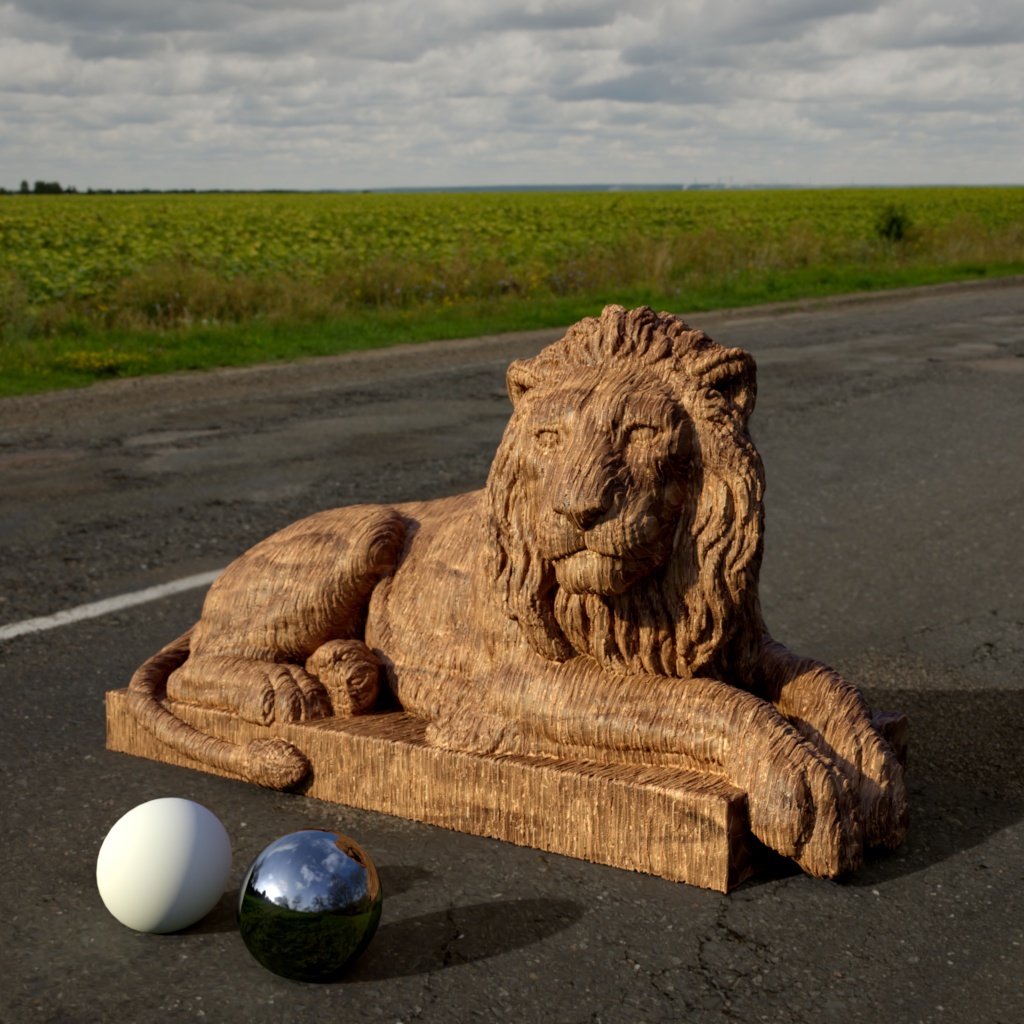
Below you can see the same scene lit with three different HDRI dome maps with "Enable Background" turned on.
|
|
|
|
| Dome Map: Greenwich Park | Circus Arena | Skylit Garage |
|

|
|
Example images use HDRI's from PolyHaven |
||
Texture Type
Specifies the type of image that is used as the light source:
- Sphere – sampled as a longitude/latitude full sphere map
- Hemisphere – sampled as a longitude/latitude hemisphere map
- MirrorBall – sampled as a mirror ball map
- Angular – sampled as an angular map
Flip Horizontal
Some renderers use a different convention for how a dome light should wrap around the virtual world in the X axis. The 'flip horizontal' option, as the name suggests, flips the dome light in the X axis to help match the look of a different renderer.
Rotate on Horizon
Rotates the dome light.
Hue
This setting shifts the color hues of the dome map.
|
|

|

|
|
Hue: 0 |
60 |
180 |
Saturation
This setting sets the color saturation of the dome map. Values below 100 are desaturated and values above 100 are oversaturated.
|
|
|

|
|
Saturation: 100 |
30 |
170 |
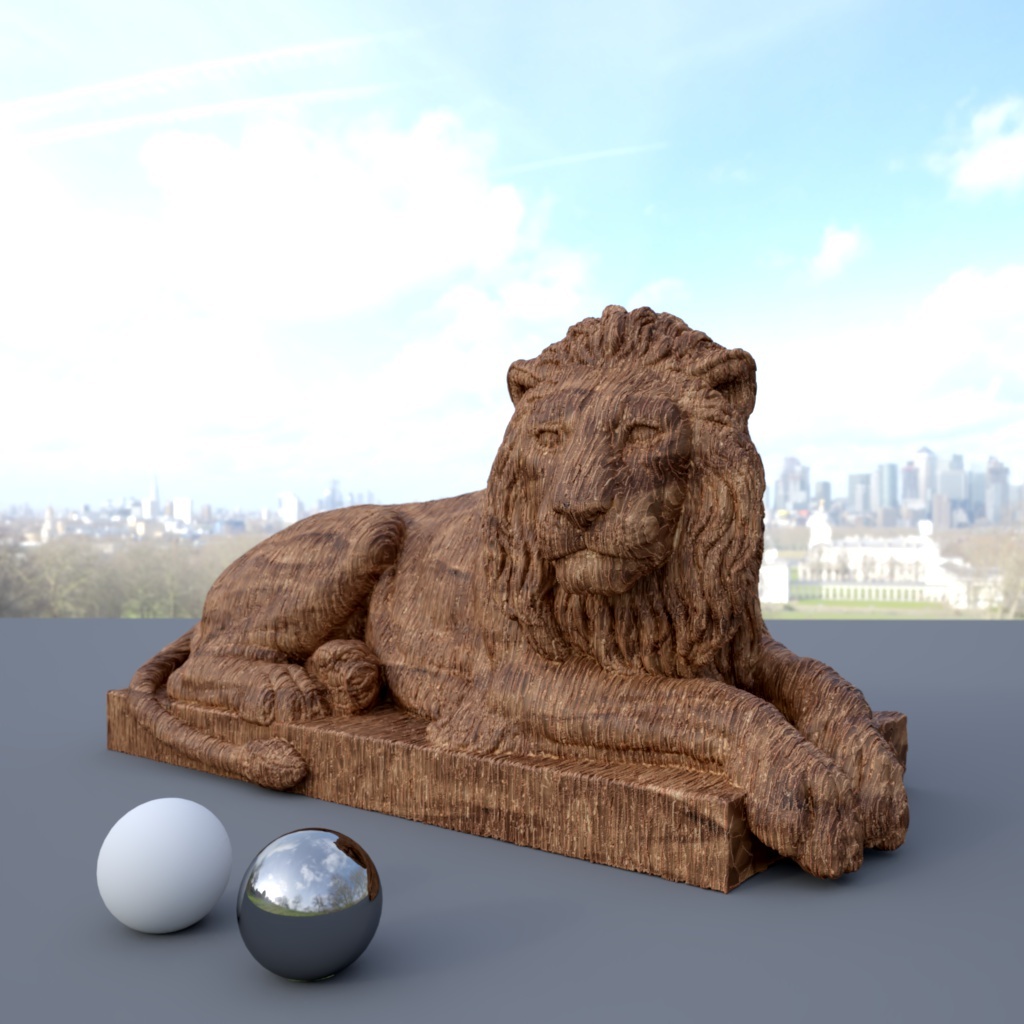
Gamma
This setting sets the gamma value for your dome map. Higher values can help increase contrast in the dome map while lower values reduce contrast. Depending on your dome map adjusting gamma can help to adjust your scenes lighting when you want sharper or softer shadows.
In the examples below the exposure has been adjusted slightly to counteract the gamma change.
|
|
|

|
|
Gamma: 1.0 |
0.5 |
1.2 |
Samples
Specifies the number of ray samples to use for the area light. More samples will produce smoother lighting and shadows. Generally, the larger and more intense an area light is, the more samples it needs to produce noise-free results.
In the examples below unified min and max samples have been set to 1 / 1 and global illumination has been disabled in order to better isolate the effect of the samples count for a dome light.

|

|
|
|
Samples: 8 |
64 |
1024 |
Preview
Preview Visibility
This option controls whether or not the dome map is visible in the viewport.
- On - The dome map preview is visible in the viewport.
- Off - The dome map preview is not visible in the viewport.
- Shaded Only - The dome map preview is only visible in the viewport when in shaded view mode.
Preview Resolution
Controls how clearly the dome map preview is rendered in the viewport.
Exposure Offset
Allows you to adjust the exposure of the dome map preview in the viewport for better visibility without affecting the actual render exposure.
Environment
In Redshift version 2025.3 and after, the background visibility of a dome light is controlled exclusively by the Camera slider in the ray contribution section.
Replace Alpha Channel
When enabled this allows you to override the texture's alpha values, this may be necessary if they are either non-existent or not correct.
Typically, for environment textures, the alpha value should always be 0.0, if you plan on compositing environment layers.
Alpha
This is the alpha value that will be used instead of the texture alpha values when "Alpha Channel Replace" is enabled.
Back-Plate
Enabled
When enabled you can render a custom back-plate texture as your scene background instead of the dome map.
Enable Background must be enabled in order to render with a back-plate.
In the examples below the grey floor object has been rendered as a matte object to better demonstrate the uses of a back-plate. In the first image the you can see only the dome map as the background however once the back-plate is enabled it completely replaces it. Note that you can still see the reflections of the dome map in the reflective ball, not reflections of the back-plate.
|

|

|
|
Back-Plate: Disabled |
Enabled |
Back-plate from Poly Haven |
Map
The texture path for the back-plate.
sRGB
Enabling this setting applies an sRGB gamma curve to your back-plate.
Gamma
This sets the gamma value for your back-plate.
|
|
|

|
|
Gamma: 1.0 |
0.5 |
1.2 |
Exposure
This setting increases or decreases the intensity of the light in "stops" for your back-plate. Therefore, a value of one means "twice as bright", a value of two means "four times as bright" and so on. A value of -1 means "half as bright", a value of -2 means "quarter bright" and so on.
|
|

|
|
|
Exposure: 0.0 |
1.0 |
-1.0 |
Hue
This setting shifts the color hues of the back-plate.
|
|

|

|
|
Hue: 0 |
60 |
180 |
Saturation
This setting sets the color saturation of the back-plate. Values below 100 are desaturated and values above 100 are oversaturated.
|
|
|
|
|
Saturation: 100 |
30 |
170 |
Aspect Ratio
This option allows you to set the aspect ratio of the back-plate texture.
- Texture - Uses the original aspect ratio of the back-plate texture, use this preserve the look of the back-plate texture.
- Render - Uses the aspect ratio of the current render settings, use this option to squeeze the entire back-plate texture into the frame.
In the example below you can see how in the render aspect ratio version all of the back-plate texture is squeezed into the frame horizontally.
|
|
|
|
Aspect Ration: Texture |
Render |
|
|
|
| Back-plate from Poly Haven | |
Apply Camera Exposure Compensation
When enabled exposure compensation is applied to your back-plate.
|
|
|
|
Apply Camera Exposure Compensation: Enabled |
Disabled |
Common Light Parameters
Shadow

|
Cast Shadow
Enable or disable shadow casting.
|
|
| Cast Shadows: Enabled (default) | Disabled |
Transparency
Specifies the transparency of the shadows cast by the light.
A value of 0, by default, results in a completely opaque shadow up to a value of 1 where the shadow is completely transparent.
| Shadow Transparency: 0 - 1 |
Softness
Specifies edge softness for non-area light shadows. A value of 0 means no softness and will yield sharp shadows. Values above 0 will produce softer shadow edges.
Only available for Point, Spot, Directional, and IES lights. (Lights with no area)
The shadow softness of an Area light is controlled by the light's size itself.
| Shadow Softness: 0 - 1 |
Softness Affects Gobo
When enabled, Shadow Softness affects the sharpness of the projection when a texture is used as the light color. When Shadow Softness is high then the texture projection is blurrier. When disabled, Shadow Softness has no effect on the texture.
Softness Affects Gobo is only available for non-Area Physical lights and IES lights.
|
|
| Softness Affects Gobo: Disabled (default) | Enabled |
Light Group

|
AOV Light Group
This is the name of the AOV light group this light is associated with.
For more information on Light Groups and how to set them up and use them please see here.
Contribution

|
Matte Shadow Illuminator
Specifies whether the light can illuminate 'Matte Shadow' surfaces (see Matte Shadow Catcher shader).
Matte Shadow Illuminator is only available for Redshift Physical and Redshift IES lights.
Affected by Refraction
This option allows you to control how specular reflections are affected by rough/refractive objects that block the light and whether or not the light rays bend as they pass through. Prior to 2.6.10 this option was not available and the light rays would never bend. Specular ray bending is an important effect for rendering realistic-looking glass and lenses.
- Never - Specular rays do not bend. This is the legacy lighting behavior.
- Auto - Specular rays bend through refractions if they are not too rough and bias towards not bending if they are rough.
- Always - Specular rays bend through refractions regardless of ray roughness.
This effect is available only for area lights and dome lights. Spot and IES lights can not be seen through bent rays because their source is infinitesimally small.
Care must be taken when using 'Always', as this can disable Multiple Importance Sampling, which is a crucial technique for getting clean renders for rough surfaces.
Light/Shadow linking is not available for specular rays that have been bent.
GI Max Trace Depth
This option lets you override the maximum trace depth for GI rays on a per-light basis.
Light Sampling Parameters
The following parameters are only visible and relevant when Automatic Sampling is disabled.

|
Light Samples
Specifies the number of ray samples to use for the light. Higher sample values will produce smoother lighting and shadows. Generally, the larger and more intense a light is, the more samples it needs to produce noise-free results.
Sampling values can range anywhere from smaller numbers like 32 to 4096 or higher all depending on your scene and lights. Values like 4096 or higher will not necessarily lead to the kind of slow-down you may be used to in other renders so don't hesitate to prioritize image quality and push this value until your scene looks smooth enough. For more information, see the Unified Sampling page.
|

|

|
| Samples: 2 | 16 | 128 |
Volume Samples
Specifies the number of ray samples for the light to use for volume shading. Higher sample values will result in less volume noise.
Contribution Scale Parameters
|
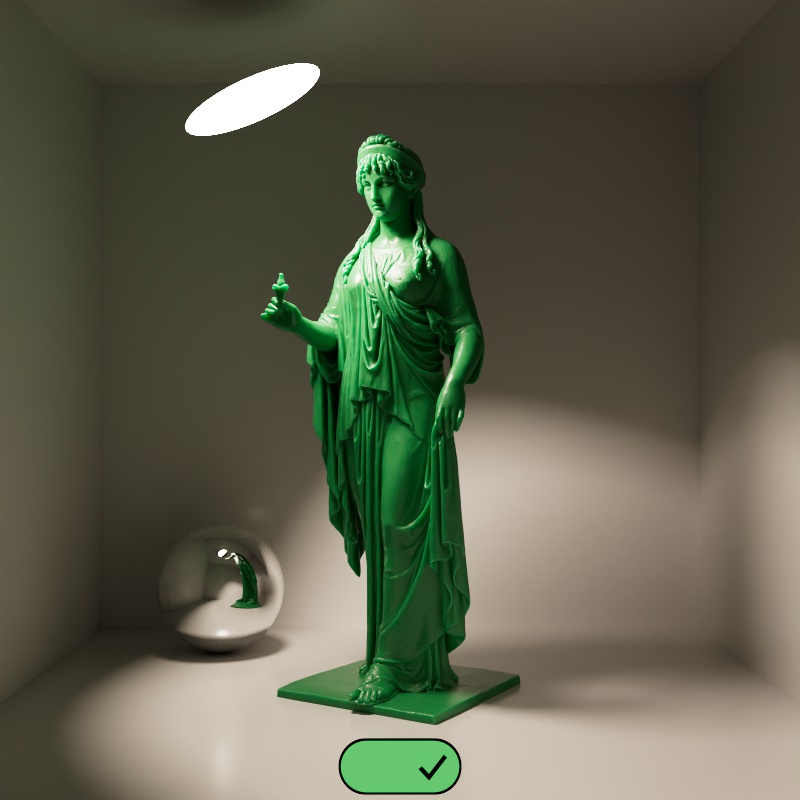
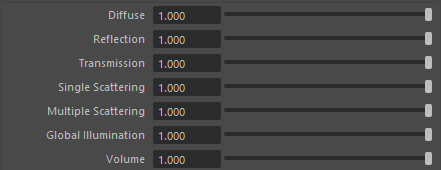
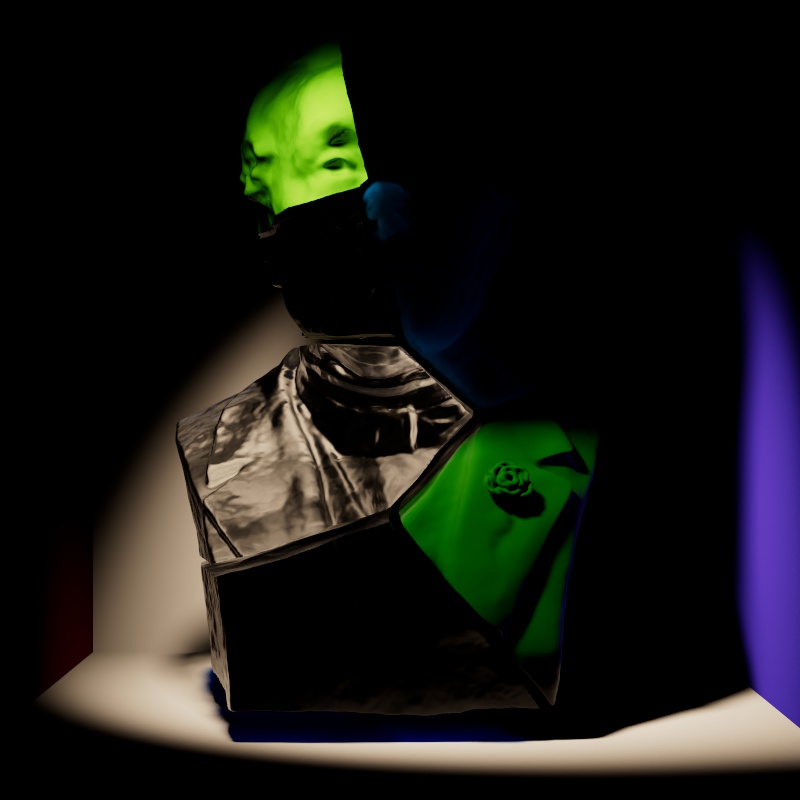
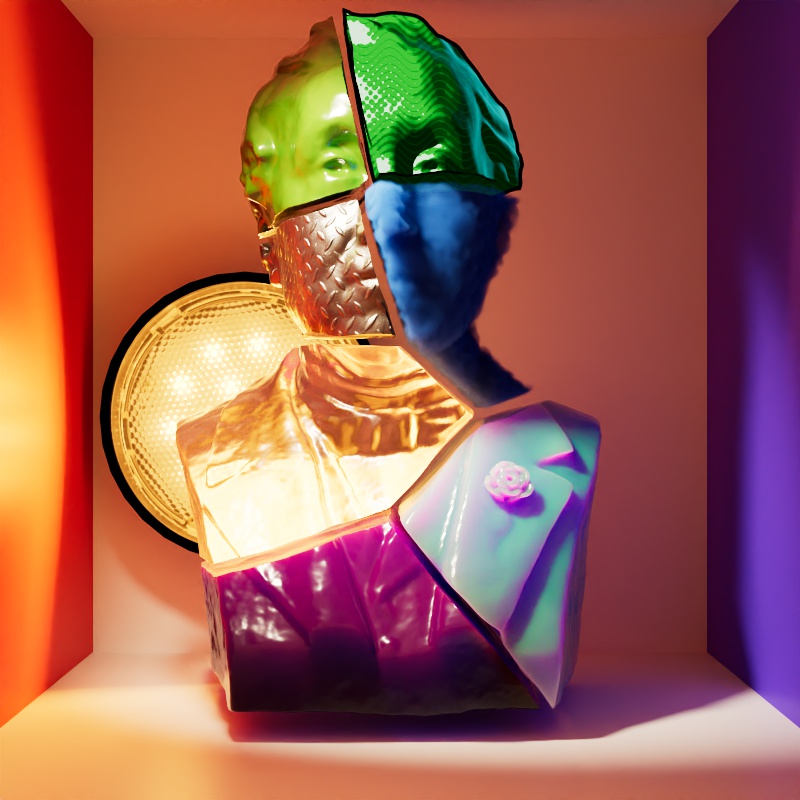
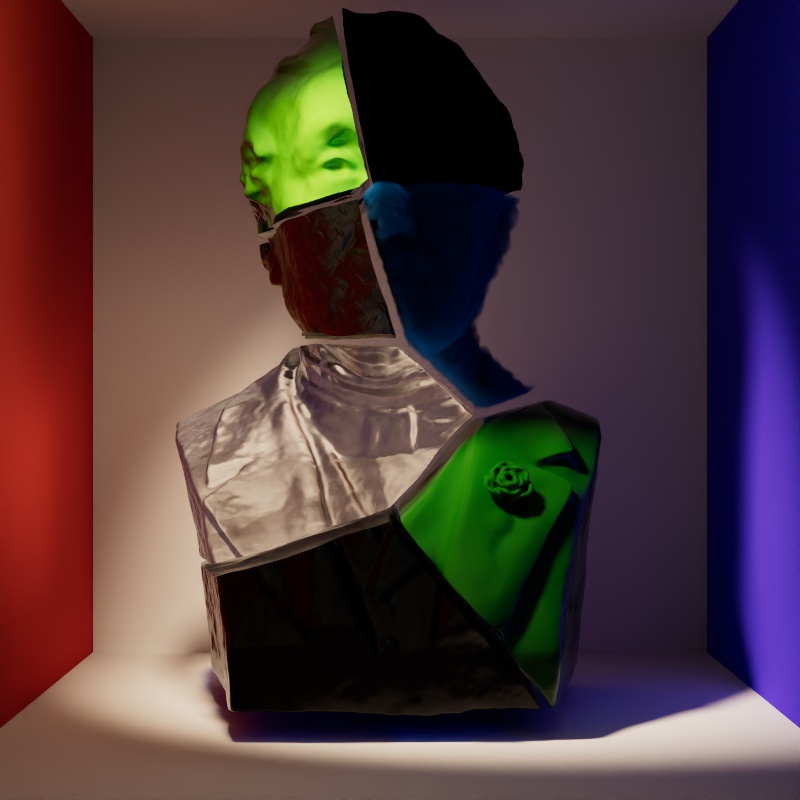
The contribution parameters covered below control how much a light is able to affect each shading component. The ability to control the intensity of each component offers creative flexibility, each can be raised or lowered and even completely disabled.
For physically correct results all contribution values should be left at 1 so the contribution of each shading component is equal and it matches a light's overall intensity. A value of 1 is indicated by a blue pole at the center of the bar in the examples below, when the bar is to the left of the pole then the output is lower than physically accurate and when the bar is to the right the output is greater than physically accurate.
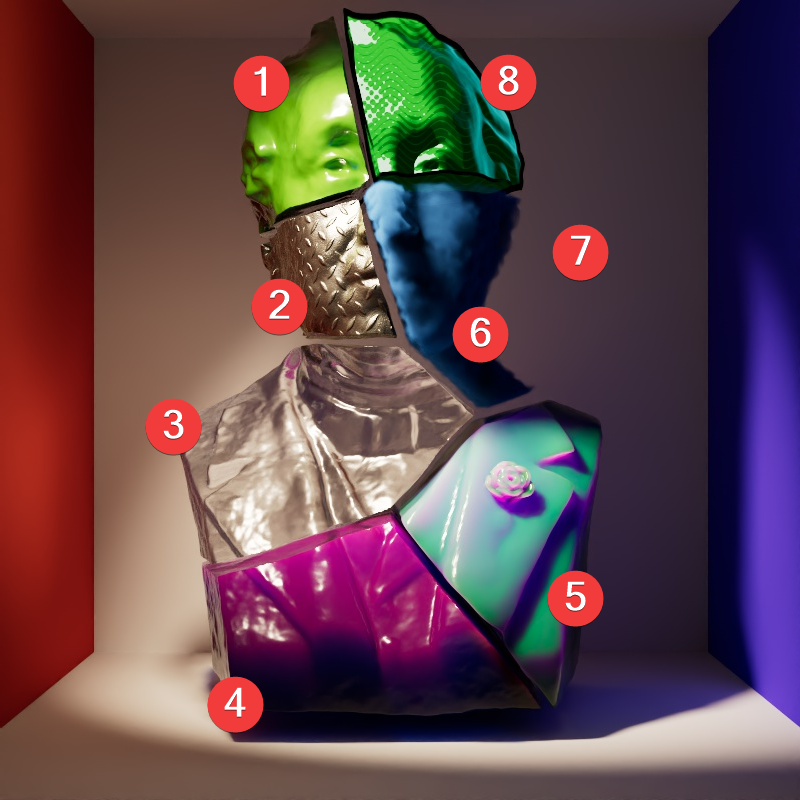
The example scene in this section features a Cornell Box with a bust from Three D Scans that is separated into pieces with different materials to illustrate the impact a light has on each shading component. The components and materials used in the scene are:
-
Camera: An additional light used to demonstrate camera visibility and transmissive effects where relevant.
-
This light uses an HDRI texture from AmbientCG.com.
-
-
Diffuse: A green Standard material with reflections.
-
Reflection: A fully metallic Standard material with diamond plate bump mapping and no diffuse component.
-
Transmission: A fully transmissive Standard material with reflections.
-
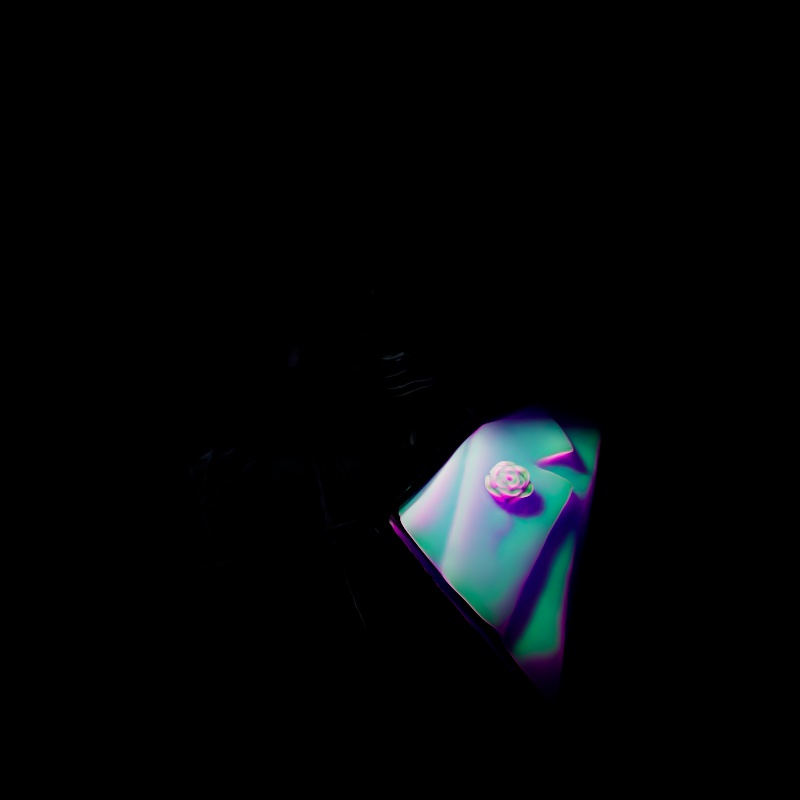
Single Scattering: A pink transmissive Standard material with single scattering and reflections.
-
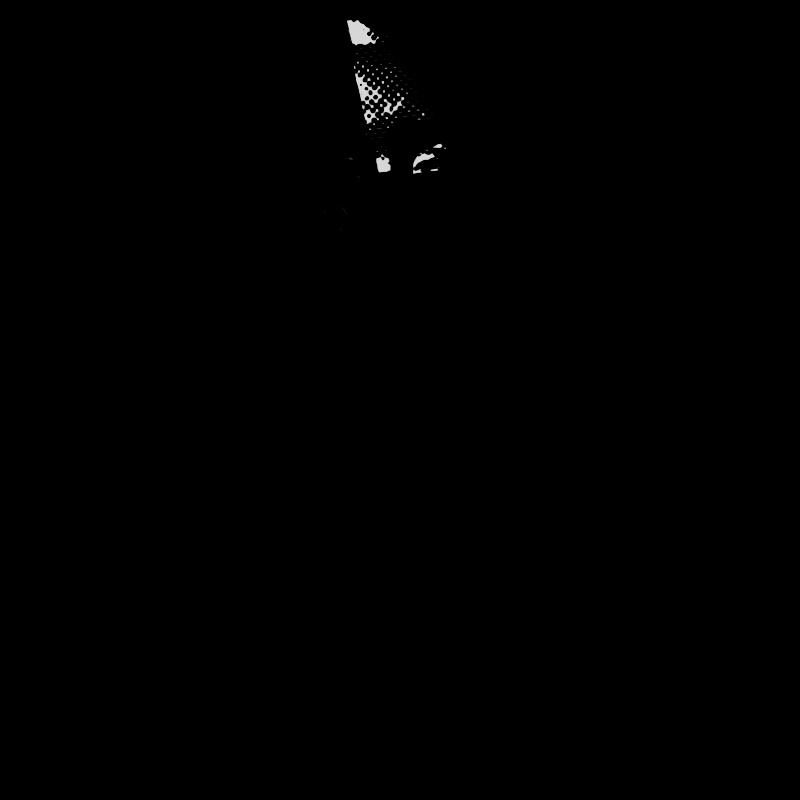
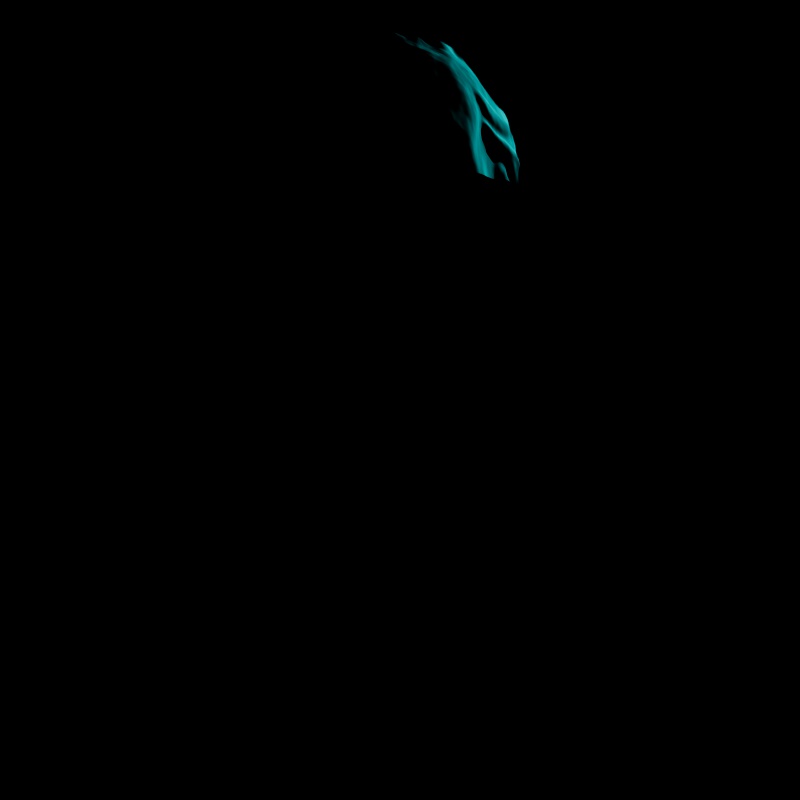
Multiple Scattering: A teal sub surface scattering Standard material with reflections and a very subtle diffuse component.
-
Volume: A blue Standard Volume material with no emission.
-
Global Illumination: The Cornell box demonstrates bounce lighting in shadow regions where no direct lighting is cast.
-
Toon Diffuse, Toon Reflection, Toon Rim: A toon material with a green diffuse component and a sine wave pattern, a white reflection component with a half tone dot pattern, and a light blue rim component.
|
| Contribution Sections |
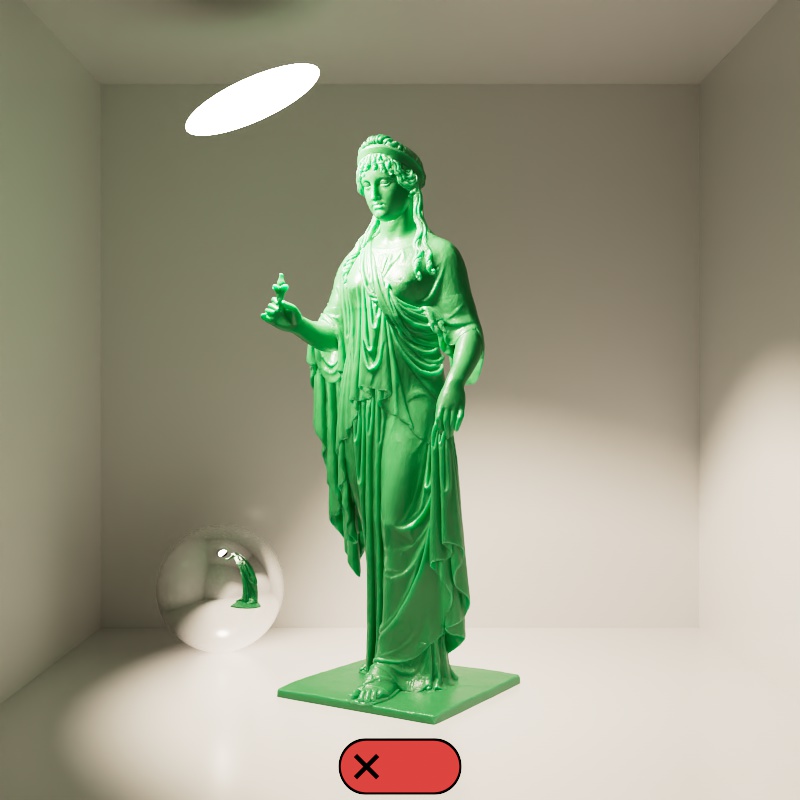
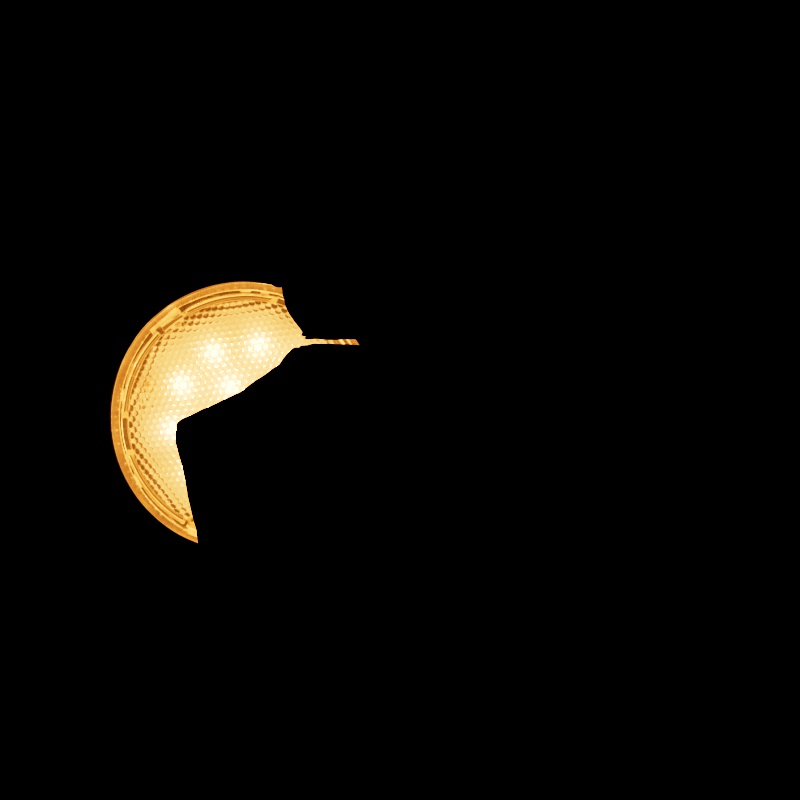
Camera
Only available for area lights and dome lights.
Scales the visibility of the light to camera rays. Lower values dim the visible appearance of the light to the camera while higher values make the light appear brighter. A value of 0 makes the light appear invisible to the camera.
Note that this does not affect the contribution of a light on any materials or objects in the scene, it only affects the direct visibility to the camera.
|
||
| Camera: 0 - 2 Other Contribution Types: 1 Blocked Rays: Enabled |
Camera: 0 - 2 Other Contribution Types: 1 Blocked Rays: Disabled |
1 0 (Isolated for Reference) |
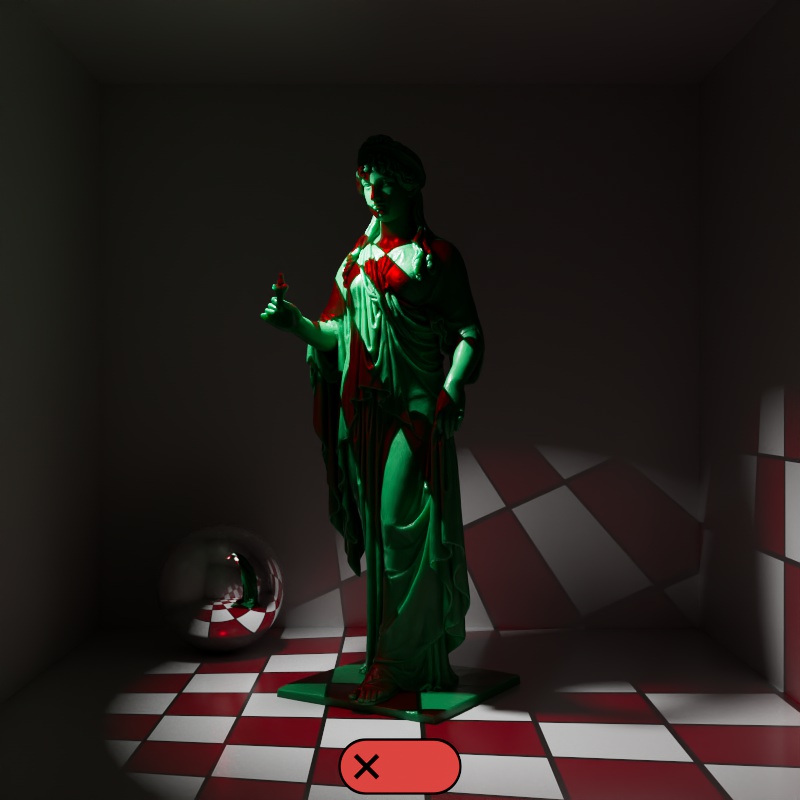
Diffuse
Scales the intensity of light for diffuse shading. Diffuse shading is generally responsible for the base color shading of most materials.
Note that this affects global illumination intensity as well.
|
|
| Diffuse: 0 - 2 Other Contribution Types: 1 |
1 0 (Isolated for Reference with GI disabled) |
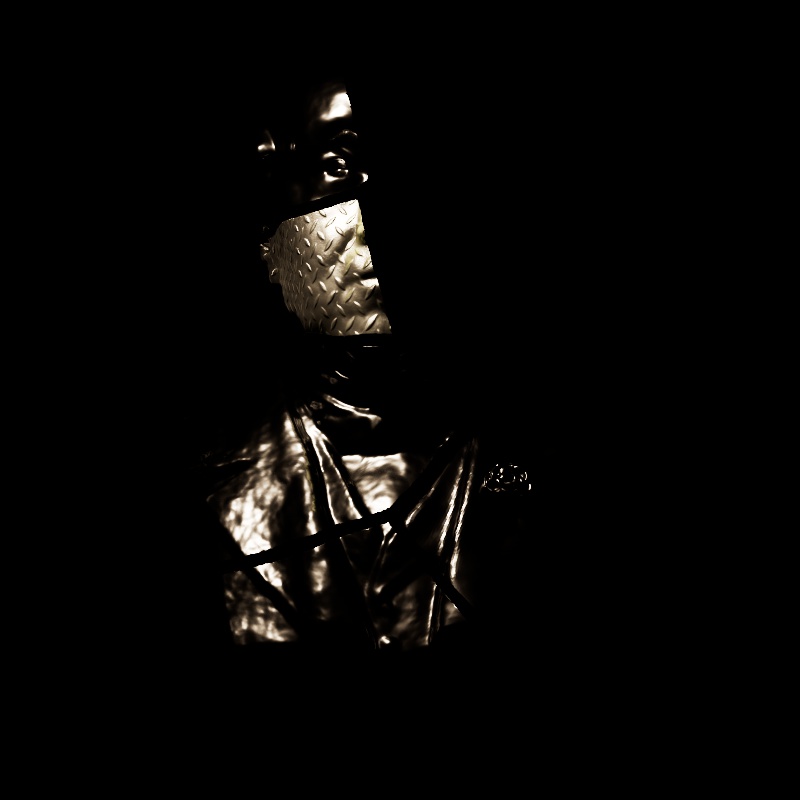
Reflection
Scales the intensity of light for specular reflections, the direct reflections of a light source.
Note that reflections of other objects are still seen in reflective materials even with a reflection contribution value of 0. In the example below, the metallic material with diamond plating is mostly heavily affected because it has no other shading component besides reflection, however, the specular highlights on the diffuse material, transmissive material, single scattering material, and multiple subsurface scattering material are affected as well.
|
|
| Reflection: 0 - 2 Other Contribution Types: 1 |
1 0 (Isolated for Reference) |
Transmission
Scales the intensity of a light as seen through a transmissive / refractive material. This can be thought of as the visibility of a light in a transmissive material.
|
|
||
| Transmission: 0 - 2 Other Contribution Types: 1 Block Rays: Enabled |
0 - 2 1 Disabled |
1 0 (Isolated for Reference) |
Note that a light can be visible in transmissive materials even when the Camera contribution is set to 0 — making the light appear invisible to the camera but still visible in transmissive materials. In this example the light has Block Rays enabled so the light casts shadows even when Camera is set to 0.

|
|
| Transmission: 1 Camera: 0 |
1 1 |
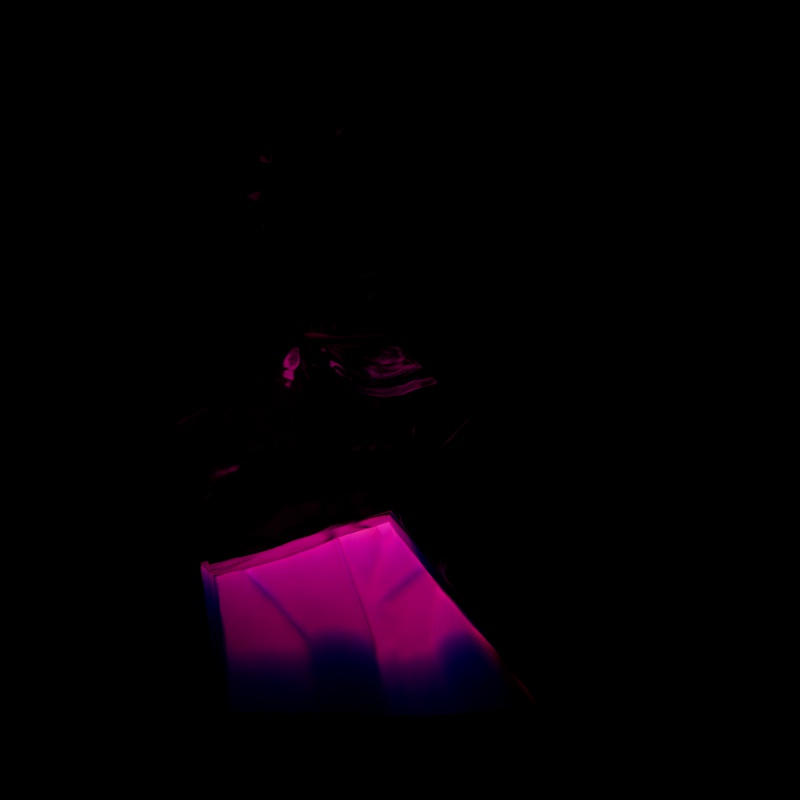
Single Scattering
Scales the intensity of light for single scattering. Single scattering simulates microscopic particulate suspended in a medium and is part of the Transmission controls of a Standard Material — this is similar to multiple subsurface scattering but is better suited to thinner volumes.
|
|
| Single Scattering: 0 - 2 Other Contribution Types: 1 |
1 0 (Isolated for Reference) |
Multiple Scattering
Scales the intensity of the light when seen through sub-surface multiple scattered materials.
|
|
| Multiple Scattering: 0 - 2 Other Contribution Types: 1 |
1 0 (Isolated for Reference) |
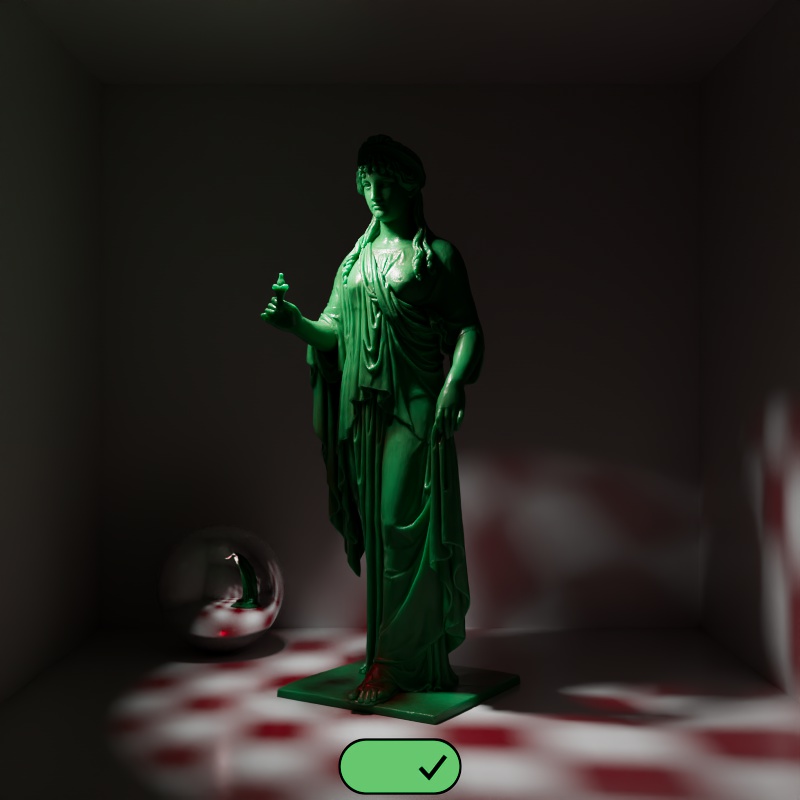
Global Illumination
Scales the intensity of a light's global illumination contribution.
Global Illumination requires Diffuse contribution, this is because global illumination simulates the secondary bounces that only occur after the first bounce of light which is what diffuse contribution represents.
|
|
| Global Illumination: 0 - 2 Diffuse: 1 Other Contribution Types: 1 |
1 1 0 (Isolated for Reference) |
Volume
Scales the intensity of a light's volume contribution, this affects the scattering component of a volume material and environmental fog. A value of 0 disables volume contribution.
In the example below, a blue volume is illuminated by the light and the scene is demoed with and without environment fog.
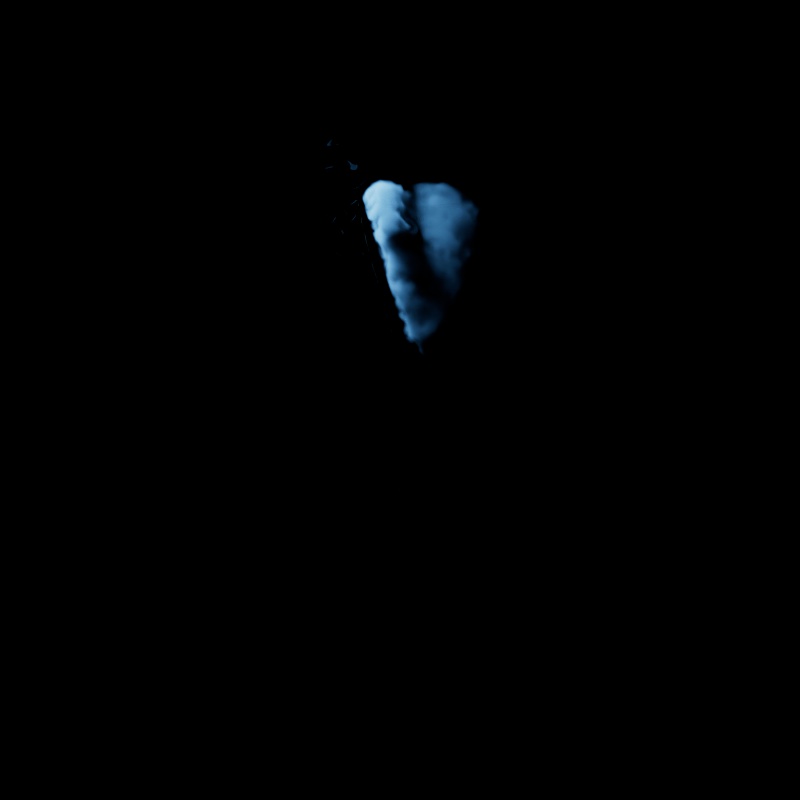
|
||
| Volume: 0 - 2 Other Contribution Types: 1 Without Environment Fog |
1 0 (Isolated for Reference) |
0 - 2 1 With Environment Fog |
Toon Diffuse
Scales the intensity of a light's Toon Diffuse contribution. A value of 0 disables the effect.
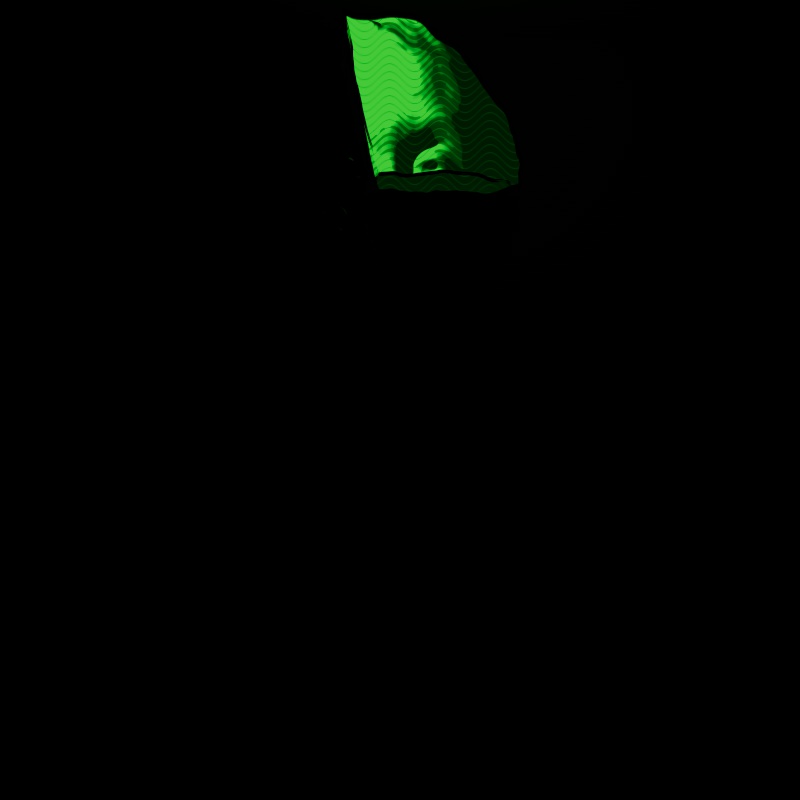
|
|
| Toon Diffuse: 0 - 2 1 |
1 0 (Isolated for Reference) |
Toon Reflection
Scales the intensity of a light's Toon Reflection contribution. A value of 0 disables the effect.
|
|
| Toon Reflection: 0 - 2 Other Contribution Types: 1 |
1 0 (Isolated for Reference) |
Toon Rim
Only available for point, spot, and directional lights.
Scales the intensity of a light's Toon Rim contribution. A value of 0 disables the effect.
|
|
| Toon Rim: 0 - 2 Other Contribution Types: 1 |
1 0 (Isolated for Reference) |
Caustics
|
Casts Caustics
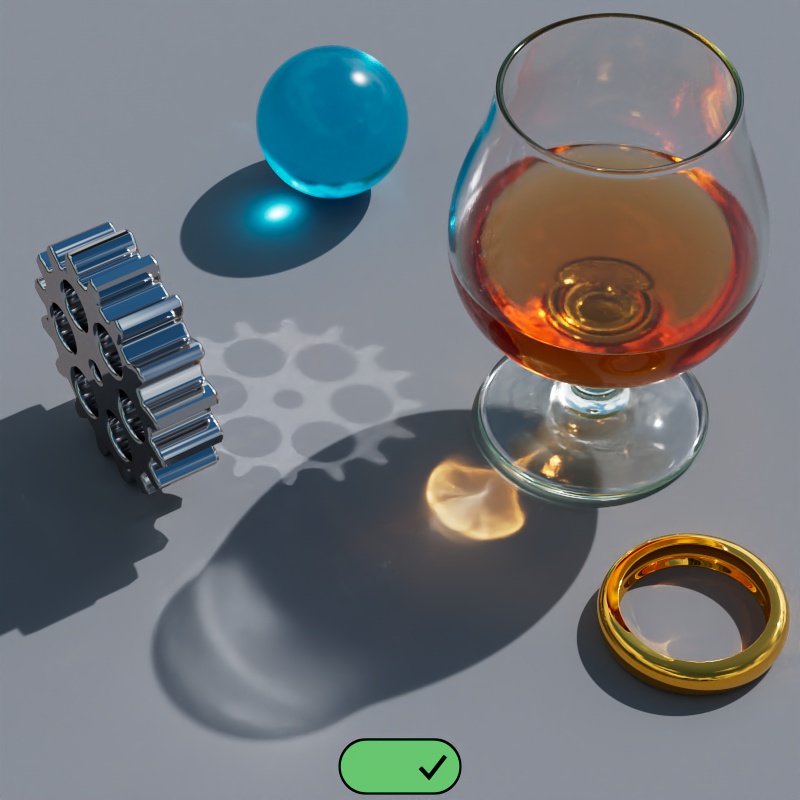
By default, all Redshift lights start in a Casts Caustics mode called "Render Settings". In this mode, a light's caustic capabilities are controlled by the "Light Casts Caustics" parameter found in the Caustics tab of the Render Settings. This allows you to easily control all lights in a scene from the Render Settings, making caustics much more simple to set up and control.
When Casts Caustics is set to "Render Settings" the default behavior of lights is:
- The light cast caustics
- Override Refraction Shadows is enabled
When Casts Caustics is set to "On":
- The light casts caustics
- Override Refraction Shadows is enabled by default but can be manually disabled.
When Casts Caustics is set to "Off":
- The light does not cast caustics
- Override Refraction Shadows is disabled
|
|
| Casts Caustics: On | Off |
Override Refraction Shadows
Only editable when Casts Caustic is set to "On."
Casts Refraction Caustics must be enabled on an object for this option to have any effect.
When enabled, Transmission Shadow Opacity is set to 1 for Standard Materials that are lit by any light with this option enabled. This ensures that a transmissive object's shadow is appropriately dark so that it can be lit up by the more realistic caustics.
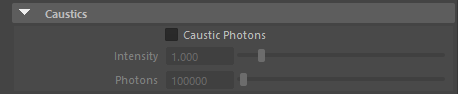
Intensity
Controls the brightness of the caustics as a multiplier relative to the intensity of the light. For the most realistic look use a value of 1 for caustics that match the intensity of the light. Increasing this value results in brighter caustics. A value of 0 can be used to effectively disable caustics for the light but Override Refraction Shadows will remain in effect, resulting in opaque shadows for transmissive materials.
Photon Multiplier
Controls the number of photons cast for the light. This is determined by multiplying the Photon Multiplier value by the "Num Photons" value found in the Photon Caustics Render Settings.
For example, if Num Photons is 10,000 and the Photon Multiplier is set to 1.5 then the light will cast 15,000 photons. If the Photon Multiplier were set to 3 then it would cast 30,000 photons.