Trapcode Particular
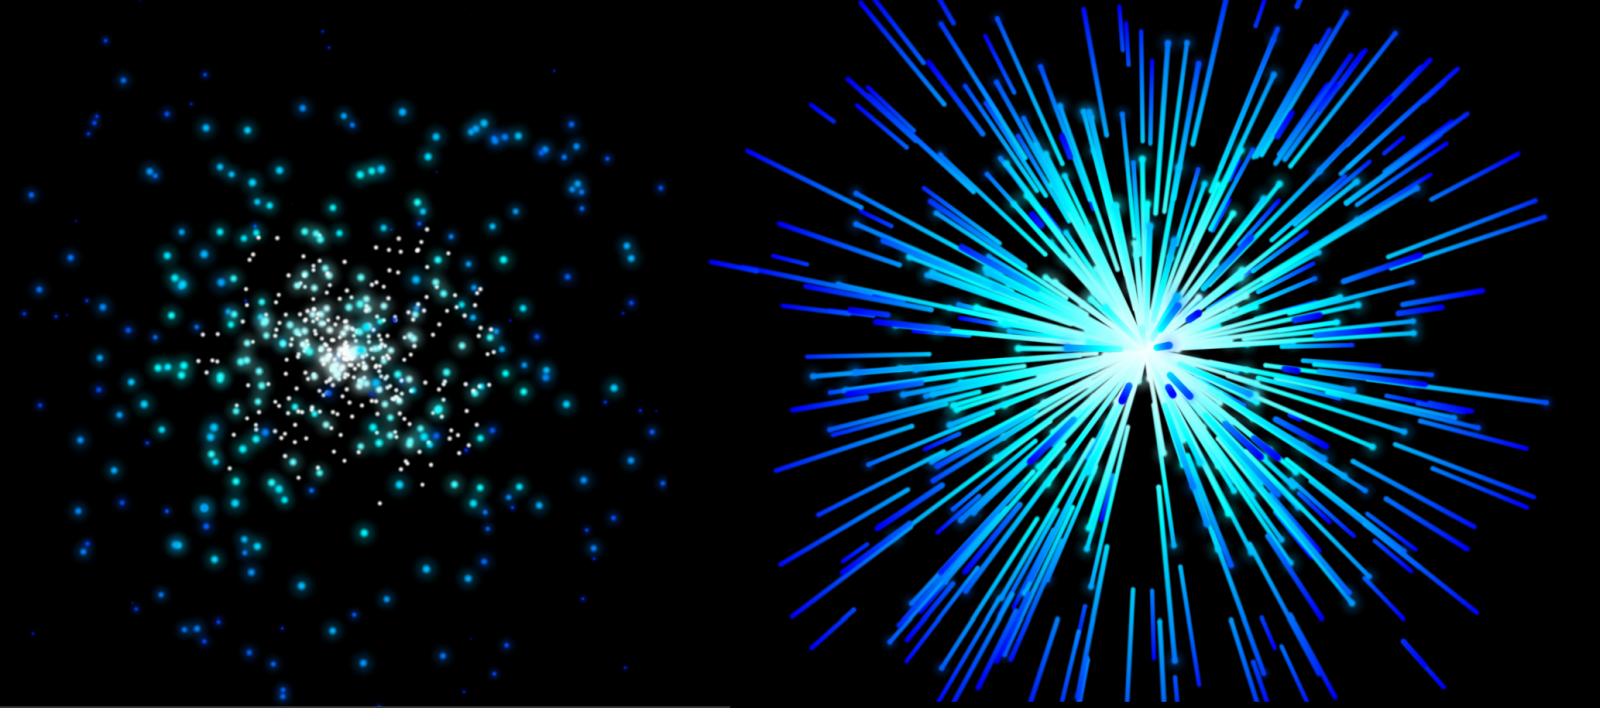
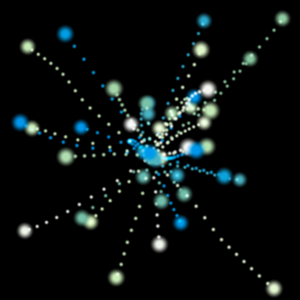
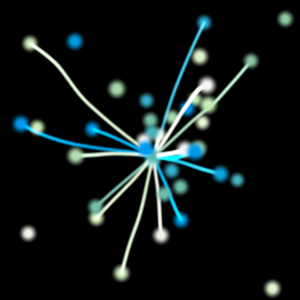
In the above image, you see the same Particular setup...with just one variable changed. Both use point emitters with uniform direction and the same glow sphere particle type and color preset (Electric) with a seven-second life. But the setup on the left uses the Emitter Type of Emit from Parent while the right setup uses Stroke from Parent. (Under the hood, Particular's stroke is still an emission, but it's executed in such a way that it appears like a continuous tail.) Whereas the Emit option here causes child particles to spawn as their own distinct points, Stroke from Parent turns those child particles into strokes.
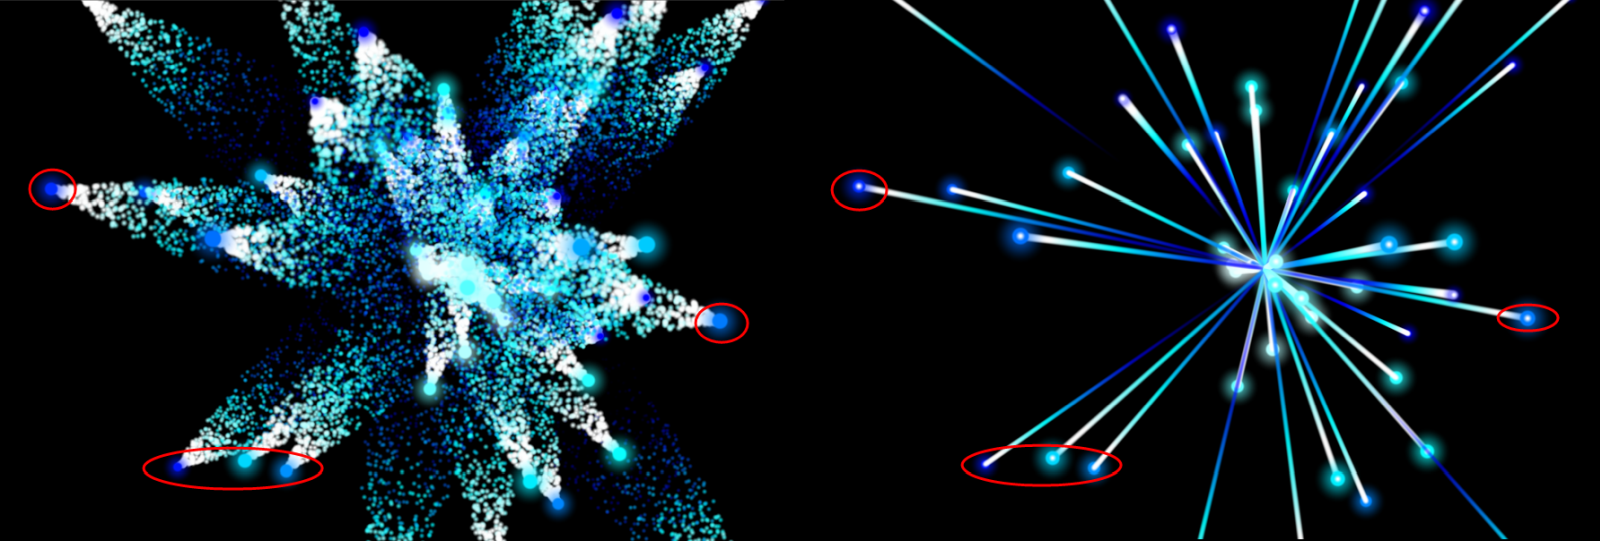
Here's a similar setup with Direction set to Directional. We've circled a few reference points so you can more easily see that this is the same setup, just with a different emission method.
With these differences in mind, let's dig into this area's specifics.
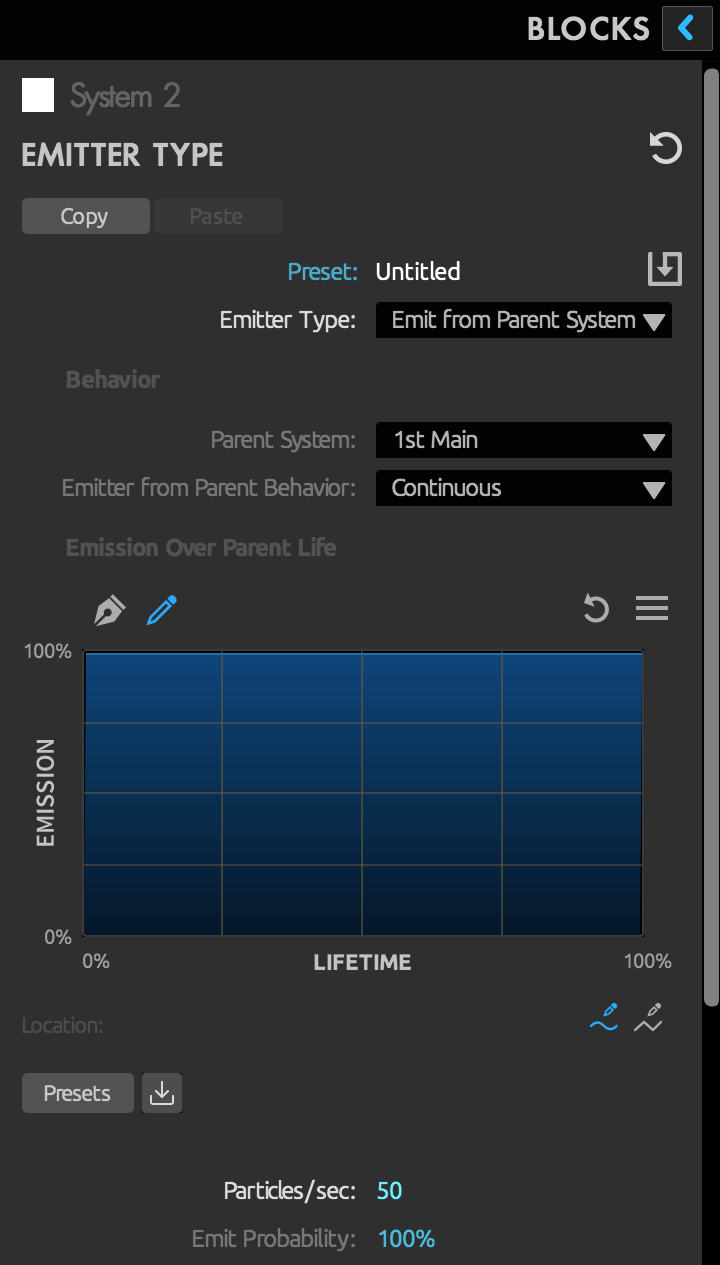
When Emit from Parent is the selected Emitter Type, the following options become available:
If emitting from a parent system, this option lets you choose any system above the selected one. The default is the system directly above the current one. Thus, if you set System 4 (for instance) to Emit from Parent, it defaults to emitting from System 3.
The drop-down menu contains four options: Continuous, Emit on Parent Bounce, From Parent Speed, and At Parent End of Life.
Emitting at Parent End of Life. Fun tip: The rings shown here are single ring sprite that emit either at the parent bounce or parent end of life and then scale up over their lifespan.
For more control over when the particles will emit from the parent, use the Emission over Parent Life curve. The horizontal axis represents the lifetime of the parent particle, and the vertical axis is the system's emission rate.
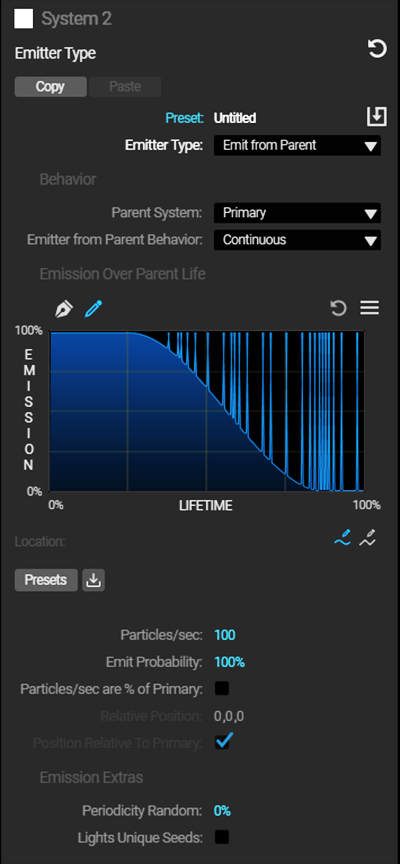
This parameter controls how many particles spawn each second from each parent particle. Note that leaving Particles/sec at a high value can increase the particle count for your scene significantly as it becomes a multiple of every parent particle. If your performance slows noticeably, you may want to check the total Particle Count (found at the bottom of the Show Systems group).
Adjusting Particles/sec can control how solid a trail of particles will look. For instance, here is a system’s Particles/sec set to 5 (left) and to 30 (right):

If the image on the right looks like Stroke from Parent, well, now you know a bit about how the Particular engine runs.
This control sets what percentage of parent particles emit child particles. At the default setting of 100%, all parent particles become emitters. Here is the same setup as shown above but with Emit Probability changed to 50%:
When enabled, the Particles/sec parameter for this system becomes a percentage of the Primary Systems' Particles/sec value. This is disabled by default.
Relative Position represents a secondary system's position values relative to the primary system. If the primary is set to an x value of 200 and the secondary system's x value is set to 500, the secondary system is positioned at the 700 value in relation to the comp. Values of 0 place the secondary system in the same place as the primary, regardless of where it is. Relative Position values can be keyframed over time to create trails and similar effects.
This toggle allows you to set the system's position relative to the primary system. When enabled, the secondary system’s position links to the parent’s position. You may still adjust this system's position, but the coordinates are relative to the parent’s position. To decouple the system from its parent and control its position on the comp scale, simply uncheck this box.
Enabling this checkbox will alter your Position coordinates above into Relative Position coordinates, which use the primary system as its reference point, rather than the center of your layer.