Trapcode Particular
The Particle group contains all the settings for a particle's appearance, including Size, Opacity, Color, and how these properties vary over the particle's lifespan.
Life controls how long particles live, measured in seconds. High values give a long particle life; low values give a short particle life. When keyframed, the particle’s life is determined by the value at the frame when it is born. This value is grayed out for Form behaviors.
Life Random sets the randomness for particle lifespan, represented as a percentage. At 0%, all particles have the same lifespan, and die all at once. When set above 0%, particles get slightly different lifespans. Higher values mean higher randomness, and the particles have more variation in life length. This is useful for creating natural-looking effects, like trails. This value is grayed out for Form behaviors.
This parameter determines what kind of particle is emitted. Controls may be enabled or disabled, depending upon the Particle Type selected. Review the Particle Type page for more information.
If you're working in Designer and want to enable particle type inheritance from primary system parents to secondary system children, be sure to check the Particle Type block's Inherit Particle Type from Parent box.

Depending upon the Particle Type chosen, you may get a different set of controls for your particle:
Sprite: Click the Choose Sprite button to bring up a panel of images available to use when Sprite is selected as the Particle Type. You'll find scores of various sprite types in Particular's asset browser, so make use of the browser's search bar to help narrow the field and quickly find your desired shape. Access the asset browser in both the ECP (first image, below) or in the Designer (bottom). Also, you can import your own Sprite using the Add New Sprite icon in the top-left corner of the asset browser. Imported images will be added in a Custom folder at the bottom.
![]()
![]()
Right-click on a model’s thumbnail image to select either:
Sprite Controls: These options modify a Sprite. See the Particle Type page for details.
Sphere/Cloudlet/Streaklet Feather: These controls alter the softness of the following particle types: Sphere, Glow Sphere, Cloudlet, and Streaklet. The controls will be grayed out for the other particle types. Low Feather values give the look of sharp circles. High Feather values give a more organic, smooth look.
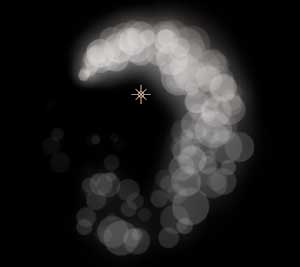
Sphere Feather set low (left) and high (right). The Particle Type is Glow Sphere.
Change properties, such as Mass and Air Resistance, to control how particles interact with their environment. Review the Particle Physics page for more information.
Size sets the size of the particles. High values create a larger particle; low values create a smaller particle. When keyframed, the particle’s size is determined by the value at the frame when it is born.
Size Random
Size Random sets the randomness for Size, represented as a percentage. Higher values mean higher randomness, and particles have more size variation.
Inherit Size from Parent
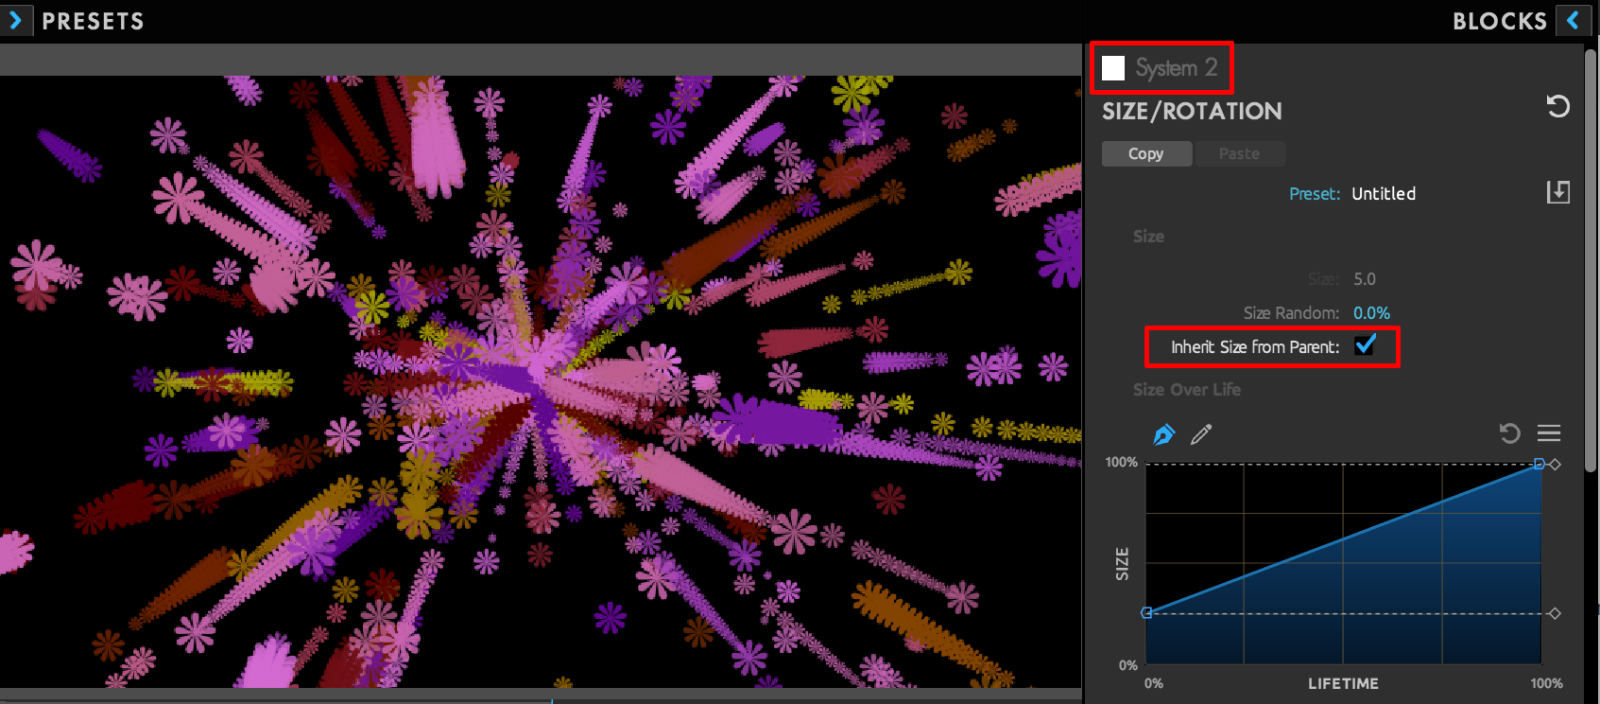
In Designer, you can work with child particles in secondary systems. Click the Inherit Size from Parent box to have child particles copy the full size of their parent. However, you can modify child particle size over the particle's life to achieve certain effects. Notice in the above image how the Size Over Life curve has child particles begin their lives at about 25% of the parent's size, then grow to 100% just before expiring, resulting in a triangular or conical "tail" behind each parent.
Size Over Life
This parameter controls how particle size varies over the particle's life or x, y, z, and radial axes for Form behaviors.
The Rotation group rotates particles independently on the x, y, and z axes. You can even give particles a random rotation so they rotate in different directions. Read more on the Rotation Group page.
This control sets the ratio of a particle's width to its height. The default is a square ratio of 1:1 (1.0). Increasing this value will make particles wider; values under 1.0 will make them thinner.
Opacity sets particle transparency. At 100%, particles are completely opaque. At 0%, they are completely transparent. When keyframed, the particle’s opacity is determined by the value at the frame when it is born.
Opacity Random
Opacity Random sets the randomness (as a percentage) for Opacity. Higher values mean higher randomness, and particles have more variation in transparency.
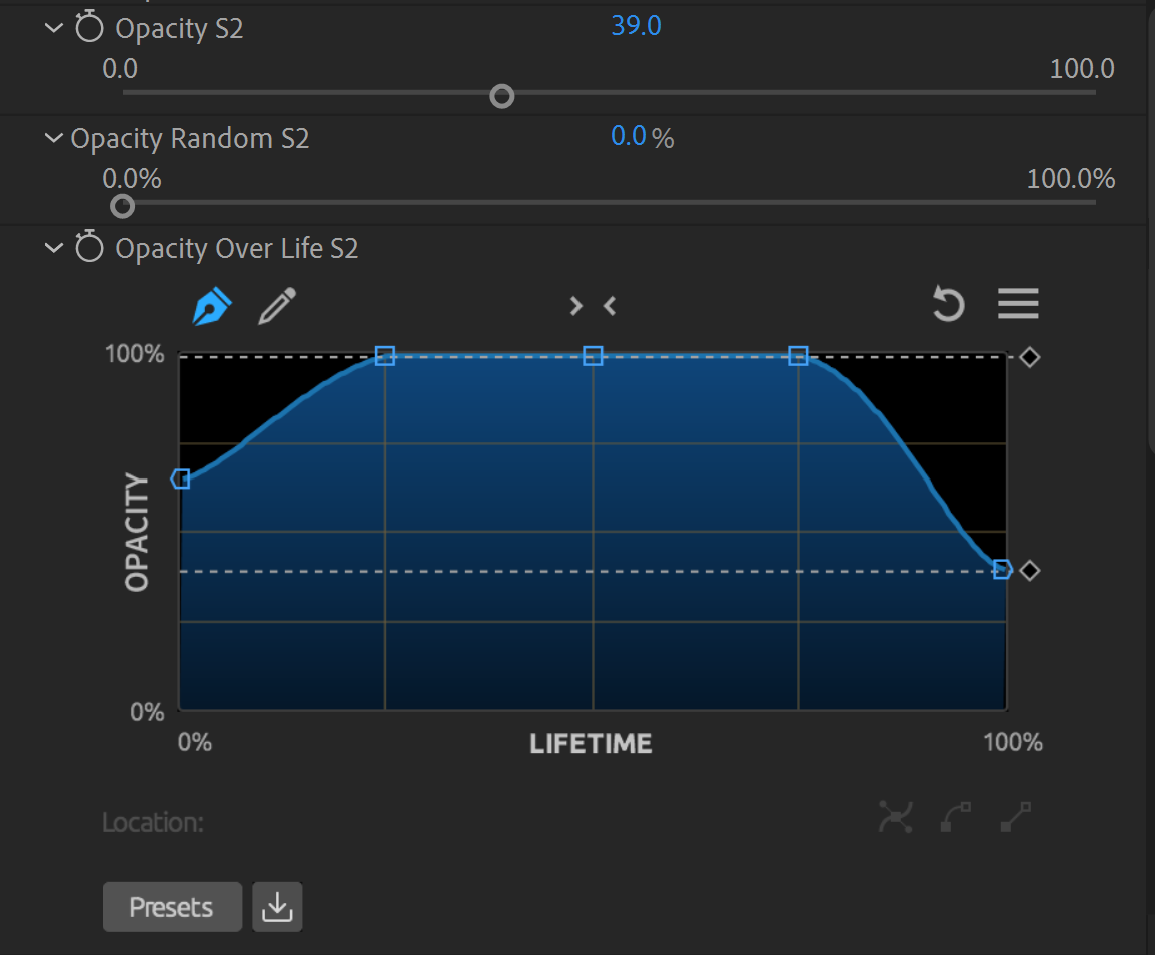
Inherit Opacity from Parent
As we saw with Particle Type and Particle Size in Designer, opacity can also be inherited from parent particles when you check the Inherit Opacity from Parent box. When combined with the Opacity Over Life curve (see below), you can create some subtle, impressive effects. Notice in the following image how our trails of sphere children seem to pulse in brightness. This pattern follows their Opacity Over Life curve.
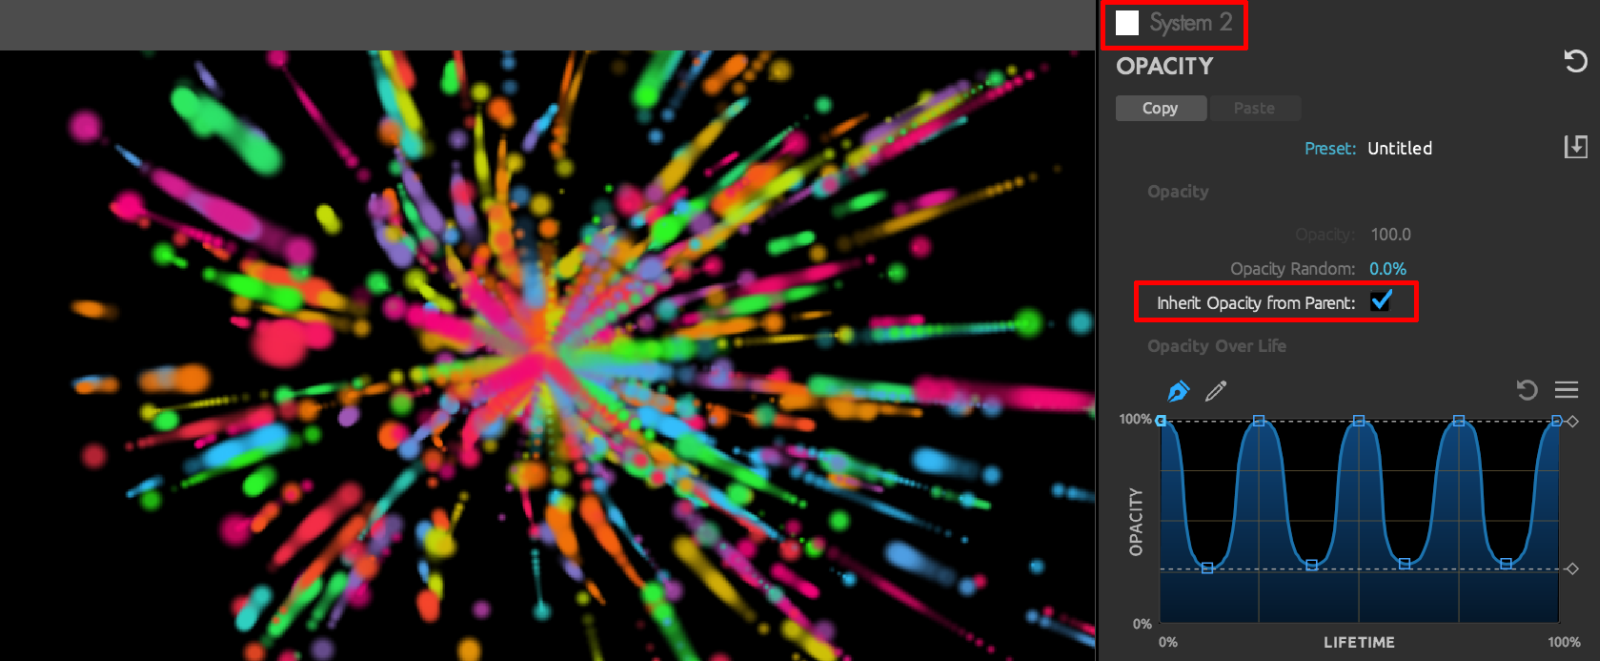
Opacity Over Life
This parameter controls how particle opacity varies over the particle's life or x, y, z, and radial axes for Form behaviors.
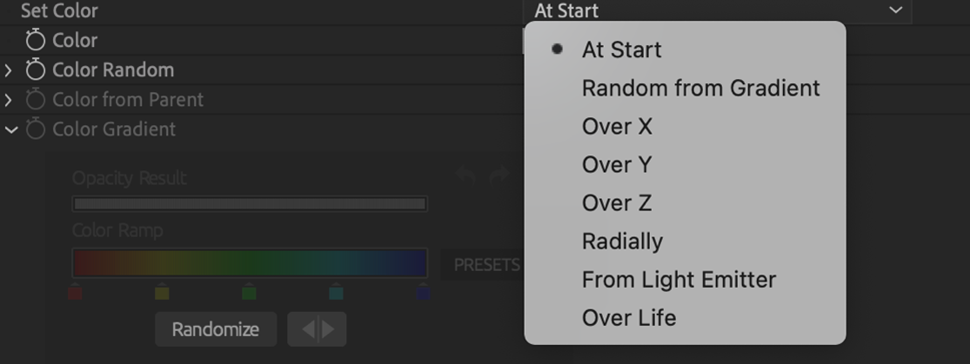
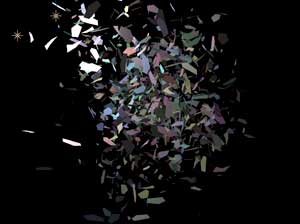
Set Color establishes the particle's color. There are eight options. Each option activates other color-related Particle parameters.
Color
Color controls the particle's color and is active when Set Color is set to At Start. There is no numeric value for Color. When keyframed, the particle’s color is determined by the value at the frame when it is born.
Color Random
Color Random sets randomness (as a percentage) for Color. Higher values mean higher randomness, and particles have more variation in color.
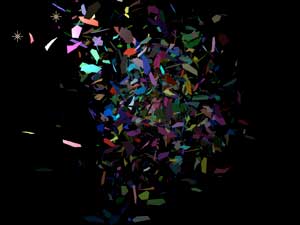
From left to right, Color Randomness at 0, 50, and 100 with Color set to white.
Color from Parent
When a secondary system's emitter type is set to Emit from Parent or Stroke from Parent, you can set whether child particles' color is controlled by their parent particle. This is a percentage that says how much the parent color mixes with the color from Set Color. At the default of 100%, color comes entirely from the parent. At 0%, color is entirely driven by the Set Color parameter above.
Note that parameters in ECP groups don't always map identically to Designer blocks. For instance, Color from Parent appears in the ECP as a control within the Particle group. However, in Designer, its easy to forget that the Color block exists within the Particle group, distinct from the Particle Type block. Conceptually, the two feature layouts are very similar, but they can appear different.

Color Gradient
The Color Gradient controls how particle color varies over the particle's life or over the x, y, z, and radial axes for Form behaviors. This control is active when the Set Color pop-up is set to Color Over Life, Over X/Y/Z/Radially, or Random from Gradient.
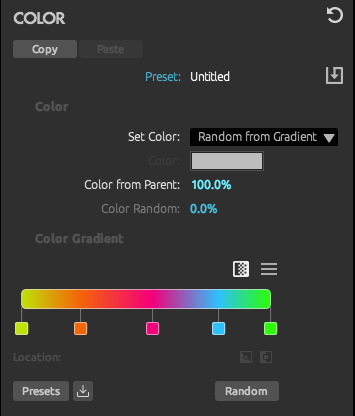
Let's start with the newly revamped Color Gradient tool by examining its primary parts. The long bar containing one or more colors is the gradient (also known as a color ramp), and it serves to show the order of colors and how they will display over time.
Clicking on the gradient will create a new color stop at that point. You can see four such color stops in the image above, each represented by a square under the gradient. (Each gradient can have up to 50 stops.) The color of the color stop will match the gradient at that point. You can change this color by double-clicking on the stop and selecting a new color. That new color will subsequently appear on the gradient. You may also drag stops laterally to change where and how they affect the gradient. If you decide to delete a color stop, simply click + drag the stop downward and hold it for a second or two until the stop disappears.
Positions on the gradient are expressed as integer percentages from 1 to 100 (left to right). To precisely place a stop, single-click it to select the stop. (It will be framed in white.) You may then enter a value in the Location field either manually or by lateral mouse dragging.
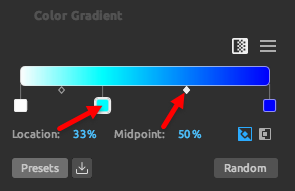
Also note the Midpoint control to the right of Location. Every color stop has two midpoints, indicated by a pair of diamond shapes just below the gradient. You can see in the above image how the selected midpoint is at a position of 33 percent. The left midpoint (deselected, black fill) rests exactly between the first and second stops, indicating where those two colors equally balance as they transition. The right midpoint (selected, white fill) further to the right at the 50% position will give a smooth, even transition from light to dark blue. If we want the light blue to last longer, and thus have a quicker transition to dark blue, we would drag that right midpoint more toward the gradient's right edge. Note that the left- and rightmost color stops will always display one midpoint; the other "midpoint" is the gradient's edge.
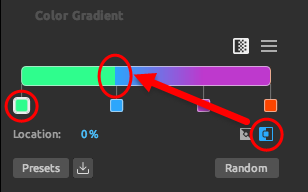
The Color Gradient tool has two ways of interpolating between colors. Both are shown as a pair of icons above the gray Random button. The left icon represents linear interpolation, which is the default. The right icon represents step interpolation. In effect, this is non-interpolation, where there is no gradual blend but simply a hard step from the selected color to the next color to its right.
Speaking of the Random button, clicking it will generate new, random colors for all your color stops. Try it several times. It's more fun and less expensive than most video slot machines.
If and when you tire of random color selection, use the Presets button to select from more tried and true color schemes. This will immediately replace the current gradient, and the replacement cannot be undone.
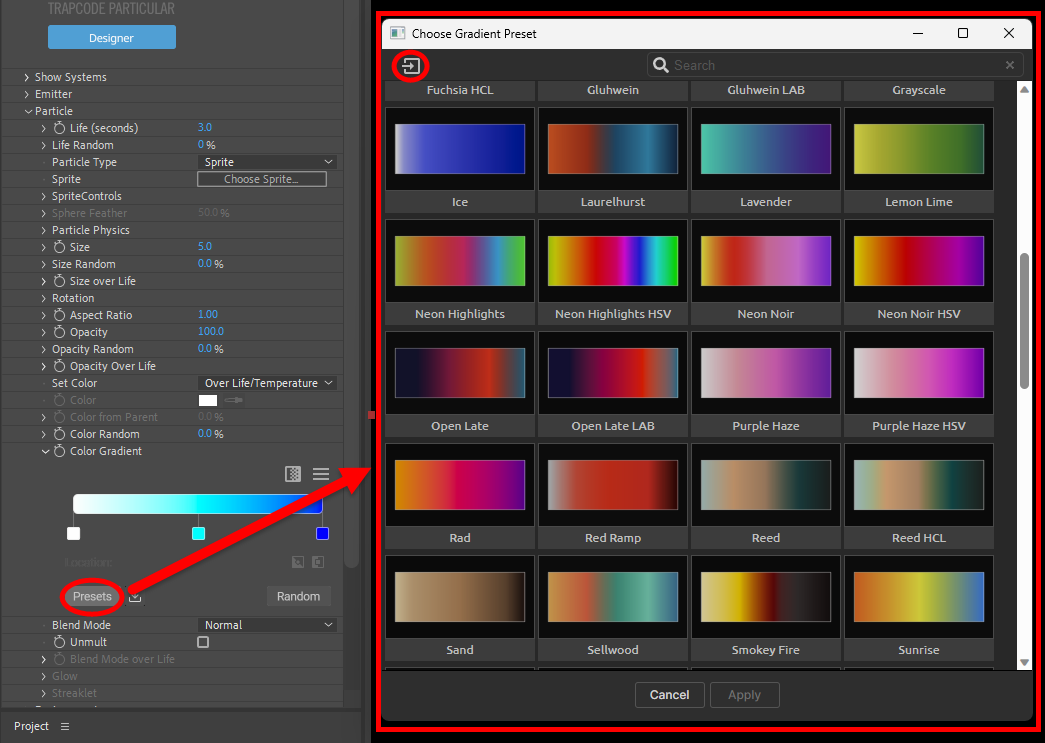
Tip: More gradient presets are available in Designer's color block. Also, the Presets/Gradients window features an Add New Gradient...icon (circled above) in the top-left corner of the asset browser that allows you to load gradients you've custom saved with the save button (located next to the Presets button) as a Custom preset. These custom presets are located at the bottom of the Gradients list and may require some scrolling to access.
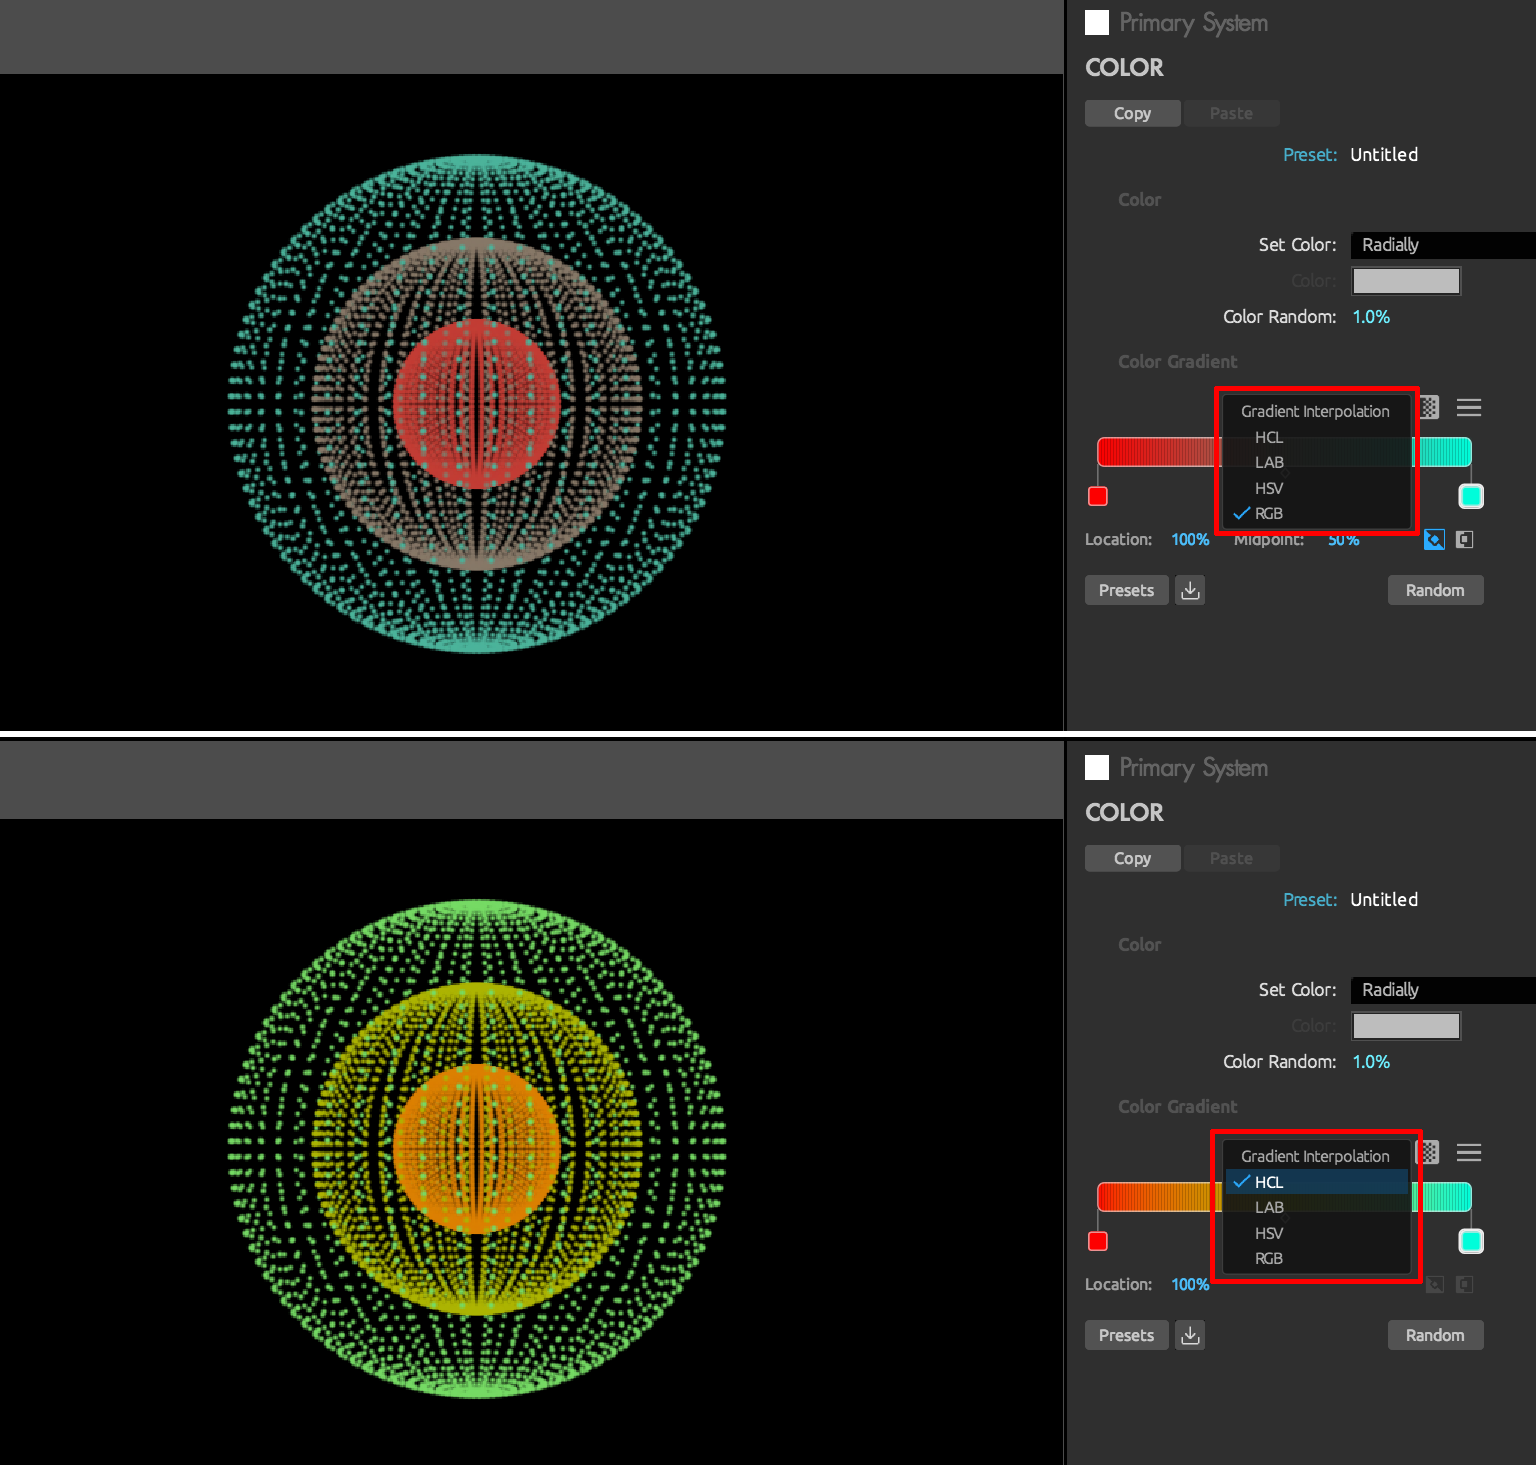
Finally, two last icons await above the gradient. The first selects one of four gradient interpolation modes (HCL (the default), LAB, HSV, and RGB). To oversimplify, these interpolation models give different ways of getting from one color to another in a gradient. RGB (shown in the first image, below) and LAB work to blend from one color to the next, which is why they can sometimes yield muddy gray tones as they travel through the middle of the color spectrum. HCL (bottom image, below) and HSV are cylindrical models, so gradients will take the shortest path around the cylinder to reach a color target. As a result, HCL and HSV tend to be brighter, yield more vibrant colors, and offer more gradient variety with fewer stops.
The second icon is a hamburger menu containing seven functions:
Note: Previously, Trapcode Particular made use of multiple color picking tools across Windows and MacOS. Now, no matter which platform or mode (ECP vs. Designer) you're working in , you'll always get the same color picker tool as the one Adobe uses in After Effects.
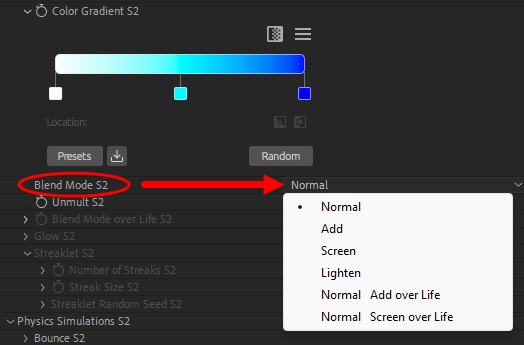
The Blend Mode controls how particles are composited together. There are six options.
Turn on Unmult when your Sprite texture has been pre-multiplied and is getting an unwanted dark edge from the black background.
This feature controls how the transfer mode varies over a particle's life. It is active when Normal Add Over Life or Normal Screen Over Life is selected for Blend Mode. Read more about how to manipulate this control on the Using Curves page.
Blend Mode Over Life is useful when transforming one particle's volume into another set of particles. For example, say you're creating flames that turn into smoke. While the particle is in the flame, the Transfer Mode should be Add or Screen, since flames have additive properties. Later, as the particle becomes smoke, the Transfer Mode should be Normal, since smoke has obscuring properties.
This feature is only active when particle type is set to Glow Sphere or Star. Glow Size is the relative size for the glow compared to the particle. Opacity, Feather, and Transfer Mode control the glow's appearance. Read more about this on the Glow group page.
These controls enable when Streaklet is the chosen Particle Type. Read more about this on the Streaklet group page.