Texture settings
Most material channels enable you to load a texture. You can select a two-dimensional shader or video or image sequence. Your selection will be used as a texture. Cinema 4D can read the following formats: image formats, movie formats
Textures up to 16,000 x 16,000 (32-bit application version) and 128,000 x 128,000 pixels (64-bit application version) can be loaded.
The following might be displayed when an image or a video is loaded:
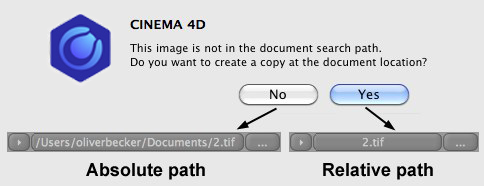
Depending on which option you select, the texture/movie will be linked to an absolute or a relative path. This means:
If you select No, the "path" to the texture will be saved as an absolute path, i.e., this is the directory path in which Cinema 4D will look for the texture for rendering. This is, however, problematic when the scene file is passed on to another artist, for example and the texture will not be found on the other computer. In most cases it is better to use relative paths (via the ![]() Save Project with Assets... command you can turn an absolute path into a relative path).
Save Project with Assets... command you can turn an absolute path into a relative path).
If you select Yes the texture/movie will be saved to the "tex" folder at the location of the scene file. If you pass the scene file, including this directory, on to another artist the textures can be easily found on the other computer. Textures with relative paths will also be searched for here.
If you copy materials (with linked relative texture paths) to another Project where they then cannot be found, a prompt will appear asking if an absolute texture path (to the original path) should be defined. If you answer with No, the textures must be copied manually to the known Cinema 4D (relative) paths.
With the introduction of the asset system with databases in S24, paths to external files/assets can look as follows:

This is an absolute path only that it does not point to a hard drive path but to a database (incl. hierarchy). These paths can be copied, edited and opened and, if you have access to the respective database, they can be used at another location.
If the path is copied to another location and the database is not included and the scene is saved, it may be necessary to use the Reload Image command to reactivate the path.
You can load a texture using the triangle button, Texture box or three dots button. Click the button or box and use the menu or file selection dialog that appears to load the texture.
Once you have loaded a texture, its preview will appear below the Texture box with three numbers shown immediately below the preview. These numbers specify the width, height and color depth of the texture. If you click on the preview picture or the name of the texture or shader, the picture/shader will be loaded into the Material Editor. You can then edit the picture externally or edit the shader's settings.
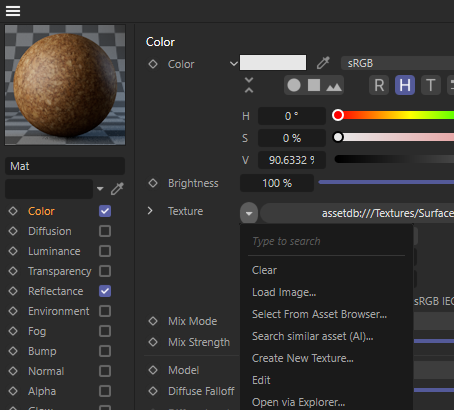
Click on the triangle button next to the Texture box to open a menu that allows you to load bitmaps and load channel shaders. The menu also contains the following commands:
Removes the texture/image from the material channel.
Opens a file selection dialog that allows you to load an image into the material channel. You can also load images by clicking on the three dots button on the far right of Texture.
This opens a reduced Asset Browser with which you can search for and select a suitable bitmap.
This starts the AI search (find Details here), which searches for similar images in the Asset Browser. Select one by double-clicking on it.
The BodyPain t3D New Texture dialog window will open in which you can create a new texture using a bitmap
Loads the shader's parameters or image's parameters (see above) into the Material Editor.
Opens the image in the default image editing application specified for your computer. For example, choosing Edit Image for a JPEG will open the image in Photoshop if Photoshop is installed and is the default image editor for JPEGs.
This command opens the image in your operating system's Explorer/Finder. If the image is located in a asset databases, the browser will be opened there.
Suppose that, after loading an image into the Texture pane, you then edit the image in an image editor. In such cases, use Reload Image to update the texture in the Texture pane. Note to BodyPaint 3D users: you cannot reload images that are being used by BodyPaint 3D (such as if you are rendering to the Picture Viewer).
These commands allow you to copy and paste shader settings from one material channel to another. For example, you can copy a shader from the Color channel and paste it into the Bump channel with the same settings. This saves you from having to set the parameters multiple times.
Here you will find a list of all the bitmap that are currently loaded in RAM. Select a bitmap's name from this list to load the bitmap into the Texture box.
You will find a list of shaders in the lower part of the menu, including those of any plug-ins installed.
Three dots button, Texture box

To load a bitmap into the material channel, click the Texture box or three dots button and use the file selection dialog that opens to load the bitmap. See Bitmap Shader.
Sampling
Use Sampling to control how the texture's pixels are interpolated. MIP and SAT are the best choices for animation or for objects in still pictures that extend towards the horizon, such as floors.
Square, Alias 1, Alias 2 and Alias 3 should, in general, be used for still pictures only — they generate crisp, sharp textures, but are too sharp for animation and if animated will be likely to flicker. MIP and SAT, on the other hand, blur the texture slightly to allow flicker-free animation.
 Example texture.
None
When Sampling is set to None, the original texture values are used without interpolation. This method is fast, but often produces poor results and in general is best avoided. Textures tend to look jagged with None interpolation. You can try to reduce the jaggies by using a high antialiasing setting.
 None.
None.
Circle
Circle sampling uses a circle of texture pixels (the ones surrounding the intermediate value). Textures that are enlarged at render time tend to look more natural with this type than with the None type. However, as the examples demonstrate, straight lines are problematic and tend to look frayed. In addition, the texture is very jagged near the horizon. Circle sampling is, however, a good choice for very small textures (e.g., 3 x 3 pixels), because it helps the pixels to blend softly.
 Circle.
Square
Square uses a square of texture pixels (the ones surrounding the intermediate value). This leads to a softer transition between texture pixels than with None. The picture quality is good.
 Square.
Alias 1, Alias 2, Alias 3
Alias 1, Alias 2 and Alias 3 blend the texture more strongly than Circle and Square. Alias 3 blends the most, Alias 1 the least. In the example above, the texture is difficult to recognize with Alias 3 because it is so small (16 x 16). Alias3 can give smoother results than Alias 1, but it also takes longer to calculate.
However, even Alias 3 cannot prevent jaggies near the horizon!
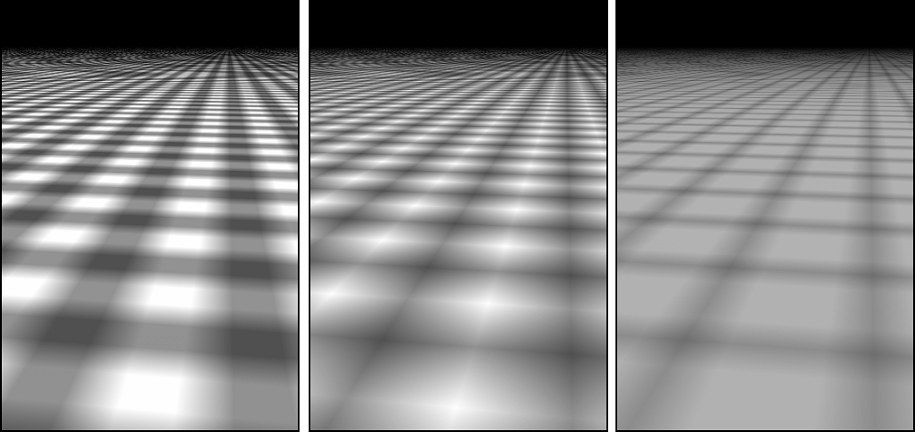 Alias 1, Alias 2, Alias 3.
MIP
MIP stands for multum in parvo, which is Latin for many things in a small place. When many texture pixels effectively lie within a single screen pixel an approximation is made based on the (known) texture pixel values. This results in very smooth blending. MIP is the default sampling type.
 MIP.
MIP.
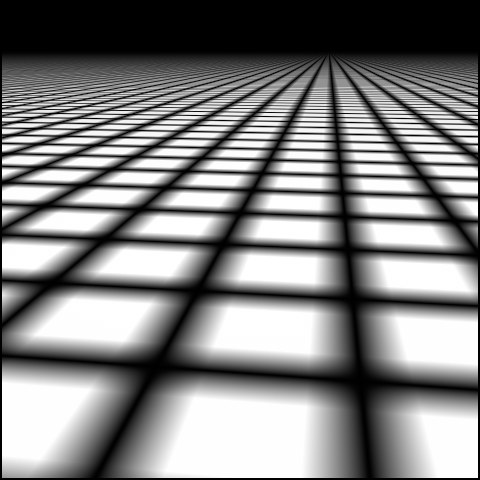
SAT
SAT is short for summed area tables and it does an even better approximation than MIP mapping. As with MIP mapping, the approximation is based on the texture pixels that lie within a single screen pixel. SAT is the highest-quality sampling type.
 SAT.
SAT.
MIP / SAT
MIP and SAT mapping are especially important for high-quality animation and for objects in stills that extend towards the horizon, such as a sea. MIP mapping is the default sampling type.
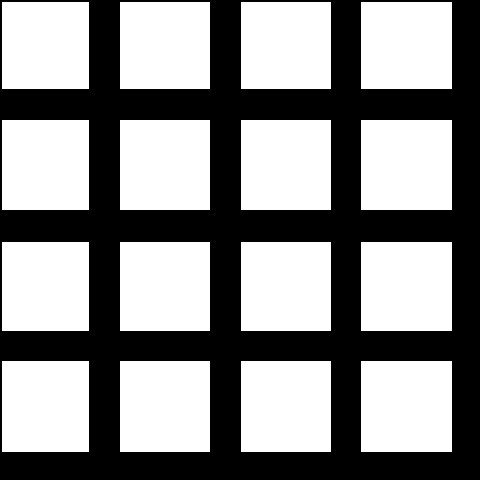
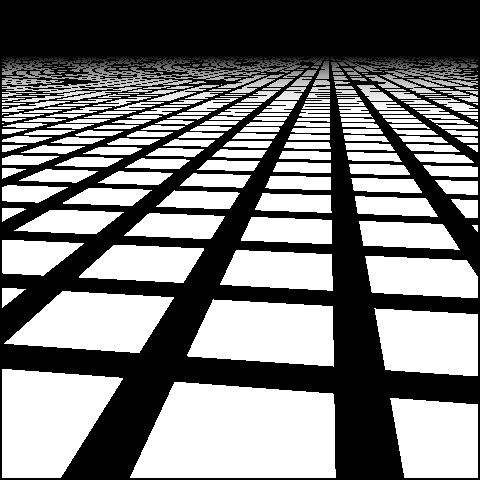
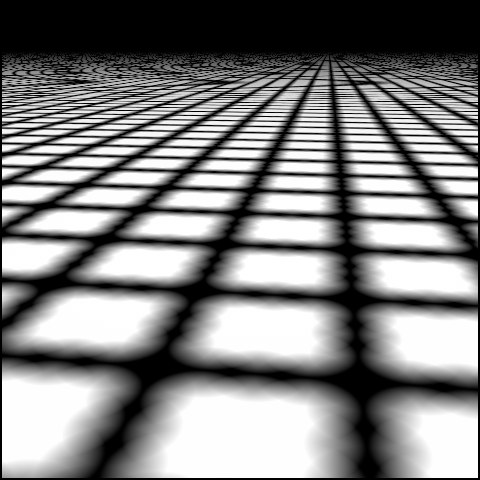
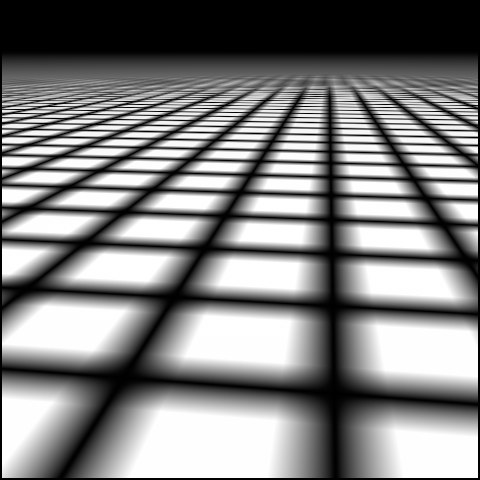
The following two pictures demonstrate MIP / SAT mapping. The tiled texture used Circle sampling. Although the quality is generally good, the quality rapidly deteriorates towards the horizon.
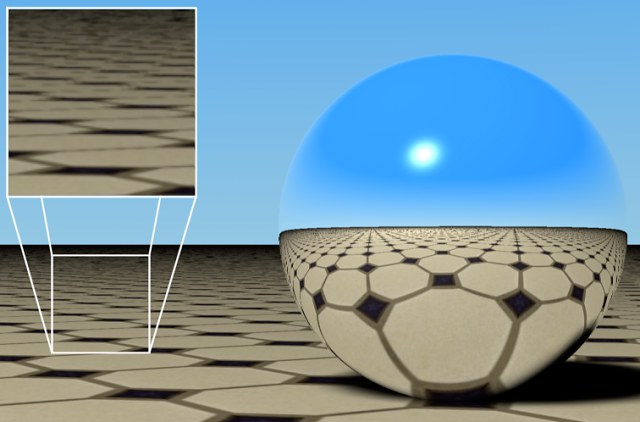 Figure 1: Rendered with MIP sampling.
This unwanted effect is the result of perspective distortion. Each screen pixel representing the floor near the horizon contains perhaps hundreds or even thousands of texture pixels.
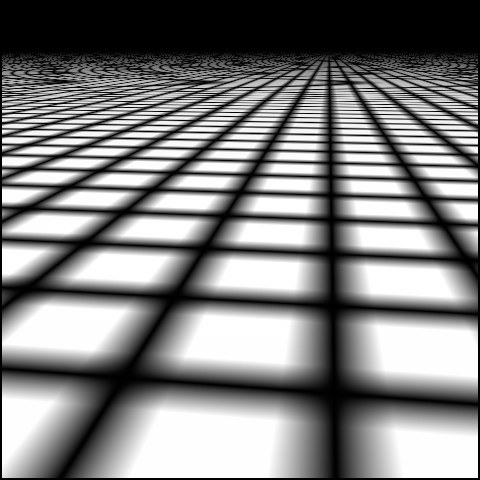
MIP and SAT mapping approximate a value using these pixels. Only an approximation is made, since calculating the exact value would increase the render time greatly. Figure 2 shows Edge antialiasing with 2 x 2 oversampling. The material used SAT sampling. The image quality is much improved, including the reflection on the sphere.
 Figure 2: Rendered with SAT sampling.
The downside to MIP and SAT mapping is that they require extra memory. MIP mapping needs an extra byte of memory per texture pixel, SAT mapping requires an extra 12 bytes per texture pixel. Although SAT mapping produces better render quality than MIP mapping, MIP mapping uses much less RAM and hence is the default interpolation type.
As a rule of thumb, use MIP mapping initially and switch over to SAT mapping if required. Cinema 4D's shaders use SAT mapping automatically without consuming additional memory.
MIP and SAT mapping affect the render time. On the one hand, MIP and SAT mapping take slightly longer to render. On the other hand, you may be able to reduce the antialiasing setting.
Blur Offset, Blur Scale
MIP and SAT mapping only approximate the optimum computation, since a precise computation would increase the render time greatly. SAT mapping is more accurate than MIP mapping. But sometimes these approximations can make a texture too blurred or too sharp.
So the Blur Offset and Blur Scale options enable you to blur or sharpen the mapping. Blur Offset softens a texture. Blur Scale fine-tunes the strength of the MIP/SAT mapping. A positive value increases the blur; a negative value weakens it. A strong value blurs detail but helps prevent flickering during animation. A weaker value brings out more detail but, increases the risk of flickering.