Track Properties
Use this setting to turn animation tracks off, i.e., the track will not be animated despite existing animation. This state will automatically be inherited by the Child objects (Child objects’ states can nevertheless be switched independently of the Parent objects). The same functionality can be found in the layer column in the form of an Film Strip icon that can be turned on or off.
Activate this setting if you want to switch the track to Solo Animation mode, i.e., only that track will be animated and all others will be turned off. This state will be inherited by all Child objects but can be changed on an individual basis. The same functionality can be found in the layer column in the form of a film strip that can be turned on or off.
See Set/Reset Constant Velocity.
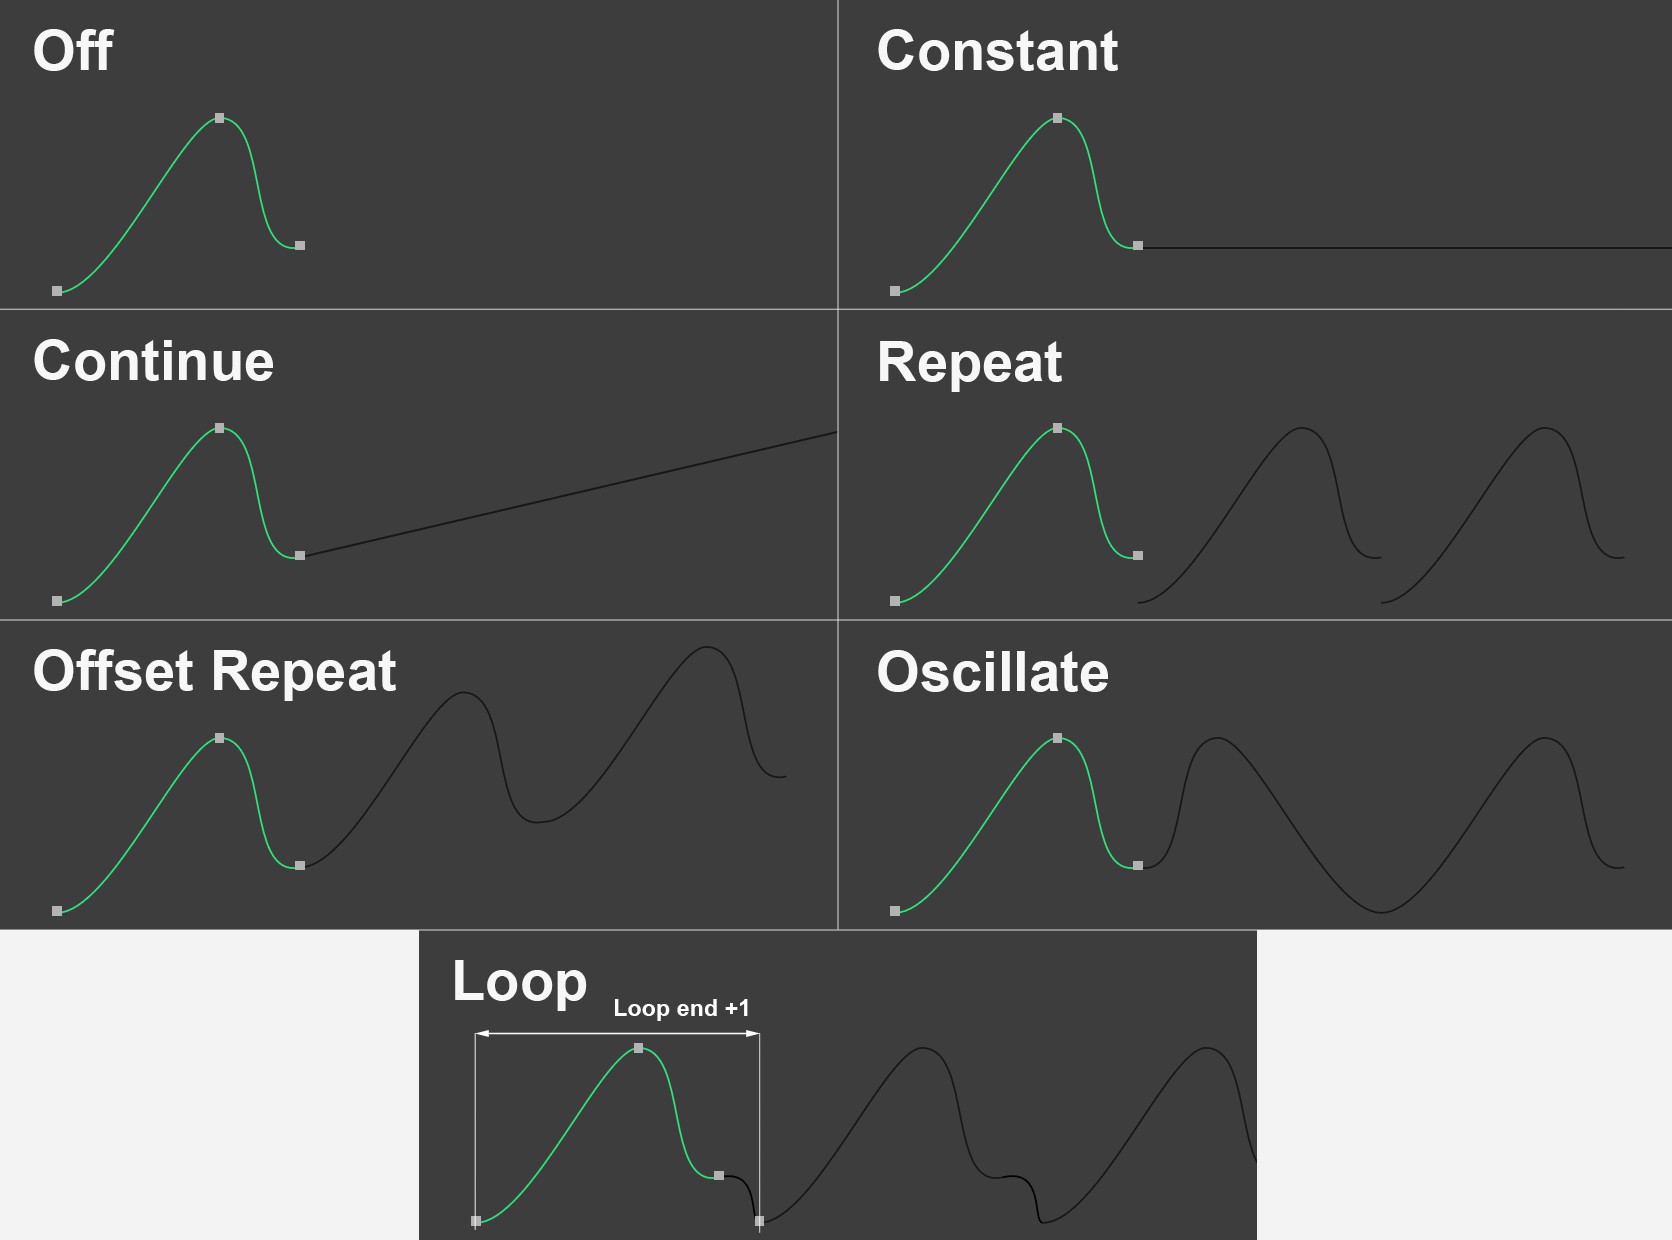 Top left: the original animation animated with 3 keys followied by the different After modes.
This is where you can easily define how the track animations should behave before the first and after the last key. The following options are available:
The property's value is undefined before and after the key animation. For a position animation this would mean that you could move the object anywhere in the editor without losing control of the animation.
The value of the first and last keys will remain before and after the key animation.
The speed with which a parameter changes will be ascertained based on a tangent's speed of ascension and maintained infinitely until the end of the document.
The key animation will be repeated seamlessly. Here it would make sense if the first and last keys shared the same value in order to prevent a jump at the end / beginning of the animation.
Similar to Repeat. When start and end keys have different values a gradual ascending or descending curve may develop periodically due to the fact that the curve with the start key will be laid on the end key.
Start and end keys will each be mirrored horizontally. Such animations are good for extension / contraction animations (e.g., hydraulic cylinders) when the opposing movements must remain constant.
Looping can occur in particular for mechanical, repetitive processes, i.e., the first and last keyframes are identical. This is exactly what this option does. It adds a Start key after the last keyframe (loop end +2) (this key is controlled by the first keyframe with regards to values and tangents and cannot be edited, the only exception being that the left tangent can be adapted with regard to timing).
Simply put, this function saves you time in that you don't have to copy and paste the start loop keyframe or fine-tune the End keyframe if the Start keyframe is modified.
If you open such a scene created in a previous version of Cinema 4D, the End keyframe will be defined as a normal keyframe.
Note that the Loop option is only available for the After function.
For the Before and After settings Repeat, Offset Repeat and Oscillate you can define the number of repetitions using their respective values. After the repetitions have ended the last value reached will be kept.
Entering 0 will result in endless repetition.
This is the time +2 at which, in Loop mode, an End Key will be added to the first keyframe, which will represent the end as well as the start of the loop.
Drag the name of a previously created Time Curve here.
If enabled, the Time Track’s temporal position or length will no longer play a role. It will basically be adapted to the corresponding animation track (as if it were identical).
If this option is enabled the colors defined in the Preferences menu ( track X/Y/Z color) for the F-Curves will be used in both ![]() Dope Sheet and
Dope Sheet and ![]() F-Curve Mode. If this option is disabled, the color can be defined freely (for most Tracks).
F-Curve Mode. If this option is disabled, the color can be defined freely (for most Tracks).
Normally F-Curves are displayed in the F-Curve window according to their key value. This can be problematic if an object is animated from, for example, P.X.=20000 to P.X.=40000. The F-Curve will then lie far outside the normal visible F-Curve range, which usually lies around the Y=0 coordinate. Since most users want F-Curves to lie over each other in order to be better able to edit an animation, the following settings can be applied:
- The Auto Relative option will fit extreme F-Curves automatically.
- F-Curve Offset and F-Curve Scale can be used to move and scale curves manually
For either method used: No key values and the animation itself will not change. Only the visual depiction of the F-Curve will change. The track name will be marked with a mock R if different values from = or, for example, 100% is set for both values. In the Timeline’s F-Curve menu you will find the Reset Relative option which will set both values back to default.
 Note the long tangents.
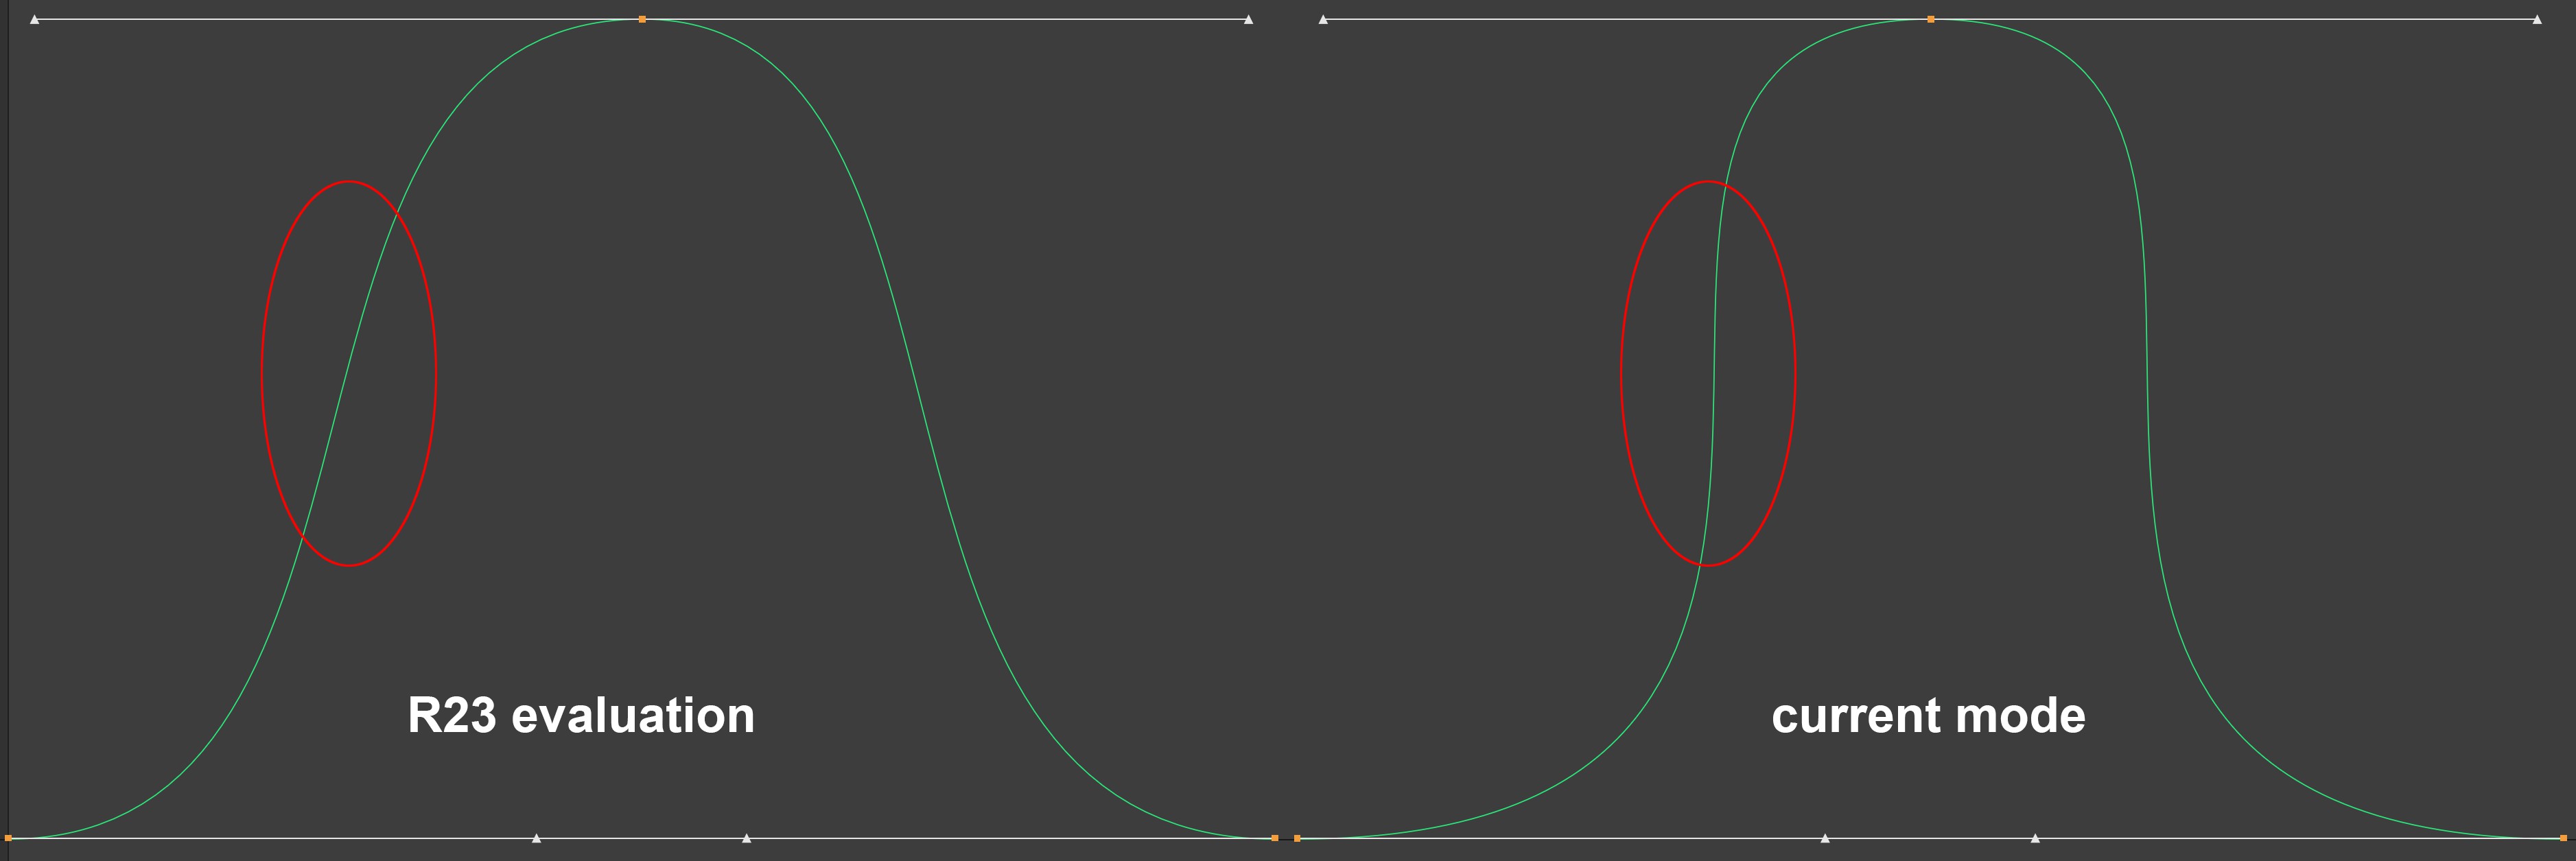
With the introduction of Cinema 4D S24, a new tangent evaluation mode has been introduced. This mode is active by default (option disabled) and it interprets keyframe tangents and thus the value interpolation between 2 keyframes slightly differently. So what does this mean in practice?
If you look at the image above, you can see that it’s possible to realize steep increases or decreases in values for keyframes that lie far apart. This means that you can use fewer keyframes overall.
The following interesting effect results: If you drag the tangents horizontally past the neighboring keyframe, you can move the vertical curve marked at the top right almost parallel. This is also a behavior that was not available in the previous mode.
If you want to use the previous evaluation method, enable the R23 Evaluation option. All scenes will also be loaded accordingly so the animation remains unchanged.