Luminance

A luminescent object can be seen even when there are no lights in the scene. It is self-illuminated.
You can use the three dots button to load an image that is to act as a luminance map. The brighter a pixel in the luminance map, the more luminescent the corresponding region of the material. If you have chosen a Luminance Color and loaded a texture (luminance map) as well, the color will be added at 100% strength to the texture. If you want to see the result without the chosen color, set Mix Strength to 0%.
Luminescent materials are used to help simulate objects that seem to be self-illuminated in the real world, such as the windows of an office block at night, neon writing or a TV screen.

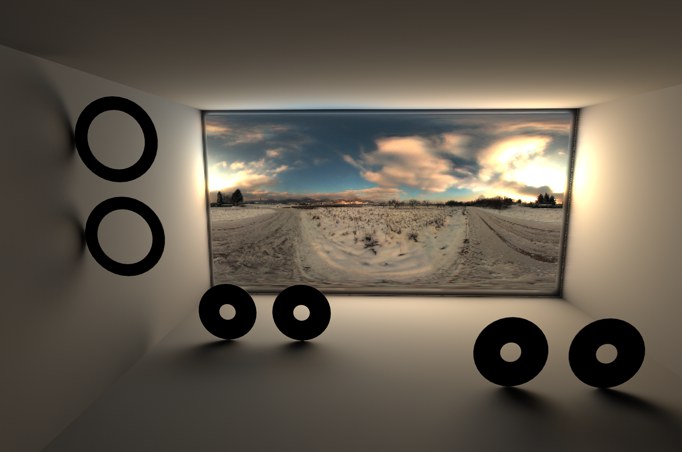
With GI enabled the illuminating object can radiate light, as seen in the image below.
 A texture in the Luminance channel can illuminate the rest of the scene if GI is enabled.
You can specify a color on most of the material channel pages using a color chooser.
Use this setting to adjust the brightness of a channel’s color. The Brightness setting functions somewhat like a multiplier and can be set to greater than 100%.
This parameter is also important in conjunction with Global Illumination lighting because it is used to adjust the brightness of the reflected light. If you load a texture the brightness of the reflected light should be defined using the Strength parameter ("Generate GI" "Illumination" tab).
Here an image texture or a 2D shader can be defined. Refer to the Textures chapter for details.
Use these parameters to mix the color and texture panes using one of four modes. The default mode for all channels is Normal, except for the Environment page, which uses Multiply as the default mode. Not all channels have Mix settings. If you load a texture or a 2D shader, it is placed on a layer above the color (i.e. the texture is placed on top of the color).
In normal mode, the Mix Strength sets the opacity of the texture. If the value is set to 100%, you will see the texture only (remember, the texture is the top layer, so if it is opaque you will not see the color underneath). If the value is set to 70%, the result is 70% of the texture and 30% of the color.
For example, if a texture pixel of RGB 255/0/0 (red) is used with a color value of RGB 255/255/0 (yellow) with the Mix Strength set to 50%, the resultant color is 255/128/0 (orange).
The texture’s RGB value is added to the color’s RGB value.
No values will be clamped (e.g., to 255/255/255)
The color’s RGB value is subtracted from the texture’s RGB value. Thus if a texture pixel is RGB 255/255/255 (white) and the color value is 255/0/0 (red), subtracting with Mix Strength set to 100% gives the result 0/255/255 (cyan).
The RGB value of the texture is multiplied by the RGB value of the color. For example RGB 255/128/0 (orange) multiplied by RGB 0/255/0 (green) results in RGB 0/128/0 (dark green).
Mix Strength defines the mixing proportion between the texture and color panes or between the brightness and transparency (depending on which mode is selected) of the texture to be mixed.