Graphical User Interface
In this section you will learn how to configure the Cinema 4D GUI. Among other things, you can tab windows, create your own icon palettes and change the menu structure.
Restore Default GUI Layout

The Standard layout can be restored at any time by selecting Standard from the drop-down menu at the top right of the main menu.
New icons and new layouts in R25
In Cinema 4D R25, both icons and layout were modified.This will take some getting used to for long-time Cinema 4D users. To make it easier for you do adjust, you will find a Neue Layouts option at the top right of the GUI. If activated, the R23 layouts will be made available on the left. This lets you set all new icons to the old locations, which will help you identify the icons.
In the Standard layout, the following applies in general: The palettes in the Viewport adhere to the following rules:
-
Left: Here you will find tools in dynamic palettes (that can change depending on the mode selected ).
-
Top: Here you will find the different modes.
-
Right: Here you will find the objects.
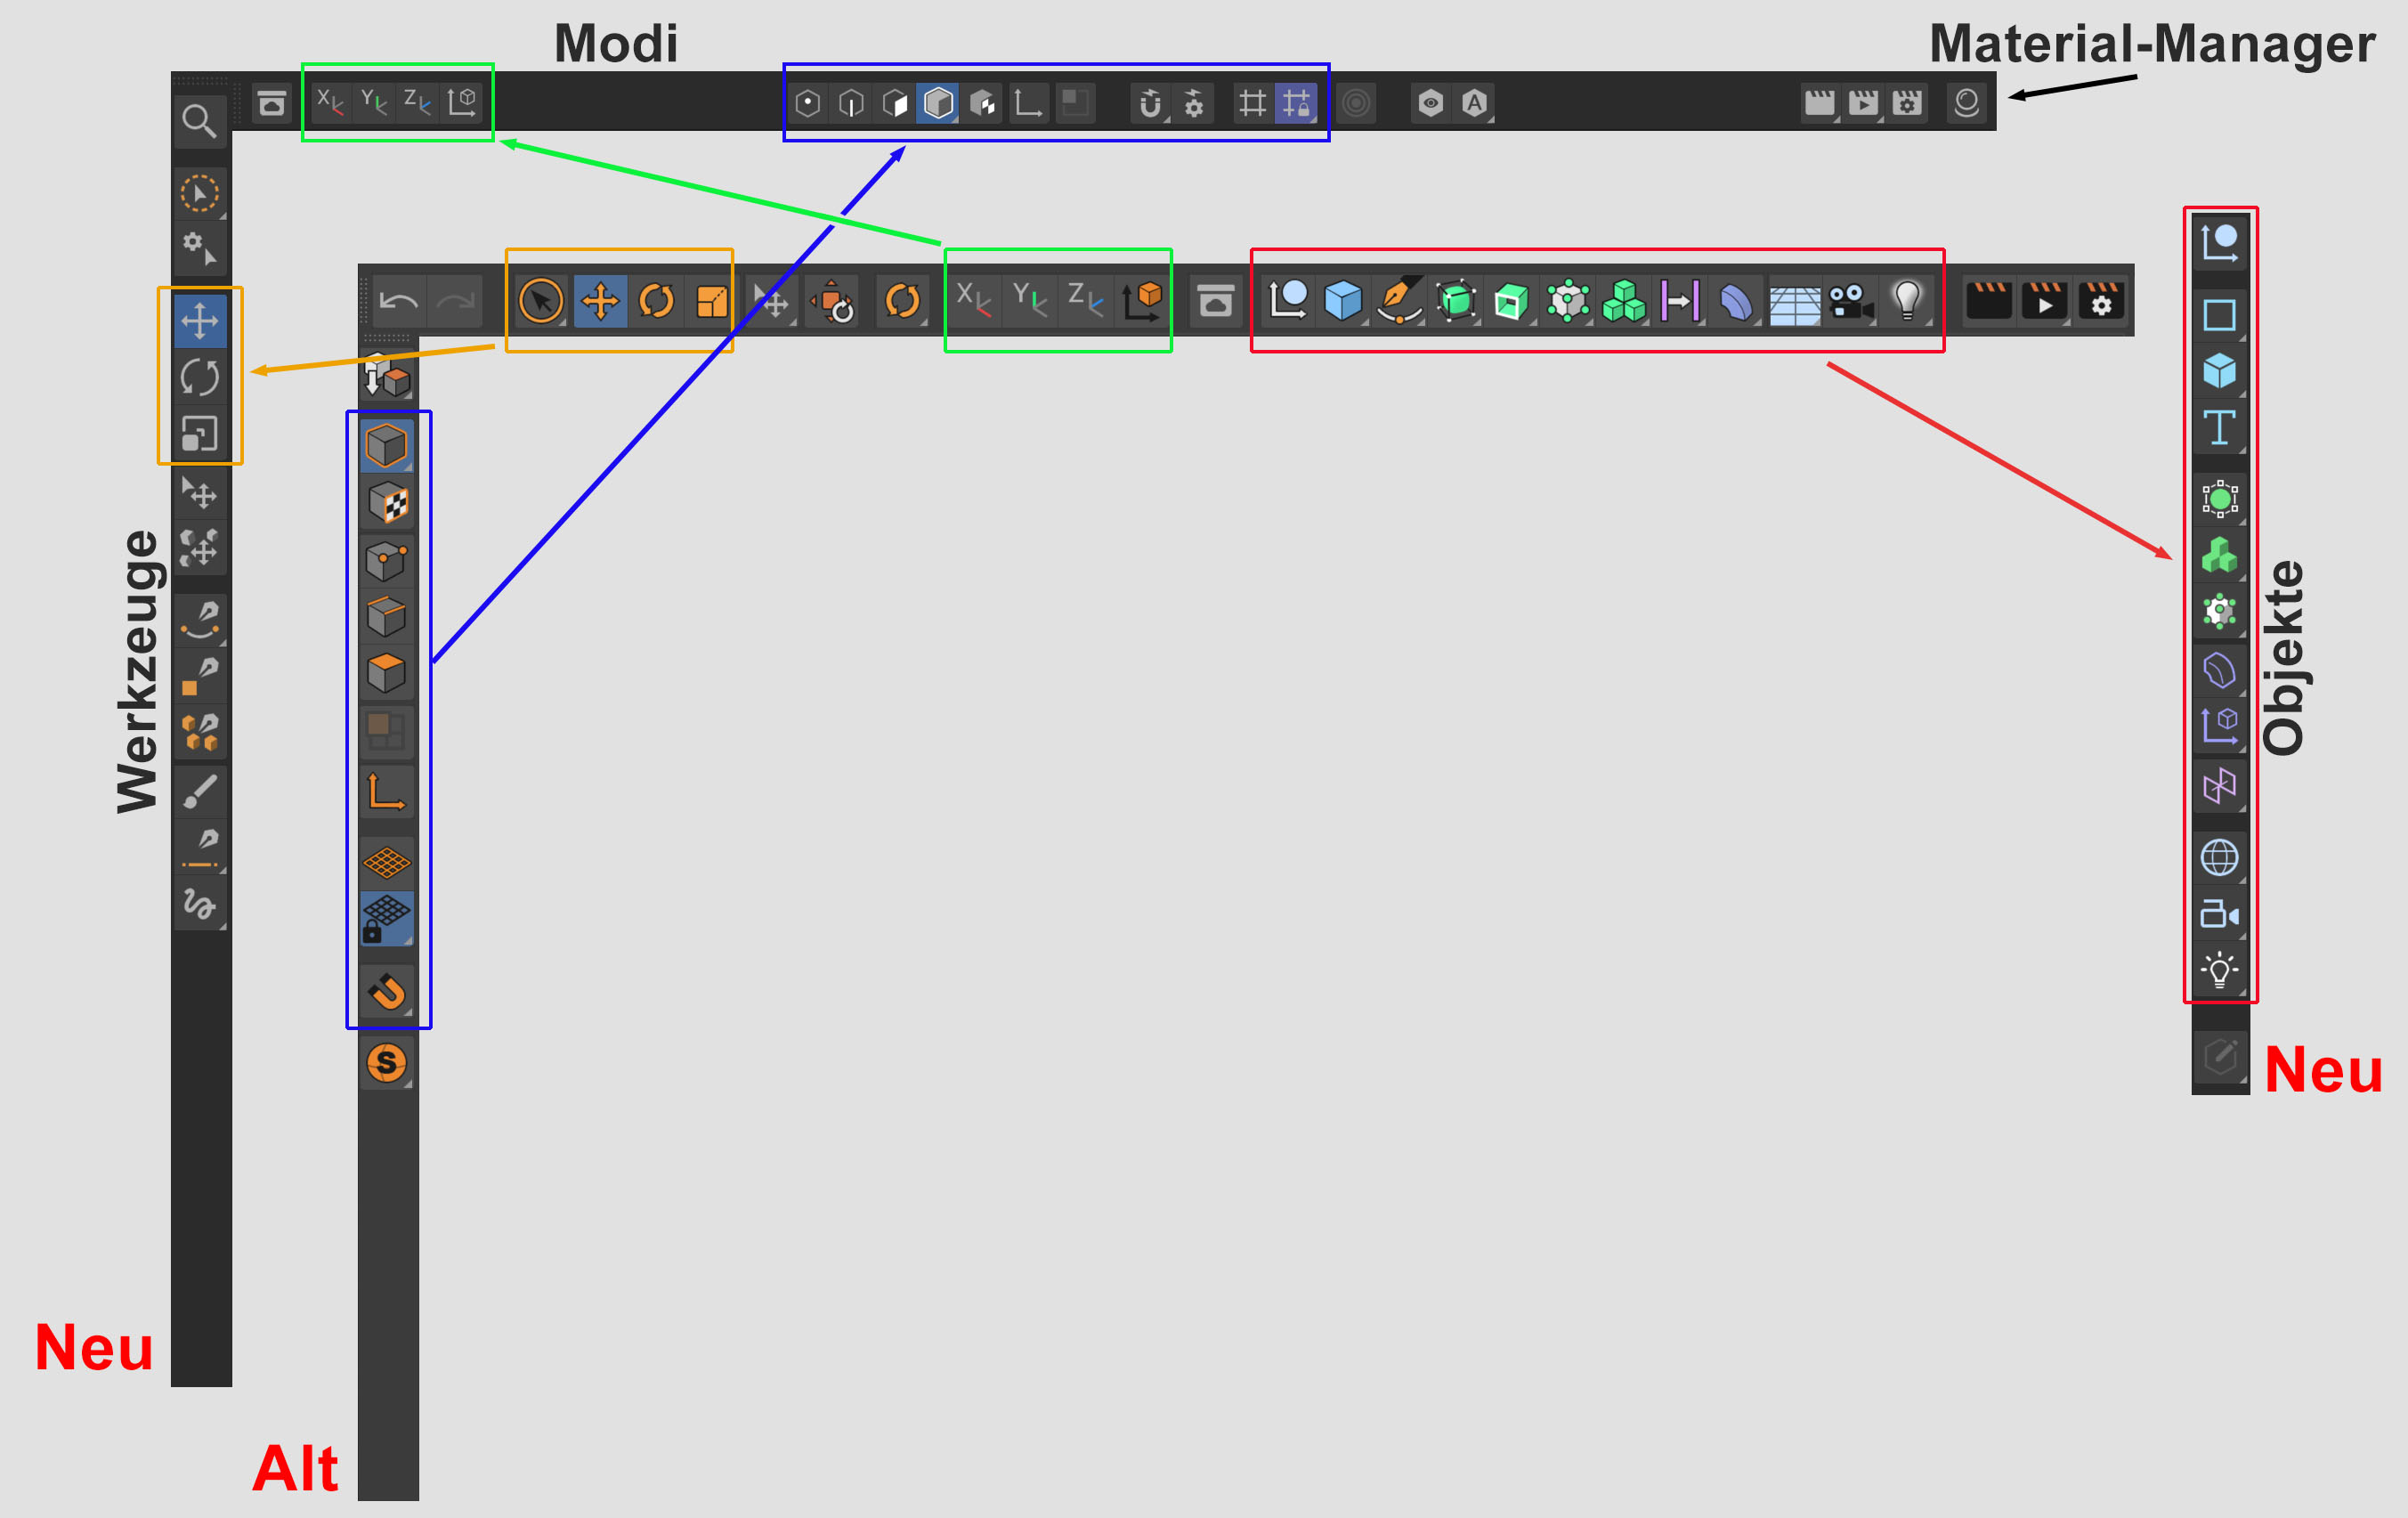
Here are the most important icon groups that were placed at new positions in the new layout.
The exception proves the rule here as well, e.g., the three render icons and the Asset Browser can also be found in the palettes at the top. The menus are organized the same with the exception of a few minor changes, which means that you will still find commands in the usual menus.
If you're asking yourself if the Material Manger still exists, the answer is "yes". It won't be visible initially but it can be opened to appear vertically next to the Viewport using the icon at the right of the Render commands.
The Coordinates Manager is also not visible by default but can be displayed or hidden using this icon at the bottom right of the Viewport

These tips should help you get started and learn the new layout.
Working with layouts
In addition to the comfort Cinema 4D already offers there are numerous other ways in which the program can be designed to match your needs perfectly. The main features are:
- Defining keyboard shortcuts in the Customize Commands… Manager
- Creating user or project specific interfaces
- Pre-defined parameters for recurring, unchanging conditions (see below)
Various Cinema 4D start files will be explained later. First we will explain how to set up various layouts - your interface for everyday work.
Regardless of how you want to change your interface to speed up workflow in Cinema 4D you should only make few permanent changes to the GUI.
For example, define a maximum of about 5 keyboard shortcuts. Over time you will get used to using these shortcuts and you will also have a better idea of which functions you use the most and hence which shortcuts you need to create. Do the same in other areas of workflow optimization: make few initial changes and make these changes according to your own method of working.
What’s the advantage of designing your own interface? The default Cinema 4D interface is designed to suit the needs of the vast majority of users. However, you might have your own preferences such as working with icon or text menus, having specific windows or Managers permanently displayed and so on.
Making it possible to easily redesign the programs interface makes it possible, for example, for various users within a team to optimize their personal interface for their particular workflow requirements (e.g., modeling, texturing, animating, lighting, etc.). Since these individual layouts can be saved and called up when needed, multiple users of a particular workstation can call up their very own interface whenever they work with the application.
This also means that each user can create several personalized layouts to suit that user’s different needs.
At first, though, you should start working with Cinema 4D using the standard layout. Once you get you know your own needs and workflow better you can adapt your layout to fit your needs. For example, you can shorten the distance needed to move the mouse between your most-used icons/menus. This can be particularly helpful when working with large monitors.
How to adapt your layout and which Cinema 4D options are available can be found below .
The functions required for managing your layout can be found in the menu under Layouts.
For Arabic-language users: The Command Manager contains the Switch R2L command, which will mirror the entire Cinema 4D layout, including all text, icons, Icon Palettes, Manager layouts, etc. This will make the layout right justified and it will support Arabic language requirements. Selecting this command again will reset the layout to left justified.
As usual, the GUI language can be defined using the Language menu (which, of course, will also affect the GUI accordingly).
Special initialization files
Cinema 4D loads several initialization files during startup. The content of these files is integrated into the layout.
These files should be located by default in your operating system’s user directory (this directory can be easily found by clicking on the Open Folder button in the menu’s page).
System admins can modify this path using the configuration settings.
template.c4d
This file’s settings are loaded and used as default values. This can be very effective if you keep using the same scene-specific settings (e.g., several different render settings).
An overview of all preference settings that can be controlled using this command can be found in the Preferences menu.
template.l4d
This file’s settings are loaded and used as the active layout. You can create this file in one of two ways:
You can generate this file by calling up the function Save as Startup Layout from the menu.