Timeline

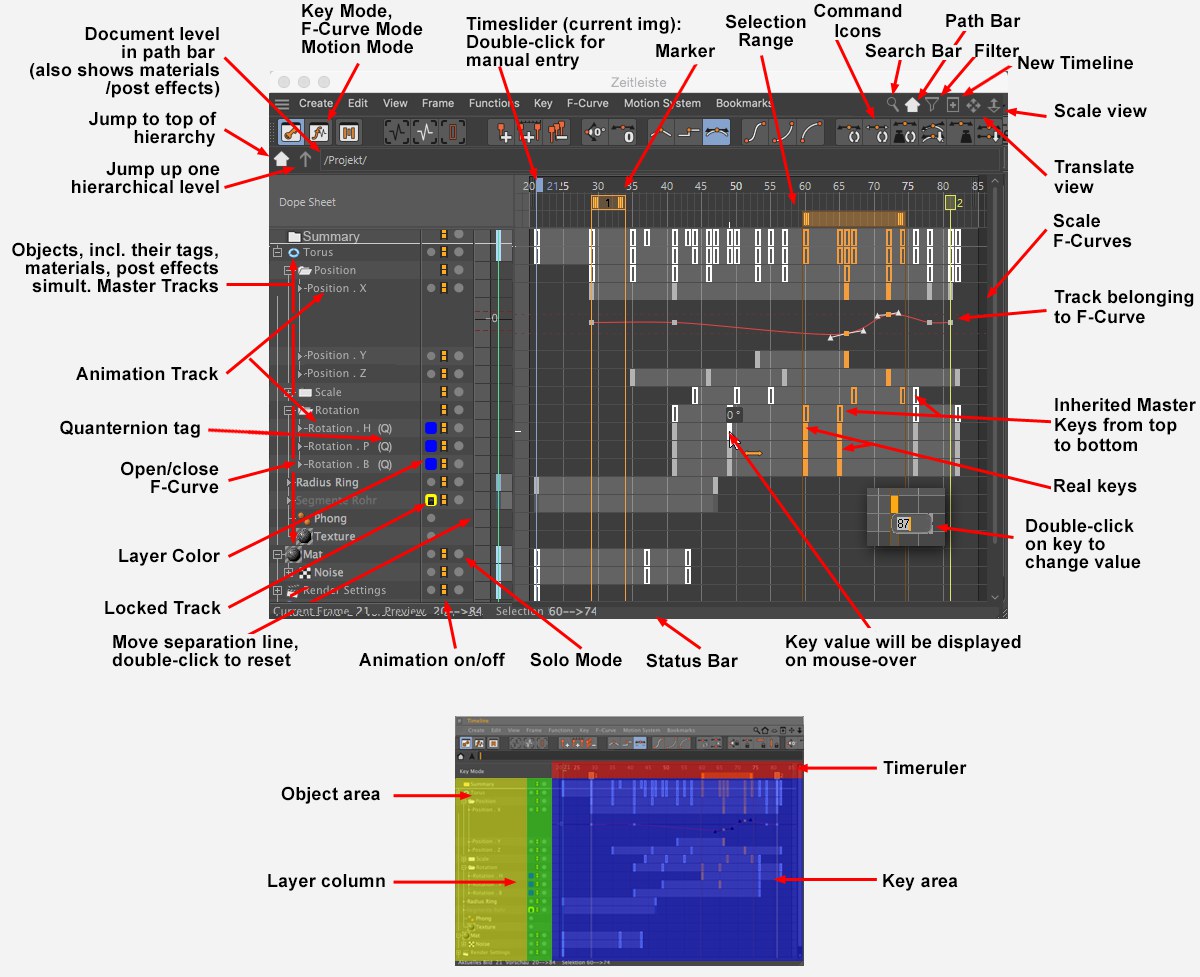
The Timeline is a powerful tool with which you can control, edit and play your animations.
The animation range for all scene objects is displayed in a horizontal window. The key element to all animations is the key frame (key). Keys contain movement (and other) information pertaining to an object at that particular time in the animation. Most animations will require the setting of at least two keys. The change in an object’s property’s values will be interpolated between these two keys (i.e. a rotation from 0° in key 1 to 90° in key 50). The movement can then be seen once the animation is played. That’s basically what the Timeline does.
If the Timeline is active, the
Tracks are used to differentiate what is currently being animated. Simply said, each track represents the temporal change of one object property. This can range from a simple change in position to a change in the Phong rotation. A track can also represent complex special effects such as pulsating, 3D sound rendering, and more. Each track contains the corresponding keys, of which an unlimited number can be created.
In addition, each track has its own F-Curve that controls the interpolation between keys (except for properties that cannot be interpolated, such as an option). Mini F-Curves are located in the expandable menu below the corresponding track’s keys and can be edited here, although only in a limited fashion. F-Curves can be edited much more comfortably in F-Curve mode, in which the curves are displayed larger and are more easily editable.
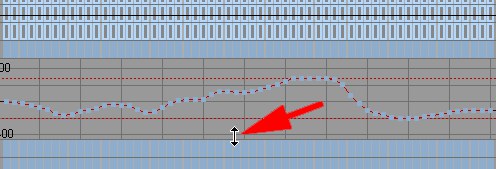
 The Mini F-Curve region can be scaled vertically by dragging its lower edge. A larger or smaller Mini F-Curve view will result respectively.
Cinema 4D’s new layer system is also helpful when working with the Timeline. Only the objects to be animated and their keys and F-Curves can be made visible, which makes working only with these elements much easier. Objects can be locked to avoid making changes to them by mistake.
In addition, the Objects Manager’s powerful filters have been integrated, which help you concentrate on what is essential.