Brush Settings
![]()
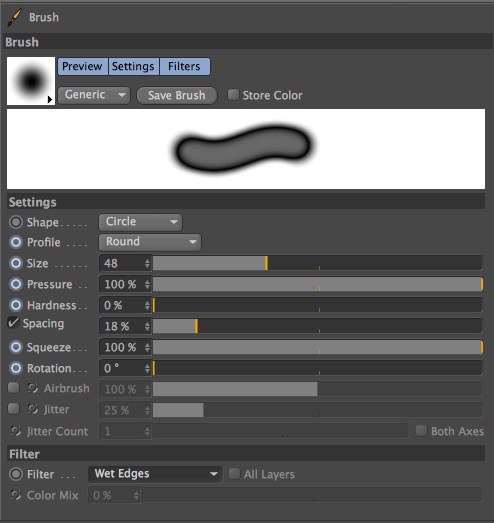
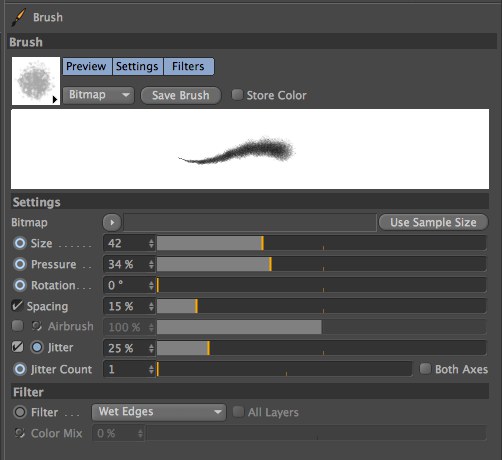
BodyPaint 3D offers you complete control over brushes. When the brush tool is selected, the brush settings will appear in the Active Tool manager. Here you will find descriptions for these settings.
A preview for the brush is displayed in the top left corner of the manager. Click on this preview to access the brush presets. Below this preview you will find a larger preview, which is a sample paintstroke.
Left of each parameter you will see a blue circle. If a circle is filled, it means an effector is enabled for the parameter such as pen pressure or pen tilt. Effectors are described later in this chapter.
Enable this option to blend the active color in the Color manager with the brush preview. If you then save the brush settings as a brush preset, the color will be saved together with the brush settings.
If Store Color is disabled, only the brush settings will be saved.
This saves the current brush settings as a brush preset in the Brush Presets. Enter the name for the brush in the dialog that opens. The familiar Save Preset window will open.
The Type drop-down list (next to the brush preview) defines the brush type: Generic or Bitmap. The tip of the generic brush is defined by means of options and sliders. These are:
Choose from two basic brush shapes: circle or rectangle. The settings below refine the basic shape.
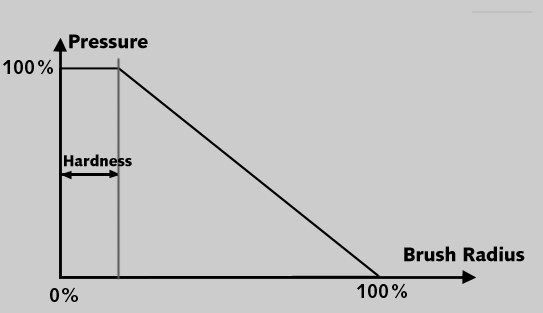
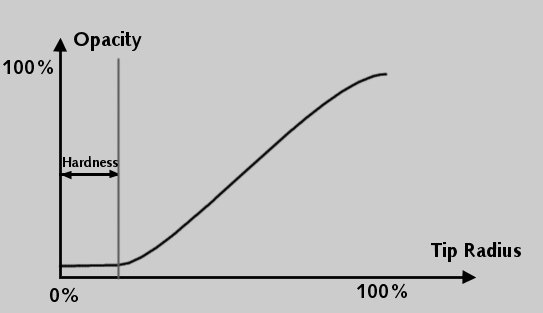
The profile defines the pressure gradient for the brush tip. The graphs should help to clarify. Each graph describes the brush pressure over brush radius.
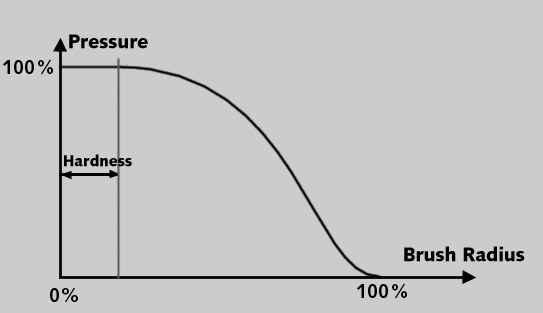


If you select the User Defined option, you can create your own pressure gradient for the brush tip. Click the blue circle next to Profile to open the following window.
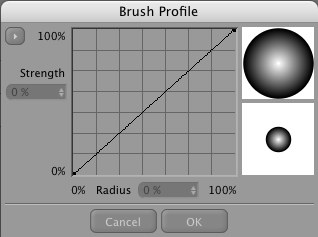
The Y axis corresponds to the brush strength (i.e. pressure) and the X axis represents the brush radius. The curve is linear by default. Click on the first point of the curve. The point will turn to indicate that it is selected. Drag the point and notice how the two real-time previews to the right of the graph update in real-time. The upper preview shows you the brush profile, the lower preview shows the brush itself.
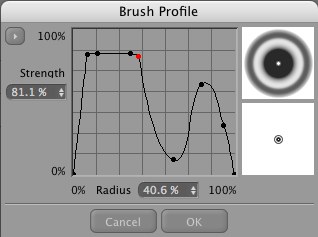
Click anywhere inside the graph (i.e. other than on a point) to create a new point. The curve will adjusts itself to run through the new point. You can add any number of new points.
To delete a point, click on the point to select it and press the Backspace key or drag the point out of the window.
You can use the Strength and Radius boxes to read or enter values for the selected point.
 |  |
If you click the triangle in the top left corner of the dialog, a menu will open with the following commands:
Copies the active curve to the clipboard. Once you have copied the curve, you can use the Paste Curve command to paste it into an effector’s graph. An effector enables you to change a brush parameter dynamically by means of an input device. For example, if you have a graphics tablet, you can use the pen direction to change the brush size while you paint.
This command is only available if you have copied a curve to the clipboard. It pastes the curve stored in the clipboard into the graph.
Restores the curve to its default shape (a straight line).
Flip Horizontal, Flip Vertical
These commands flip (mirror) the curve horizontally or vertically.
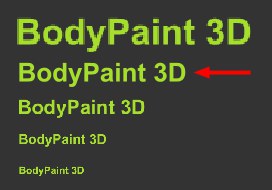
This defines the overall size of the brush. You can edit the value using the slider or you can enter the value numerically into the box right of the slider. The value defines the diameter of the brush in pixels. You can set the value from 1 to 200 pixels.
Brush size and pressure can be defined interactively and uniformly in Cinema 4D for ALL brush tools:
-
Center mouse button + drag left/right = brush size -
Center mouse button + drag up down = brush pressure
This slider defines the brush pressure. The lower you set this value, the more transparent the brushstroke becomes. The maximum value of 100% defines an opaque brushstroke.
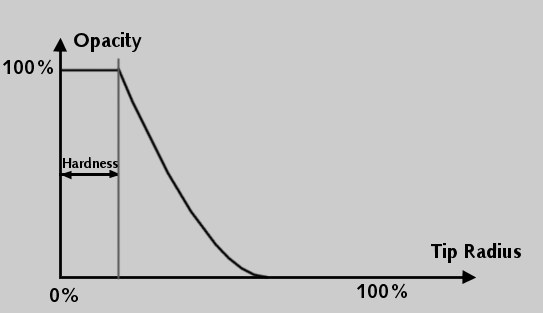
This determines how much of the brush is hard as a percentage. The lower you set this value, the softer the brush becomes at the edge and the more its edge will blend with the background color. If Hardness is set to the maximum value of 100% the brushstroke will not blend with the background color at all.
 0% Hard. 0% Hard. |  100% Hard. 100% Hard. |
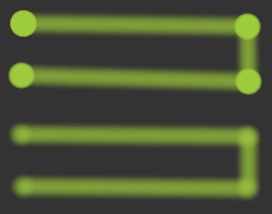
If you enable this option you can define the distance between brushmarks in the stroke. A large value will result in a trace of brush marks that follow the cursor. A low value will produce the effect of a continuous brushstroke. If Spacing is disabled, the continuity of the brushstroke will depend on the speed of your computer — a rapid brushstroke may lead to fragmentation.
 High Spacing value.
The Jitter option causes the paint to be applied at a certain distance from the brush tip.
 Linear brushstroke with Jitter enabled. Linear brushstroke with Jitter enabled. | 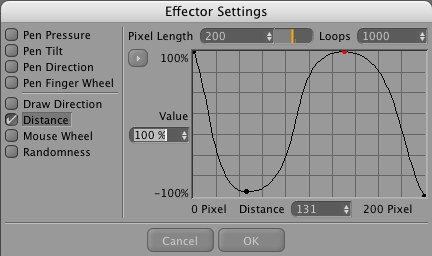 |
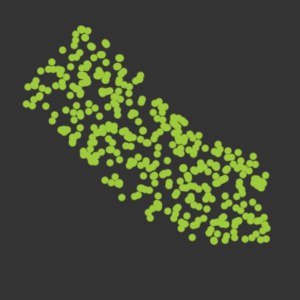 Jitter and Randomness enabled. Jitter and Randomness enabled. | 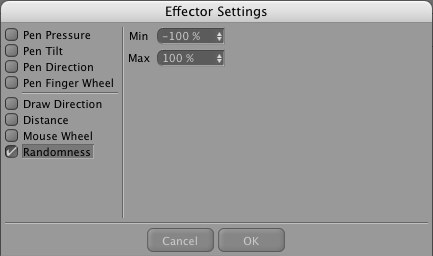 |
Additional random copies of the brush tip will be created. This enlarges the overall application and increases coverage.
Here you can squeeze (i.e. narrow) the brush tip. A value of 100% leaves the brush in its original shape (circular or rectangular). The lower you set the value, the narrower the tip becomes.
 100% and 0% Squeeze.
You can rotate the brush tip by moving the slider or by entering a rotation angle in the input box.
 Airbrush with large and small settings.
Simply clicking with the mouse will apply color - no brush movement is required. It is better if you do not define a brush hardness or pressure. Use the slider to define the amount of color to be applied. If you use this functionality in conjunction with Jitter you should enable the Both Axes option.
BodyPaint 3D handles all loaded bitmaps as grayscale images. You can still use RGB Color bitmaps, but BodyPaint 3D will convert them in memory to grayscale. Black areas of the bitmap are transparent and white areas are opaque. Gray tones vary in transparency accordingly — tones closer to black are more transparent than tones closer to white.
If you click on the triangle, a menu opens with the commands Load From Selection / Texture and Load From Disc, None and Edit in BodyPaint 3D.
Loads a bitmap from a storage medium. Don’t forget to save the brush via the Save Brush command. Otherwise it will be lost when you exit Cinema 4D.
If you select the Load from Selection/Texture command the currently displayed texture or part of the texture (if a selection has been made) will be used as a brush (see also Store Brush).
Selecting the Edit in BodyPaint 3D command will load the bitmap used to define the brush’s profile into the Texture view where it can be modified.
None removes the currently loaded bitmap brush profile.
After modification, select Load from Selection/Texture to load the modified bitmap. Don’t forget to save the brush to the Content Browser via the Save Brush option.
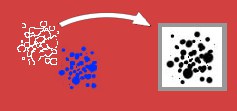
 Various brush sizes. Red arrow: After clicking on Use Sample Size.
Clicking this button will set the brush parameter Scale back to the base texture’s original size. This increases the quality of the applied stroke. Increasing the brush size lowers the quality of the applied stroke.
The bitmap brush has fewer settings than the generic brush — Shape, Profile, Hardness and Squeeze are all absent because these properties are defined by the bitmap itself.
The Size, Pressure, Spacing, Jitter and Rotation parameters have exactly the same effect as with the generic brush type — see Generic Brush Type for details.
Filters add effects to the brush such as painting with watercolors and smudging.
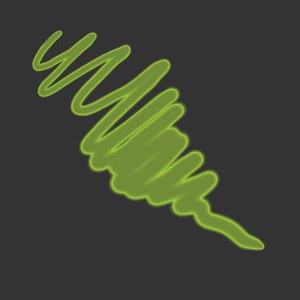 Filter set to Wet Edges.
This filter generates a watercolor effect. The brushstroke is slightly transparent and paint accumulates at the edges (i.e. the edges are less transparent than the center).
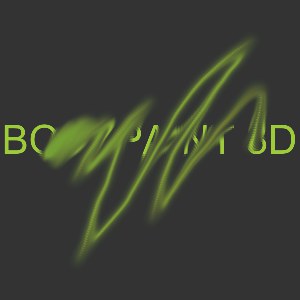 Filter set to Smudge.
If All Layers is enabled, all layers will be considered when you smudge the active layer.
The Color Mix slider controls the extent to which the active color or pattern (i.e. the one in the Color Manager) is applied to the smudge. If the slider is set to 0%, no new paint is applied and you will smudge the existing colors only. As you increase the slider’s value, so more and more of the active color or pattern is applied to the smudge. In addition, you can enable an effector for the Color Mix value.
Dodge, Burn, Saturate, Desaturate
For details on these filters, see Dodge, Burn, Saturate/Desaturate and Sponge.