Edit Menu
Undoes the last change made to a texture, such as a brushstroke or a filter effect. Note that this type of undo shares the same buffer as the standard Undo command.
In contrast to Copy, this command commands not just the active layer but all layers merged together. The selection therefore applies to all layers. Hidden layers are ignored.
Pastes the contents of the clipboard into the selection.
Fills the selection — or the entire layer if there is no selection — with the active color.
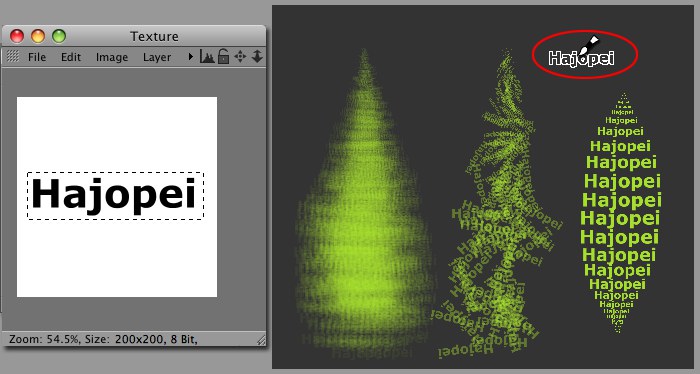 Use a selection to create a brush.
Lets you create a Brush Preset using the current texture or texture selection. Black is the color with which the actual brush shape will be applied. White represents the transparent areas and the grayscale colors represent the values between transparent and opaque. When this command is selected existing layers may be consolidated internally.
The familiar "Save … " dialog window will open in which you can define the library save path. The bitmap used to create the brush will also be saved to the library.
You can also modify existing brushes in BodyPaint 3D by selecting the Edit in BodyPaint 3D command.
These two commands let you create either a Color texture or a Wallpaper Preset using the current texture or texture selection. The familiar "Save … " dialog window will open in which you can define the library save path.
Both will be saved in the Content Browser’s "BodyPaint 3D Presets (User)" folder.
Tiling enables you to paint over the edges of a texture in the Texture view — the brushstroke will continue from the opposite edge. Enable Tile U and Tile V for tiling in the horizontal and vertical directions respectively.

Toggles multi channel mode on and off.
(see also Channels).
This mode lets you to display individual material channels on your object. The active channel is temporarily displayed as a color channel.
For example, if you activate the transparency channel, you will see the channel displayed on the object as a grayscale texture. You can then manipulate the grayscale texture in the usual way, such as by painting on it with the brush tool.
Once you are done editing the single channel, disable the option to display all material channels once again in the usual way.