UV Tools
Why should UV components be highlighted? For editing purposes.
Each polygon in the Perspective Viewport is always represented in the UV Editor. If an object consists of 487 polygons, the same number will be displayed in the UV Editor. The position, size and rotation of each UV polygon defines that part of the texture on which the corresponding object polygon is displayed.
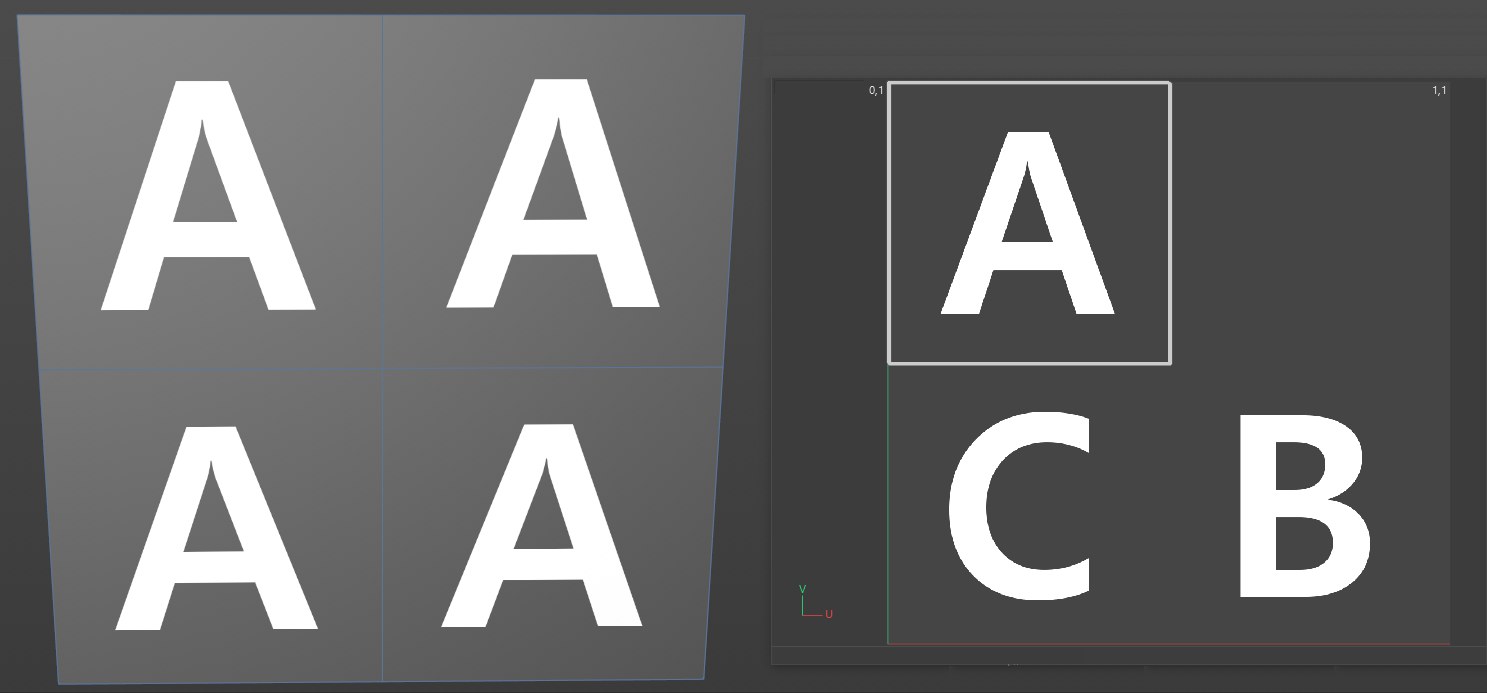
The individual UV polygon is linked to an actual object polygon but is otherwise independent, i.e., you can move, scale or rotate the UV polygon on the texture as you please. The position, size and rotation of the object polygon will remain unaffected. However, its look (if Quick Shading and Textures are enabled in the Viewport’s Display menu; the texture will be displayed on the object in Shading mode) will be affected. Theoretically, you can place each individual UV polygon at the same location of the texture and each object polygon would display the same section of the texture. Please note the following two images with regard to this:
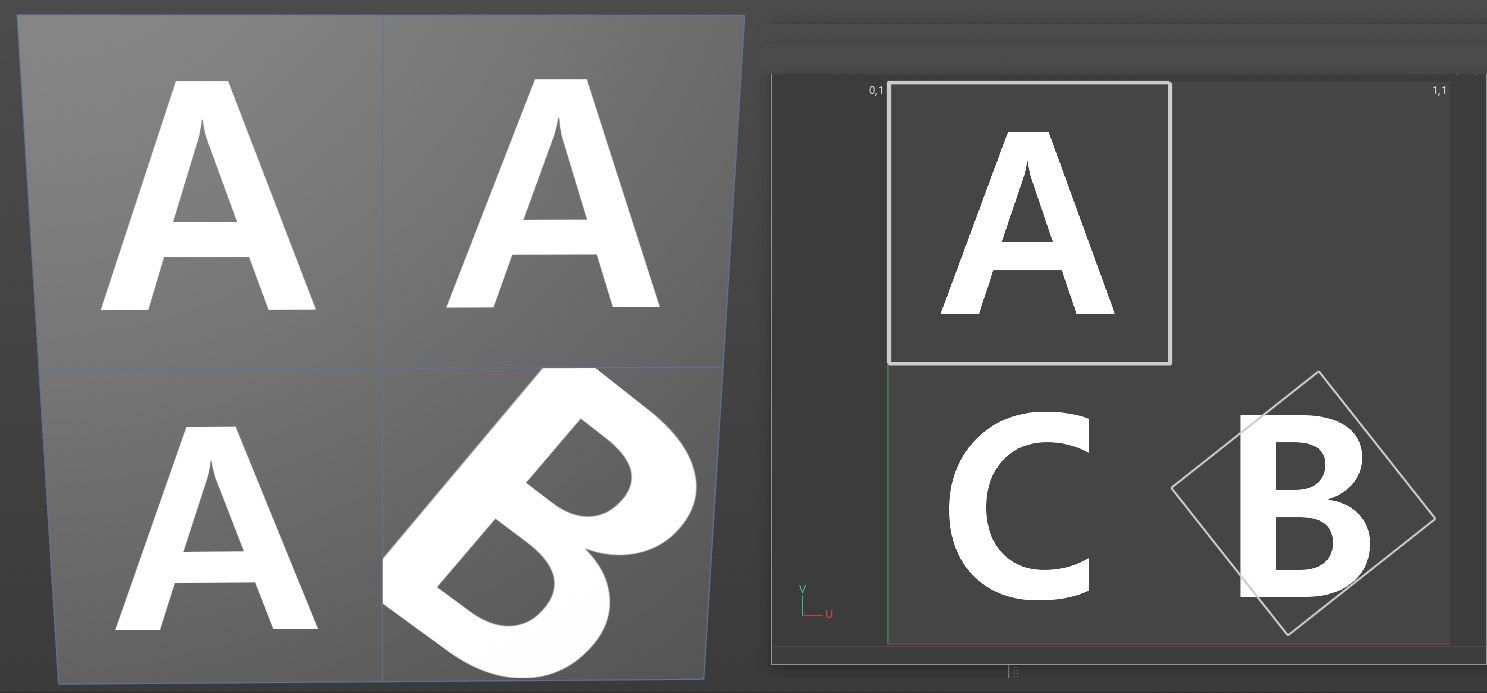
 In this and the following images: at left the texture UV projected onto a cube, at right the texture UV Editor with the bitmap texture.
All vor UV polygons lie above the A. If, for example, you move a polygon over the B and then rotate it and scale it down, the following will result>

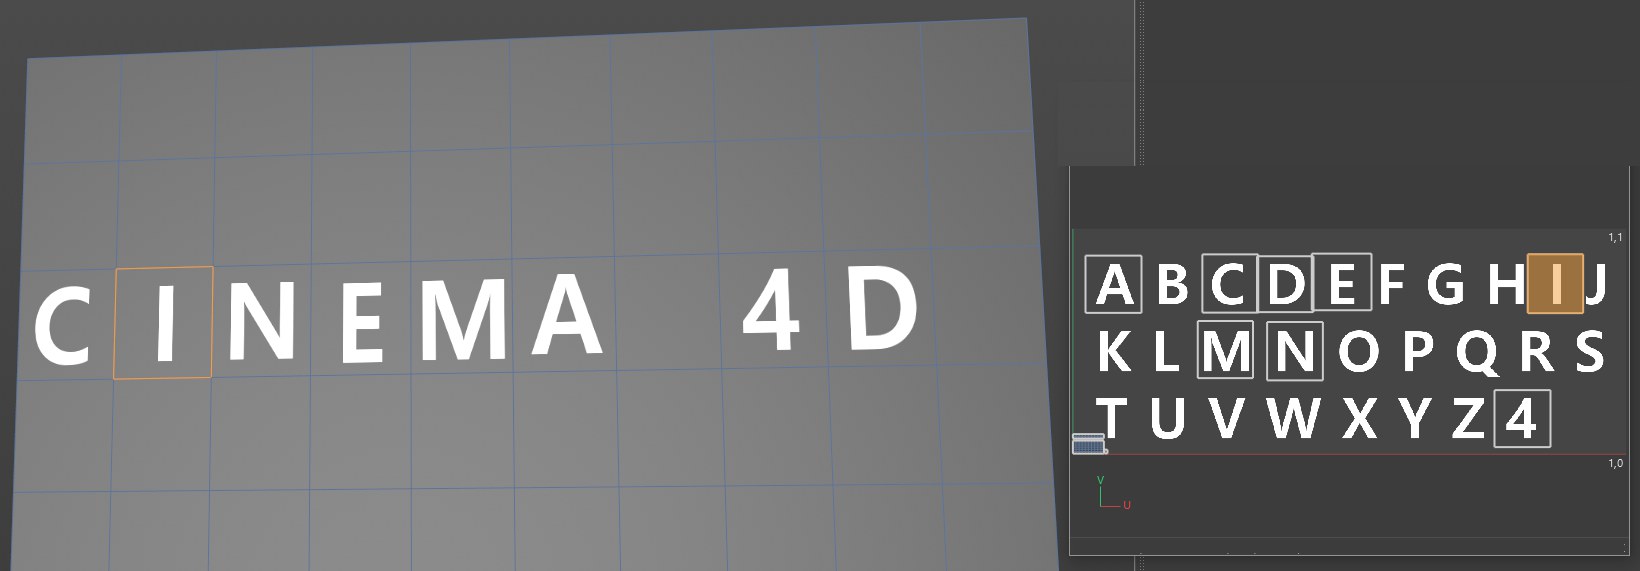
How the UV coordinates work is shown even more clearly in the image below

In the image on the right you can see how the UV mesh can be manipulated to achieve the desired result. At the top right, the original UV mesh has been scaled down and moved to empty regions of the texture.
The UV polygons in the center row were each positioned over the respective letters.
The tools described in the following sections work analogous with the selected points. To provide a better overview, the functions are only described using polygons as examples. If a function differs with regard to points, this will of course be mentioned.
Most of the following tools work in both the 3D view and the texture view.
Note that the options for the tools described in the following differ in part, depending if the focus is on the Texture UV Editor (![]() UV Mode
UV Mode