Basic Properties
The only property found on this tab is the name of the tag. This setting defaults to Cloth, but it can be changed manually for project organization purposes.
![]() Icon Settings
Icon Settings
Sometimes, when working with numerous icons that look the same, you want to have a better overview of it all. This is what this function does. Objects and tags can be assigned their own icons or existing icons can be re-assigned or colored:
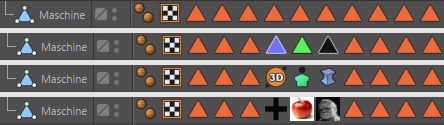 Examples for tags that were colored, replaced by existing ones and custom tags.
Note the Show Custom Icons command in the Object Manager’s View menu, which lets you switch to the Cinema 4D icons.
There are a few objects (e.g., Houdini generator) and tags (e.g., Material tags) that can’t be colored because they are controlled by Cinema 4D directly.
Here, you can either
- load a bitmap - whereby an alpha channel will be evaluated, if present. Internally, this bitmap will be scaled and distorted accordingly if it has a different size than 64*64 pixels (which is used internally by Cinema 4D). or
- enter an existing command ID for corresponding icons. These IDs can be found in the Customize Commands Manager.
This function can be used to color an existing or a custom icon. You can select from the following options:
- None: No coloring will take place
- Display Color: Each object can be assigned a Display Color in the Basic tab. This will be used here. Since the Display Color can also assume a layer color objects can also be colored according to the layer to which they are assigned.
- Custom: Lets you select a custom color.
Tags have no Display Color and can therefore only be colored using a custom color. Do do so, activate the Icon Color option.
These commands can be used to save icons as a preset or to load an icon. Custom icons are saved to and managed with the Content Browser under Presets/User (in the corresponding folder).
Here you can enter a name for the object.
If an element was assigned to a layer its layer color will be displayed here. This field reflects the layer color in the Layer Palette. You can drag & drop layers from the Layer Manager or similar layer fields onto this field. You can also assign layers or remove elements from current layers using the menus located behind the small triangle.
The Cloth Engine’s priority can now be freely defined. Prior to Cinema 4D R18, the priority was set to Generators + 100 and could not be modified, which could lead to problems with priorities for other functions.
More information about priorities can be found under Priority.
Generally speaking, the priority should only be modified if unusual effects are produced. A typical example would be if a character’s clothing lagged one frame behind. In this case, the Simulation setting would have to be modified.
This option turns the Cloth Simulation on and off. With a checkmark placed in the checkbox for this field, the cloth engine is live. This turns on the engine, allowing for solutions to be solved for the cloth object.
At many points when applying clothes to an entire character, certain pieces of cloth don’t need to be simulated and can slow down the performance. For example: A jacket is being added to a character’s wardrobe. Now, during the simulation it will need to collide against the shirt during the draping process. The pants would not need to be a part of this simulation, so its Cloth Engine option could be disabled.