Asset
Here you will find a summary description of the Asset and Output Generators.
This factor can be found at numerous locations throughout Cinema 4D when importing or exporting foreign formats. Therefore, don’t be surprised if the term ,export’ is used if this factor is seen in an import function (this factor is explained as a whole here).
This factor lets you scale files upon import/export, i.e., practically all relevant numerical values saved in the file or those to be saved will be multiplied by this factor and then saved - or interpreted when loaded.
The unit at the right in turn defines how upon
- Import the numerical value saved in the file is converted to the current Cinema 4D unit. Example: if an X value of 1 is saved in the file and you define Feet, the X value will be converted to 30.48 cm in Cinema 4D (if centimeters are defined by default in Cinema 4D).
- Export numerical values are saved in the file. Example: an X value is set to 100 cm in Cinema 4D. If you define Feet for export, the exported file will save a numerical value of 3.281 (1 meter = 3.281 feet).
More information about units and scaling can be found in the Project Scale section.
This command selects all Output Generators belonging to a given Asset Generator. This can, for example, be very useful if you’ve moved an Output Generator in the Object Manager (e.g., to another hierarchy) and can no longer locate it.
Use this command to update the Output Generators. Superfluous generators will be removed (this can, for example, happen when Output Generators are duplicated and parameters are changed in the Asset Generator that change the output type).
Since Generators cannot create or delete materials/textures in Cinema 4D, but the Asset can still "allocate" this, this button can be clicked to manually create a new material. Make sure that you use this command (or the output generator button of the same name) to extract all textures of a given Asset needed for an animation.
This command resets the cache of any dynamics simulation integrated into the Asset. If you switch the input object, for example, clicking this button may be useful. Normally, this happens automatically when the animation jumps back to frame 0.
If other parts of Cinema 4D react oddly - or not at all - to Houdini Output Generators (e.g., Hair), set the corresponding objects (e.g., Hair objects in the Basic tab) or tags (e.g., XPresso tag in the Basic tab) to Priority Generators 2 or higher (see above).
As already explained here, the cooking process can be aborted (the Asset Generator icon will turn red). Click on this button to start the cooking process manually.
Here you can modify the priorities of Asset Generators. The following options are available:
- Automatic: Internally, the priority Generator + 1 or Expression +1 will first be used depending on whether an input object exists or not. If the Asset contains particle generators, Animation will be used for the calculation.
- Manual: If you want to give each Asset Generator its own priority, this can be done in Manual mode. Let’s say you feed the Output Generator as an Input Object into a second Asset Generator and its Output Generator into a third. You would then have a type of Asset cascade whose sequence is relatively important. Using the Manual function you can precisely define which Asset should be implemented when (in as far as you don’t want to use the Object Manager sequence, which is also valid).
Details about Priority can be found in that section.
![]() Infos
Infos
Displays the Asset file’s relative or absolute file path.
The Houdini license that is installed on your computer.
Displays the name defined for the Asset when it was created.
Displays paths (to subsets, etc.) and names (node names).
Displays information about the internal setup of Assets of Output Generators. The Asset creator can use this information to see which Asset element the Generator is dependent on.
Here you will find information about the corresponding Asset Instance ID (all Assets open in Cinema 4D will be numbered).
If provided by the Asset, you will find one or more parameters in the Input sub-tab with which you can connect objects as Input Objects. These are named either ,Sub-Network Input #x’ or according to how they were named in Houdini.
Depending on its purpose, it can be useful to hide the object since only the output object that is generated should be visible in most cases.
If enabled, the linked object above it and all its sub-objects will be included:
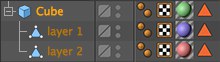
If you drag Cube into such a link field, both layers will also be included and all will be summarized into a single objet. Textures assigned to these elements (incl. those assigned via a Polygon Selection tag) will be assumed correctly and can be evaluated by the Asset.
If you use a Thinking Particles group as an Input Object, these can have any number of subordinate particle groups. This option defines whether or not sub-groups should also be included.
If the Asset contains groups (the Houdini parameter’s name must have a group prefix) that are used for point and polygon selections, a Tag link field will be displayed. Point or Polygon Selection tags can be dragged into this field to restrict the Asset’s effect on point or polygon selections.
In the Group field, digits (than can also correspond with the Houdini Polygon Index) as well as Houdini Expressions (e.g., $F for the current animation frame; see Houdini documentation) can be used. Groups and Tags will be evaluated together.
Use this command to select the Output Generator’s Asset Generator and display its control parameters.
Use this command to restore the Output Generator’s Asset Generator if it was deleted..
Since Generators cannot create or delete materials/textures in Cinema 4D, but the Asset can still instruct this to happen, this button can be clicked to create a new material manually. Make sure that you use this command (or the output generator button of the same name) to extract all textures of a given Asset needed for an animation.
![]() Streaming
Streaming
The following parameters can be used to uncouple the corresponding properties from the respective Asset Generator. They will then not be passed on to the Output Generator.
For interactive or animated parameter changes, textures will, if needed, be extracted immediately (which can take quite some time and can therefor be disabled here). This option should be enabled for rendering, otherwise textures will not be updated.
If enabled, tags belonging to the options will be displayed.
Normally, position, scale and rotation of an Asset are pre-defined, i.e., the Output Generator cannot simply be animated in Cinema 4D. Despite any animation created, the Asset would remain at its pre-defined location. Disable this option if you want to freely modify the position, scale and rotation of the Asset.
Disable this option if you do not want geometry that modifies in a given Asset (incl. particle positions) to affect the Output Object. The current geometry will remain as it is.
If this option is enabled, the vertex Normals will be imported as Normal tags. Otherwise normal Phong shading will be used.
If this option is enabled, UV coordinates will be imported as UVW tags.
If enabled, existing Vertex Colors will be imported as Vertex Color tags.
If enabled, existing vertex maps will be imported as Vertex Map tags.
If this option is enabled, textures in the Asset will be projected onto the Output Generator. Only if this and the next option are enabled will all textures in the Asset be extracted in a Cinema 4D material when changes are made to the Asset parameters.
Update Image File On Parameter Change
If the previous option is enabled, this option will define whether or not bitmap textures in the Asset will also be saved directly to the location at which the project is saved.
All other parameters listed in the Attribute Manager come from the respective Asset and are not described here.