Focus
The Focus tab’s settings control, among other things, numerous parameters that affect the Motion Camera’s focal length and focus, which makes it possible to create effects that would otherwise not be possible using normal camera settings.
Enable this option if you want the Motion Camera tag to also take control of the respective camera’s focus parameters. The camera parameters will be overwritten.
This setting must be animated (here and not for the camera itself) if you want to use Focus-Dynamics.
If this option is enabled, the camera’s focal length will be adjusted automatically. This will be done in accordance to the defined target object (Animation tab) and the Blend settings (Target Position A1, etc.).
If Enable Auto Focus is disabled, the camera’s focal distance can be adjusted here manually. If Enable Auto Focus is activated, this field will be grayed out.
I Enable Auto Focus is activated, the Offset value can be used to generate a blurred effect.
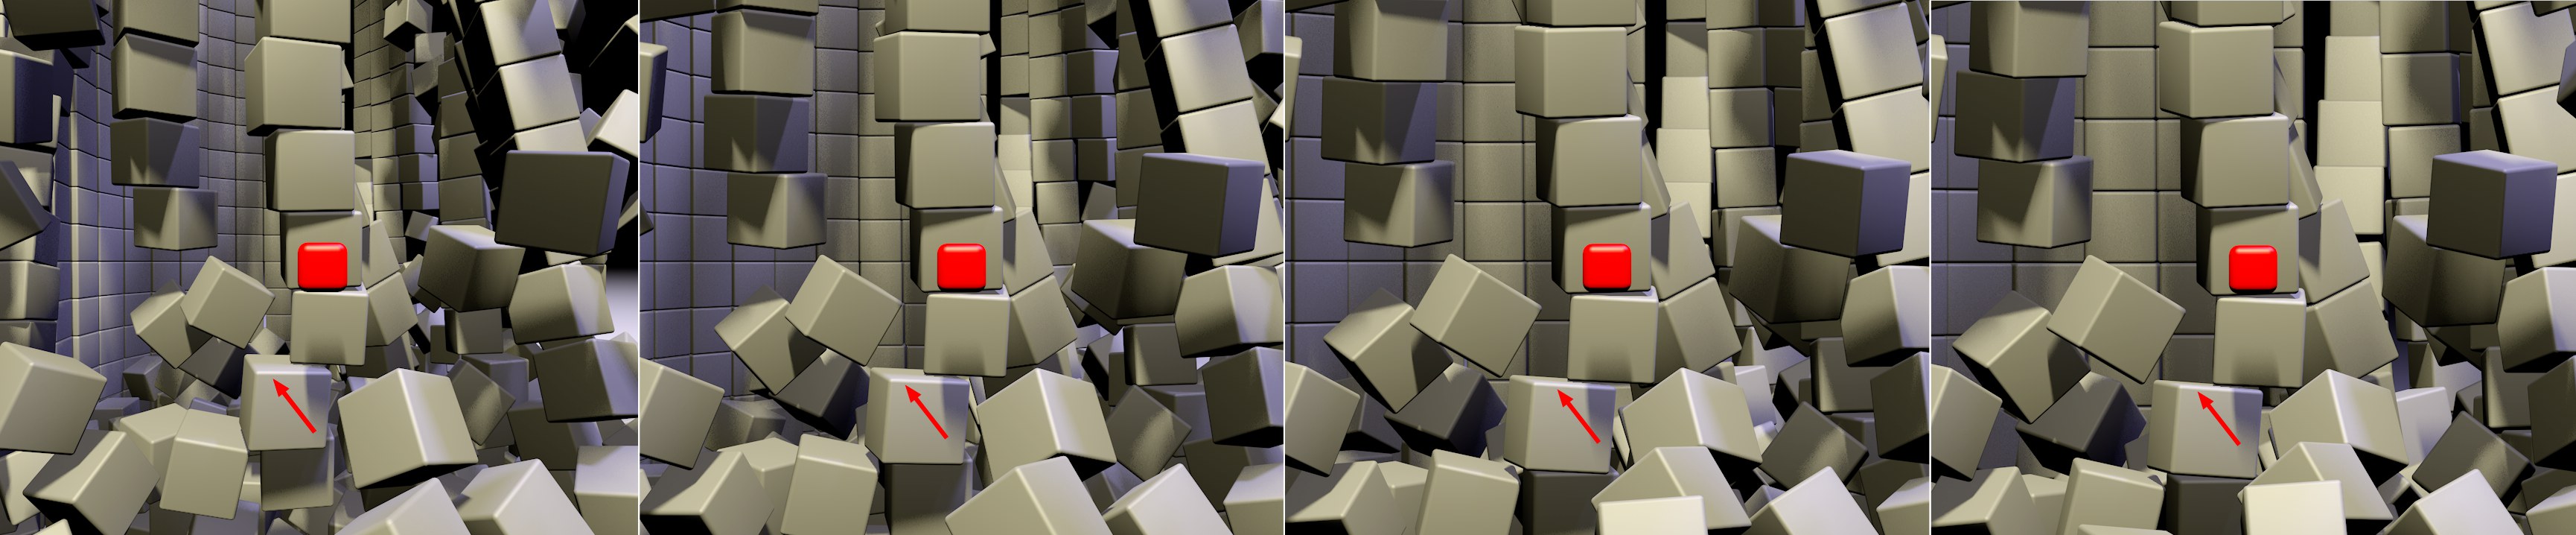 The camera moves away from the red cube from left to right while simultaneously zooming in. Note the change in perspective at the marked location.
Probably everybody is familiar with Alfred Hitchcock’s vertigo effect. The camera approaches an object (or pulls back from it) and simultaneously zooms out (or in). The size of objects at the center of view remains unchanged and the perspective at the edges changes. To achieve this effect, the camera must always be in motion.
This effect can be created by setting Intensity larger than 0 (the best results can be achieved if Enable Auto Focus is disabled.
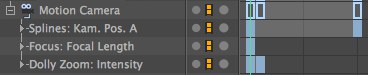
The Dolly Zoom modifies the focal length. You should therefore set a keyframe for the focal length at the beginning of the animation to make sure you always start with the correct focal length. Additionally, Intensity should be set to 0% at the start of the animation (whereby this value can be animated to the desired, e.g., 100% value at frame 2 of the animation). The animation should look similar to this in the Timeline:
A value of 0% will produce no dolly zoom and a value of 100% (which is recommended) will produce the full Dolly Zoom effect. Intermediate values will produce a ,sloppy’ effect.
As soon as the value is set to greater than 0% the Focal Distance value will be grayed out automatically.
Enables or disabled the Depth settings and their effect on the corresponding parameters (DOF Map Front Blur and DOF Map Rear Blur and their Start and End settings).
2 modes are available:
- Standard for normal ,old’ post effects (see Depth of Field).
- For Post if you want to render a depth of field pass for use in external applications such as After Effects, Nuke or Fusion. In the Viewport you can see how the grayscale gradient will be applied - exactly at the center (,Focus Area’):
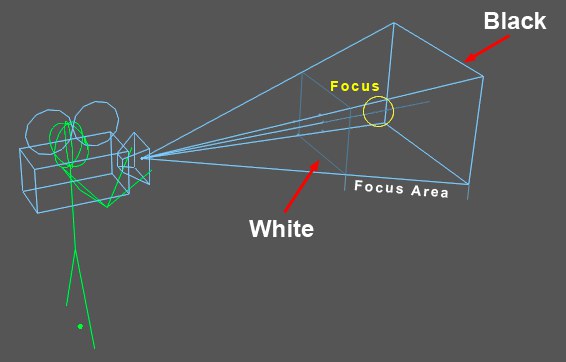
Based on the Focal Length value, half of the Focus Area to the rear and front will be used in which the grayscale gradient and depth of field (focused within the Focal Length and increasingly blurred in both directions) will be adjusted accordingly.
Use this setting to define regions within which the blur falloff takes place - from 100% in the center focus area to 0% at the edge (see also DOF Map Front Blur in the camera settings).