Options
The Radius and Angle settings are the same as in the Live Selection tool.
This is the tool radius, which is also displayed in the editor view.
If this option is active, only visible guides can be selected. If this option is not active, elements on the reverse side of an object will be selected as well.
If the Hair object is polygonal, the selection of guides can be restricted to a specific polygon selection (Cinema 4D must be in polygon mode).
If this setting is active, locked guides can be selected as well.
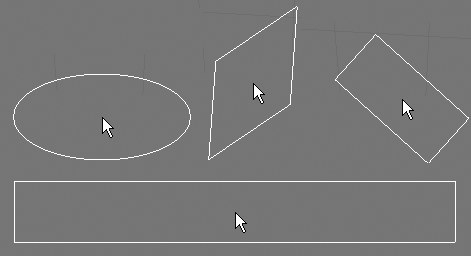 A small sampling of possible tool shapes (Aspect and Angle values were varied).
Use Shape to define the shape of the tool: Circle, Box or Diamond.
If you use a graphics tablet, use this setting to define which settings will be affected by the pressure of the pen.
Use this setting to stretch the shape of the tool in a horizontal direction.
Use this setting to rotate the shape of the tool.
The brush will only affect elements that lie under the cursor when the mouse button was pressed. The selected elements can be brushed over and around other elements, which will themselves remain unaffected.
If this setting is active, only selected elements will be affected (guides, points, tips, vertices, roots).
If this setting is activated, a link will be established between the guide points. The distance between individual points will remain the same. If you move a point, the other points will follow. If this setting is not active, the points can be moved independently, without affecting others (just like moving Cinema 4D spline points).
Activating this option ensures that no guides will be brushed below (penetrate) an object’s (exceptions: splines or guides) hair-covered surface, using collision detection.
You can then brush your character’s hair all day long without making the guides disappear beneath the surface.
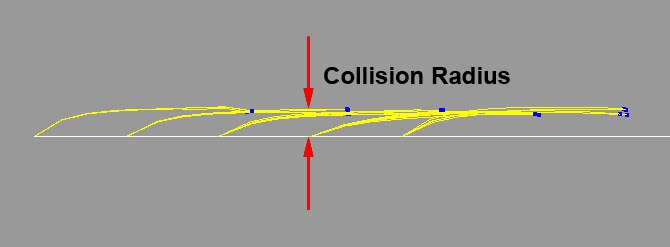
This setting defines the distance of each guide point from the hair-covered surface, at the point at which the collision detection will begin. You will not be able to brush the guides to a distance from the surface below this setting. This way you can prevent the hair from sticking to the surface.
These are (finally) the settings with which you determine how the brush affects the guides:
- Move: This is the normal brush mode with which you can move guide points.
- Twist: Twists the guide points around the guide (no effect will be seen when applied to straight, smooth guides).
- Repel: Repels the guides in a radial pattern from the center of the tool.
- Kink: Kinks the guides in a random direction at the beginning of each segment.
- Smooth: smooths the guides by diminishing the angle between segments.
- Scale: Scales guides without altering their shape (negative values are also possible, which will reduce the guides’ size).
- Straighten: Straightens the hair perpendicular to the surface and simultaneously smooths the hair.
- Delete: Deletes all guides the tool comes into contact with.
- Vertex Paint: Paints vertex weight for each guide point (see below).
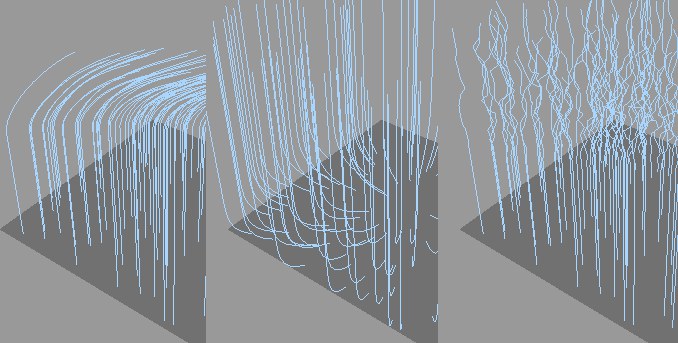 From left to right: Move, Repel, Kink.
These options define a given tool’s falloff from the center of the tool to the Radius. A visual depiction of Falloff can be found here. The Spline option lets you define your own falloff curve.
Use this slider to define the strength with which the brush tool should work. A value of less than 100% is recommended, which will give you better control of the brush effect.
- Simultaneously pressing the Ctrl-key will invert the effect of the tool.
This setting defines how hard or soft the effect of the brush should abate within the given radius.
See Falloff.
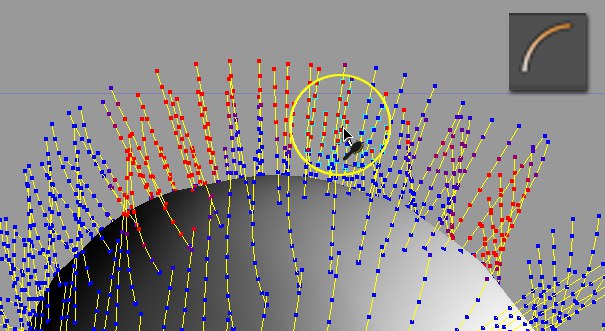
This option lets you paint weight onto each individual guide point. This weight is saved to a Hair Vertex tag and can later be used elsewhere within Hair (e.g., Hair object: Dynamics tab / Maps menu, in order to influence stiffness). The default weight of 100% (red) can be reduced by assigning Strength a negative value and painting over the elements.