Illumination
These parameters control the global illumination effect for the material and have the same function as the settings of the same name that are described in the Material / Illumination chapter.
Deactivate this setting if a given material should not have an effect on other objects.
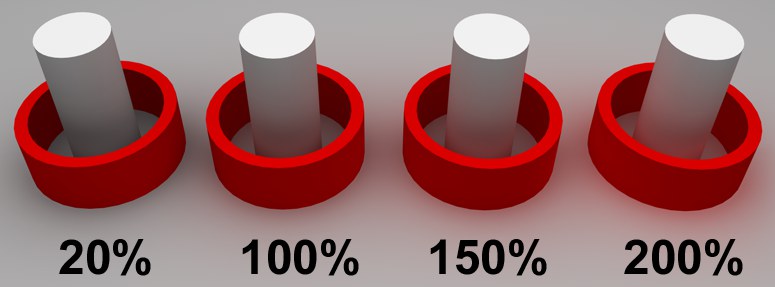
Use this setting to define how strong a given material will emit. The default value is 100% and values up to 10000% can be entered.
Deactivate this option if a given material should not receive brightness or color from other objects.
When active you can define to what degree a given material will receive color and brightness of other materials.
 From left to right: Increasing saturation values.
Use this setting to define the level of saturation of the light radiated or reflected from the material. This lets you accurately adjust the "color bleeding" for that material.
Enable this option to activate Photon caustics generation for the active material. Make sure that either the Transparency (for caustics that result from light breaking through water in a glass) or Reflection (for caustics resulting from light reflecting from a curved object) material channels is active.
Only the Generate parameter is relevant when using volume caustics.
Use the input box to set the strength of the effect.
This enables/disables the reception of surface Photon caustics for the material.
Use the input box to set the strength of the effect.
This specifies how close photons must be to one another in order to be interpolated. Higher values tend to produce better results but they also take longer to render.
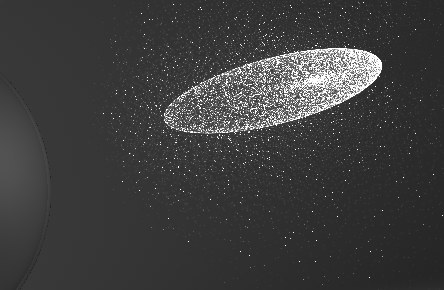 Radius = 1; individual photons can be seen as points of light because they are not interpolated together.
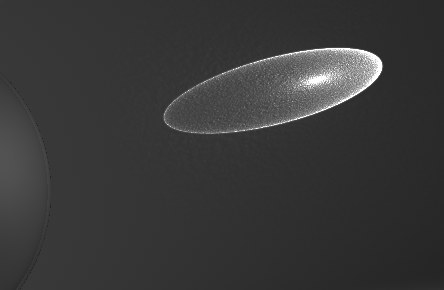 Radius = 10.
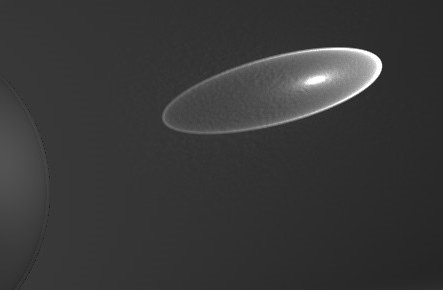 Radius = 100.
Larger values would only make the Photon Caustics appear more blurred.
If the defined value is too small, individual photons will become visible. This might make for an interesting visual effect but is not suited for realistic renderings. Larger values will combine and interpolate photons accordingly, which produces a realistic caustics effect.
This defines the maximum number of photons within the Radius that are used to calculate the effect. For example, if you enter a value of 100, up to 100 photons will be evaluated — any photons in excess of this number are ignored. Samples and Radius both affect the quality of the effect.
To summarize: more samples per radius means a more accurate image. Increasing the Radius means more blur but a longer render time also.