Shader
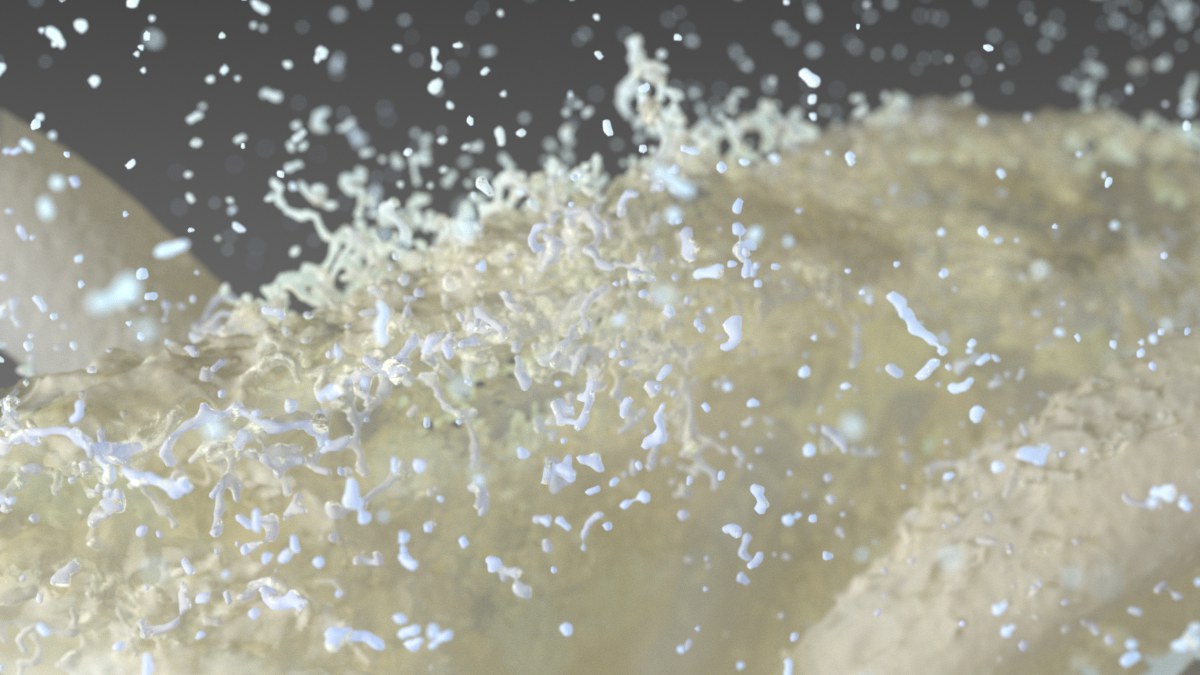 Subsurface Scattering can, for example, be used to render milk.
The settings on this page are only displayed if ProRender is enabled and then only apply to its own Subsurface Scattering. Note that SSS is a render-intensive volume effect that requires a lot of time to eliminate noise.
SSS is a volume effect and works only within closed volume.
It should also be mentioned that an internal transparent layer will be spanned around the volume when SSS is calculated in order to render SSS. This is important to know in order to better understand the descriptions below.
This setting is used to define the degree to which other materials (in particular the Reflectance channel) should be mixed with Subsurface Scattering. If no other channels are implemented, this setting is irrelevant. If set to 100%, of the material channels will be ignored, with very few exceptions (e.g., Displacement). Then, only SSS will be in effect.
The strength of the effect can be influenced by a grayscale texture.
Here you can select from default material settings that set Scatter Color and Depth Color accordingly. All you have to do then is adjust the Scatter Depth value because the range between milk and skin, for example, is quite vast.
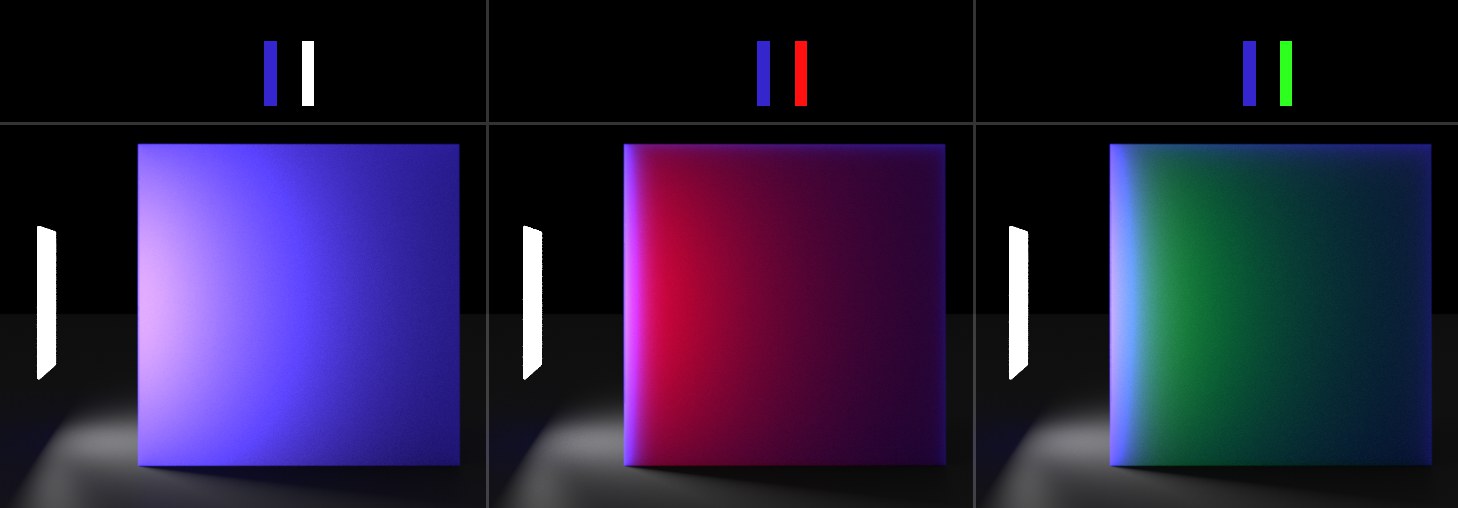 From left to right, different colors (displayed at top) for Scatter Color and Depth Color.
The Scatter Color defines the general color of the SSS effect. You can also use it to define the color on the (illuminated) surface of a material. The Depth Color described below defines the scatter color on the inside of the material and brings it to better fruition in regions that are not directly illuminated.
Scatter Color can be identical to Depth Color for simple SSS effects. In reality, the depth color varies quite often due to the fact that an object’s surface is made up of a different "material" than deeper down. Human skin, for example, is made up of different layers (the top layer is more callus (pigment color), while the circulated tissue (red) creates a reddish touch). Experiment with different Preset options to see what effect each has.
A texture can also be used to define the Scatter Color.
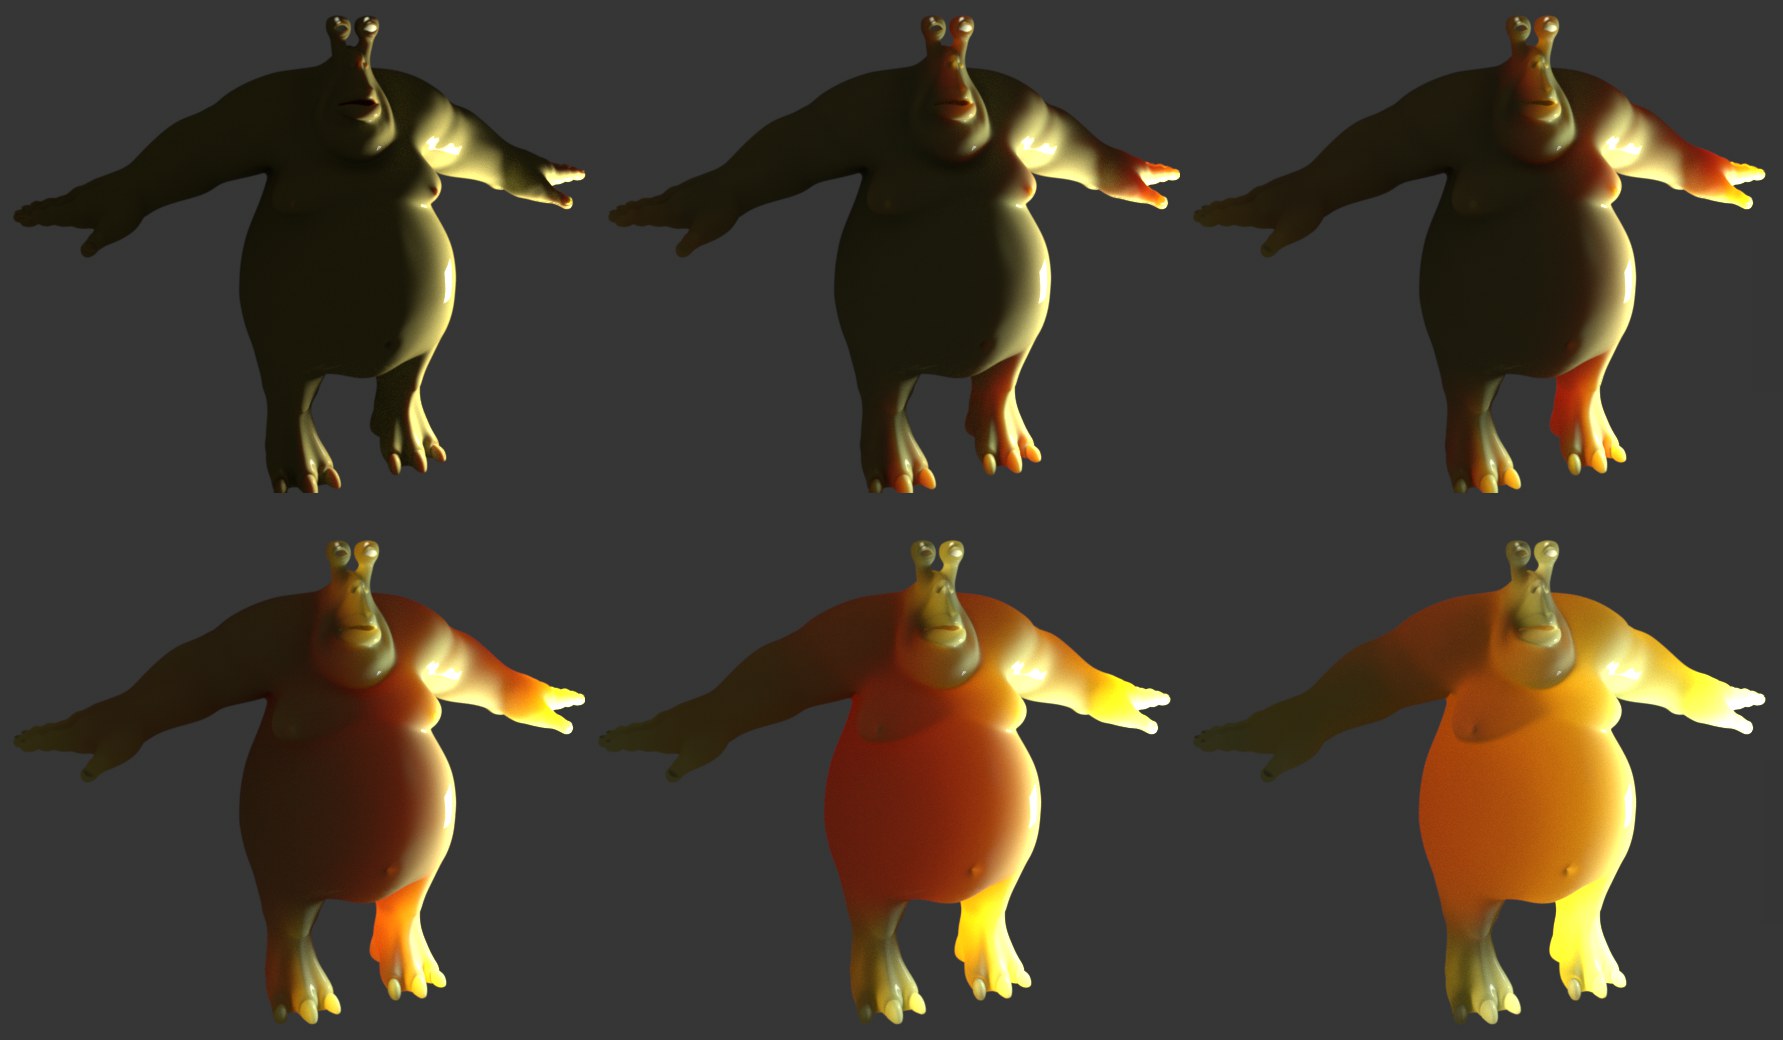 The figure is illuminated from the right: Increasing Scatter Depth values from left to right and top to bottom.
This setting is a general (not absolute!) measure for the depth to which light penetrates the volume. If set to 0, SSS will be disabled. Increasing values will brighten the volume correspondingly, whereby the effect of Depth Color will also increasing accordingly.
 From left to right, Phase set to -0.95, 0, 0.95. Scatter Depth: about a quarter of the diameter of the stomach. The Reflectance channel is also used in this scene, which can be seen by the reflection of the light source.
When light is scattered in the material, the Phase setting can be used to define a specific direction in which it scatters. Imagine a ray of light that penetrates a material where it is scattered, i.e., deflected. If Phase is set to 0, this will occur randomly between 0° and 360° (this is called an isotropic scattering). If the Phase value is increased positively, individual light rays will be diverted from its initial direction accordingly and correspondingly less towards the rear (forward deflection). If negative values are used, the effect will be inverse (backward deflection) and the light will have a correspondingly greater reflective behavior.
The following applies:
- Values greater than 0: This reflects the behavior of fluids such as milk.
- Values less than 0: This reflects the behavior of more dense materials such as marble
Generally speaking, it can be said that increasing the Phase value will produce an overall brighter result while other settings remain unchanged.
As already mentioned above, a transparent layer is assumed internally when a volume is rendered. This option defines if a matte effect should be assigned to this layer (option disabled) or not (option enabled). This option should be enabled if you want to render a glass-like surface without refraction.
If Transparent is enabled, a large Scatter Depth value can be used to make the "scattered" object transparent, which, however, is unrealistic for solid bodies (see center depiction in the image).
 Left, Emission with a Noise texture, center and right without illumination and Noise, once with Transparent enabled, once with Transparent disabled.
The Emission setting can be used to make the object self illuminate (e.g., without being illuminated by other light sources). What is this good for? Currently, all objects are rendered as if they have a constant density. In reality, though, many inhomogeneous materials should produce inhomogeneous SSS. To simulate this, the Emission setting can be controlled by a texture (with a slight Intensity setting).
If Transparent is enabled, ghostly figures can also be created (see image).
Use this setting to scatter the intensity of emission, i.e., the brightness.
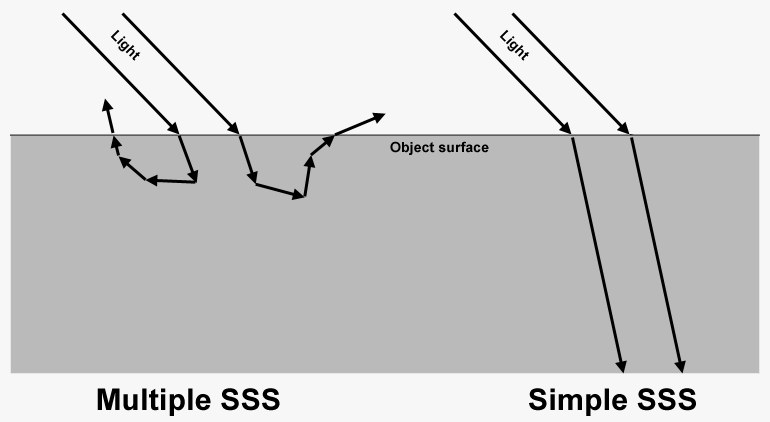 For multiple SSS, light rays are randomly scatters multiple times (contrary to what’s shown in the image, they can exit on the opposite side or from completely different locations).
As you can see in the image above, scattering takes place multiple times if the option is enabled, and disabling the option will produce a single scatter. The practical effect, however, is often not so obvious as one would assume. The reason is the previously mentioned transparent layer around the volume. If the Transparent option is disabled (default state), it will be rendered as frosted glass and can obscure the multi-scattering effect.
The difference can be seen when a Spot light is applied:
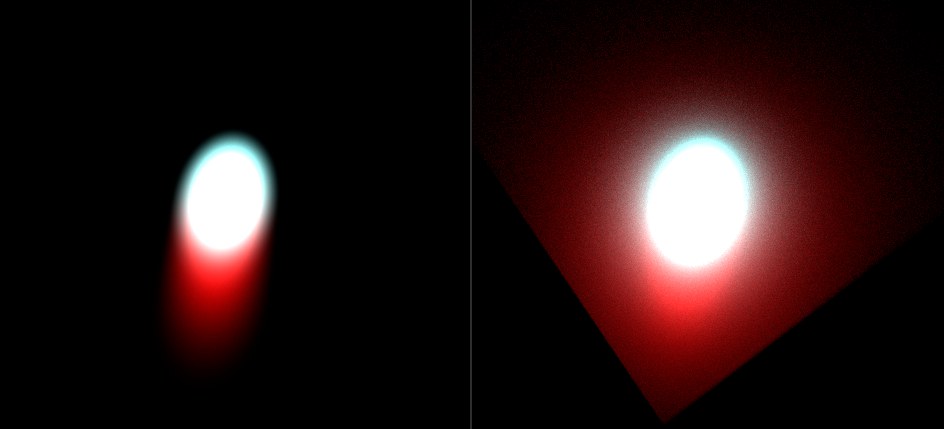 A Spot light cast on a cube: Multi-Scattering disabled on the left, enabled on the right. Transparent is enabled for both.
In general, enabling this option will produce more realistic-looking results with only minor increases in render times.