Preset Management

Elements can be saved as presets at several locations within Cinema 4D:
- Render settings (Render Setting … button / Save Preset command)
- Objects (Object Manager: Create / Save Object Preset)
- Color gradients (Attribute-Manager: Color gradient via small arrow at the left / Save Preset button), etc.
By default, presets created by the user will be placed into the Presets / User directory, in an appropriately named folder. From here, you can relocate them as you see fit by simply creating new preset libraries (File / New Preset Library) and dragging the shader presets there.
Most presets can - as long as they can be clearly asigned - be loaded from the Content Browser via drag & drop or double-click. If multiple presets are selected, the Open command in the context menu must be used.
Presets that cannot be clearly assigned (e.g., color gradien tor spline presets) will be loaded directly from the Attribute Manager (e.g., via Load Preset).
Special instructions can be found at the bottom of this page.
Preset libraries can be write-protected by activating the Read Only option (right-click on library). If this option is active, items in the library cannot be deleted, renamed or added. If a library is locked, it will be marked with a lock icon. Select the option again to restore the library to an unlocked state.
If you open preset libraries via double-click or by dragging them into the Content Browser they will be write protected. If, on the other hand, you place these in the library / browser user directory this write protection will be omitted.
Under Presets you will also find special presets that, for example, were included in the software package you ordered from . If you want to permanently integrate these preset libraries into Cinema 4D, copy them to your Cinema 4D user library/browser directory. If on the other hand, you only wish to open these other preset libraries temporarily, use the Content Browser navigate to the folder where the libraries are located and double-click on the libraries.
Furthermore, you will find a folder named Defaults in which all preset elements (objects, shaders, materials, tags) are saved. They define the properties of each newly created element, respectively.
Multilingual Presets
Proceed as follows if you want to create presets that should be renamed into the corresponding accordingly if Cinema 4D is opened in another language:
-
If Cinema 4D is running in English, switch to, for example, German and close Cinema 4D.
- Start Cinema 4D again. It will run in the German-language version. Now change the preset names in the Content Browser to German. Once Cinema 4D is closed again the elements will be localized. Depending on the language version in which Cinema 4D is subsequently run the preset element names will be displayed accordingly.
Additional information for certain presets
Material presets
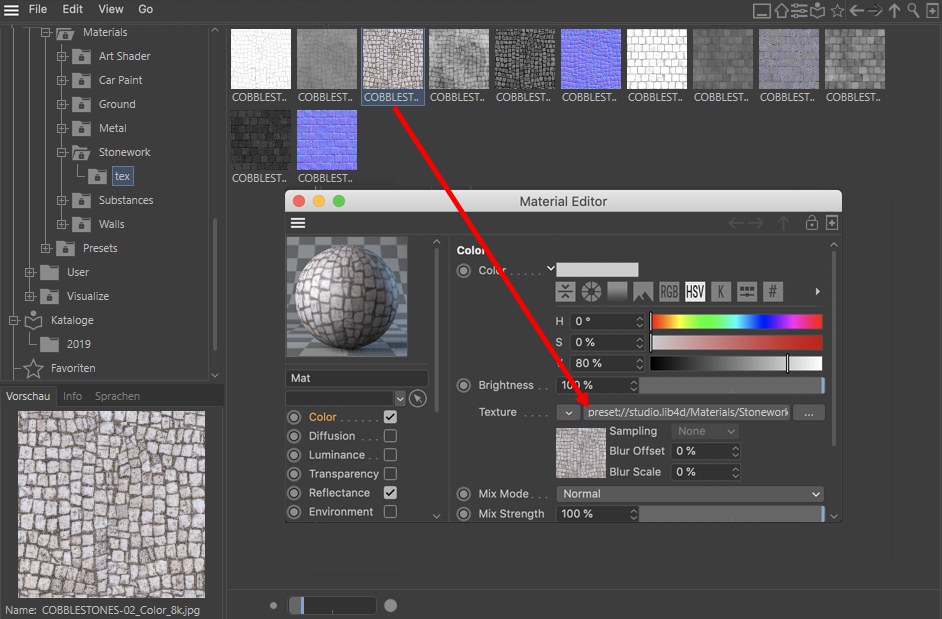
The following applies when creating presets via drag & drop:
Textures will also be copied into the library (into a "tex" folder) and the paths in the material channels will be modified accordingly. If you press the Alt key while copying via drag & drop no textures will be copied and no paths will be modified. This eliminates the need to save scenes or materials if you only want to save a particular shader’s settings. Such presets will be saved internally with the help of the Content Browser and can be accessed again at any time. Note that the files you create will be saved to a library. Depending on the number and size of the scenes they contain, Preset Libraries can take up quite a bit of memory on your hard drive! Alternatively, you can Drag & drop any preset into a corresponding Manager.
Color field presets
If you press the Ctrl/Cmd key when loading presets from the Content Browser, all selected Farbfelder presets will be added to the existing ones in the Project; if this key is not pressed, the existing presets will be replaced (in the case of drag & drop with all selected presets).
Converting all Content Browser libraries to assets
If you want to convert legacy libraries you created yourself to assets, right-click on the respective library in the Content Browser and select the following command::
Convert to Assets
A database selection dialog should open with which you can define the database in which all libraries should be saved. Details about databases can be found here.
Several meta data elements (e.g., comment) will be assumed and others will be created automatically (e.g., image size), and you can create others in the future by simply searching for them manually (e.g., keywords).
When switching to asset-supported data management, it's worth investing the extra effort (e.g, adding keywords): the Asset Browser offers much more comfortable methods for searching for and finding assets.