Table of Contents
In Sculpt mode, numerous functions are available on selected Sculptable Meshes, e.g. to manage their masks or partial visibilities. It also allows you to create groups that automatically restrict sculpting to specific areas without having to use masks. You can access these functions in the Radial Menu that can be opened either via the three-dot button at the bottom of the right menu bar or by doing a four-finger-tab in the viewport. All commands are also accessible from the settings of a Sculptable Mesh. The following illustrations describe these functions and where they can be found.
Tip:
When clicking on the three-dot icon or using the four-finger-tab, if the Masking shortcut is pressed, the Radial Menu will open directly in the Masking mode, if the Masking + Smooth shortcuts are pressed, it will open directly in the Visibility mode, otherwise the Mesh submenu is opened.
In addition to the extensive ZRemesher functionality that can be used to optimize polygon density and topology, Forger also includes another remeshing feature. You can find it after selecting a Sculptable Mesh in its settings (see Vases icon in the top menu bar). This function is especially useful in the initial stages of sculpting, when basic shape changes are still to be made to the mesh.
In addition to harmonizing the polygon density, this function also enables the merging of shapes that lie at an immediate distance from each other. For example, you could first roughly shape the horns or arms of a creature with basic objects and then weld them to the main body. The following image shows this process.
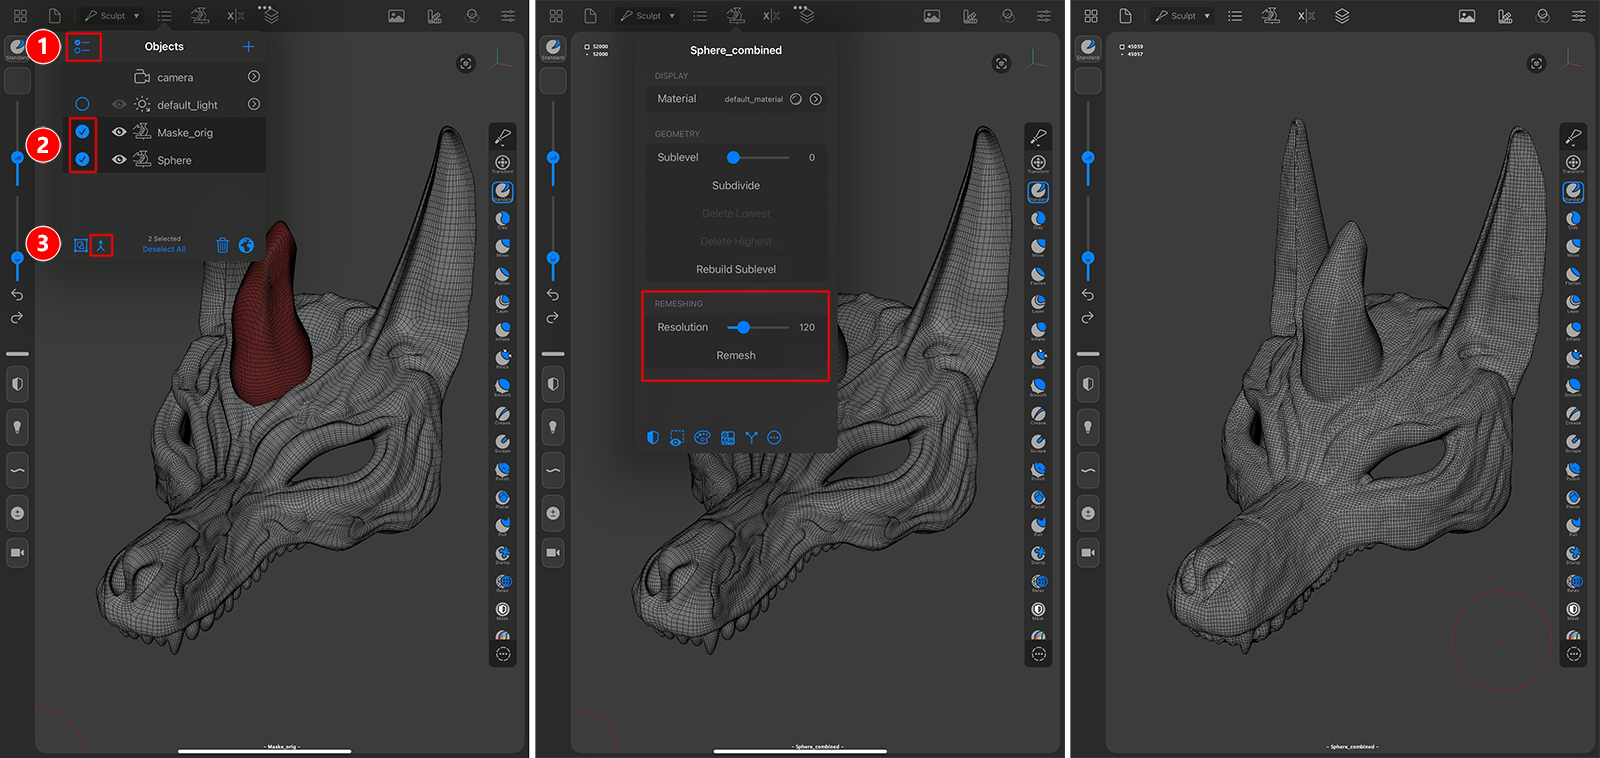
In the example above, a horn was formed separately from a Sphere primitive. To connect the head and the horn to form a single mesh, activate the multi-selection mode in the Objects List (see number 1).
Circles appear in front of the objects in the list, which can be marked by tapping. In this way, select the two objects to be merged (see number 2). Finally, tap the Connect icon at the bottom of the Objects List to connect the marked objects to a new mesh (see number 3).
Then select the resulting mesh and open its settings via the vase icon in the top menu bar. There you will find the Remeshing settings (see middle figure). After adjusting the Resolution (it sets the polygon density of the resulting mesh) just can hit the Remesh button and it will compute a new topology that also bridges gaps and smooths hard transitions between shapes. A possible result is seen on the right side of the above image.
Tip:
If you need individual control over the resulting topology and polygon density, check out the ZRemesher tool.
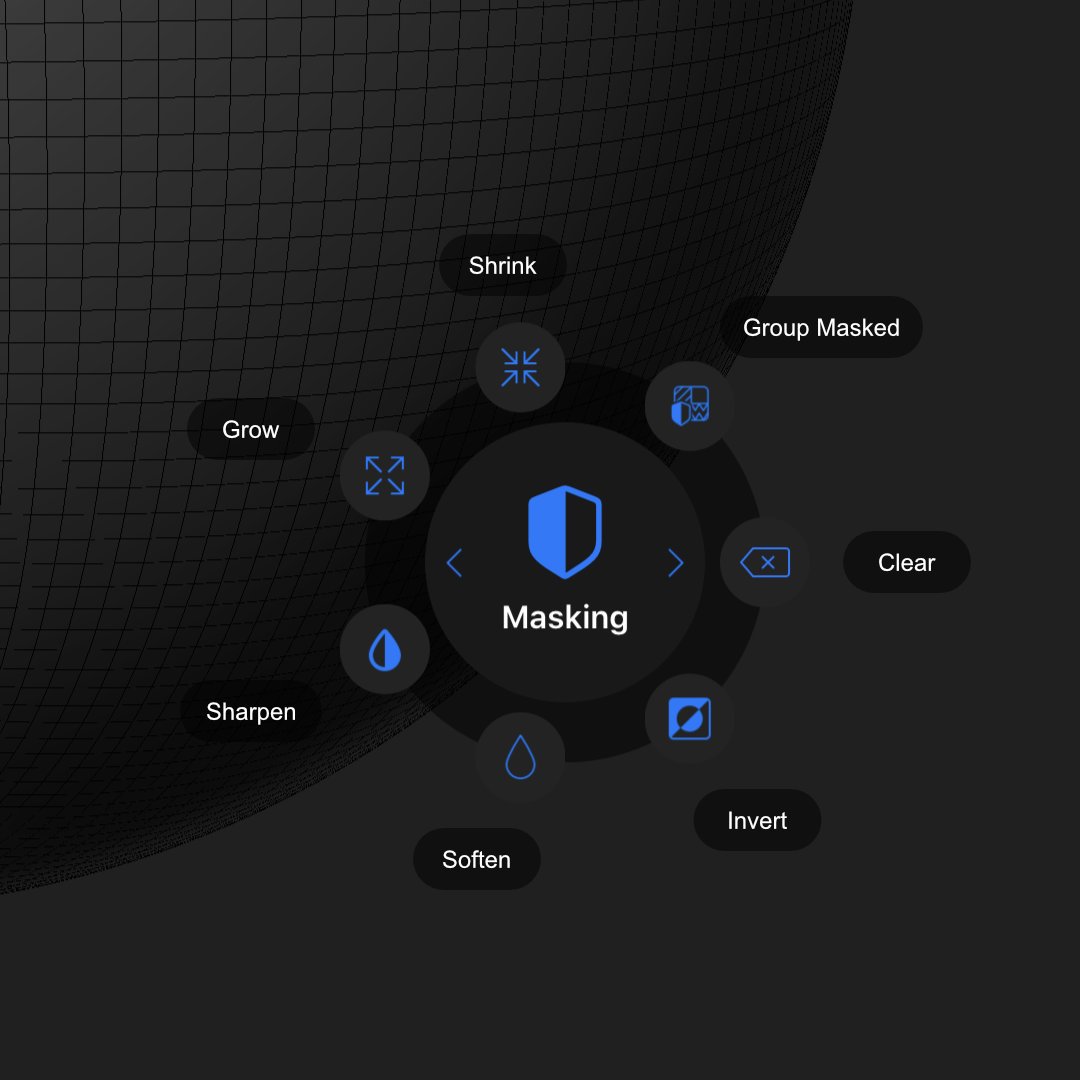
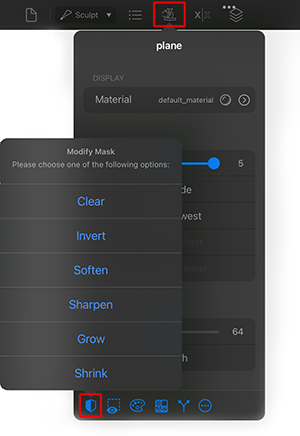
Some of these commands are also available using the Modifier buttons from the left Toolbar menu:
Hold the Mask Modifier and start drawing a masking shape outside the current mesh, i.e. from the empty vieport space. All parts of the Sculptable Mesh that are inside that masking shape will get masked. The type of masking shape used is set from the active tool settings (see bottom left icon in the brush tool dialog).
You can also use the same technique to delete all maskes from the active mesh. Just draw a masking shape completely outside the selected mesh while holding th Mask Modifier.
Holding the Mask Modifier and simply tapping the empty viewport inverts the existing mask.
By holding the Mask Modifier and the Alternative Modifier (+-) buttons together and drawing a masking shape, you can subtract that drawn shape from an existing mask.
Holding the Mask Modifier and simply tapping the mesh will blur existing masks.
Holding the Mask Modifier and the Alternative Modifier (+-) together while tapping on the mesh will sharpen existing masks.
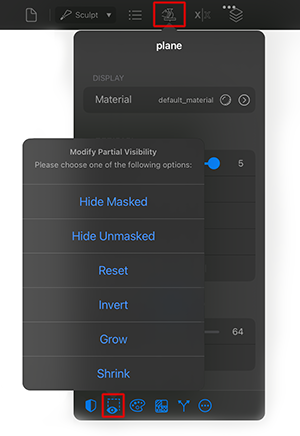
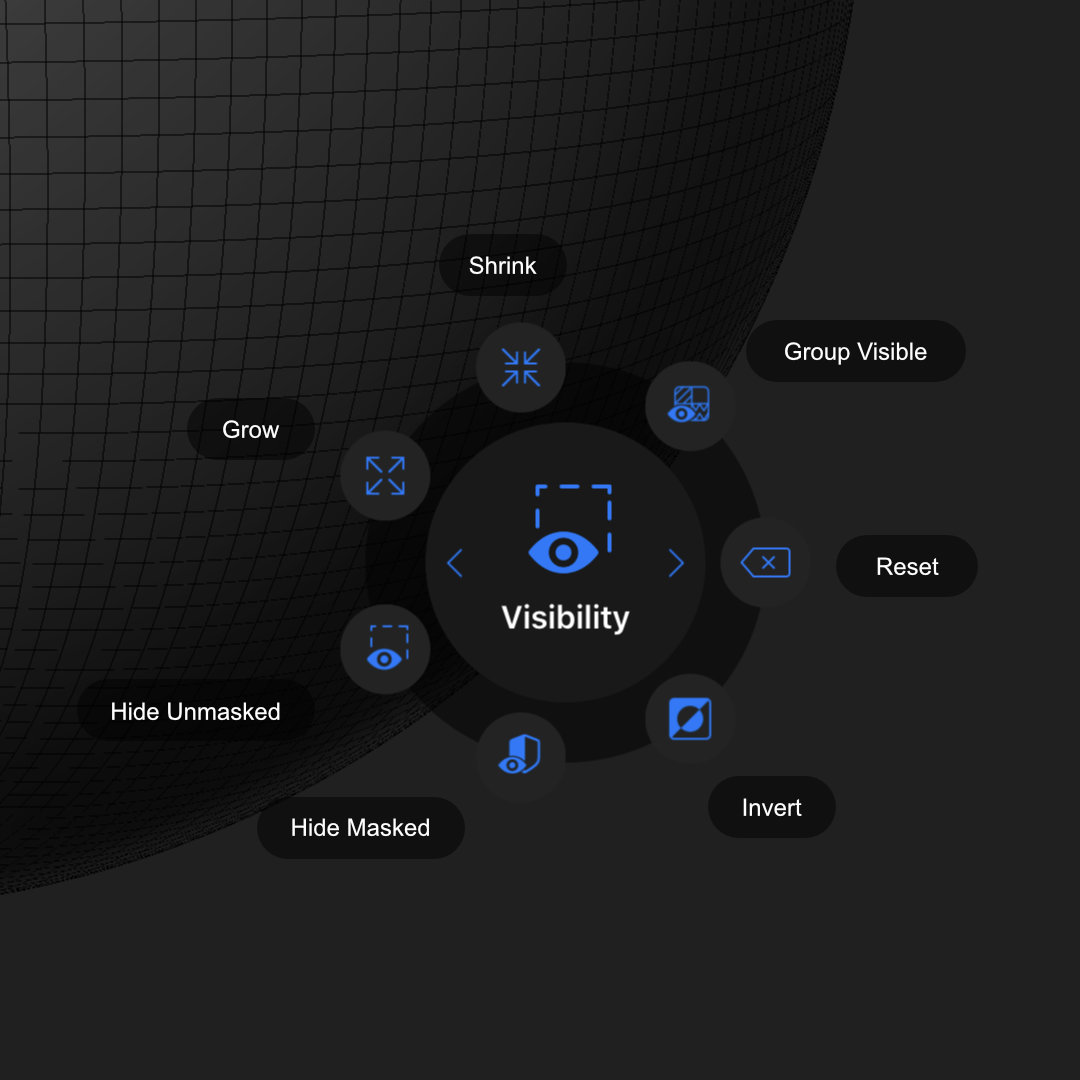
Some of these commands are also available using the Modifier buttons from the left Toolbar menu:
Holding the Mask Modifier and the Smooth Modifier shortcuts together allows you to draw the chosen masking shape, starting from outside of the mesh. This time the unselected area of the mesh will be hidden in the viewport. The type of masking shape used is set from the active tool settings (see bottom left icon in the brush tool dialog).
Holding the Mask Modifier, the Smooth Modifier and the Alternative Modifier (+-) at the same time, you can draw a selection shape (start to draw outside of the mesh). This time only the mesh area that is inside the drawn shape stays visible. All other mesh parts get hidden in the Viewport.
|
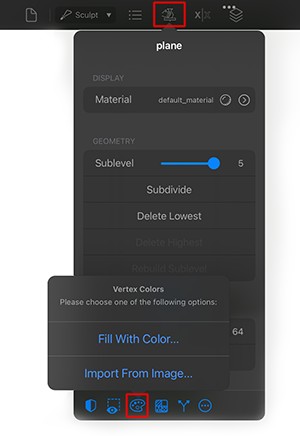
Vertex Colors: Shows a menu with the following options:
|
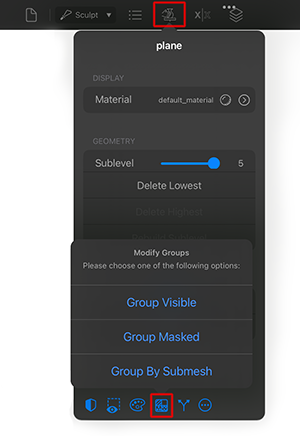
Groups can be created from a masked area, from the visible part of a mesh or from the submeshes.
They can be used, for example, to automatically limit the influence of sculpting brushes without having to use masks. Unlike masks, groups still offer the possibility of being deformable with Sculpting. The first group touched with the Sculpting tool is automatically unlocked. All other groups are locked. For this function, the Face Group option must be activated on the respective Sculpting brush (see Advanced Settings).
See also Split/Extract Submeshes commands below.
|
Modify Groups: Shows a menu with the following options:
To visualize groups in the viewport, activate Colors Group from the Display Settings (Basic tab). |
|
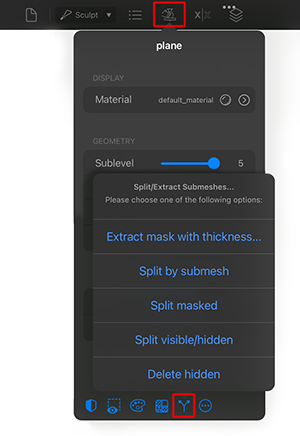
Split/Extract Submeshes: Shows a menu with the following options:
|
|
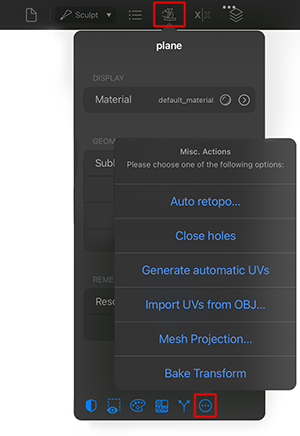
Misc. Actions: Shows a menu with the following options:
|
Generate automatic UVs: Creates automatic UV coordinates for the selected mesh. UV coordinates are needed if you plan to load or export texture information for the object.
Import UVs from OBJ...: Allows importing UV coordinates from a specified OBJ, the OBJ must have the same amount of vertices as the lowest subdivision level, and they must be in the same vertex order.
Mesh Projection...: This function projects the selected mesh onto other objects in the scene. This can be used, for example, for molding individual object sections or for transferring a shape to an object with a different topology. The shape change between the original and the projected geometry can be created as a Sculpting Layer, allowing the result to be blended smoothly. You can find more info about this here. For a more individual projection have a look at the ZProject tool.
Bake Transform: Applies the node transform to the mesh.