System - Production
Overview

|
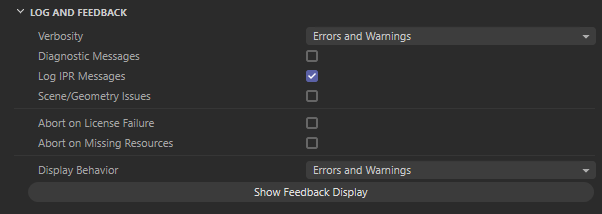
Log and Feedback
|
When rendering Redshift will print out a multitude of useful messages in your 3d app's script/console window. In order to avoid clutter, Redshift's default behavior is to only print out a subset of all the messages it generates.
If you want to view all the messages in the script window, the user can set Redshift's verbosity level to "Debug". This option can be found in the System tab.
Apart from the 3d app's script/console window, Redshift stores all messages in log files.
Verbosity
Controls how much detail is show in the 3d app's script/console window that pertains to Redshift rendering from the following options:
- Errors and Warnings (default) - Only show errors and warnings in the 3d app's script/console window, the most critical things for quickly being notified about problems with the scene.
- Detailed Info - Show more detailed information in the 3d app's script/console window.
- Debug - Show all messages, the most detailed information, in the 3d app's script/console window.
Diagnostic Messages
When enabled, it prints even more detailed information to the Redshift log. This is useful for debugging a problematic scene and sharing the results with Redshift developers on the forums as outlined in the Bug Reporting thread.
Log IPR Messages
When enabled, messages are printed to the Redshift Log file during Interactive IPR Rendering. This is enabled by default.
When disabled, nothing is printed to the Redshift Log file during interactive IPR rendering.
Scene/Geometry Issues
When enabled, it alerts the user via the log file to invalid geometry and other issues found in the scene so the issues can be fixed.
Only valid geometry is rendered.
Abort on License Failure
When enabled, it aborts rendering when Redshift licensing fails.
Abort on Missing Resources
When enabled, it aborts rendering when the scene is missing resources like textures and other external references.
Display Behavior
Controls when the Redshift Feedback Display is automatically popped open on screen from the following options:
- Always - Always show the Feedback Display with each render.
- Errors and Warnings (default) - Only show the Feedback Display when errors and / or warnings are found.
- Errors Only - Only show the Feedback Display when errors are found.
- Never - Never automatically pop up the Feedback Display.
Show Feedback Display
A button to open the Redshift Feedback Display
Bucket Rendering

|
When Redshift renders in the Bucket rendering mode (set in the Sampling tab), it renders the image in square tiles, these tiles are also known as 'buckets' or 'blocks'.
Bucket Size
Controls the size of the buckets when rendering from the following options:
- 64 - Renders in 64x64 pixel square buckets.
- 128 (default) - Renders in 128x128 pixel square buckets.
- 256 - Renders in 256x256 pixel square buckets.
The size of each bucket can be important to GPU performance!
Please keep in mind that, when rendering with multiple GPUs, using a large bucket size can reduce performance unless the frame is of a very high resolution. This is due to the 'last bucket effect' where the frame's last bucket has been assigned to a GPU and is currently rendering while the other GPUs have finished with their buckets and are waiting for that last bucket to be rendered. This effect, in essence, reduces parallelism and can waste several seconds of rendering time per frame. For this reason, we recommend using 128x128 buckets. Please refrain from using small 64x64 buckets as these can underutilize the GPU.
Bucket Order
Controls the order in which the buckets are rendered from the following options:
- Spiral (default) - Rendering starts in the center of the frame and spirals out from there to the edges of the frame until the frame is complete.
- Horizontal - Bucket rendering starts at the top from left to right and then moves down left to right until the frame is complete.
- Hilbert - Buckets are rendered using a zig-zag pattern that is designed to pick the next closest bucket to the current one until the frame is complete.
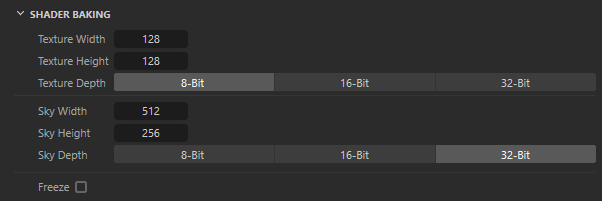
Shader Baking
|
Cinema 4D shaders are supported in Redshift by baking the shaders down to textures that are controlled by the parameters covered in this section.
Maxon Noise Shader
If you are looking to use a Cinema 4D noise shader please use Redshift's Maxon Noise shader which is natively supported by Redshift and does not require shader baking.
Texture Width
Specifies the resolution for the width of the baked textures.
Higher values result in higher resolution textures while lower values result in lower resolution textures.
Texture Height
Specifies the resolution for the height of the baked textures.
Higher values result in higher resolution textures while lower values result in lower resolution textures.
Texture Depth
Specifies the bit depth for the baked textures from the following options:
- 8-Bit (default) - Generally good enough for textures used for color.
- 16-Bit - Better for textures that may reveal banding with 8-Bit textures like bump and displacement maps.
- 32-Bit - Best for textures that may reveal banding issues like bump and displacement maps.
Sky Width
Specifies the resolution for the width of the baked texture used for the Cinema 4D Physical Sky.
Higher values result in higher resolution C4D sky textures while lower values result in lower resolution sky textures.
Sky Height
Specifies the resolution for the height of the baked texture used for the Cinema 4D Physical Sky.
Higher values result in higher resolution C4D sky textures while lower values result in lower resolution sky textures.
Sky Depth
Specifies the bit depth for the baked textures used for the Cinema 4D Physical Sky from the following options:
- 8-Bit
- 16-Bit
- 32-Bit (default)
Generally this should be left at the default 32-bit as it provides the highest quality and most realistic portrayal of the high dynamic ranges frequently found in pictures of the sky.
Freeze
When enabled, it stops Redshift from updating shader baking for Cinema 4D shaders.
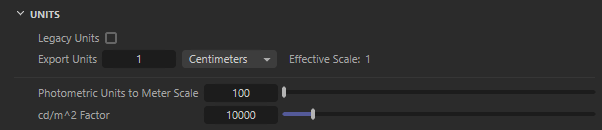
Units
|
Mode
Controls how physical units are handled by Redshift from the following options:
Project Settings
Redshift is fully unit aware, using the same parameters defined by Cinema 4D's Project Scale found in the Scene Settings. Lights that use physical units and shading effects based on physical phenomena like subsurface scattering behave realistically and are managed automatically. Redshift manages proxy export and import based on scene units, so you can transfer an asset built in Houdini in meters to Cinema 4D in centimeters without hassle. This is the default and recommended setting for best results and ease of use.
Cinema 4D's Project Scale defines how the numerical values stored in the scene are interpreted, effectively changing the scale of the scene and the intensity of the lights. However, please note, some parameters scale while others do not when changing the Project Scale.
- What doesn't scale:
- Parameters with fixed units that define physical phenomena like Transmission Depth
- Lights that use physical Units like Lumens or Watts
- A parameter driven by a Unit Conversion node in "Fixed" mode
- What scales:
- Lights that use the Unit type "Image"
- Parameters that use scene units for driving artistic effects like an Ambient Occlusion's Max Distance
- A parameter driven by a Unit Conversion node in "Scene Units" mode
The Unit Conversion node and shading parameters defined by a unit function best when the "Project Settings" mode is used.
Custom
Redshift uses a legacy form of scene unit management. Requiring more manual intervention when converting to scenes of different scales and managing parameters like Photometric Units to Meter Scale and cd/m^2 Factor.
Disabled
Redshift uses the oldest form of scene unit management. Unit settings are ignored and changes to Cinema 4D's Project Scale have no impact on rendering.
Image Units Scale
Only available when the Units Mode is set to "Project Settings."
Scales the intensity of lights that use the "Image" unit type. The "Image" unit is used to represent lights in an artistic way, not strictly based on a physically accurate light unit, because of this the intensity can be scaled here. The default values are chosen for the most familiar results in each DCC.
Export Units
Only available when the Units Mode is set to "Custom"
The export units options allows you to adjust the effective scale of your scene based off of the current Project Scale setting as defined in Cinema 4D's Project Settings.
Photometric Units to Meter Scale
Only available when the Units Mode is set to "Custom" or "Disabled." When the "Project Settings" mode is selected, light intensity is handled automatically in a physically correct way.
Certain features of Redshift such as photographic exposure, physical sun/sky and IES light support require knowledge of the "units to meter" and "candela to square meter" settings. It's important to set these values correctly, otherwise lighting coming from physical light sources might appear too dim or too bright.
If you're working with centimeters (i.e. 1 world unit is 1 centimeter), the units to meter scale should be set to 100. That's because, in this case, 100 world units means 100cm, which means 1 meter. If you're working with meters, then it should be set to 1, because 1 world unit means 1 meter.
cd/m^2 Factor
Only available when the Units Mode is set to "Custom" or "Disabled." When the "Project Settings" mode is selected, light intensity is handled automatically in a physically correct way.
Photographic exposure, IES lights and the physical sky/sun use the cd/m^2 (candela to square meter) setting. Please make sure to attach a photographic exposure lens shader when using IES lights and physical sun/sky, otherwise your lighting will appear too bright or too dim.
Legacy
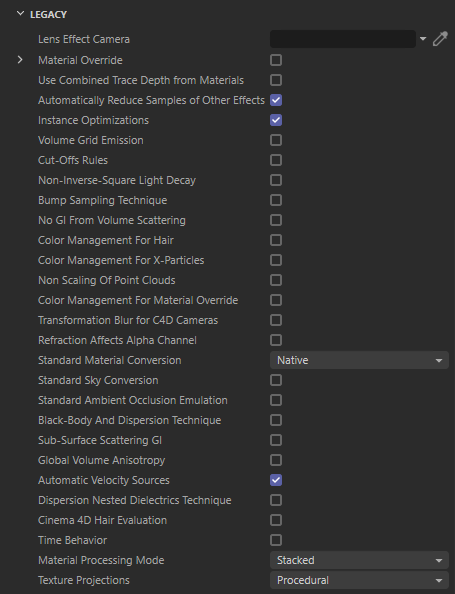
|
The legacy options this section are mostly provided for backwards compatibility or in some cases unique global options that are generally no longer recommended as best practice. The legacy options allow you to more closely match the rendered results of older versions of Redshift while using a newer version of Redshift.
For example, you might want to take advantage of new Redshift features and enhancements but you still need to match the look of a scene that was created using the old Black-Body and Dispersion Technique. Instead of being forced to use a version of Redshift prior to version 3.0.50 you could use the latest version of Redshift but with the legacy option "Black-Body and Dispersion Technique" enabled.
Lens Effect Camera
This option allows you to provide a single Redshift Camera tag and use its settings for all cameras in the scene.
This is provided as a backwards compatibility option to match the look of older scenes that made use of this feature.
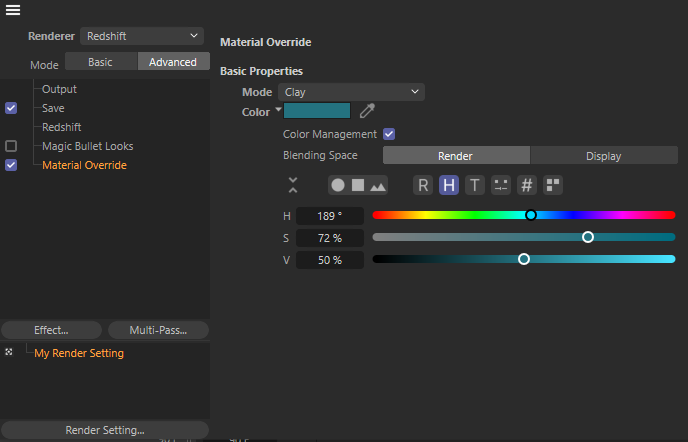
Material Override
When enabled, Redshift will use an outdated material override method to render every material in the scene with the same lambert material, its color is driven by the Diffuse Color parameter below (default grey).
Diffuse Color
This controls the color of the lambert material used in the legacy Material Override feature.
Better Material Overrides in Cinema 4D
Cinema 4D features an improved material override function that is built into the Render Settings as an Effect which can be seen in the image below.
Custom Material mode can be used to apply a user created shader to every object in the scene or to only override certain materials by using the include and exclude list.
Clay mode can be used to quickly apply a diffuse shader with a custom color to every object in the scene.
|
|
|
Creating a new Cinema 4D Material Override |
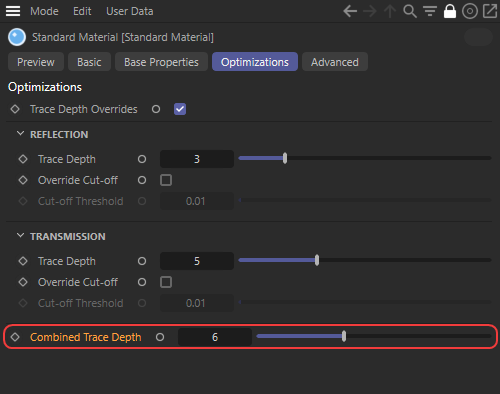
Use Combined Trace Depth from Materials
When enabled, Redshift will use the Combined Trace Depth value set per material instead of the Combined Trace Depth set in the Globals Render Settings tab.
When disabled - by default, Redshift will use the Combined Trace Depth value set in the Globals tab and ignore the Combined Trace Depth value set at the material level.
|
| Example of Combined Trace Depth at the material level |
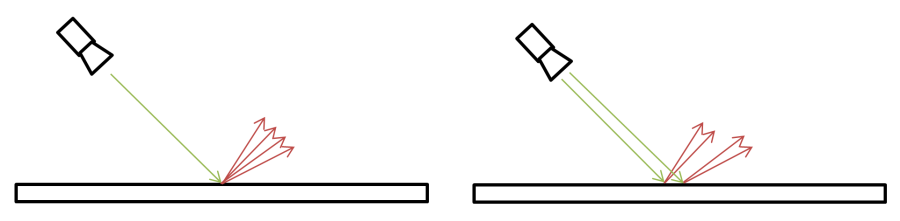
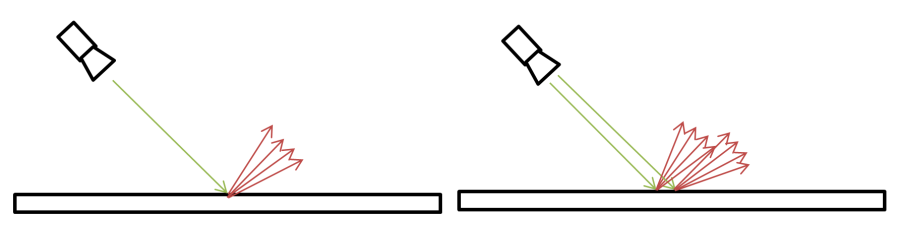
Automatically Reduce Samples of Other Effects
Enabled by default, Redshift distributes samples across all secondary ray type effects: brute-force GI, ambient occlusion, area lighting, reflection, refraction, etc.
Redshift attempts to shoot the user-defined number of secondary rays per pixel. It does that by dividing the number of secondary rays by the number of primary rays (unified sampling rays). For more information please see the Unified Sampling page.
Example scenario: Benefits of "Automatically Reduce Samples of Other Effects"
You've already tweaked your render settings to perfection and all surfaces look nice and clean. Then the director walks in and asks for longer motion blurs or a stronger depth-of-field effect. Doing either of these two and maintaining the same visual quality means having to increase your primary rays. If Redshift didn't divide the samples, increasing the primary rays (to clean DOF or motion blur noise) would make the entire frame considerably slower to render!
We do not recommend disabling this option.
When disabled, this division of secondary rays per primary rays no longer occurs resulting in more secondary rays being shot which can mean considerably longer render times when increasing the unified sampling primary ray count.
|
|
Automatically Reduce Samples of Other Effects: Enabled (default) Reflection rays (red) are divided by the number of primary rays (green). |
|
|
Automatically Reduce Samples of Other Effects: Disabled The same number of reflection rays (red) are shot for each primary ray (green). |
Instance Optimizations
When enabled - by default, it forces Redshift to use an improved instancing algorithm that cuts down on scene traversal time.
This option should only be disabled if you suspect you have encountered a bug regarding Redshift rendering instances in C4D.
Volume Grid Emissions
Introduced in Redshift version 2.5.38
When enabled, it forces Redshift to render with legacy (incorrect) volume grid emission for compatibility with older scenes.
Prior to this fix the following issues may arise:
- Volume emission intensity could be too strong or too weak
- Volume emission result could show a stair-stepped effect
- Volume emission would look ok in-camera but it could be on the weak side as far as its GI contribution was concerned
Cut-Offs Rules
Introduced in Redshift version 2.5
When enabled, it forces Redshift to use the old sampling Cut-Off rules used in Redshift versions prior to version 2.5.
This is provided as a backwards compatibility option to match the look of older scenes.
Non-Inverse-Square Light Decay
Introduced in Redshift version 2.5.55
When enabled - by default, it forces Redshift to employ a hack exclusively for lights that have linear or no decay ( non-physically correct decay) in order to make this kind of decay look ‘nicer’ when the surface that is being lit is very close to the light source, but it is not actually correct.
When this hack is disabled, the fall-off can get darker when the distance from the light is less than 1 unit, which is actually mathematically correct.
Bump Sampling Technique
Introduced in Redshift version 2.6.10
When enabled, it forces Redshift to use an old bump-mapping technique that resulted in less detailed bump-mapping in the distance, particularly if mip-mapping is disabled.
This is provided as a backwards compatibility option to match the look of older scenes.
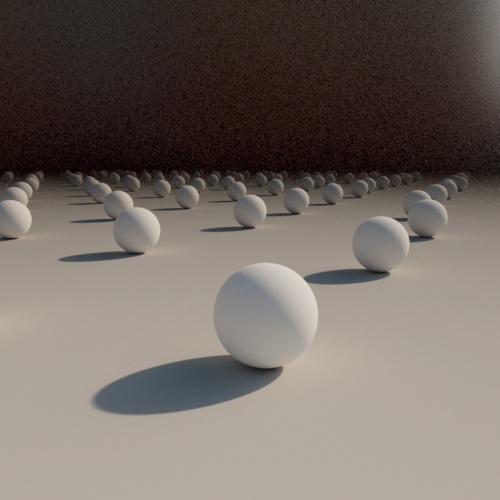
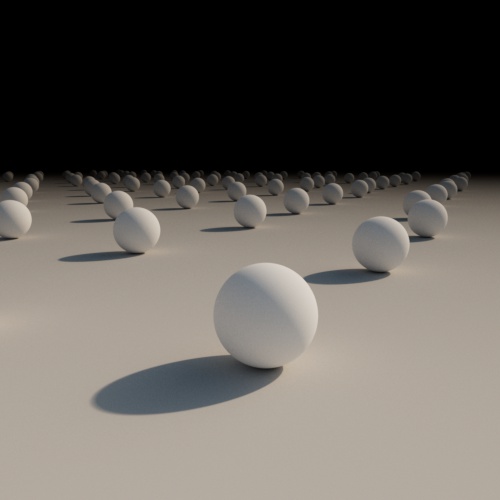
No GI From Volume Scattering
Introduced in Redshift version 2.6.15
When enabled, it forces Redshift to disable all global illumination contribution from Volume Scattering.
This is provided as a backwards compatibility option to match the look of older scenes.
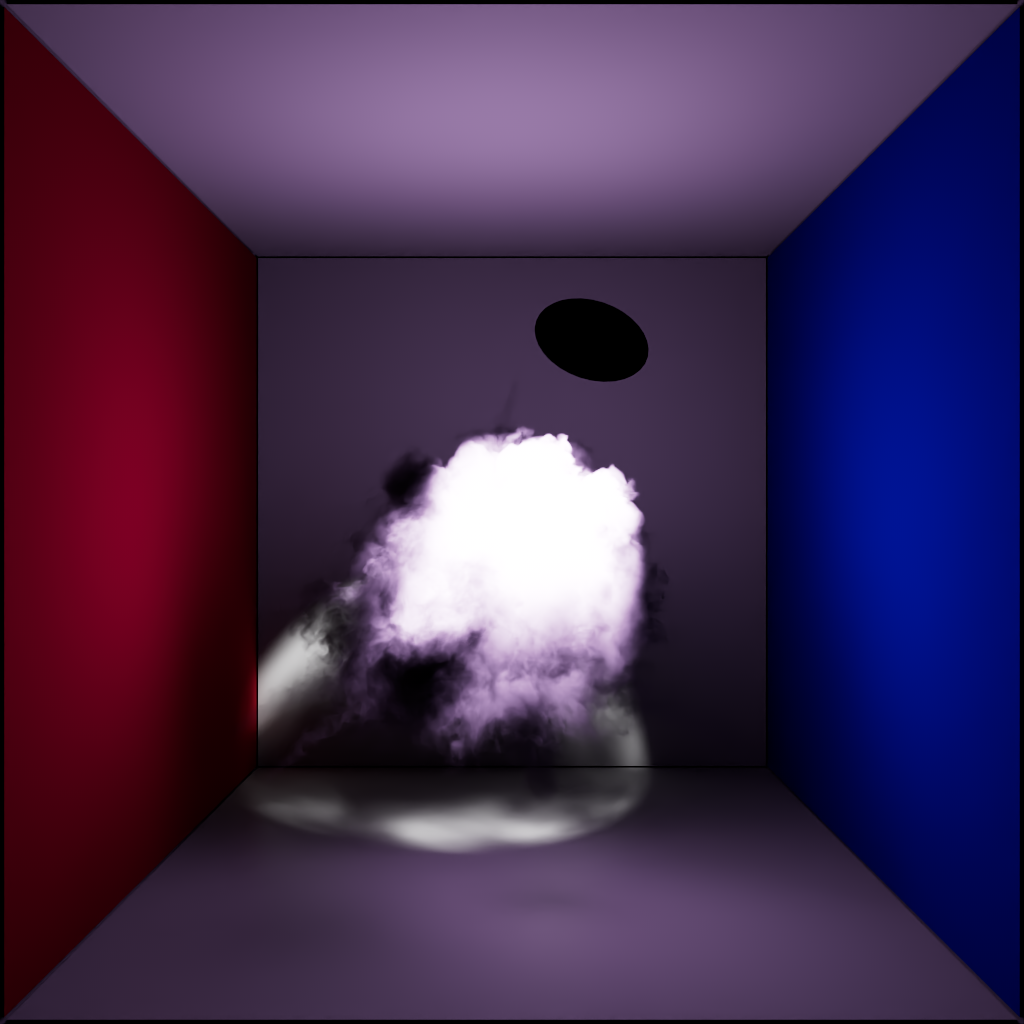
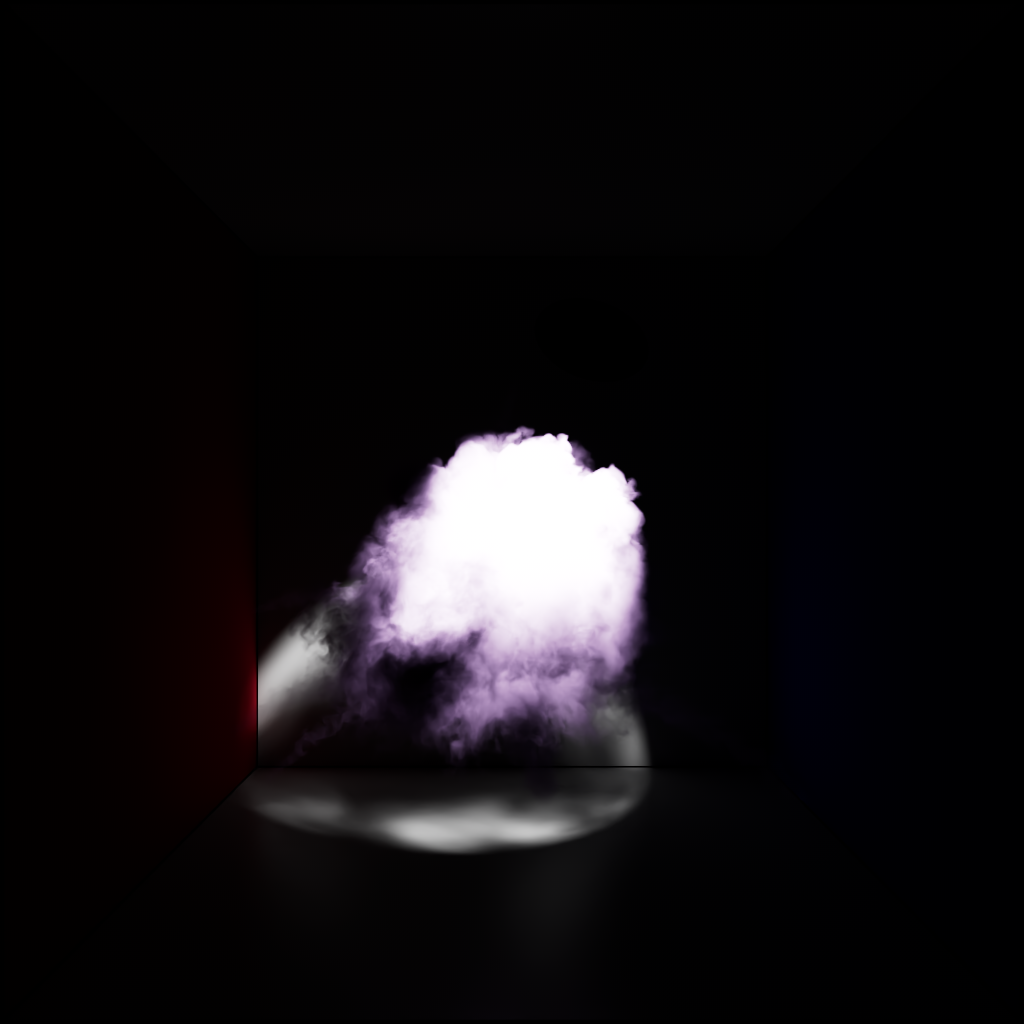
In the example images below a light is shining primarily on a volume in the center of a room, when No GI from Volume Scattering is enabled this results in very little bounce lighting around the room which looks very unrealistic.
|
|
| No GI From Volume Scattering: Disabled (default) | Enabled (legacy) |
Color Management For Hair
Introduced in Redshift version 2.6.39
When enabled, it forces Redshift to use an outdated color correction technique that results in inconsistent color for Cinema 4D hair.
This is only provided as a backwards compatibility option to match the look of older scenes.
Color Management for X-Particles
Introduced in Redshift version 2.6.39
When enabled, it forces Redshift to use an outdated color correction technique that results in inconsistent color for X-Particles.
This is only provided as a backwards compatibility option to match the look of older scenes.
Non Scaling Of Point Clouds
Introduced in Redshift versions 2.6.54 and 3.0.18
When enabled, it forces Redshift to use an outdated and broken method of scaling for point clouds that use Redshift's native point primitive.
Prior to this fix, if you had a point cloud object and you scaled it, the points would move further apart or closer together but their actual radius wouldn’t change. I.e. the points wouldn’t become smaller or bigger!
This is only provided as a backwards compatibility option to match the look of older scenes.
Color Management for Material Override
When enabled, it forces Redshift to use color management on the legacy Material Override function by applying an sRGB gamma correction.
Transformation Blur for C4D Cameras
When enabled, transformation motion blur is completely disabled for cameras in Cinema 4D.
When disabled - by default, cameras will render with transformation motion blur under the appropriate conditions.
Refraction Affects Alpha Channel
Introduced in Redshift version 3.0.31
When enabled, it allows materials with refraction to contribute to the alpha channel. For example, a material with refraction could have an alpha value below 1.0 as long as it isn't refracting something else with an alpha value of 1 like another object or light.
By default, when this option is disabled, alpha channels are completely
unaffected by refraction - leaving opacity as the only material property that will affect alpha channel values.
Enabling "Refraction Affects Alpha Channel" may be a desirable workflow but please keep in mind that compositing renders on top of other elements will not be technically correct since material refractions should bend the rays.
Refraction affects alpha can be overridden per-material with the Opacity Affects Alpha Channel parameter found in the advanced section of a Redshift material.

|
|

|
| Refraction Affects Alpha Channel: Disabled Color Channel: Alpha |
Enabled Alpha |
Enabled Beauty |
| A dome light is used with a replace alpha value of 0. | ||
Standard Material Conversion
This setting controls how Redshift interprets Cinema 4D Standard Materials.
- Native (default) - The latest and most advanced support for C4D Standard Materials.
- Architectural (legacy) - Uses the deprecated Redshift Architectural shader as the base for C4D Standard Material conversion.
- Material (legacy) - Uses an older version of C4D Standard Material conversion with the Redshift Material as the base.
Standard Sky Conversion
When enabled, it forces Redshift to use an outdated technique for converting a Cinema 4D Sky object and treating it as a Redshift Dome light.
When disabled, Redshift uses the latest technique for converting a Cinema 4D Sky object and treats it as a Redshift Environment shader.
Standard Ambient Occlusion Emulation
When enabled, it forces Redshift to emulate the ambient occlusion effect of a C4D Standard Material.
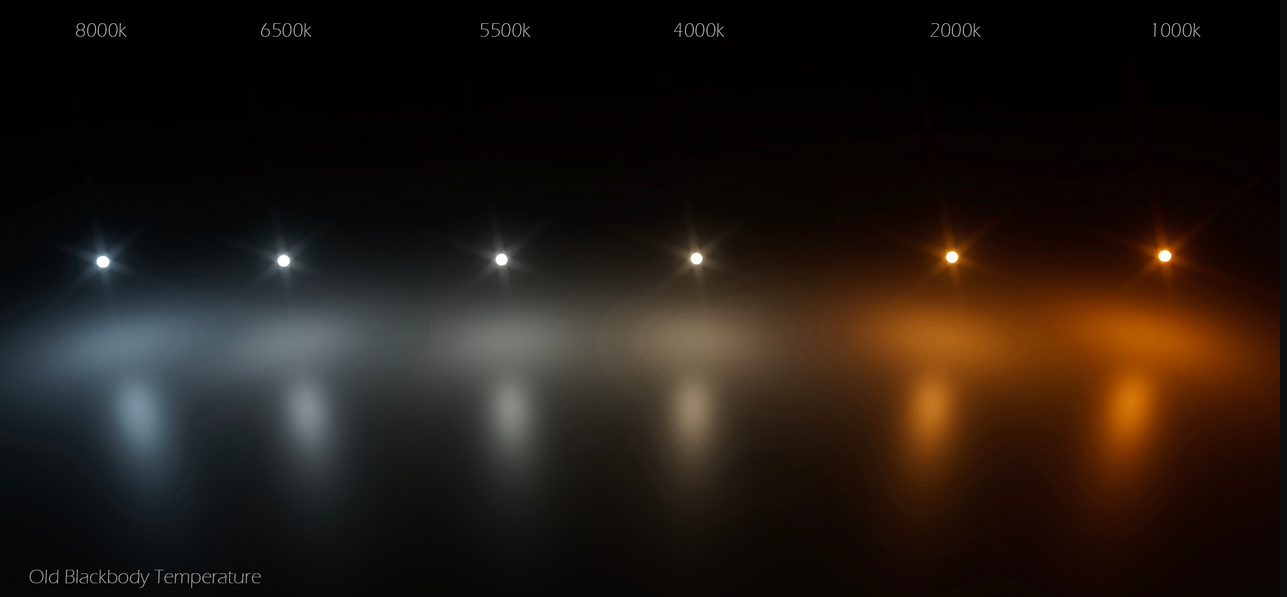
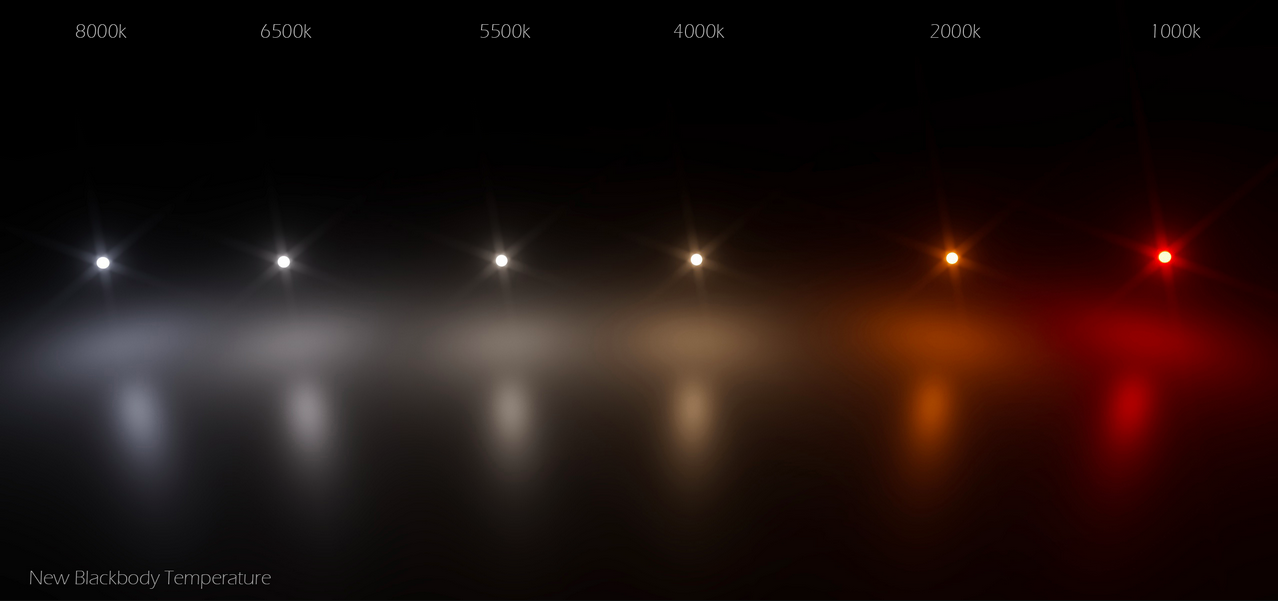
Black-Body and Dispersion Technique
Introduced in Redshift version 3.0.50
When enabled, it forces Redshift to use an old inaccurate and physically incorrect method of rendering black-body (light temperature) and dispersion (abbe) shading that does not work correctly with OCIO rendering.
When disabled - by default, Redshift uses a new and improved rendering method for this kind of shading that features increased realism.
|
|
|

|
| Black-Body and Dispersion Technique: Enabled (old) |
Disabled (new) | Enabled (old) | Disabled (new) |
Sub-Surface Scattering GI
Introduced in Redshift version 3.5.05
When enabled, it forces Redshift to render without sub-surface scattering global illumination.
When disabled - by default, Redshift renders with sub-surface scattering global illumination.
|
|
|
| Sub-Surface Scattering GI: Enabled (old) SSS shader Scale: 10 |
Disabled (new) 10 |
Disabled (new) 1 |
| SSS scale must be high enough that the light can pass to the other side of a object or else there will be little to no SSS GI contribution. | ||
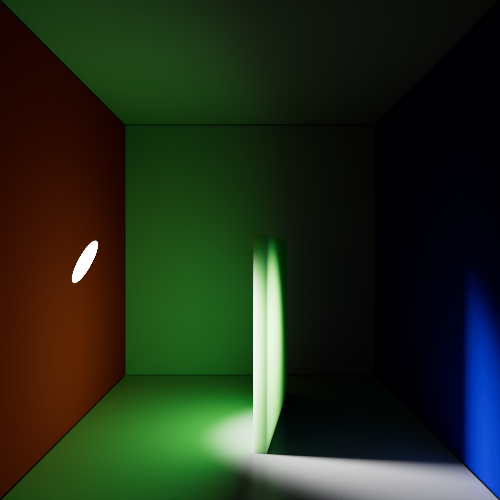
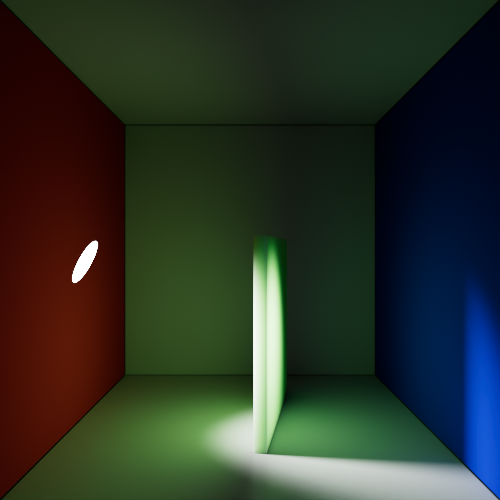
Global Volume Anisotropy
Introduced in Redshift version 3.5.05
When enabled, it forces Redshift to use an outdated method of volume anisotropy for global volume fog that is less stable and breaks down at extreme values.
When disabled - by default, Redshift uses a an improved method of volume anisotropy for the global volume fog that is more stable and holds up better at extreme values.
|

|
|
|
| Global Volume Anisotropy: Enabled (old) Volume Anisotropy: 0.95 |
Disabled (new) 0.95 |
Enabled (old) -0.95 |
Disabled (new) -0.95 |
Automatic Velocity Sources
Introduced in Redshift version 3.5.10
When enabled - by default, Redshift will automatically find and use motion vector data for alembic files and native C4D cloth and volumes. This enables the use of motion blur for these objects without the need for an RS Object tag.
When disabled, Redshift requires an RS Object tag and the manual input of motion vector data.
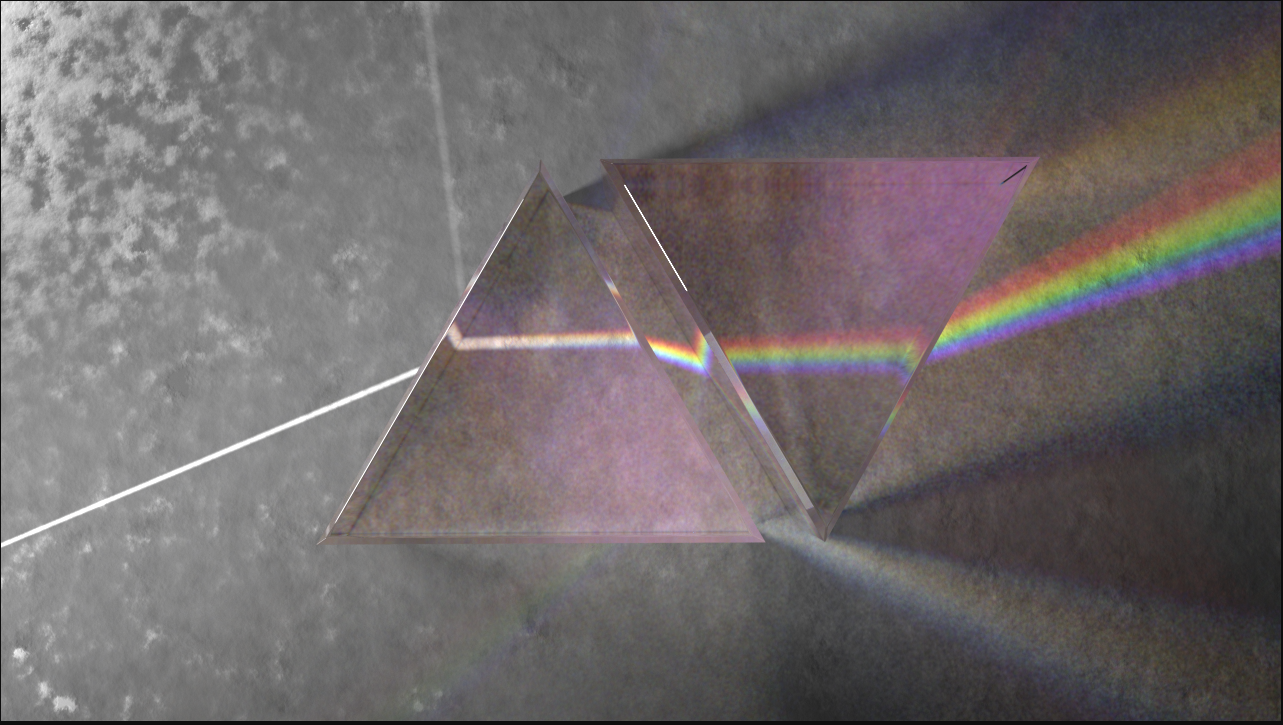
Dispersion Nested Dielectrics Technique
Introduced in Redshift version 3.5.13
When enabled, it forces Redshift to use an outdated dispersion rendering technique that stops materials with dispersion from being visible through other materials that also have dispersion.
When disabled - by default, materials with dispersion can be seen through other materials with dispersion as you would expect.
Note: Extremely low dispersion values were used for demonstration in the example images below.
|
|
|
Legacy Dispersion Nested: Enabled (old) |
Disabled (new) |
|
|
| Interior objects by themselves | |
C4D Hair Evaluation
Introduced in Redshift version 3.5.13
When enabled, Redshift bypasses the evaluation of hair when rendering to the Picture Viewer.
When disabled - by default, Redshift evaluates hair as normal.
Hair Strand Attribute Sampling
Introduced in Redshift version 2025.5
When enabled, Redshift renders C4D Hair Objects or Curves in the "Hair Strand" mode limited to a maximum of 4 attribute samples per strand. Due to this limitation color smearing can occur but this option can be used to maintain the look for scenes built before 2025.5.
When disabled - by default, the limitation is lifted allowing for better hair sampling accuracy.
Both examples use the same color ramp, note how the hair is able to more accurately display many more colors when the limitation is lifted by disabling Legacy Hair Strand Attribute Sampling.
|
|
| Disabled (new default) | Enabled (legacy) |
Time Behavior
Introduced in Redshift version 3.5.15
When enabled, Redshift uses an old version of time management.
When disabled - by default, Redshift uses a new version of time management that enables new features like the looping functionality in a Maxon Noise shader.
Automatic Displacement
Introduced in Redshift version 3.6.04
When enabled - by default, a material that uses a Displacement shader is displaced automatically. Note, you still need enough geometric detail to properly support displacement via subdivisions or tessellation.
When disabled, Displacement must be set up manually with an Object tag.
Manually configured displacement settings via a Redshift Object tag take priority over Automatic Displacement, this ensures compatibility with previously created scenes.
Vector displacement maps still require manually setting the Maximum Displacement. Height field maps support automatic maximum displacement with both single displacement shaders and displacement blenders.
GI Conserve Reflection Energy for Photon Caustics
Introduced in Redshift version 2025.0
Conserve Reflection Energy (CRE) is a Global Illumination feature that approximates the look of caustics by simulating very soft bounces of light. While the CRE effect looks nice without caustics, when rendering with caustics the effect is redundant and decreases the contrast provided by actual caustics.
When enabled and rendering with Photon Caustics, Conserve Reflection Energy is enabled resulting in a less accurate render by simulating fake caustics and real caustics at the same time.
When disabled and rendering with Photon Caustics, Conserve Reflection Energy is disabled resulting in a more accurate render where only real caustics are used.

|

|
| GI CRE for Photon Caustics: Enabled Old behavior |
Disabled New behavior |
Area Light Visibility
Introduced in Redshift version 2025.3
When disabled, by default, area and dome lights are less dependent on their camera visibility offering more control over scene lighting. For example, a light can be invisible to camera rays (Camera contribution 0) and still visible in transmissive refractions.
When enabled, lights revert to their visibility behavior in 2025.2 and older. When a light is invisible to camera rays it is also invisible to transmissive rays.
Material Processing Mode
Introduced in Redshift version 3.5.08
-
Single (Legacy) - Disables material stacking, only the top most material will render regardless of opacity.
-
Stacked - Enables material stacking, materials below the top most material can be seen underneath if the materials on top use opacity or transmission.

|

|
|
Material: Bottom |
Top |
|
|
|
Material Processing: Single (Legacy) |
Stacked |
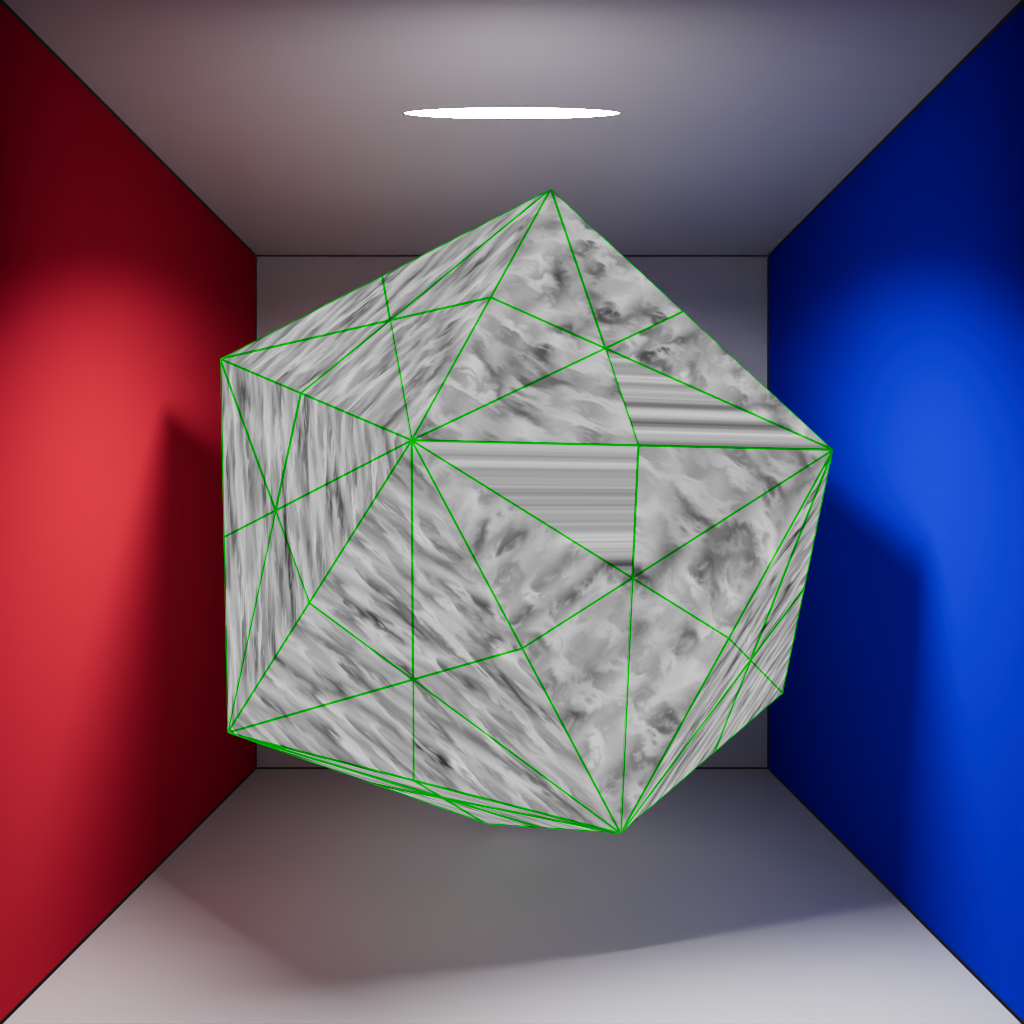
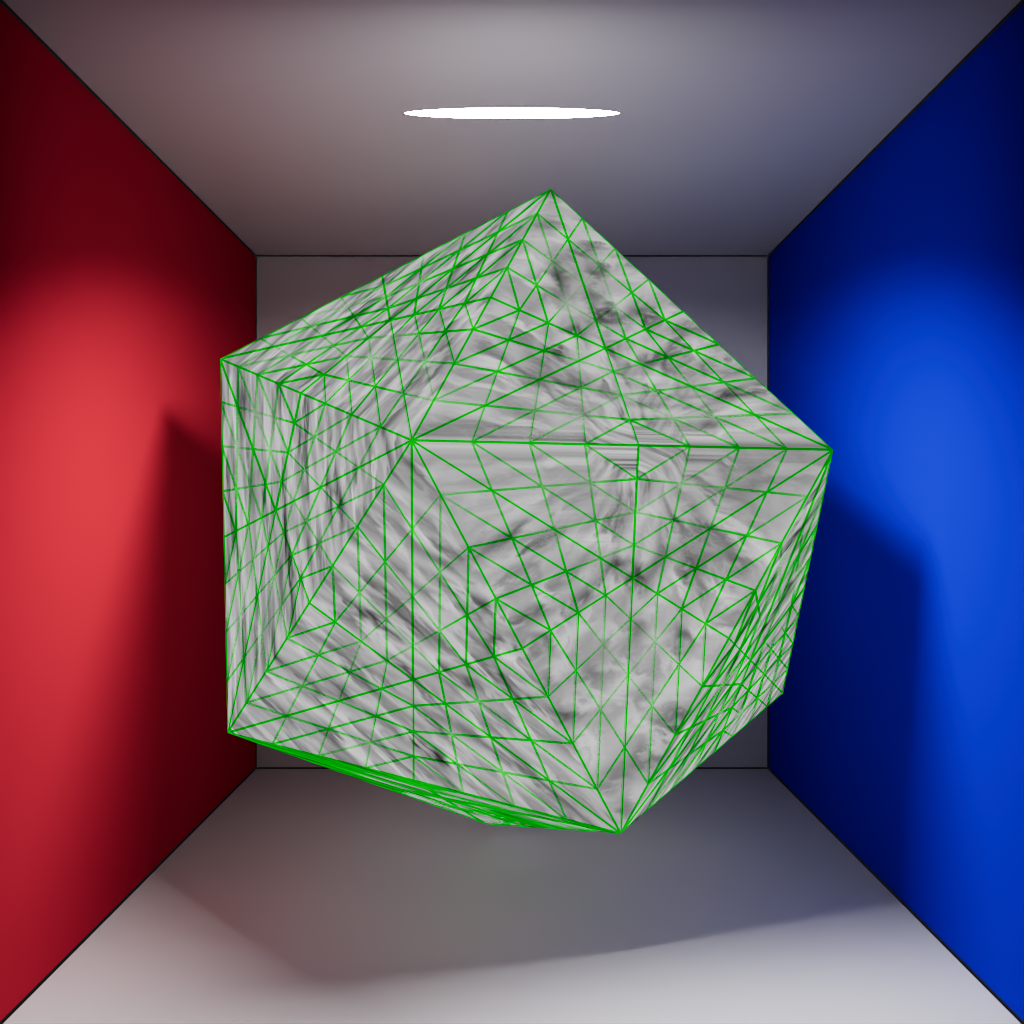
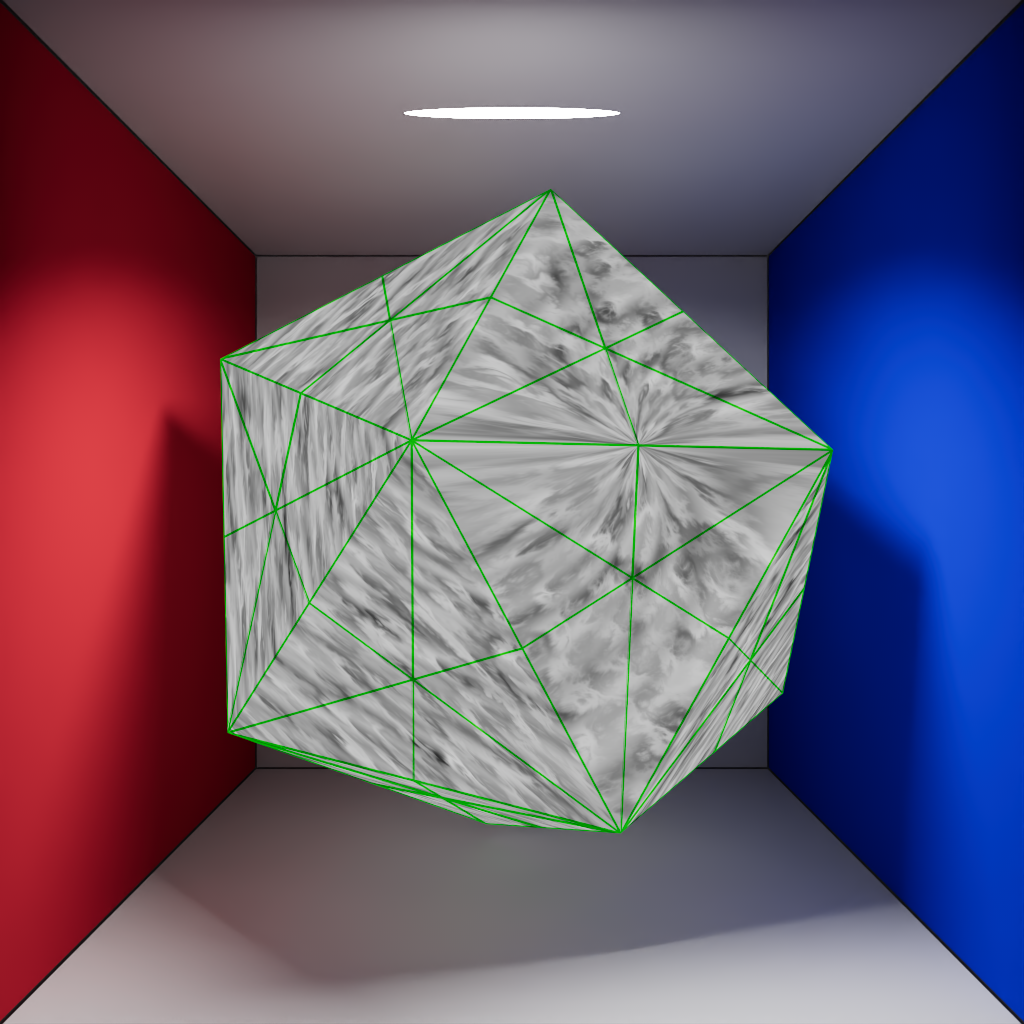
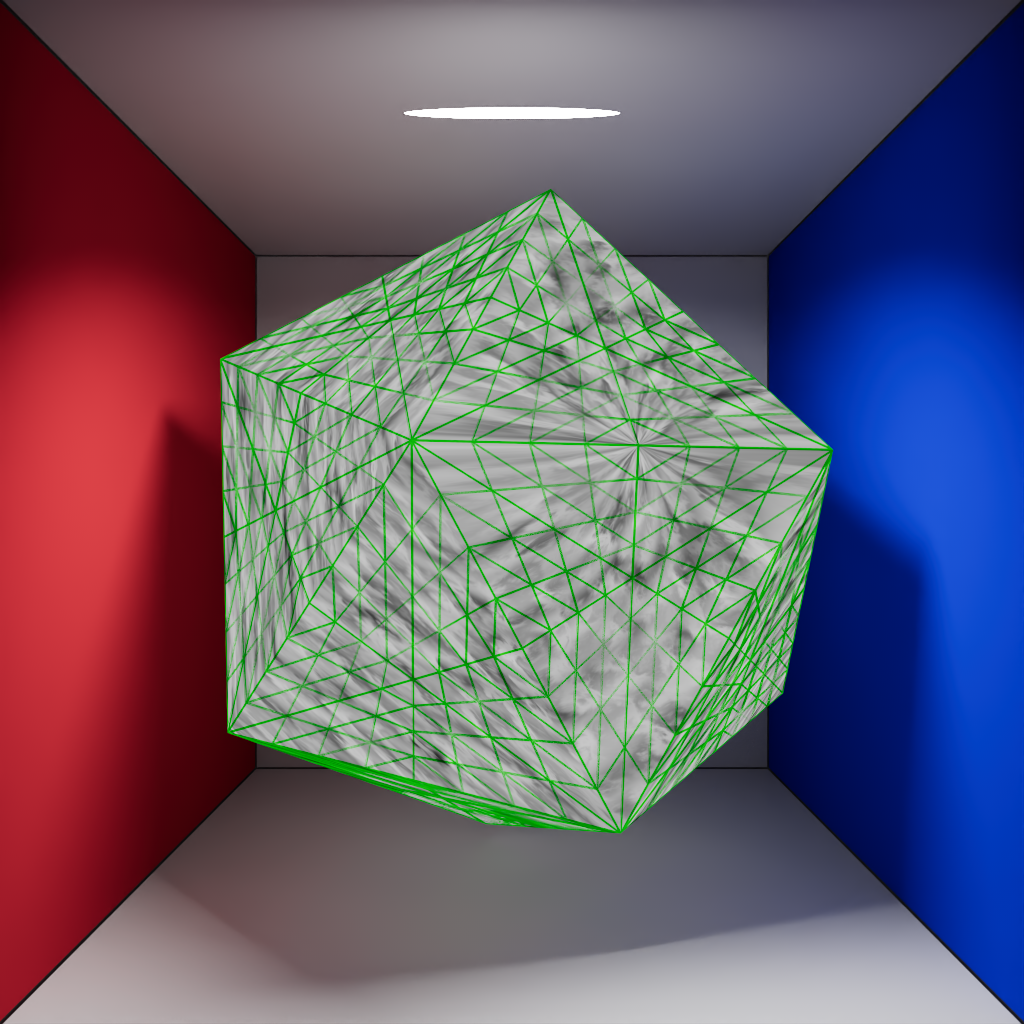
Texture Projections
Introduced in Redshift version 3.5.08, updated in version 2026.5
Before version 3.5.08 procedural projections were baked into UV sets before rendering and if a mesh was coarse the UVs could change and distort with the topology of the mesh. When Texture Projections is set to Procedural these limitations are no longer applicable, the quality and consistency is improved regardless of the mesh resolution.
This setting has no impact on the default UVW Mapping option, it only affects the procedural projection methods like Spherical, Cylindrical, Cubic etc.
-
Baked UVs (Legacy) - Matches the low quality procedural projection results before version 3.5.08.
-
Procedural (Legacy) - Default, improves quality by removing procedural projection limitations.
-
Native - Helps the baking system work more efficiently and fixes an issue for UV Context when overriding tiling on the C4D Material Tag and using UVW projection.
|
|
|
|
Mesh Subdivision: 0 Texture Projections: Baked UVs (Legacy) |
1 | 3 |

|
|
|
|
Mesh Subdivision: 0 Texture Projections: Projection |
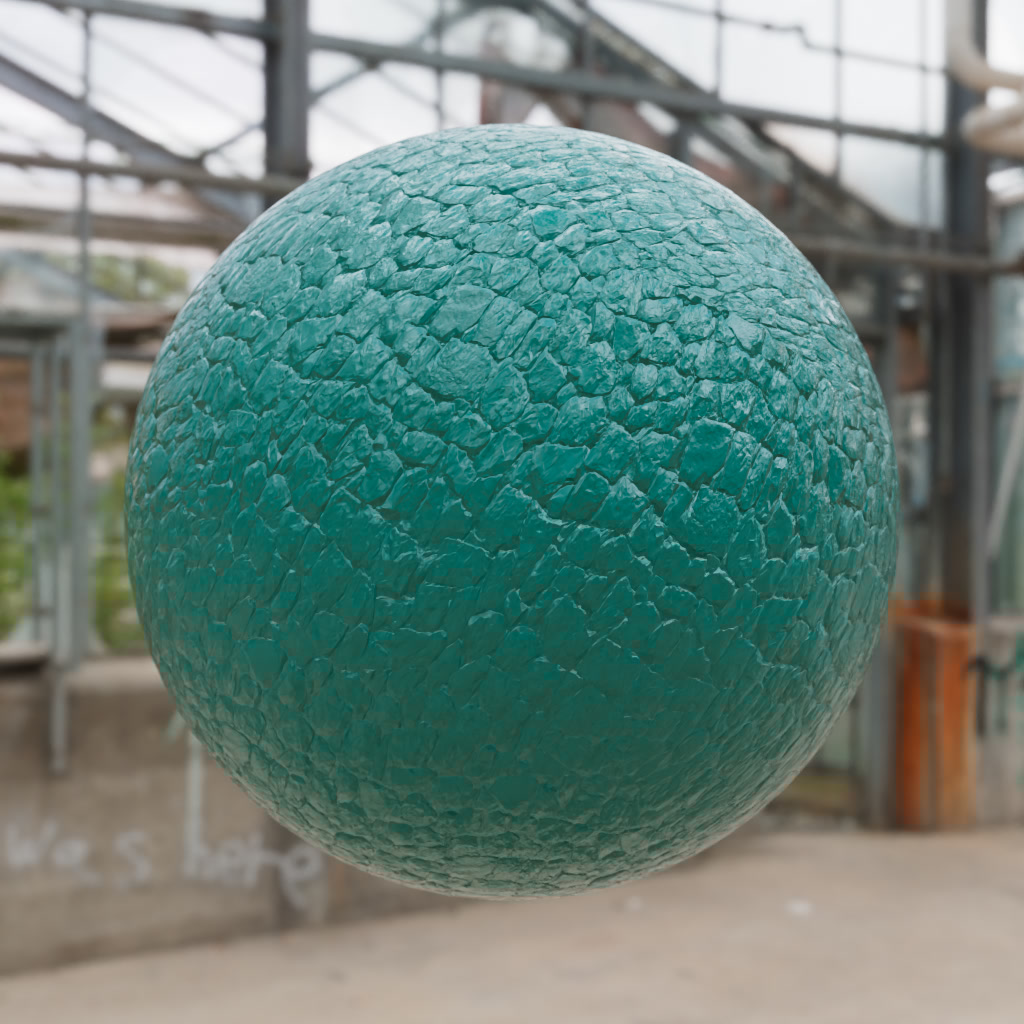
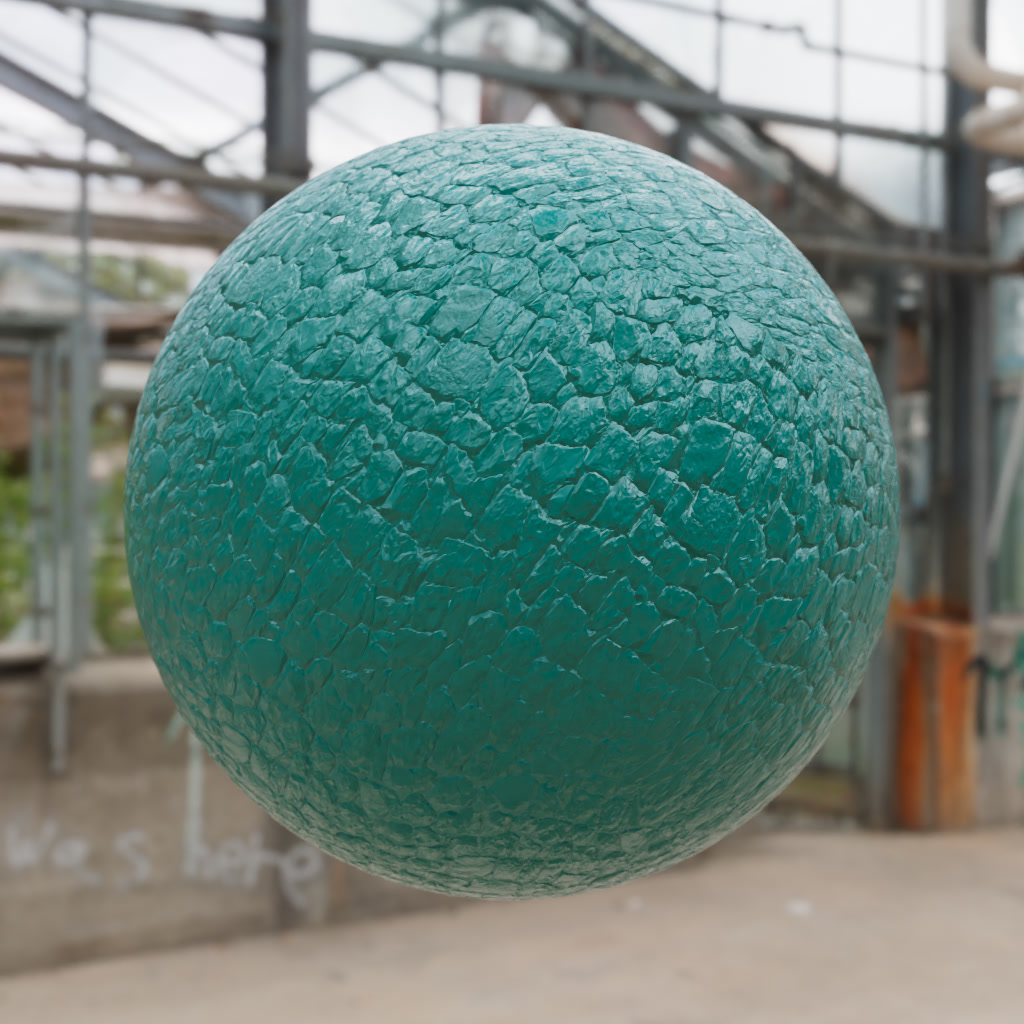
Experimental Options
|
Bump Smoothing on Lighting Silhouettes
Enabled by default, it allows Redshift to smooth bump and normal maps on the light silhouettes of objects, where the surface normal and light direction are perpendicular to each other.
This is done to avoid faceting artifacts that can arise in those areas, especially if the object is low-poly. However, this can also produce loss of surface detail that might be necessary in some cases. For this reason, Redshift allows the user to turn off the light silhouette bump smoothing.
Shadow Ray Biasing
Enabled by default, it allows Redshift to use a ray biasing trick in order to avoid self-shadowing artifacts that are most common on low polygon meshes. For more information, please see the Shadow Ray Biasing page.
When a renderer computes shading, it uses the mesh's vertex normals. This way, if the mesh has smooth normals, the renderer can generate smooth lighting even if the mesh is of a low-tessellation. However, this can create the unfortunate situation where a vertex normal might be able to 'see' the light that the polygon cannot!
Even though shadow ray biasing can get rid of most self-shadowing issues, it can also introduce other types of artifacts in certain situations, please see here for more information.
|

|
| Shadow Ray Biasing: Disabled | Enabled |
Enable Secondary Ray Clamping on First Bounce
When enabled, Redshift clamps the first ray that bounces from the surface so that any secondary rays that follow are not as strong.
Clamping usually occurs after all rays are shot but in some situations where secondary rays are much stronger than primary rays enabling Secondary Ray Clamping on First Bounce can help with things like fireflies and flickering of secondary rays.
Sampling Optimizations
Enabled by default, it allows Redshift to further optimize sampling calculations for increased rendering speed with no loss in quality.
This should only be disabled for debugging purposes as there should be no visual differences with it enabled or disabled.
Shading Normal Adaptation Technique
Skewed Reflection introduced in Redshift version 2025.1
Keller introduced in Redshift version 3.5.11
Controls the method used to render bump and normal maps with the following options:
-
Keller (Default) - Uses a method that results in fewer artifacts compared to "None," accentuates light that enters the surface at a parallel angle.
-
Skewed Reflection - Uses an alternative method to Keller, captures more light from all around the surface.
-
None - Uses the legacy method that is more prone to visual artifacts.
The difference can be subtle between Keller and Skewed Reflection but tends to become more apparent along edges and at an angle to a flat surface as seen below.
|
|
|
| Normal Technique: Keller | Skewed Reflection | None |
|
|

|
HIP Ray Tracing (if available)
When enabled this will utilize any available hardware for accelerated ray tracing as long as you are rendering with compatible AMD video cards.
The impact of hardware accelerated ray-tracing varies from scene to scene, with scenes that spend more of their time specifically on ray tracing generally seeing more of an improvement with hardware RT enabled. Non-ray-traced effects like irradiance point cloud and irradiance cache GI are not accelerated by hardware RT.
GPUs that support hardware RT can be mixed with GPUs that do not support hardware RT.
Debug Capture

|
If the user gets a GPU crash, they will see a message recommending that they re-render their frame using the 'debug capture' option enabled. This option allows Redshift to produce a lot of extra information during rendering which, when sent to the developers, can help them diagnose and fix issues.
Enable
When enabled, it produces a lot of extra information during rendering which is intended to help with diagnosing rendering issues.
Shader Integrity check (Very Slow)
When enabled, it checks the integrity of the shaders during rendering which is intended to help with diagnosing rendering issues.
Enabling this option will result in very slow rendering.
Memory
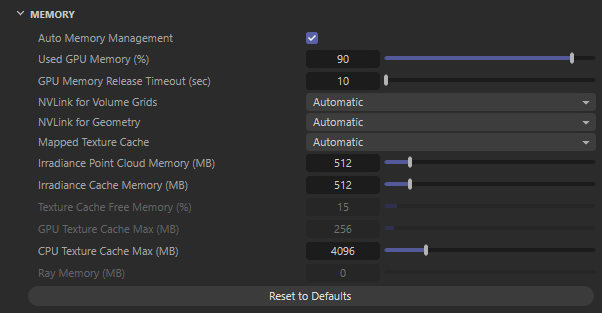
|
For additional information on this subject please see the Memory page here.
This is only for advanced users! Incorrect settings can result in poor rendering performance and/or crashes!
Auto Memory Management
When enabled, it allows Redshift to analyze the scene and determine how GPU memory should be partitioned automatically between rays, geometry and textures.
When Auto Memory Management is enabled many parameters below are grayed out and uneditable.
We recommend leaving Auto Memory Management enabled unless you are an advanced user and have observed Redshift making the wrong decision (because of a bug or some other kind of limitation).
Used GPU Memory (%)
Controls how much of a GPU's memory is reserved for Redshift.
By default, Redshift reserves 90% of a GPU's free memory. This means that all other GPU apps and the OS get the remaining 10%. If you are running other GPU-heavy apps during rendering and encountering issues with them, you can reduce that figure to 80 or 70. On the other hand, if you know that no other app will use the GPU, you can increase it to 100%.
Please note that increasing the percentage beyond 90% is not typically recommended as it might introduce system instabilities and/or driver crashes!
GPU Memory Release Timeout (sec)
Controls how long Redshift will hold onto your GPU's memory in seconds.
Redshift reserves a percentage of your GPU's free memory in order to operate but the process of reserving and freeing GPU memory is an expensive operation so Redshift will hold on to GPU memory while there is any rendering activity, including shaderball rendering.
By default if rendering activity stops for 10 seconds, Redshift will release this memory. It does this so that other 3d applications can function without problems.
This setting was added in version 2.5.68. Previously, there were cases where Redshift could reserve memory and hold it indefinitely.
NVLink for Volume Grids
Controls how volume grids are handled on a system that is set up for NVLink from the following options:
- Automatic - Redshift will automatically use NVLink when available for volume grids that go out of core.
- Force Enabled - Redshift will use NVLink when available for volume grids.
- Force Disabled - Redshift will not use NVLink for volume grids, even if they go out of core.
NVLink for Geometry
Controls how geometry is handled on a system that is set up for NVLink from the following options:
- Automatic - Redshift will automatically use NVLink when available for geometry that goes out of core.
- Force Enabled - Redshift will use NVLink when available for geometry.
- Force Disabled - Redshift will not use NVLink for geometry, even if it goes out of core.
Irradiance Point Cloud Memory (MB)
Specifies the maximum amount of GPU memory Irradiance Point Cloud computations are allowed to use during the actual "working" process.
The default 128MB should be able to hold several hundred thousand points. This setting should be increased if you encounter a render error during computation of the irradiance point cloud.
Irradiance Cache Memory (MB)
Specifies the maximum amount of GPU memory Irradiance Cache computations are allowed to use when during the actual "working" process.
The default 128MB should be able to hold several hundred thousand points. This setting should be increased if you encounter a render error during computation of the irradiance cache.
Texture Cache Free Memory (%)
Specifies the percentage of the leftover GPU memory that can be used for texture caching.
Once reserved memory and rays have been subtracted from free memory, the remaining memory is split between the geometry (polygons) and the texture cache (textures). The "Texture Cache Free Memory" parameter tells the renderer the percentage of free memory that it can use for texturing.
Examples:
- Say we are using a 2GB videocard and what's left after reserved buffers and rays is 1.7GB. The default 15% for the texture cache means that we can use up to 15% of that 1.7GB, i.e. approx 255MB.
- Alternatively, say we are using a videocard with 1GB and after reserved buffers and rays we are left with 700MB, the texture cache can be up to 105MB (15% of 700MB).
GPU Texture Cache Max (MB)
Specifies the maximum amount of GPU memory in MB that can be used for texture caching.
This is useful for videocards with a lot of free memory. For example, say you are using a 6GB Quadro and, after reserved buffers and rays you have 5.7GB free. 15% of that is 855MB. There are extremely few scenes that will ever need such a large texture cache! If we didn't have the "Maximum Texture Cache Size" option you would have to be constantly modifying the "Percentage" option depending on the videocard you are using.
Using these two GPU texture memory options ("Percentage" and "Maximum") allows you to specify a percentage that makes sense (and 15% most often does) while not wasting memory on videocards with lots of free mem.
CPU Texture Cache Max (MB)
Specifies the maximum amount of CPU memory (system RAM) in MB that can be used for texture caching.
System RAM used by Redshift
Before texture data is sent to the GPU it is stored in CPU memory. By default, Redshift uses 4GB for this CPU storage. If you encounter performance issues with texture-heavy scenes, please increase this setting to 8GB or higher.
Ray Memory (MB)
Specifies how much GPU memory in MB Redshift will reserve for shooting rays.
By default, If you leave Ray Memory at zero, Redshift will use a default number of MB that depends on the shader configuration.
If your scene is very lightweight in terms of polygons, or you are using a videocard with a lot of free memory, you can specify a higher budget for the rays and potentially increase your rendering performance by helping Redshift submit fewer, larger packets of work to the GPU.