Tracker Menu
With only a few exceptions, the commands listed here are only available if a Motion Tracker or Object Tracker object is selected. In addition, different commands will be made available depending on the mode - 2D/3D View - and the Tracks selected. Several commands can also be called up via the Motion Tracker Graph’s context menu.
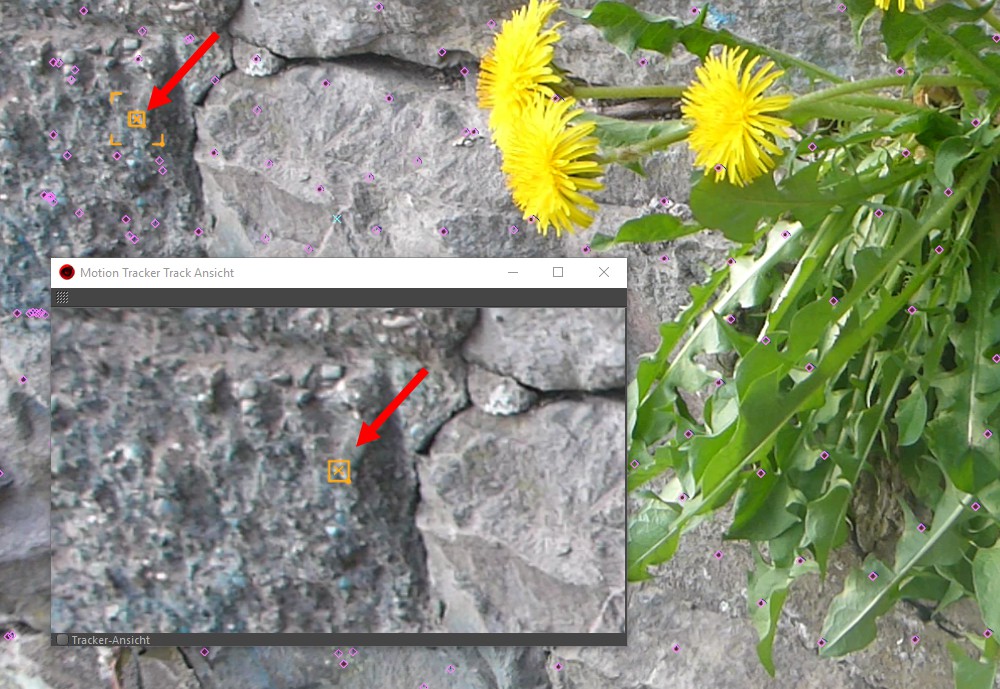
If not already displayed in the layout, selecting this command will open the Motion Tracker Track View. In this window, the currently selected (individual) Auto or User Track will be shown centered (always) and with enlarged footage. The window is interactive, i.e., the Track can be moved with the mouse. In principle, this window is similar to the ![]() Lock View on Tracks function, only that the Motion Tracker Track View automatically shows the currently selected Track, including footage and offers an enlarged overview in the Viewport.
Lock View on Tracks function, only that the Motion Tracker Track View automatically shows the currently selected Track, including footage and offers an enlarged overview in the Viewport.
The Motion Tracker Track View and the (2D) view correspond to one another.
Modifications made to the Track will immediately be carried over to the Viewport and vice-versa. The mouse wheel can be used to zoom in or out on the Motion Tracker Track View. Double-clicking on the Motion Tracker Track View will open the User Track list (if no Motion Tracker object or footage is loaded, these can also be loaded per double-click).
In the context menu you will find several useful commands. Not yet described are those specific to the Motion Tracker Track View (which have no influence on pattern recognition):
Lock, Unlock Track
Use this option to lock or unlock the currently visible Track. This prevents it from accidentally being moved, for example. The Motion Tracker object has the same function in its User Track list.
Tracker View
If the Motion Tracker Track View should be shown as a Tracker View (grayscale depiction in consideration of the color filter), this option should be enabled (see also Footage Display.
This command is also available as an option at the bottom left of the window.
Use Bilinear
If this option is enabled, the Motion Tracker Track View will be displayed using bilinear enlargement, i.e., smoothed. Otherwise the footage pixels will always be visible.
Show Pattern Area
Show Search Area
Use these settings to define if the respective regions should be displayed in the Motion Tracker Track View.
This mode is designed for working with the Motion Tracker. It replaces the previous 2D and 3D View commands and is positioned prominently as an icon in the Motion Tracker layout (Icon list on the top).
- Enabled: Work with 2D Tracks (show footage, set, move Tracks, etc.; only works in the Perspective view). The enabled view will be shown in the Viewport with a yellow frame. The keyboard shortcuts such as Ctrl/Cmd + a (select all Tracks), H to show all footage, directional arrows to move selected Tracks and normal selection tools such as Live or Rectangular Selection.
This mode will be automatically enabled when a Motion Tracker object is created or if you double-click on an existing Motion Tracker object. - Disabled: Work with 3D elements of the Motion Tracker: the 3D features will be shown and can be selected, for example. When disabled, the original 3D mode will be reverted to (i.e., prior to activating 2D Tracks).
This command does the following:
- A Motion Tracker object will be created
- A video sequence is loaded into the corresponding field
- A 2D tracking will be created that continues seamlessly into …
- … a 3D camera reconstruction
The Full Solve command does everything you would normally do manually in the Motion Tracker object's Footage, 2D Tracking and Reconstruction menus.
If you're lucky you will end up with a fully functioning 3D reconstruction (i.e., a reconstructed animated camera as a Child object of the Motion Tracker object). However, this is only the case for footage that is easy to track. In most cases you will have to do some manual fine-tuning.
If a reconstructed camera is not generated at the end of the process, this is primarily a result of bad Tracks. These can be corrected and/or added manually (see What are good and bad Tracks?). After the Tracks have been modified you will have to execute the Full Solve command again or click on the Run 3D Solver button in the Motion Tracker's Reconstruction tab.
If you take a look at the status bar and it reads "Deferred Solve Finished”, the solve was successful (see also 3D Reconstruction).
If you have completed one or more of the steps listed above, the command will continue with the next step (select the partially solved Motion Tracker object to do so).
User Tracks are normally created by pressing Ctrl/Cmd on the footage. You can also use the Create User Tracks tool, which bears the advantage of a magnifying glass also being displayed. Not hotkey must be used.
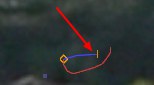
This command makes it possible to visually check the quality of a Track better than usual.
Select one or more Tracks and enable this mode. Where the 2D Track was successfully tracked, it will remain fixated in the Viewport or with its position until the mode is disabled.
When the footage is played or if a different time is selected, the footage view under the Track will move instead. Tracks will remain stationary and cannot disappear from view when played. Slipping and jumping Tracks can be easily localized.
All known interactive editing methods, such as moving a keyframe or adding a new Track also work in this mode.
If you make additional selections, simply click on the button again. If you do this without previously making a new selection, the mode will be disabled.
The ![]() Motion Tracker Track View works similarly for selected Tracks.
Motion Tracker Track View works similarly for selected Tracks.
This mode is enabled by default and ensures that a new 2D tracking is created immediately for newly modified Tracks (e.g., after a corrective nudge, change of pattern or search size, etc.).
If this mode is disabled, changes can be made quickly without always having to wait until 2D Tracking has been completed. You can then track manually by clicking on the respective buttons in the Motion Tracker object. Here, tracking is only possible either forwards or backwards.
If the Auto Update Tracks option is enabled again, a new tracking will start immediately. Modified Tracks that have not yet been re-tracked will be colored accordingly.
Selections
Selects all Auto Tracks and ignores all User Tracks.
Selects all User Tracks and ignores all Auto Tracks.
This command is only available if a 3D reconstruction has successfully been performed. All Tracks that were successfully reconstructed as a 3D feature will be selected.
Inverts the selection: selected Tracks will be deselected and vice-versa.
Hides selected Tracks. These tracks still exist, will be evaluated during reconstruction - but are merely not visible. This can, for example, be useful if you want to hide Auto Tracks so you can concentrate working on the User Tracks.
Hides all unselected Tracks.
All hidden Tracks will be unhidden.
Inverts the state of visibility: visible Tracks will be hidden and vice-versa.
Deletes all selected Tracks (these can be restored using the next command). These Tracks will not be evaluated during 3D reconstruction.
The tracks deleted using the previously described command will be restored - and made useable for reconstruction.
Here, the footage will be scaled and moved so all Tracks are visible.
This command moves and scales the footage so the selected Track is visible at the center of the section. This is particularly useful if a Track is selected in the Motion Tracker Graph and you want to edit it in the view.
This command also works if multiple Tracks are selected. The footage will then be moved/scaled so all selected Tracks are displayed as large as possible.
Use these commands to fine-tune Tracks. A single selected Track can be nudged by 1 pixel in the respective direction. If no keyframe had already been set, one will be created automatically. The arrow keys will do the same. Simultaneously press the Shift key to make larger Track jumps.
This command tracks all selected Tracks in both directions starting from the current frame (see also Manual Tracking). If no Tracks are selected, all untracked Tracks will be tracked. If no Tracks exist, Tracks will be created automatically and subsequently tracked.
If you are located at a User Key (with the corresponding selected Track), an individual tracking direction can be defined for this key.
This command tracks all selected Tracks forwards, resp. backwards from the current frame (see also Manual Tracking). If no Tracks exist, Auto Tracks will be created automatically and subsequently tracked.
If you are located at a User Key (with the corresponding selected Track), an individual tracking direction can be defined for this key.
This command inserts a key for selected, tracked Tracks at the current position in the animation. This is recommended for Tracks that shift. Execute the command at the Track's last correct position. The Motion Tracker will save this pixel pattern and will search for this pattern in the next (new) frame.
This command differs from the context menu's Add key here command.
This command deletes all keys for the selected Tracks at this point in the animation (which are displayed as a small point on the Track path as well as in the Animation Palette for the Track - where they cannot be deleted).
It is important to note that Track keys can only be deleted using this command (even if the keys are also displayed at other locations such as in the Timeline).
Tracks whose pixel patterns move out of the footage or become too blurred (or can no longer be tracked for other reasons) but are still erroneously tracked at another position can be trimmed using this command. The Motion Tracker will be told when to stop tracking. Go to the last correctly positioned Track and execute the Trim Track command. The side showing away from the key will be trimmed. If you trim 2 keys, a gap will first appear that can be enlarged by additional trimming (e.g., to mask a tree hushing through the scene).
A trimmed Track path will be indicated in the Viewport by a small, vertical line (see image for next command) an marked in the Motion Tracker Graph by a gray key.
A Track can be trimmed twice per key. If you want to delete a path between 2 keys completely, select the key in front of the key to be deleted, execute the Trim Track command, then select the key next to the next key and execute the command again. The path between the two keys will then be deleted.
Track paths deleted using the previous command that are no longer than 3 frames can be untrimmed using this command. Note that a Track path can be trimmed at both ends.
Context menu
Most of the commands described above will be made available if you right-click in the Viewport. The following will also be made available:
Create User Track Here
A User Track is created at this location (it must subsequently be tracked). A faster method is to Ctrl/Cmd+click on the footage.
Insert Key Here
A key can be created at the current position for an existing Track path (see also What are Tracks?). This defines the existing Track path as faulty and a new position is defined. This is always recommended if a Track has jumped to a faulty pixel pattern. A new 2D Tracking will automatically take place.
You can also drag the selected Track to a new position.
Assign Selected
Here you can assign selected Tracks to an existing Object Tracker. The Assign Selected option is located in the Object Tracker's Trackers menu.