Details
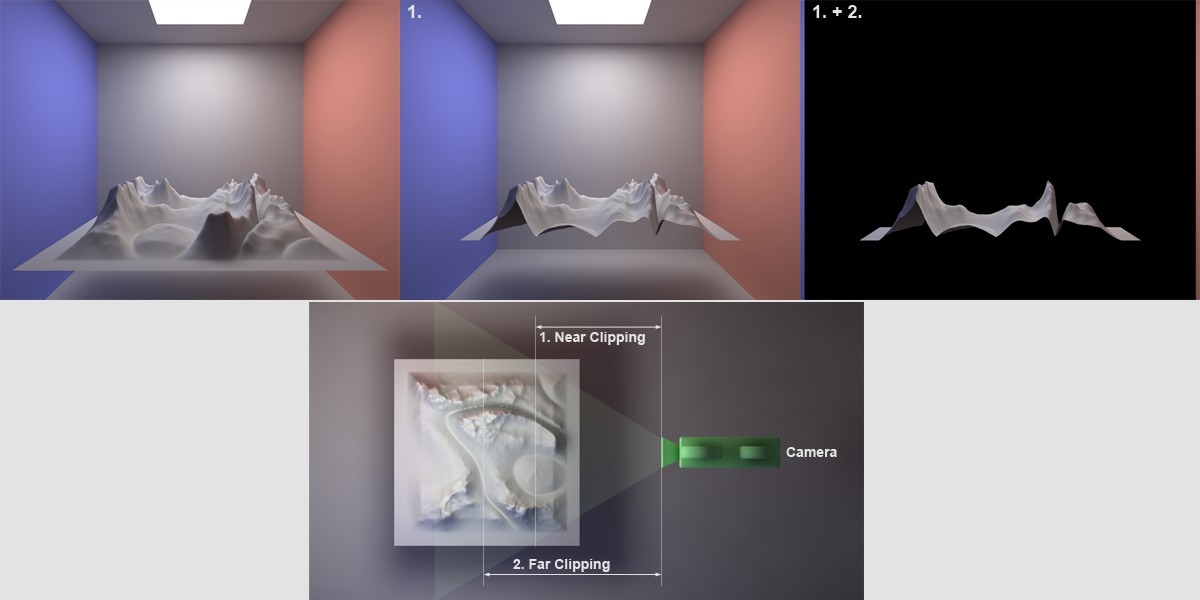 Top center Near Clipping; top right Far Clipping.
This setting defines cutting planes that lie perpendicular to the angle of view of the camera, in front of which (near clipping) or behind which (far clipping) rendered objects will be cut off. This is ideal for cutting objects. Note, however, that these objects will remain closed for the renderer with most effects. Shadow casting light sources cannot illuminate the interior of such objects.
When applying Far Clipping, the ![]() Background can be used to avoid rendering objects that lie in cut off regions at the rear of the scene black by default.
Background can be used to avoid rendering objects that lie in cut off regions at the rear of the scene black by default.
Use the clipping values to define the distances from the camera to the given cut plane.

The cut planes can be used to remove incorrectly depicted parts of images, as shown in the example above.
Enables or disables the camera view cone in the Viewport.
These settings can be used for two purposes:
- When rendering the Depth Multi-Pass channel, the normal linear grayscale gradient can be fine-tuned. You can, for example, define, that it begins at a specified depth.
- To define the physically incorrect Depth of Field, which is described below (When using the Physical Renderer that calculates a physically correct depth of field using the camera settings F-Stop (f#), Focus Distance, etc. these parameters only serve to calculate the Multi-Pass’, depth’. Hence, the following description only applies to the standard renderer).
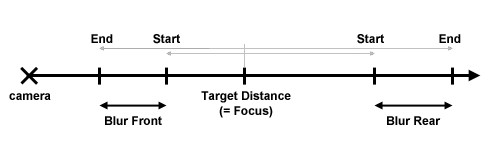
Use the Depth of Field value to define which part of an images should be in focus and which out of focus. Either the rear region (DOF rear) or the front region (DOF front) can be blurred. Correspondingly, objects in the foreground or background, respectively, will be blurred. You can also focus on the center region of a scene. In this case both the foreground and the background will be blurred. If neither of the options is enabled, the camera will behave as before: all objects will be in focus.