Redshift Renderer
With the introduction of Cinema 4D 2024.0, Redshift is enabled by default as a renderer in the Render Settings. The way Redshift works differs to some extent from the Standard and Physical renderers of older Cinema 4D versions, but these can still be used as renderers. You will also find corresponding notes on someRender Settings help pages if the settings described there (for example, Antialiasing, Global Illumination, or Single Material) are only available for Standard or Physical renderers. For Redshift, comparable settings can be found within the Redshift section of the Render Settings and are therefore described elsewhere.
Since Redshift can show its speed and quality advantages in particular when it is supported by powerful graphics hardware, you should first check the Preferences menu to see if the most powerful GPU has also been activated there for rendering (see the following image). However, if you cannot use a GPU, e.g., because you are only using the CPU version of Redshift, rendering via the CPU is also possible.
Here you will find a detailed description of these Redshift presets.
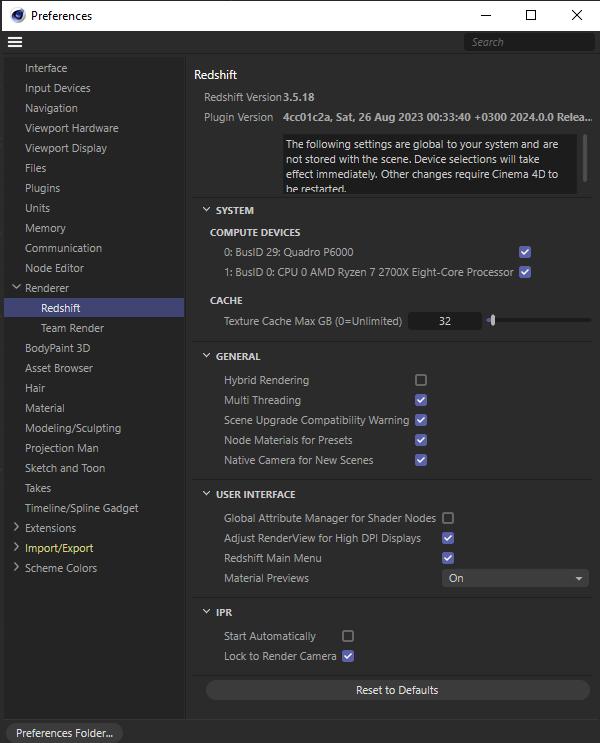 In the Preferences menu you will also find important defaults for working with Redshift.
You can then make the configurations for rendering with Redshift in the Render Settings. There are two tabs available for this, Basic and Advanced:
Under Basic, you'll find everything you need to know about rendering, such as quality settings, and options forde-noising, including global illumination, or calculatingmotion blur.
If you need more control, you can switch to the Advanced settings, where you have access to all the settings Redshift offers for rendering across several tabs. When switching between Basic and Advanced, none of your settings will be lost. A rendering made with Basic settings will still look the same after switching to Advanced and rendering again.
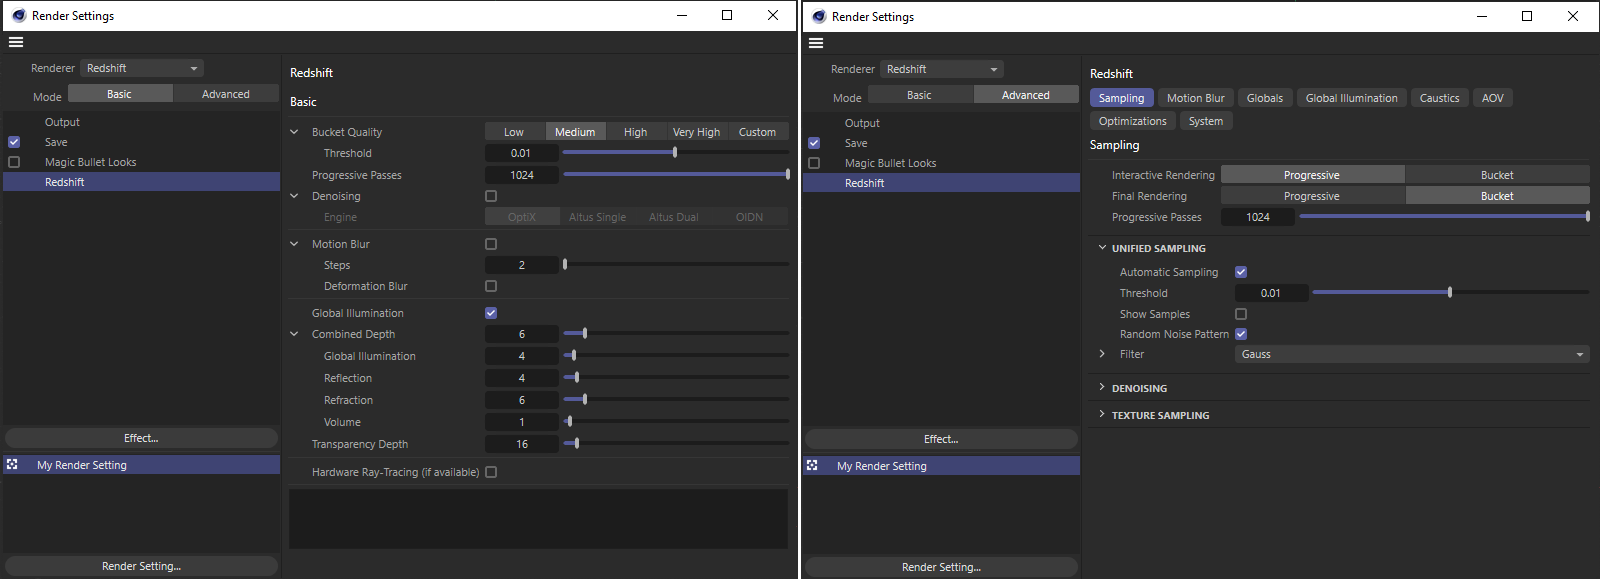 The Redshift settings for rendering in Basic and Advanced modes.
A detailed explanation of all render settings can be found on these pages in the Redshift documentation: Basic Settings and Advanced Settings.
Note that Redshift can only showcase its quality when Redshift materials are used in conjunctin with a Redshift camera and special Redshift light sources. You can also access important Redshift components directly from the Redshift main menu in Cinema 4D.
A brief introduction to typical workflows when preparing a scene for Redshift can also be found here.
Finally, your basic work will be able to change positively while modeling, working with materials and lighting, because Redshift also offers interactive modes for rendering in the Vewports. By selecting Start IPR in the Rendshift menu of an editor view, you can also start a rendering there that updates automatically while you continue working on the scene. The quality and rendering method can also be individually adjusted via the Redshift menu of the view between Progressive and Bucket (see also the following image).
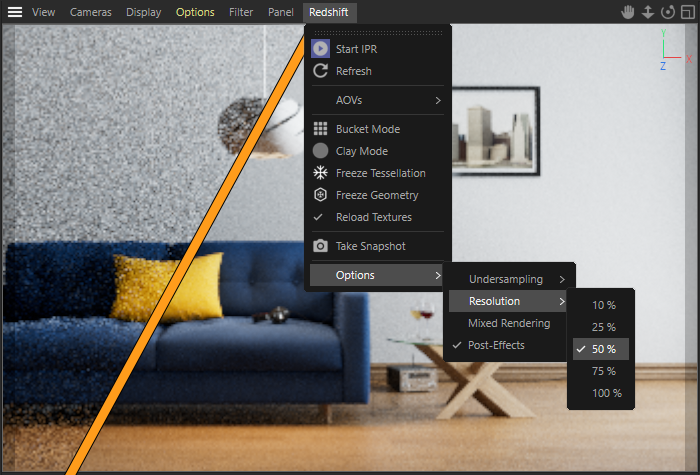 Interactive preview rendering with Redshift directly in the Viewport. The calculation methods and qualities can be selected directly at the view, independent of the Render Settings. The colored dividing line highlights two different phase of the interactive rendering, which evolves from coarse to fine as you continue to work on the scene.
For more information about these settings for interactive rendering directly in the views, click here.
In addition, you can find the complete documentation for all Redshift components here (currently only available in English).