Symmetry
Enables or disables symmetrical editing.
Select the mode in which you want to use symmetry when painting weighting onto Joints. Three modes are available:
The weighting of the selected Joints will be edited symmetrically, i.e., what is done on one side of the symmetry axis will be projected onto the opposite side. This mode is especially suited for Joints that are positioned along a character’s symmetry axis, e.g., the Joints of the spine or head.
The weighting of a selected Joint will be applied to another Joint, e.g., the weighting of the left upper arm to the right upper arm. The naming convention of the Joints will be applied. To make sure the tool uses the correct Joints you can add the corresponding prefix or suffix to the Left and Right fields. For example, if your Joints are named L_Upperarm and R_Upperarm simply type L_ into the Left field and R_ into the Right field.
Enter the parts of the objects’ names that differ from the other. If you use the same naming convention for all your Joints, Symmetry will always be able to locate the correct Joint. The weighting of the Joints selected for editing using Symmetry will be visible in the editor view during editing. You can edit either side of the character.
When using the Name mode, if objects can't be matched by their names, then the symmetry will occur on the selected joint itself (for example, on a spine joint). It makes it easier to work within the same mode, instead of having to switch to Single mode whenever you need to weight in symmetry on the same joint.
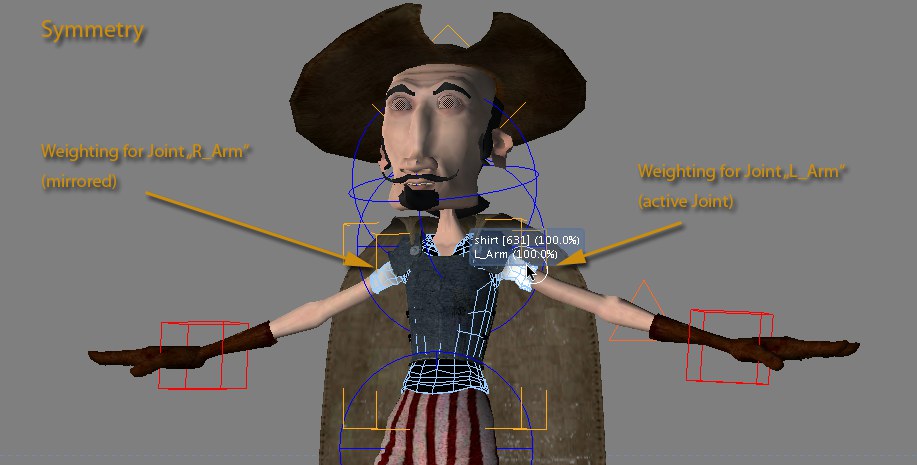 Scene © Andre Richter.
This mode works in a very similar fashion to the Name mode. However, the assignment is not done according to name but rather according to the links on the Joint Object’s symmetry side. Note that an assignment can only be made if a Joint with an existing link is selected. If a Joint that is linked to by another Joint is selected, no symmetry can be assigned. When in this mode you are restricted to working on one side of the character only.
Create a radius within which symmetry should be used. If certain weighted points opposite of those you are editing do not react do changes made simply increase the radius accordingly.
Here you can add name prefixes or suffixes of the Joints’ names. For example, a prefix or suffix can be entered that is different from that of the symmetry object, e.g., L_ (as opposed to R_ of the symmetry object). The tool can then assign symmetry based on names of Joints. This option will only be made available if the Name mode has been enabled.
Here you can add name prefixes or suffixes of the Joints’ names. For example, a prefix or suffix can be entered that is different from that of the symmetry object, e.g., R_ (as opposed to L_ of the symmetry object). The tool can then assign symmetry based on names of Joints. This option will only be made available if the Name mode has been enabled.
Select the coordinate system that should be used for the symmetry plane defined in the Mirror setting. The following three options are available:
The coordinate system will us the currently selected Joints.
The world coordinate system will be used.
Selecting this option will let you drag any object into the Object field to be used as a reference for the symmetry plane’s coordinate information.
Select which plane of the coordinate system defined in the Coordinates menu should be used for symmetry. The following options are available:
Symmetry will be applied across the XY axis, or along the Z axis.
Symmetry will be applied across the YZ axis, or along the X axis.
Symmetry will be applied across the XZ axis, or along the Y axis.
Any object can be placed into this field to be used as a reference for the symmetry layer. This field will only be made available if Custom is selected in the Coordinates menu.