Shader Properties
This is the texture or shader to be filtered.
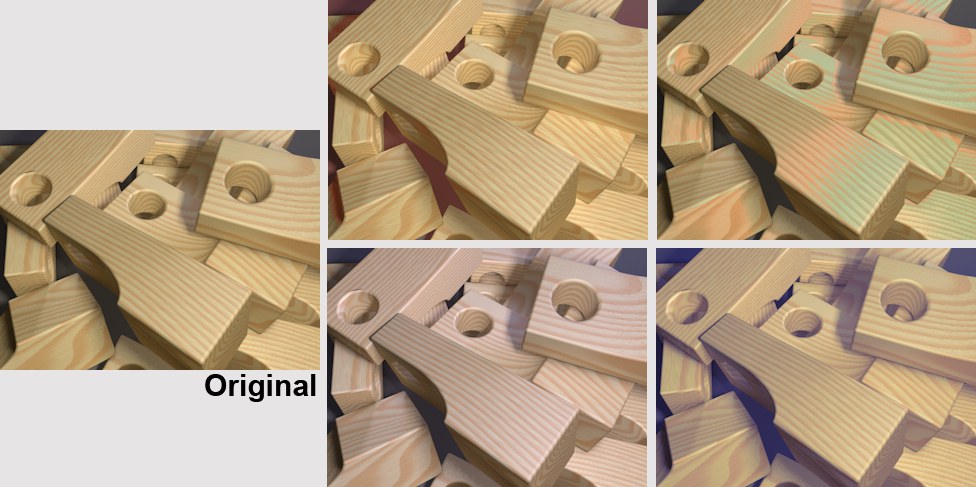
Hue [0..360°]
Saturation [-100..100%]
These parameters affect the texture’s hue on the color wheel and the total saturation respectively.
The lightness of the color, from black (-100%) to white (100%).
If this option is enabled, the texture will be converted to grayscale. You can then color the grayscale texture using the Hue and Saturation settings.
Adds the values of all color components.
Regulates the overall contrast of the texture. A value greater than 0 raises the contrast, a value less than 0 lowers the contrast. A value of -100% produces a completely neutral gray. A value of 100% gives full contrast between complete saturation and no saturation.
Regulates the mid-tones. Lesser values darken the mid-tones, greater values brighten them up.
Enable Clipping
Low Clip [0..10000%]
High Clip [0..10000%]
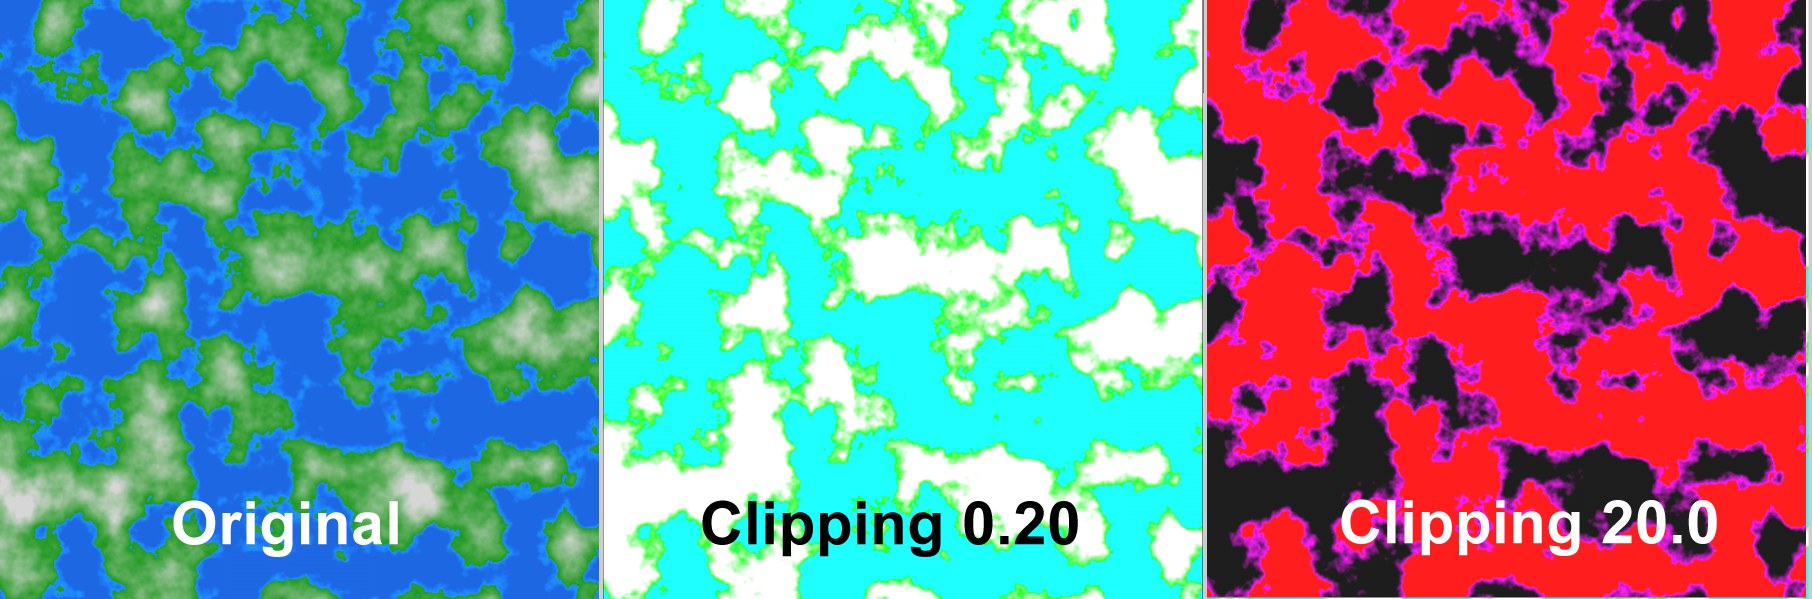 Original, Clipping 0,20, Clipping 20,0
These parameters clip or cut colors on two borders. The fastest way to understand how the parameters work is simply to try them.
![]() Gradation Curves
Gradation Curves
 The gradient curves can be used to brighten, darken or color specific brightness regions.
The gradient curves can be used to precisely modify brightness and color regions of original image. For example, only the dark regions of an image can be brightened or brighter regions can be colored.
This can also be done for individual color channels using the separate red, green and blue gradient curves.
In the Picture Viewer’s Filter settings you will find a Color Grading function that affects images interactively.
Use this option to activate or deactivate the graph in the window below.
Use this setting to define the strength of the Gradation Curve’s effect on the texture. A value of 0% will result in no effect, a value of 100% produces the maximum effect.
Use this curve (in addition to the RGB curves) to define the overall brightness. How the Curve works is explained below.
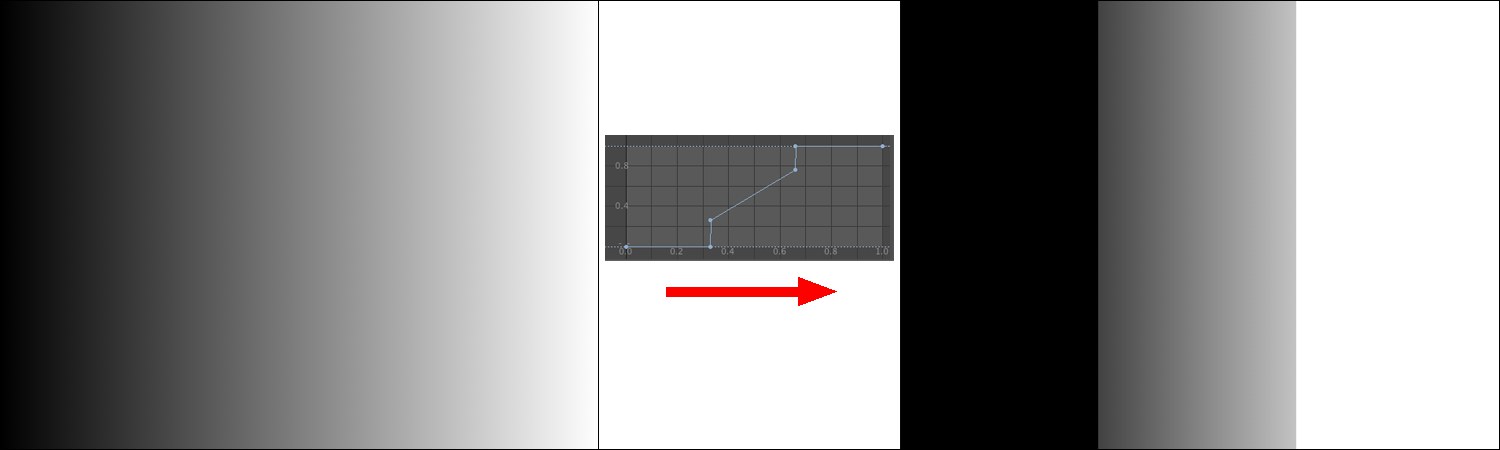 The gradient curve is applied to the linear grayscale at the left. The result is shown on the right.
A gradient curve defines where a new brightness value will be assigned along the X axis. This is easy to recognize in the image above. The Curve applies a brightness value of 0 to the first third, i.e., black. The second third has a linear gradient that assigns proportional brightness values to the region. The last third has a maximum value, which means it appears white.
This can also be done separately for each color channel, red, green, and blue. This makes it possible to color dark or bright regions only (the histogram in the Picture Viewer shows where which color dominates in the image):
 Dark regions in the center were colored red and bright regions at the right blue.