Table Of Contents
Introduction
"Biased" renderers allow users to specify the quality ('num samples') of effects such as glossy reflections, brute-force GI, AO and so on. This level of control is both a strength and weakness of biased rendering.
It's a strength, because the human eye is much better at determining if a particular object/material/light is more visually important and can afford more computational effort (more samples) to get it to look clean. For this reason, proper adjustment of the various 'num samples' parameters can produce cleaner results in less time than on renderers that don't allow that level of control.
However, that level of control is also a weakness because the artist has to spend time tweaking the 'num samples' settings. Even worse, sometimes users may increase the 'num samples' of the wrong effect which can make rendering longer while not providing any visual benefit.
For this reason, it's important to understand the different possible types of noise that exist in Redshift and know which settings to tweak to produce clean results.
The different types of noise
Any computer graphics effect that requires the shooting of multiple rays ('samples') is prone to noise.
These effects are the following:
- Area lighting (shadows)
- Ambient occlusion
- Glossy reflection and refraction
- Brute-force GI
To improve noise on individual lights, you need to increase the "num samples" area lighting parameters of the light responsible for the noise. Typically, the larger the area light, the more samples it will need to produce clean shadows. But size is not the only concern: a light might be small but casting long, soft shadows. In this case, it also needs more samples. Generally speaking, lights producing large shadow penumbras might need 128-256 samples or even more.
To improve noise on ambient occlusion, you need to increase the "num samples" of the AO shader node, per-material. The AO feature of the architectural shader also has a "num samples" parameter. The stronger the AO effect is (based on distance, spread, etc) the more samples it needs. 64-128 samples are often sufficient to get clean results.
To improve noise on glossy reflections/refractions, you'll need to increase the appropriate 'num samples' of the shader node, per-material. Typically, the lower the glossiness (i.e. the softer the reflection/refraction), the more samples you'll need. Also if the environment contains very bright lights and reflections, you might also need higher 'num samples' too. Low-gloss, high-contrast scenes might require large values such as 256 or even 512.
To improve noise on Brute-force GI, you need to increase 'num rays' of the GI settings. Please refer to the brute-force GI documentation for more information on this.
A few examples
The advice of 'increase num samples when you see noise' is not very useful if you cannot tell which effect is responsible for that noise. While this typically comes with experience, we'll attempt to visually demonstrate the different types of noise so you have some idea what to expect.
While adjusting 'num samples' of various effects it is recommended that you use low, fixed rate unified sampling. Set unified sampling's min/max samples to a value like 16. Please read the 'unified sampling' documentation for more details.
Area lighting and glossy reflections
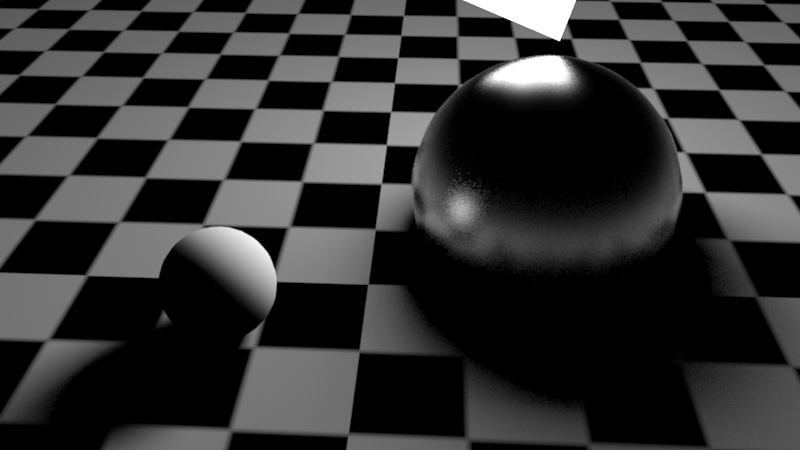
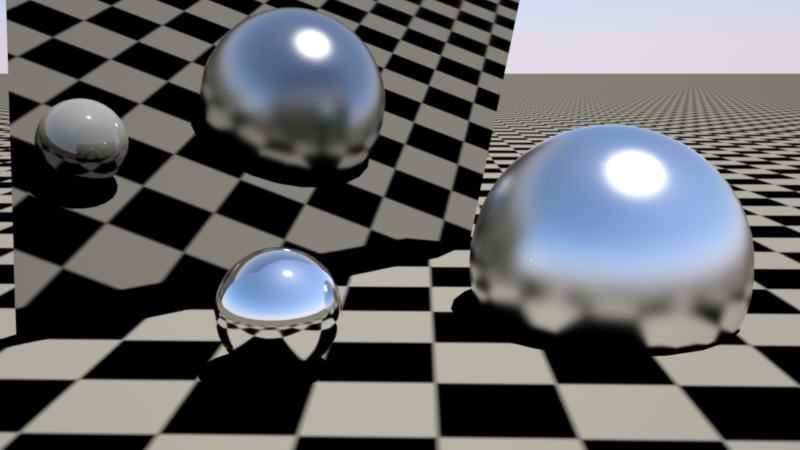
The scene shown below demonstrates area lighting and glossy reflections. The left sphere is purely diffuse while the right sphere is purely reflective. GI is disabled. The scene is using default settings. The default area light samples are 16 and default glossy reflection samples are 8. As it can be seen, these default settings are not enough to obtain a clean result.

Default settings for area lighting and glossy reflections produce noisy shadows and reflections
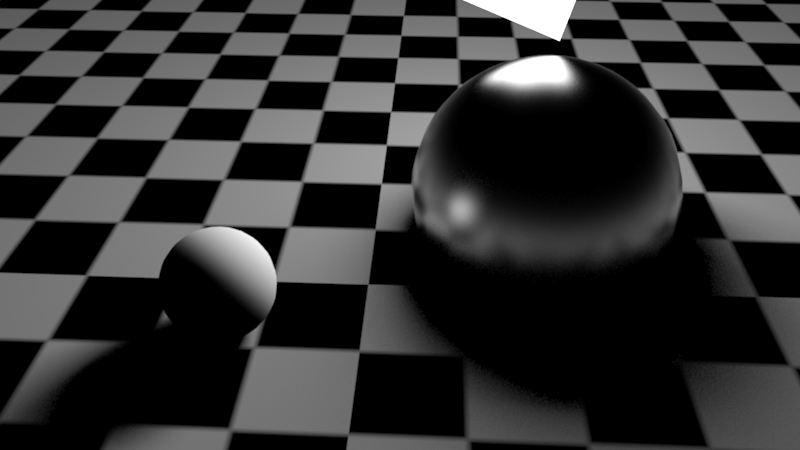
Increasing area light samples to 128 (from the default 16) improves the shadow quality and certain parts of the light reflection
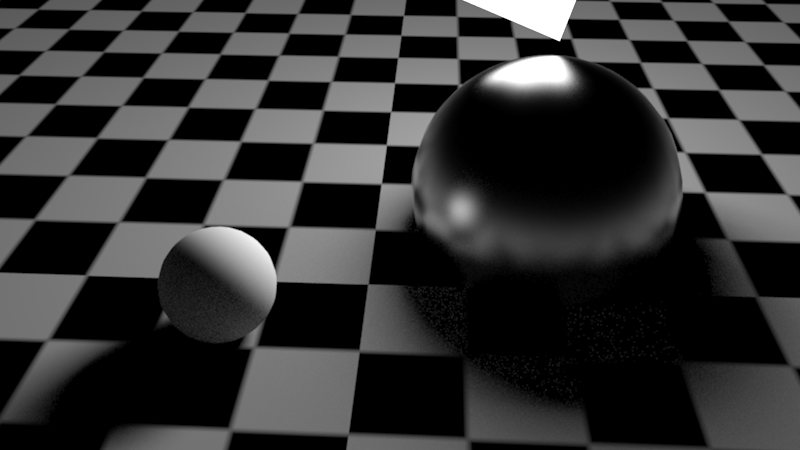
Increasing the material's glossy reflection to 256 samples improves the reflection quality
Brute-Force GI noise
You will typically see brute-force GI noise on the parts of the scene that is not directly 'seen' by lights, such as the dark sides of objects.
If brute-force GI is enabled for our test scene, the default setting (16 rays) produces noise underneath the diffuse sphere.
Default brute-force GI (16 rays). There is noise underneath the diffuse sphere.

Increasing brute-force GI rays to 256 (from 16), improves the results
Fireflies
Fireflies are a type of noise that can occur when a small percentage of rays are unlucky enough to sample extremely hot light sources, when most of the rays do not. They can also occur when a rough surface reflects or refracts an extremely hot source and there are just not enough rays to get a smooth result. Cranking up the number of rays to get a smoother result may help, but for low gloss reflections/refractions the results may actually appear worse, because the probability of the rays hitting the extremely hot source will have increased. You may find you need many thousands of rays to get a smooth result, which can dramatically impact performance.
Thankfully, there are a couple of fairly cheap solutions available to help solve this problem.
Max Secondary Ray Intensity
This technique, while not physically correct, is the most effective at reducing firefly noise and requires no set up time. It works by limiting the brightness of secondary ray samples (reflection/refraction/GI), i.e. the results of lighting and reflections/refractions when seen through secondary rays. By limiting the brightness, fewer rays are needed before they average out to give a smooth result.
The two examples below show the same scene as above, but with a hot sun light and a mirror to demonstrate any changes in reflections.
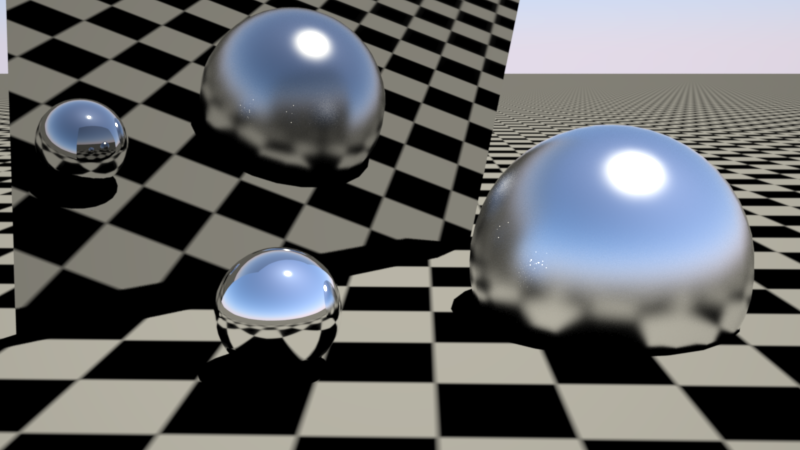
White dots ('fireflies') can be seen on the larger lower-gloss sphere. These come from the bright sun reflections on the small high-gloss sphere.

'Max Secondary Ray Intensity' used, with a value of 1.0. The white dots in the low-gloss sphere disappear, but there is some visible energy loss in the reflections as seen in the large mirror.
Lower values for 'Max Secondary Ray Intensity' do a better job of mitigating fireflies, but result in more energy loss.
The 'Max Secondary Ray Intensity' value works in conjunction with Redshift's photographic exposure 'allowed overexposure' setting. An aggressive 'allowed overexposure' value (such as 0.0) means that low values (such as 1.0) should be used for 'Max Secondary Ray Intensity', otherwise you will still get fireflies! If you need to preserve high intensities on your highlights, you should avoid very low 'allowed overexposure' values (e.g. below 0.2), which in turns allows for higher 'Max Secondary Ray Intensity' values such as 2.0, 3.0 or higher to be used.
Ray Switch Shader
The ray switch shader can be used to change the appearance of an object through reflections/refractions, by allowing you to define a different material for different ray types. By simply cloning the shader graph for the material and toning down the reflection strength, you can reduce fireflies. While this is a more manual process, it usually results in even greater energy loss compared to using 'Max Secondary Ray Intensity' since the overall reflection intensity is being reduced, whereas 'Max Secondary Ray Intensity' is simply clamping individual secondary rays which are above a certain intensity.
In the example below, the small sphere which was causing the fireflies in the fuzzy, larger sphere has a ray switch shader applied to it, with the reflection component manually toned down to reduce the brightness of the specular sun reflections. While this has effectively cut the fireflies from the fuzzy sphere, the consequence of the toned down reflection are very visible in the large mirror.
Fixing fireflies using a ray switch. Fireflies are fixed (mostly), but the small sphere looks dimmer on all reflections (including the mirror plane)