Interface and Panels
Main Panels
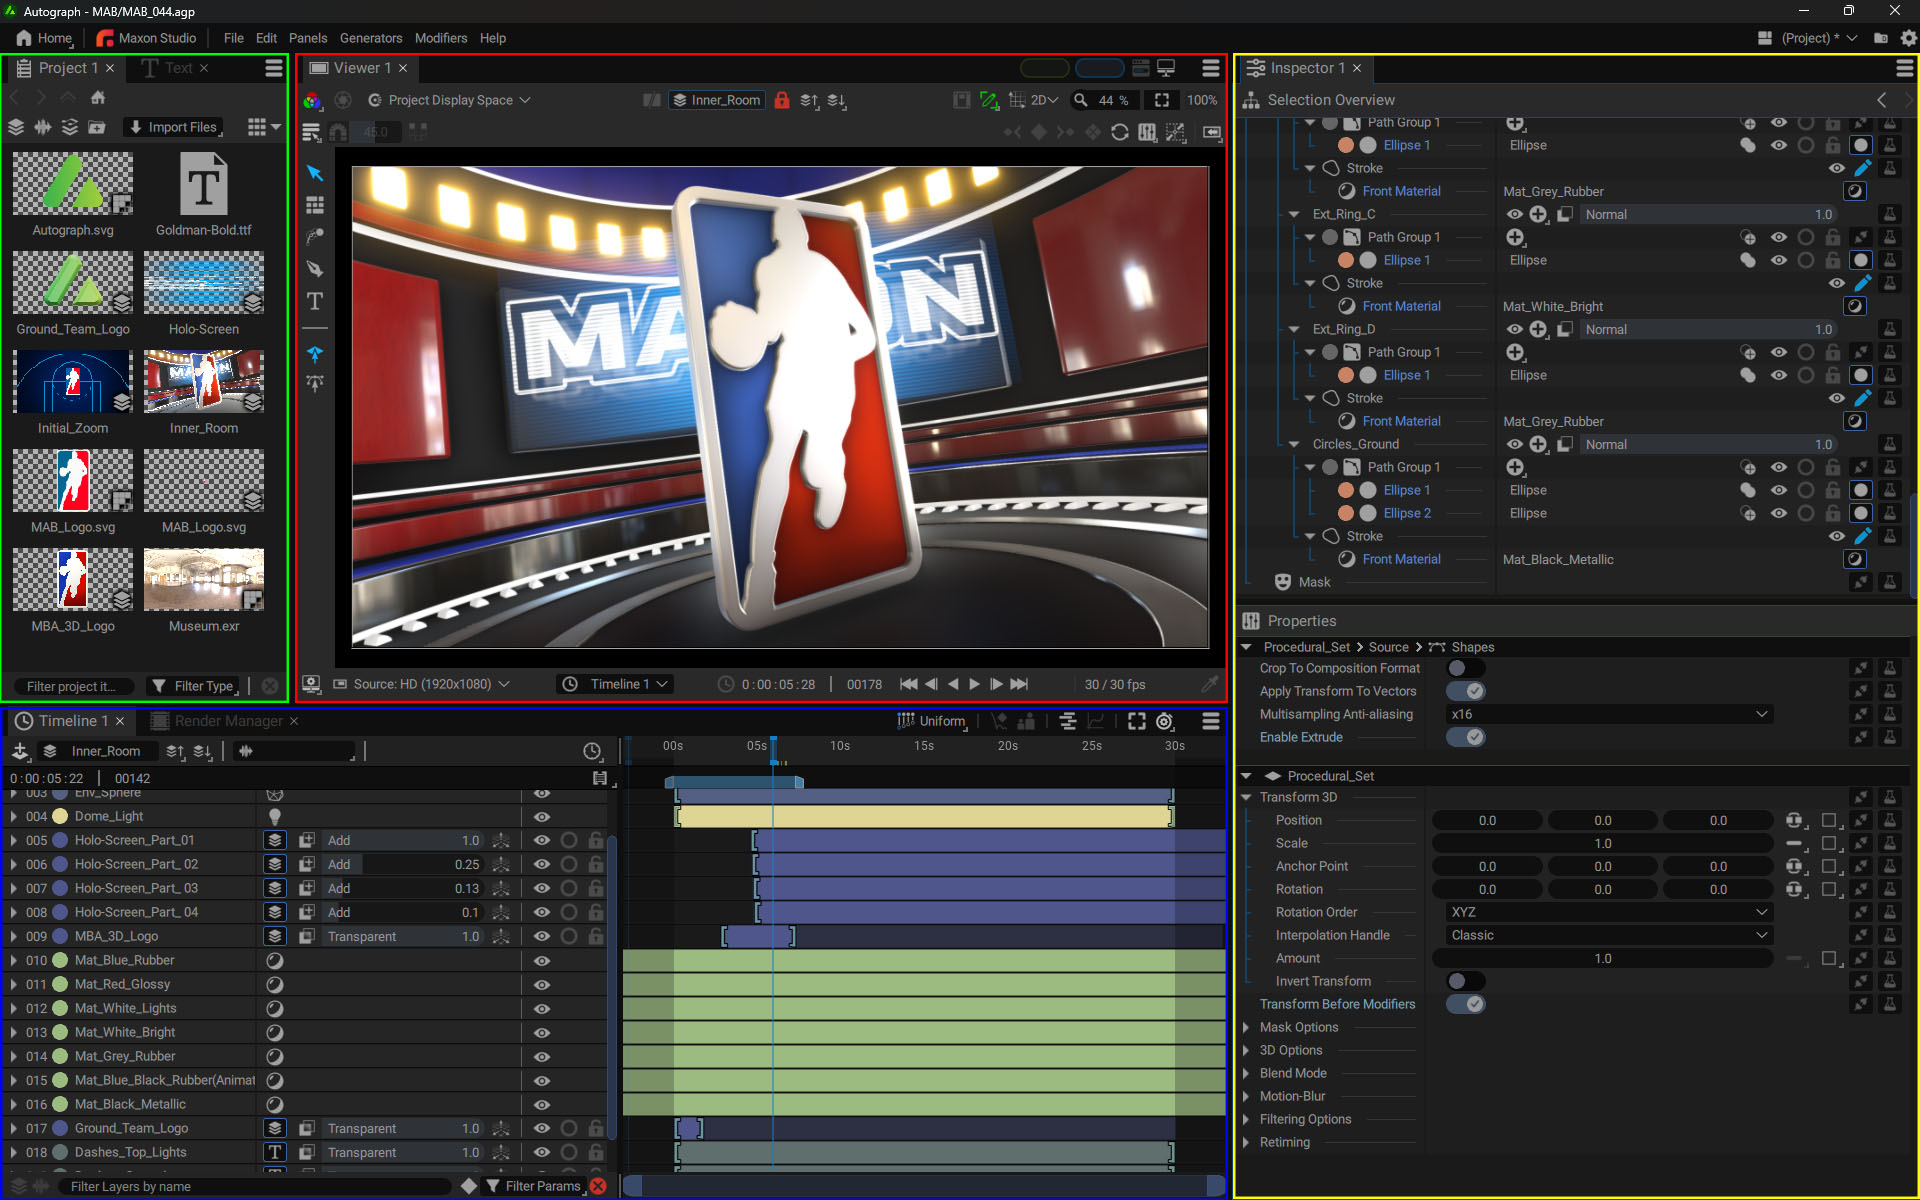
Autograph's interface is made up of four main panels:
- Project Panel: where you can create, import, and manage all of the resources used in your project
- Viewer: where you can connect to different graphic sources in order to visualize them
- Inspector: panel composed of the Selection Overview and Properties section for quick access to parameters
- Timeline: where you can combine and animate elements
Other panels such as the Python Console, Render Manager and Text Panel are also available in the Panels menu.
At the very top of the interface, there is a menu line where you access the welcome screen, display panels, manage workspaces and software settings, as well as view error messages or more general information.
Creating a New Panel
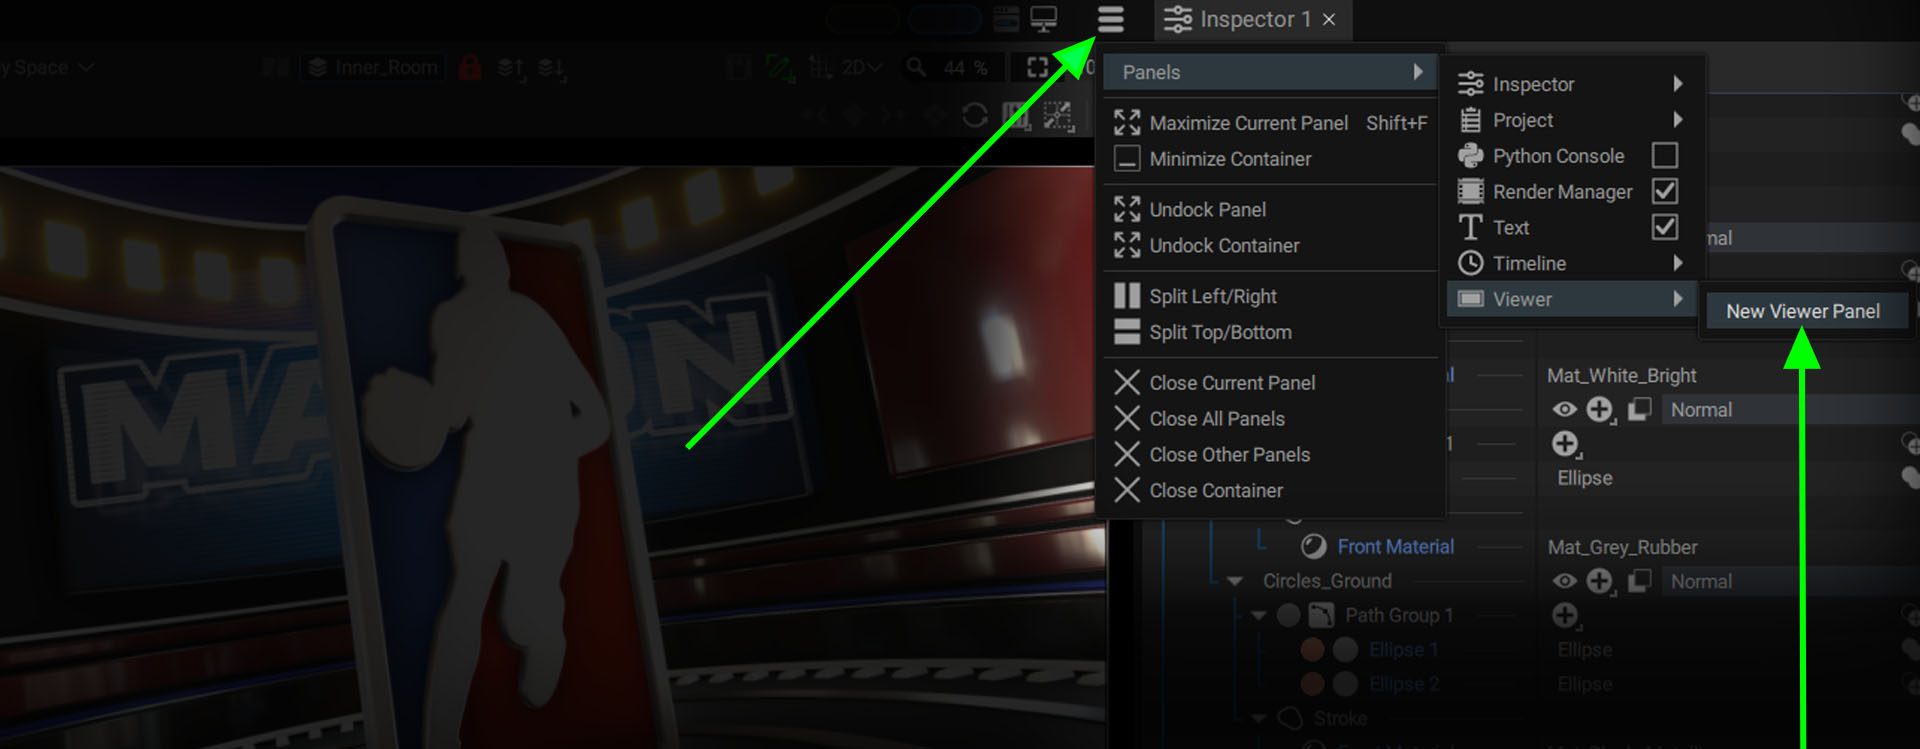
The Panels menu in the main bar at the top of the interface lets you display panels or create new ones. You can also use the option menus at the top right of each panel.
To create a new panel, simply click on the menu button, choose Panels, and then select the type of panel you want to add.
By default, this new panel will be positioned as a tab in the current panel. Then several panels will included in the same container.
Some panels, such as the Render Manager and Text Panel can only exist in a single instance. But others, such as the Timeline and Viewer can be added without limit.
Moving Panels
To move a panel, click and drag its name by holding down the left-button and moving it over the interface.
- Blue areas allow you to preview the final position of the panel when you release the mouse button.
- If you position this panel on one of the sides of the window, a green bar will indicate whether the panel will take up the full height or the full width.
Closing Panels or Containers
Using the panel menu, you can :
- Close Current Panel
- Close All Panels
- Close Other Panels (leaving the current panel open)
- Close Container
Splitting and Undocking Panels
A panel can be split in two or detached from the main window. This allows you to organize your Workspace across several screens.
These options are also available in the Panel Menu:
- Undock Panel: sends the current panel to a new floating window, for example to place it on a second screen.
- Undock Container: sends the current container to a new floating window.
- Split Left/Right: splits a container in two along a vertical line.
- Split Top/Bottom: splits a container in two along a horizontal line.
To move and reconnect a floating Panel to the main window, simply move it via its header as described above.
Minimizing and Maximizing Panels
This menu also contains options for maximizing a panel across the entire interface, or minimizing it so that it takes up as little space as possible.
Several keyboard shortcuts are available:
Maximizing
- Press ctrl/cmd + space (same shortcut applies to return to full workspace)
- Double-click on the panel icon at the top left of the header (double-click again to get back to he initial state)
Minimizing
To minimize a panel, you can reduce its size until it becomes a single line.
There are also several keyboard shortcuts available:
- ctrl + shift space: to fold/unfold the panel
- ctrl/cmd + double-click on the panel icon at the top left of the header to fold it
- A single click on the panel icon will unfold it
Switching a Panel to Full-Screen Mode
At the very top of each panel there is a monitor icon. By clicking on it and selecting one of the two options, the current panel will switch to Full-Screen mode:

- Full-Screen (Fitted): if the image to be rendered has a higher or lower resolution than that of the screen, it will be resized to be fully visible.
- Full-Screen (100%): each pixel in the rendered image will represent a pixel on the screen. Depending on the image resolution to be rendered, it may be smaller than the screen or only partially visible.
- Show Viewer UI: display or not UI elements on top of the rendered image (Widget, Overlays, etc.)
If you have several screens, the one with panel at the moment of switching to this mode will be the one used.
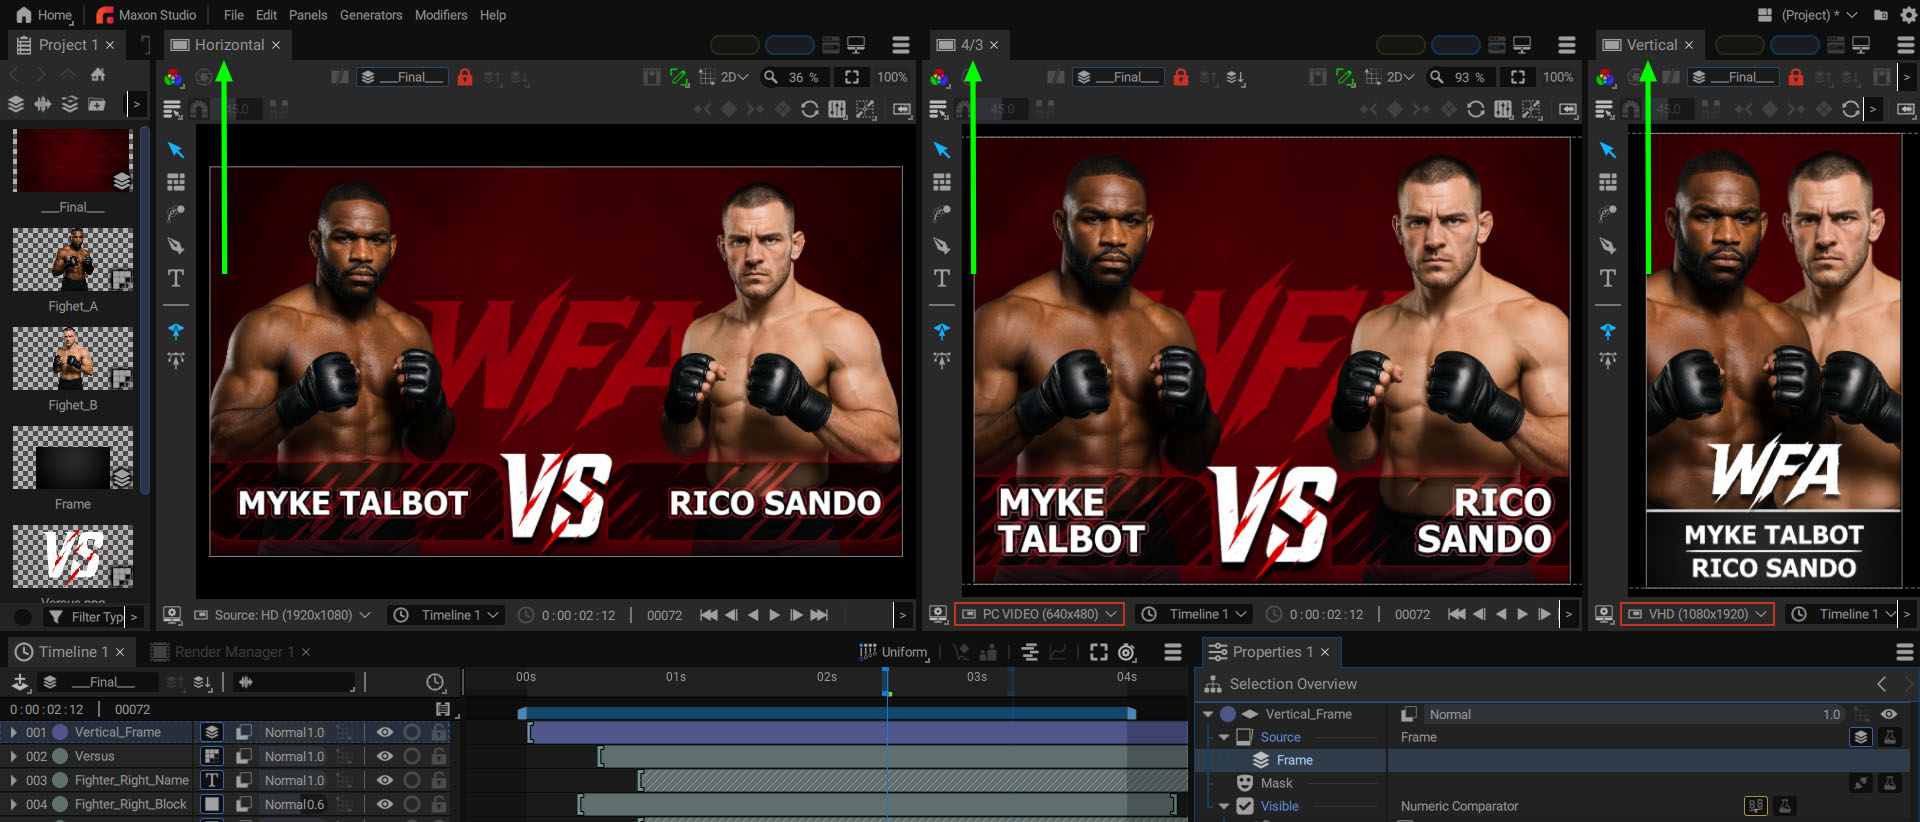
Renaming Panels
Each panel can be renamed by double-clicking on its name. In a responsive design project producing several formats from a single composition, naming these Viewers Vertical 9/16, Social 4/3, or FullHD can be very useful.